How to Grow Roma Tomatoes: Expert Tips for a Lush Homegrown Harvest
- March 15, 2024
- 0 comment
Learn how to grow Roma tomatoes with our detailed guide, perfect for both beginners and seasoned gardeners. Discover the joy of cultivating these plum-shaped, flavorful tomatoes, known for their versatility in sauces, pastes, and salads. Follow our expert tips for a lush harvest of Roma tomatoes, enriching your garden and culinary creations.
Health Benefits of Roma Tomatoes
| Benefit | Description |
|---|---|
| Nutritional Value | Roma tomatoes are low in calories but high in vitamins C and K, potassium, and folate, contributing to overall health. |
| Rich in Antioxidants | They contain antioxidants like lycopene, which may reduce the risk of heart disease and certain cancers. |
| Dietary Fiber | A good source of fiber, which aids in digestion and helps maintain a healthy gut. |
| Heart Health | The potassium and vitamin B content in Roma tomatoes can help lower blood pressure and cholesterol levels, supporting heart health. |
| Skin Health | High in vitamin C, which is vital for skin health, aiding in collagen production and skin repair. |
| Low in Carbohydrates | Their low carbohydrate content makes them a suitable choice for low-carb diets. |
| Versatility in Cooking | Roma tomatoes are ideal for sauces, pastes, and salads due to their meaty texture and low seed content. |
| Hydration | High water content helps keep the body hydrated, especially in hot weather. |
List on How to Grow Roma Tomatoes
Choosing the Right Location
Sunlight for Roma Tomatoes
- Importance of Sunlight: Roma tomatoes, like most tomato varieties, require ample sunlight for healthy growth and optimum fruit production. Sunlight is crucial for photosynthesis, the process by which plants convert light energy into chemical energy to fuel growth and fruit development.
- Required Sunlight: These tomatoes need at least 6-8 hours of direct sunlight daily. Less sunlight can lead to weaker plants and reduced yield.
- Choosing a Sunny Spot: When selecting a location in your garden, observe the area to ensure it gets consistent sunlight throughout the day. Avoid places that are shaded by trees, buildings, or other structures.
- Benefits of Full Sun: Full sun exposure helps in keeping the foliage dry and reduces the risk of fungal diseases. It also ensures that the plants produce more and better-quality fruits.
Soil Requirements for Roma Tomatoes
- Soil Quality: Well-drained, fertile soil is crucial for Roma tomatoes. Poor drainage can lead to waterlogged soil, which increases the risk of root diseases and negatively impacts plant growth.
- pH Level: The ideal pH level for Roma tomatoes is between 6.0 and 6.8. This slightly acidic to neutral pH range facilitates the optimal uptake of nutrients from the soil.
- Improving Soil Fertility: Amend your garden soil with compost or well-rotted manure to improve its fertility. Organic matter not only provides essential nutrients but also improves soil structure and drainage.
- Testing and Adjusting Soil pH: It’s a good idea to test your soil’s pH. If the pH is too low (acidic) or too high (alkaline), it can be adjusted using lime (to increase pH) or sulfur (to decrease pH).
- Mulching: Applying mulch around the plants can help maintain soil moisture and temperature, and also prevent weed growth. Organic mulches, like straw or grass clippings, can further enrich the soil as they decompose.
Planting
Planting Timing

- Understanding Frost Dates: The last frost date is a crucial factor in planting tomatoes. Frost can damage or kill young tomato plants. To find the last frost date in your area, you can consult local gardening groups or meteorological services.
- Starting Seeds Indoors: This gives your tomatoes a head start. Use a seed starting mix and keep the soil moist and warm (about 70-80°F or 21-27°C). Providing adequate light is essential; use grow lights if natural light is insufficient. Transplant the seedlings to larger pots if they outgrow their initial containers before it’s time to move them outdoors.
Spacing
- Importance of Proper Spacing: Spacing the plants appropriately ensures they receive enough sunlight and air circulation, reducing the risk of disease and stress on the plants.
- Row Planting: If you’re planting multiple rows, maintaining the 3-4 feet spacing between rows allows for easier access for maintenance like watering, pruning, and harvesting.
- Group Planting Considerations: If space is limited, Roma tomatoes can also be grown in groups or clusters, but ensure each plant still has enough space to grow without being overcrowded.
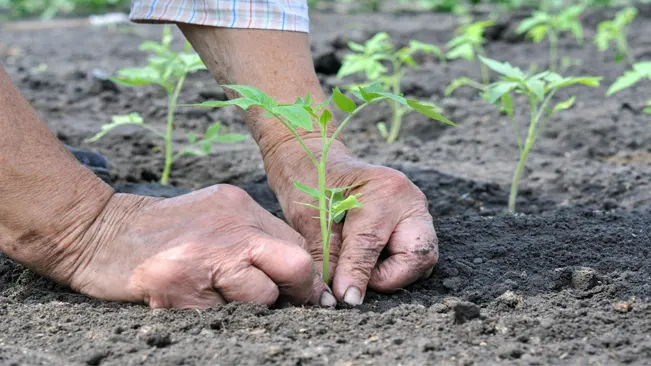
Planting Depth
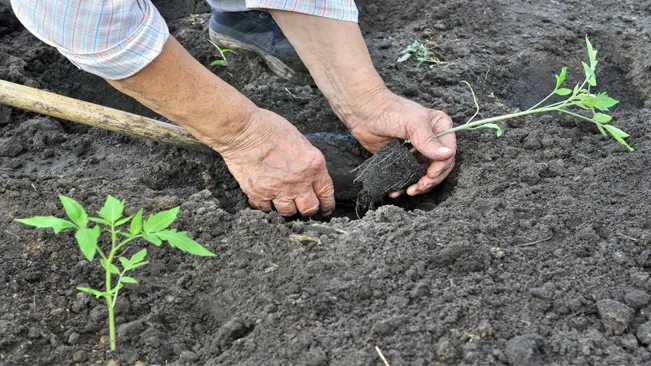
- Deep Planting Benefits: Tomato plants develop roots along their stems. Planting them deep encourages a stronger and more extensive root system, leading to a sturdier plant capable of absorbing more nutrients and water.
- Technique: When planting, remove the lower leaves from the seedling and bury the stem up to the remaining top leaves. This might involve burying a significant portion of the plant, but it’s beneficial for its development.
- Aftercare: Water the plants thoroughly after planting to settle the soil around the roots. In the following days, monitor the soil moisture closely and keep the soil consistently moist (but not waterlogged).
Care and Maintenance
Watering
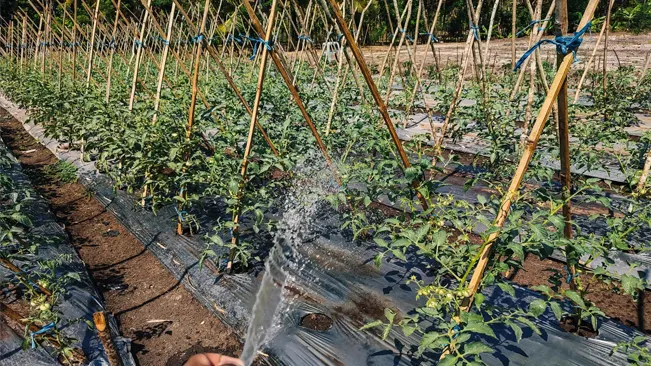
- Consistency: Regular watering is key to preventing problems like blossom end rot and fruit cracking.
- Technique: Water at the base of the plant to keep the leaves dry. This reduces the risk of fungal diseases.
- Amount: About 1-2 inches of water per week is ideal, but this can vary depending on soil type and climate. The goal is to keep the soil evenly moist but not waterlogged.
- Monitoring: Use your finger to check the soil moisture. Water when the top inch of soil feels dry.
Mulching
- Materials: Organic mulches such as straw, grass clippings, or bark chips are excellent choices.
- Benefits: Mulch helps in controlling soil temperature, keeping it cooler in summer and warmer in cooler weather.
- Thickness: Apply a 2-3 inch layer of mulch around the plants, being careful not to pile it against the stems.
Fertilizing
- Initial Fertilization: A balanced 10-10-10 fertilizer (nitrogen, phosphorus, potassium) is suitable for initial planting.
- Phosphorus-Rich Fertilizing: As the plants start to flower and set fruit, switch to a phosphorus-rich fertilizer to encourage healthy fruit development.
- Application: Follow the instructions on the fertilizer package for proper application rates and intervals.
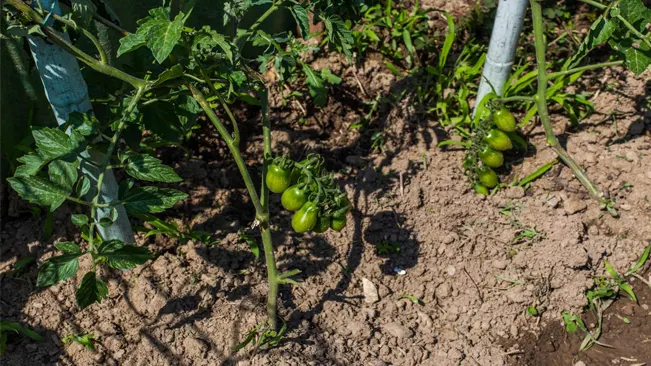
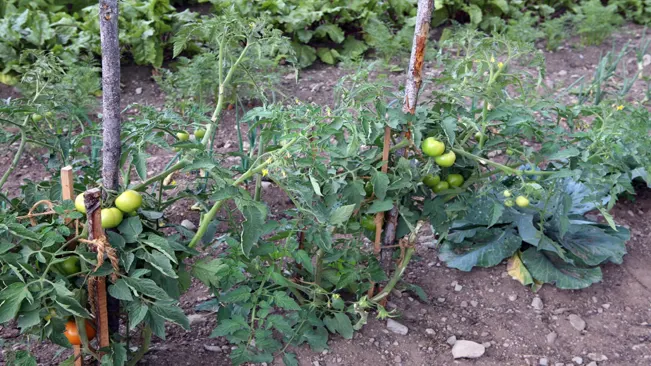
Staking or Caging
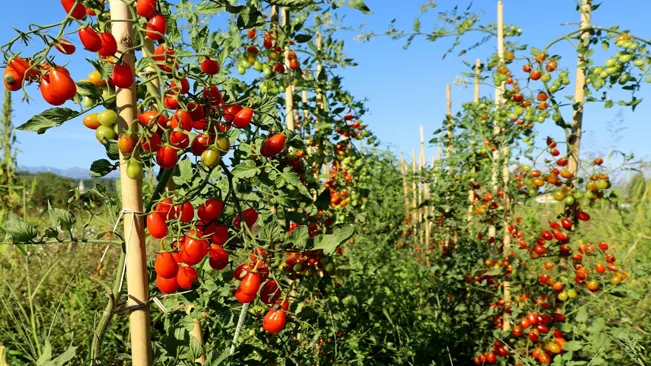
- Support Types: Stakes are typically used for indeterminate varieties, while cages can be used for both determinate and indeterminate plants.
- Installation: Install stakes or cages early in the season to avoid damaging the roots later.
- Tying: Use soft ties or twine to attach the plant to the support, being careful not to damage the stems.
Pruning
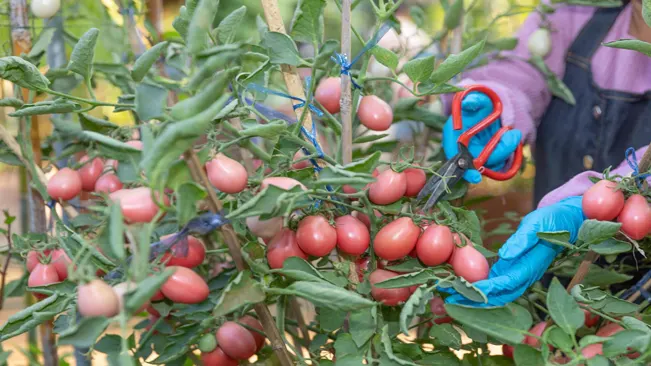
- Suckers: These are the shoots that grow in the axils of the leaves. Removing them encourages more fruit production and less leafy growth.
- Air Circulation: Pruning helps improve air circulation around the plant, reducing the risk of disease.
- Technique: Use a clean, sharp pair of pruning shears. Make clean cuts close to the main stem to avoid leaving stubs that can be entry points for disease.
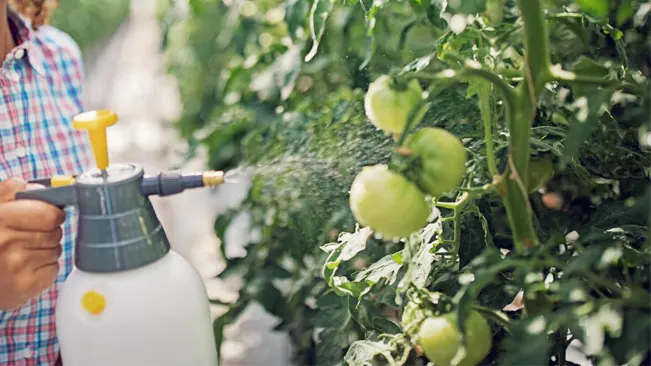
Pest and Disease Management
Pest Management
- Aphids:
- These small, soft-bodied insects can be green, yellow, brown, red, or black.
- They suck sap from the plant, causing leaves to curl and stunt growth.
- Control: Spray with water to dislodge them or use insecticidal soap. Introducing natural predators like ladybugs can also be effective.
- Tomato Hornworms:
- Large, green caterpillars with a horn-like tail.
- They eat leaves and young fruit, causing significant damage.
- Control: Handpick and remove them. Beneficial insects like braconid wasps can also help in controlling their population.
- Spider Mites:
- Tiny, spider-like pests, often red or yellow.
- They cause yellowing or browning of leaves and can lead to leaf loss.
- Control: Use a strong water spray to dislodge them. Insecticidal soaps or neem oil can be effective treatments.
Disease Management
- Blight (Early and Late):
- Fungal diseases that can affect leaves, stems, and fruit.
- Early blight causes dark, concentrically ringed spots on lower leaves. Late blight results in rapid decay of the entire plant.
- Control: Use resistant varieties, rotate crops, and remove infected plant parts. Fungicidal sprays can also be used.
- Powdery Mildew:
- Shows up as a white powdery substance on leaves.
- It reduces the plant’s vigor and affects fruit quality.
- Control: Improve air circulation, avoid overhead watering, and use fungicidal sprays if necessary.
- Verticillium and Fusarium Wilts:
- Soil-borne fungi that cause yellowing and wilting of leaves, often starting at the base of the plant.
- Control: Use disease-resistant varieties, ensure good drainage, and practice crop rotation.
Harvesting
When to Harvest
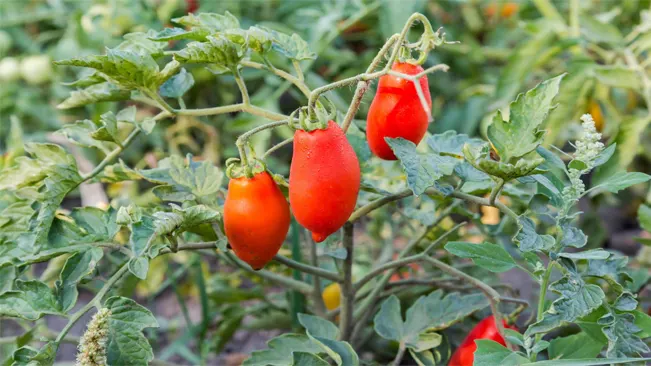
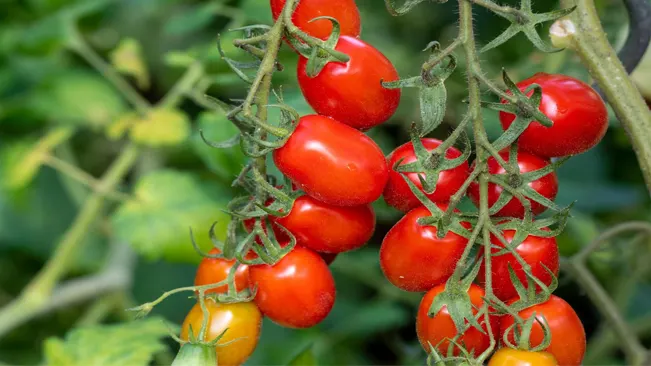
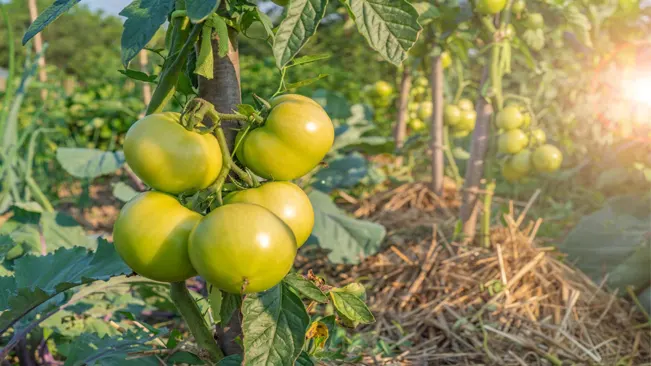
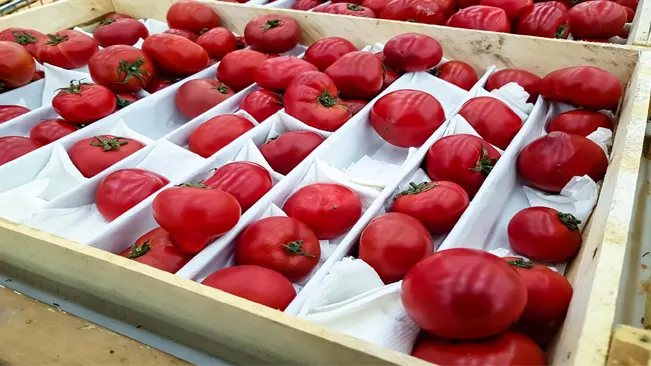
- Indicators of Ripeness: Roma tomatoes are considered ripe and ready for harvest when they attain a uniform deep red color. The fruit should feel firm yet slightly yield to gentle pressure. This indicates that the tomatoes have reached their peak flavor and texture.
- Size and Appearance: Pay attention to the size and overall appearance. Roma tomatoes typically have an elongated, plum shape. A ripe tomato will be plump, smooth, and free of green spots.
- Taste Test: If you’re unsure about the ripeness, you can do a taste test by picking one tomato. It should have a rich, slightly sweet flavor typical of ripe Roma tomatoes.
Harvesting Method
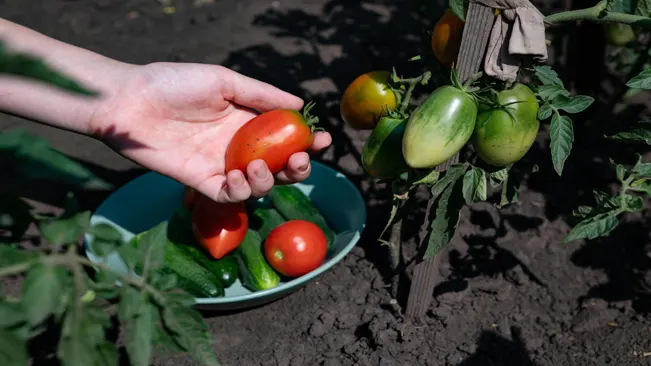
- Twisting Technique: To harvest, grasp the tomato firmly but gently and twist it from the stem. This method is preferable if the fruit easily separates from the vine.
- Using a Knife: If the tomato is firmly attached, use a sharp knife or garden scissors to cut the stem, leaving about an inch of the stem attached. This helps in preventing damage to both the plant and the fruit.
- Harvesting in Stages: It’s common for not all tomatoes to ripen at the same time. Harvest them as they become ripe, which allows the plant to focus its energy on ripening the remaining fruits.
Storage
- Room Temperature: Store the harvested Roma tomatoes at room temperature, ideally in a single layer to prevent bruising. This helps in preserving their texture and flavor.
- Avoiding Refrigeration: Refrigeration can lead to a loss of flavor and a mealy texture in Roma tomatoes. The cold temperature breaks down the membranes inside the fruit walls, altering the taste and consistency.
- Sunlight and Air Circulation: Keep them in a place away from direct sunlight with good air circulation. A countertop away from the window or a pantry shelf works well.
- Shelf Life: At room temperature, Roma tomatoes usually last around 4-7 days, depending on their ripeness when picked.
- Overripe Tomatoes: If you have overripe tomatoes, consider using them in cooking, where their softer texture and concentrated flavor can be an advantage.
Related Post:
- How to Grow Malabar Spinach: Tips for a Thriving Vine
- How to Grow Eggplants: Beginner’s Guide to Thriving Plants
Conclusion
Roma tomatoes are distinguished by their elongated, egg-like shape and firm texture, making them ideal for cooking and canning. They have fewer seeds and less water content compared to other varieties, which contributes to their rich, concentrated flavor. This makes them particularly popular for making thick sauces, pastes, and sun-dried tomatoes. Additionally, their robust nature and disease resistance make them a favorable choice for home gardeners and commercial growers alike.
FAQs (Frequently Asked Questions)
- What is the best time to plant Roma tomatoes?
Plant Roma tomatoes after the last frost in spring. For most regions, this is late spring or early summer. - How much sun do Roma tomatoes need?
Roma tomatoes require full sun, meaning at least 6-8 hours of direct sunlight each day. - What type of soil is best for Roma tomatoes?
They thrive in well-drained, fertile soil with a pH between 6.0 and 6.8. Enriching the soil with compost or organic matter is beneficial. - How often should I water Roma tomatoes?
Water deeply once or twice a week, allowing the soil to dry out slightly between waterings. Consistent moisture is key, especially during fruit setting. - Do Roma tomatoes need to be staked or caged?
Yes, providing support with stakes or cages helps to keep plants upright, improves air circulation, and reduces disease risk. - How far apart should I plant Roma tomatoes?
Space plants about 24-36 inches apart in rows that are 3-4 feet apart. This spacing allows for adequate air circulation and sunlight. - When are Roma tomatoes ready to harvest?
Harvest when they are firm, have a deep red color, and slightly give when pressed. This is typically 70-80 days after planting. - How do I prevent pests and diseases in Roma tomatoes?
Regularly check for pests, use organic insecticides if necessary, and practice crop rotation. To prevent fungal diseases, avoid overhead watering and provide good air circulation. - Can I grow Roma tomatoes in containers?
Yes, Roma tomatoes can be successfully grown in containers. Ensure the container is large enough (at least 5 gallons) and has good drainage. - What is the best way to fertilize Roma tomatoes?
Use a balanced, slow-release fertilizer at planting. When fruits begin to form, switch to a phosphorus-rich fertilizer to promote healthy fruit development.

Kristine Moore
Forestry AuthorI'm Kristine Moore, a seasoned garden landscaping professional with over 30 years of experience. My extensive career has been dedicated to transforming outdoor spaces into stunning, sustainable landscapes. With a deep understanding of horticulture, design principles, and environmental stewardship, I have become a respected figure in the field, known for creating harmonious, visually appealing, and eco-friendly gardens. My commitment to excellence and continuous learning in landscaping trends and techniques has solidified my reputation as an expert in garden design and implementation.


Leave your comment