How To Plant Summer Squash Seeds: Tips & Tricks for Beginners
- February 23, 2024
- 0 comment
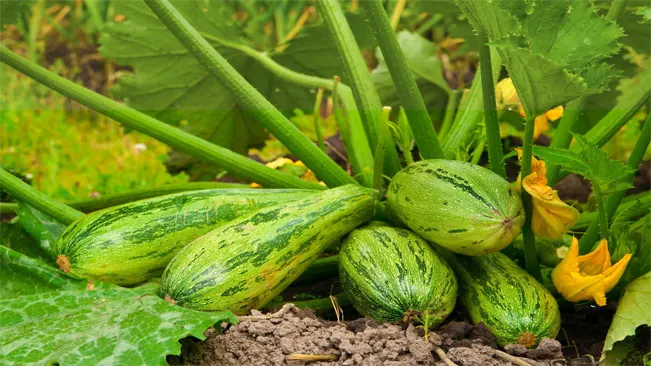
Summer squash, with its vibrant colors and versatile use in the kitchen, is a favorite among gardeners and cooks alike. Planting summer squash seeds can be a rewarding endeavor, yielding an abundance of fresh produce throughout the warmer months. This guide will walk you through the process of planting summer squash seeds, from preparation to harvest.
Nutritional Benefits of Summer Squash
| Benefit | Description |
|---|---|
| Nutritional Value | High in vitamins A and C, magnesium, fiber, riboflavin, phosphorus, and potassium. Low in calories, making it a healthy addition to any diet. |
| Versatility in Cooking | Can be used in a variety of dishes, including soups, stews, salads, stir-fries, and baked goods. Its mild flavor makes it adaptable to many culinary styles. |
| Easy to Grow | Adaptable to a variety of climates and generally easy to cultivate, making it suitable for gardeners of all skill levels. |
| Pest Control | Attracts beneficial insects that help control garden pests. |
| Soil Improvement | Helps to break up the soil and improve its structure, beneficial for subsequent plantings. |
| High Yield | Produces a large number of fruits from each plant, offering a plentiful harvest throughout the growing season. |
| Decorative Appearance | With its vibrant yellow and green colors, it adds aesthetic appeal to gardens. |
| Health Benefits | Contains antioxidants that may reduce the risk of various health conditions, including heart disease, certain cancers, and age-related eye disorders. |
| Low Maintenance | Requires relatively little care once established, making it a good choice for busy gardeners. |
| Good for Weight Loss | Being low in calories and high in water content, it is an excellent food for weight management and dieting. |
Choosing the Right Time
Timing is crucial for planting summer squash. The seeds thrive in warm soil, so it’s best to plant them after the last frost date in your area. Summer squash seeds require a soil temperature of at least 70°F (21°C) to germinate effectively.
- Last Frost Date: The key factor in determining the right planting time for summer squash is your area’s last frost date. Frost can damage or kill young squash plants, so it’s crucial to wait until the danger of frost has passed. This date varies depending on your geographical location. You can find this information through local weather stations, gardening societies, or agricultural extension offices.
- Soil Temperature: Summer squash seeds need warm soil to germinate effectively. The ideal soil temperature for these seeds is at least 70°F (21°C). Planting seeds in soil that is too cold can lead to poor germination, stunted growth, or even seed rot. You can measure soil temperature using a soil thermometer, which is inserted a few inches into the soil at the planting site.
- Season Length: Summer squash grows and produces fruit relatively quickly, but it’s still important to consider the length of your growing season. In regions with short summers, you may want to start seeds indoors or purchase young plants from a nursery to extend the growing period. This ensures that you have enough time for the squash to mature and produce a good yield before the onset of cold weather.
- Microclimates: Be aware of microclimates in your garden. Areas that are sheltered or receive more sunlight may have warmer soil earlier in the season, which could allow for earlier planting. Conversely, low-lying or shaded areas may stay cooler longer.
- Staggered Planting: To extend the harvest period, consider staggered planting. Plant a few seeds at the recommended time after the last frost, then plant additional seeds in intervals of 2-3 weeks. This method provides a continuous supply of summer squash throughout the growing season.
- Climate Change Considerations: With changing climate patterns, frost dates and growing seasons may shift. Stay updated with the latest local climate information and adjust your planting schedule accordingly.
- Preparation for Unexpected Cold Snaps: Even after the last frost date, there’s always a chance of an unexpected cold snap. Be prepared to protect young squash plants with covers, such as cloches or floating row covers, if a late frost is forecasted after planting.
Selecting a Suitable Location
Choose a sunny spot in your garden as summer squash plants love sunlight. Ensure the location receives at least 6-8 hours of direct sunlight daily. Summer squash plants need well-drained soil, rich in organic matter. Amend the soil with compost or well-rotted manure before planting to boost fertility.
- Sunlight Requirements
- Importance of Sunlight: Summer squash plants are sun-loving and require full sunlight for optimal growth. The process of photosynthesis, which is crucial for plant growth and fruit production, is maximized in full sun.
- Daily Sunlight Needs: Ensure the chosen location receives at least 6-8 hours of direct sunlight daily. More sunlight typically results in healthier plants and a better yield.
- Soil Conditions
- Well-Drained Soil: Summer squash prefers well-drained soil. This means the soil should allow water to percolate through it easily, preventing waterlogging, which can lead to root diseases.
- Soil Texture: Ideal soil for summer squash is loamy, which is a balanced mixture of sand, silt, and clay. Loamy soil holds nutrients and water well, yet drains efficiently.
- pH Levels: The optimal pH level for summer squash is slightly acidic to neutral (around 6.0 to 7.0). You can test your soil’s pH using a home testing kit.
- Organic Matter and Fertility
- Enriching the Soil: Before planting, enrich the soil with organic matter. This can be done by adding compost or well-rotted manure to the soil.
- Benefits of Organic Matter: Organic matter improves soil fertility and structure. It enhances the soil’s ability to retain moisture and nutrients, which are essential for the growth of summer squash.
- Natural Fertilizers: In addition to compost, consider using other organic fertilizers like bone meal or fish emulsion for added nutrients.
- Site Preparation
- Clearing the Area: Remove weeds, stones, and debris from the planting area. Weeds compete with squash plants for nutrients and water.
- Tilling the Soil: Loosen the soil by tilling or digging to a depth of about 8-10 inches. This process aerates the soil and makes it easier for the roots to penetrate.
- Considerations for Space
- Spacing: Summer squash plants can become quite large and need space to spread out. Ensure there is enough space between plants (about 2-3 feet for bush varieties and more for vining types) for air circulation and easy access for maintenance and harvesting.
- Rotating Crops: If possible, do not plant summer squash in a location where squash or related crops (like cucumbers or melons) have been grown recently, to avoid soil-borne diseases.
- Environmental Factors
- Wind and Shelter: While sunlight is crucial, too much wind can harm the plants. A location sheltered from strong winds is ideal.
- Accessibility for Watering and Care: Choose a spot that is easily accessible for regular watering and care, as consistent moisture is key for summer squash.
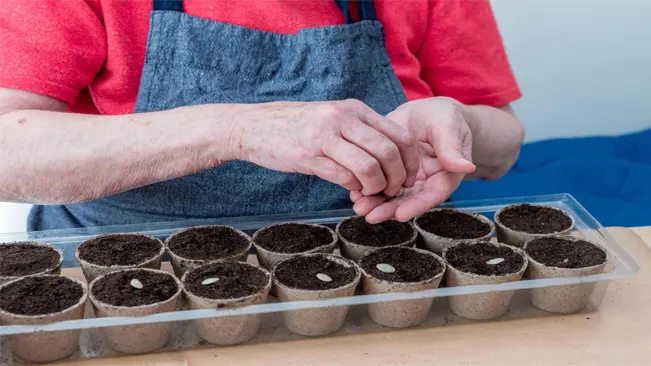
Planting the Seeds
Plant the seeds directly in the ground. Sow them about 1 inch deep, spacing the seeds 2-3 feet apart in rows. If you’re planting in hills, place 2-3 seeds per hill, with hills spaced about 4 feet apart. Water the seeds gently but thoroughly after planting.
Preparing the Soil
- Before planting, ensure the soil is well-prepared. It should be loose, well-draining, and rich in organic matter.
- Use a garden fork or tiller to loosen the soil to a depth of about 8-12 inches.
- Mix in compost or aged manure to enrich the soil, which will provide nutrients for the growing plants.
Seed Depth and Spacing
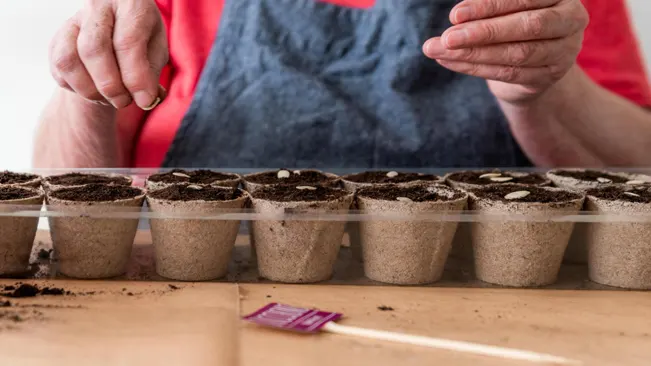
- Plant the seeds about 1 inch deep. This depth is ideal for ensuring the seeds have enough soil coverage to retain moisture but are not so deep that they struggle to emerge.
- When planting in rows, space the seeds 2-3 feet apart. This spacing gives each plant enough room to grow and ensures adequate air circulation, reducing the risk of fungal diseases.
- If you opt for the hill method, where plants are grouped in clusters, sow 2-3 seeds per hill. Each hill should be spaced about 4 feet apart. Hills help improve drainage and can be more effective in areas with heavy soil.
Watering After Planting
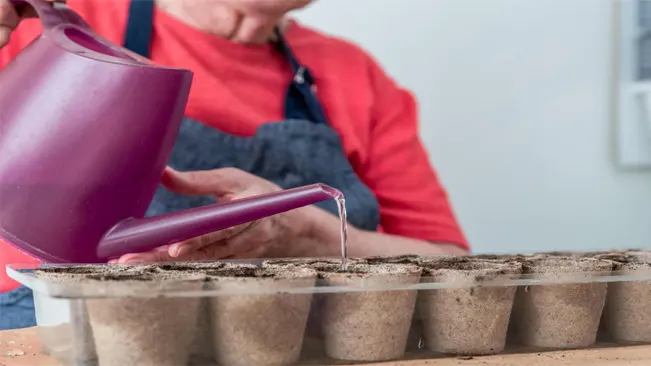
- Once the seeds are planted, water them gently but thoroughly. The goal is to moisten the soil without dislodging the seeds.
- Ensure that the soil stays consistently moist but not waterlogged until germination occurs. This usually takes about 7-14 days, depending on soil temperature and conditions.
Thinning Seedlings
- After the seedlings emerge and develop a few true leaves, thin them out. If you planted multiple seeds per spot, keep the strongest seedling and remove the others.
- This thinning process ensures that the remaining plants have enough space and resources to grow robustly.
Watering and Mulching
Summer squash plants need consistent moisture. Water the plants deeply once a week, more often during dry spells. To conserve moisture and suppress weeds, apply a layer of organic mulch around the plants.
Watering Summer Squash Plants
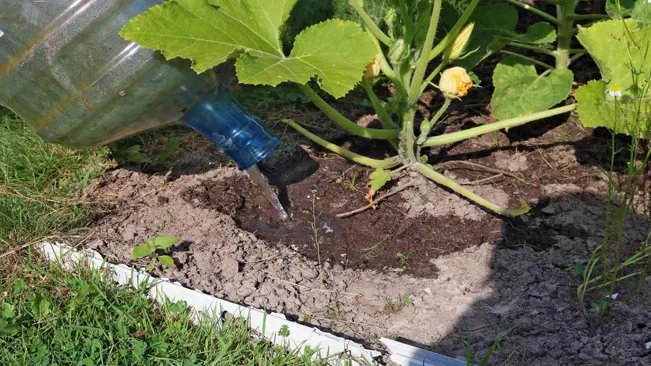
- Deep Watering: Summer squash plants thrive when they receive deep, thorough watering. This approach encourages the roots to grow deeper into the soil, making the plants more resilient and better able to access nutrients and moisture. When you water, aim to soak the soil to a depth of at least one inch.
- Frequency of Watering: The key is to keep the soil consistently moist but not waterlogged. Typically, watering once a week is sufficient, but this can vary based on climate and soil type. During hot, dry periods, you may need to water more frequently. It’s important to monitor the soil moisture level regularly.
- Best Time to Water: Water early in the morning to reduce evaporation and allow the foliage to dry out during the day. Evening watering is less ideal as it can leave the plants damp overnight, increasing the risk of fungal diseases.
- Avoiding Overhead Watering: It’s better to water at the base of the plant rather than overhead to minimize wetting the foliage. Wet leaves can lead to fungal diseases. Drip irrigation or soaker hoses are ideal for this.
Mulching Summer Squash Plants
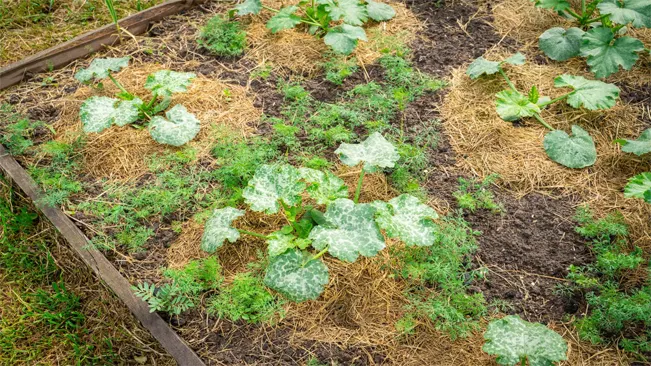
- Purpose of Mulch: Mulch helps to retain soil moisture, suppress weeds, and can also regulate soil temperature. Organic mulch has the added benefit of improving soil fertility as it decomposes.
- Types of Mulch: Organic mulches like straw, grass clippings, or shredded leaves are great choices for summer squash. They are readily available and can contribute to the overall health of the soil.
- Applying Mulch: Apply a layer of mulch around the base of your summer squash plants, keeping it a few inches away from the stems to prevent rot. The layer should be about 2-4 inches thick.
- Mulch and Pest Control: In addition to its other benefits, mulch can also help in pest management. Certain types of mulch can deter pests, and a thick layer can make it more difficult for pests like squash bugs to reach the plants.
- Refreshing Mulch: As the growing season progresses, the mulch may break down or thin out. Check periodically and add more mulch as needed to maintain an effective layer.
Fertilizing
Feed the summer squash plants with a balanced fertilizer when the first fruits are about the size of your finger. Avoid over-fertilizing, as this can lead to lush foliage but poor fruit production.
Importance of Fertilizing Summer Squash
- Nutrient Supply: Summer squash plants are heavy feeders, meaning they require a good amount of nutrients to grow properly and produce bountiful fruit. Fertilizing provides these essential nutrients.
- Balanced Growth: Using a balanced fertilizer ensures the plant receives a proper mix of nitrogen, phosphorus, and potassium. Each of these nutrients plays a crucial role:
- Nitrogen: Promotes healthy leaf and stem growth.
- Phosphorus: Essential for root development and flowering.
- Potassium: Aids in overall plant health and disease resistance.
When to Fertilize
- The timing of fertilization is crucial. The first application should be made when the first fruits are about the size of your finger. This timing ensures that the plants are getting the nutrients they need during a critical phase of their growth and fruit development.
Choosing the Right Fertilizer
- A balanced fertilizer, typically marked with a balanced ratio like 10-10-10 or 20-20-20, is ideal for summer squash. Organic options such as compost or well-rotted manure can also be very effective.
How to Fertilize
- Application: Apply the fertilizer according to the instructions on the package. Generally, it’s best to spread the fertilizer evenly around the base of the plant, a few inches away from the stem to avoid burning the plant.
- Watering: After applying the fertilizer, water the plant thoroughly. This helps to distribute the nutrients into the soil and make them available to the plant’s roots.
Avoiding Over-Fertilization
- Over-fertilizing can lead to excessive foliage growth at the expense of fruit production. This imbalance occurs because too much nitrogen encourages leafy growth, while not enough phosphorus limits fruit development.
- Signs of over-fertilization include lush, green foliage with few or no squash developing, and sometimes, the leaves might appear burnt at the edges due to fertilizer burn.
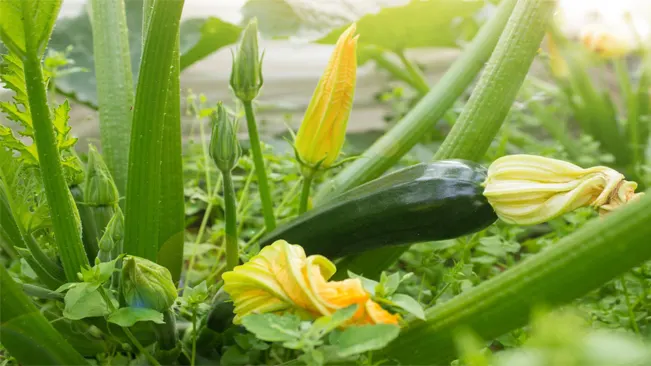
Pollination
Summer squash plants have male and female flowers. Sometimes, manual pollination may be necessary to ensure a good yield. You can do this by transferring pollen from male to female flowers using a small brush or your finger.
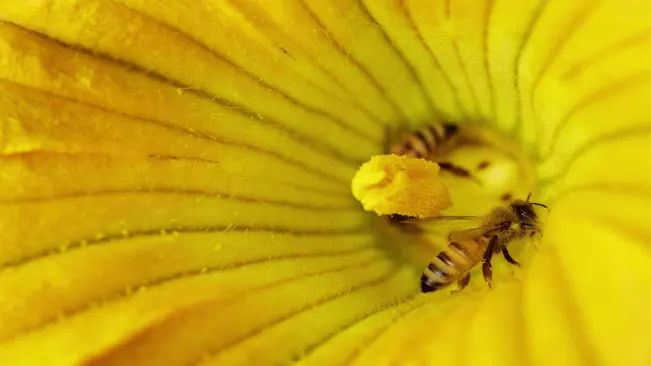
Natural Pollination
In a natural setting, pollination occurs with the help of pollinators like bees. These insects visit the male flowers first, collecting pollen, and then transfer it to the female flowers during subsequent visits. This transfer is crucial for the fertilization of the female flowers, leading to fruit development.
Reasons for Manual Pollination
There are several reasons why manual pollination might be necessary:
- Low Pollinator Activity: Sometimes, there may not be enough bees or other pollinating insects to adequately pollinate the flowers. This can be due to various factors like weather conditions, pesticide use, or a general decline in bee populations.
- High Plant Density: In dense plantings, pollinators might have difficulty accessing all the flowers.
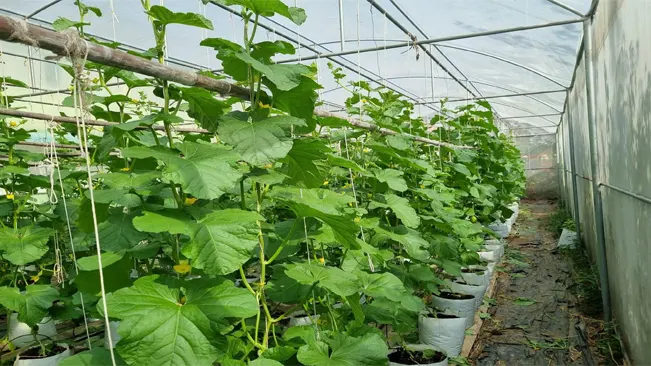
- Controlled Environments: In greenhouse settings, natural pollinators may not be present, necessitating human intervention.
How to Manually Pollinate
- Identify the Flowers: First, differentiate between the male and female flowers. The female flower will have a small bulge (the embryonic squash) at its base.
- Collecting Pollen: Once the male flowers are open and shedding pollen, you can either gently tap the pollen onto a small brush or remove the entire flower and strip its petals back to expose the pollen-covered anther.
- Transferring Pollen: Gently brush the pollen onto the stigma in the center of the female flower. Alternatively, if using the male flower directly, touch the anther to the female stigma.
- Timing: This should be done in the morning, as flowers are usually only open and receptive for a single day.
- Repeat: Pollinate multiple female flowers for better chances of successful fruit development.
Harvesting
Harvest summer squash when they are young and tender, typically 6-8 inches long. Frequent harvesting encourages more fruit production. Use a sharp knife to cut the squash from the vine, being careful not to damage the plant.
When to Harvest
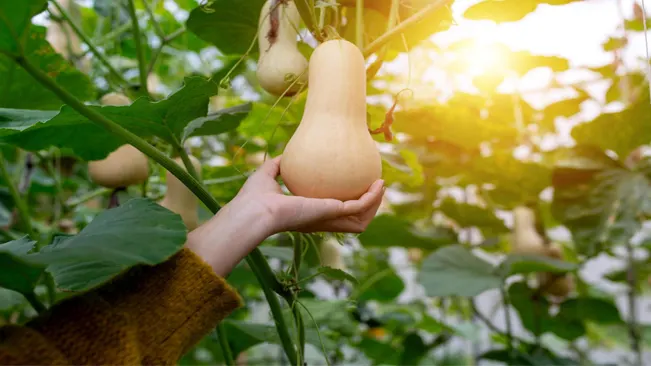
- Optimal Size: Summer squash should be harvested when they are young and tender. The ideal length is typically about 6-8 inches for most varieties. This size ensures the skin is still soft and the seeds inside are small and undeveloped, making them more palatable and easier to cook.
- Regular Checks: Check your squash plants every other day once they start producing. Squash can grow quickly and can become overgrown and tough if not harvested promptly.
Benefits of Regular Harvesting
- Encourages More Fruit: Frequent harvesting stimulates the plant to produce more fruit. If squash is left on the vine for too long, the plant may stop producing new squash as it focuses its energy on the seeds of the over-mature squash.
- Better Quality: Younger squash tend to have better flavor and texture. They are more tender, less fibrous, and the skins are edible.
How to Harvest
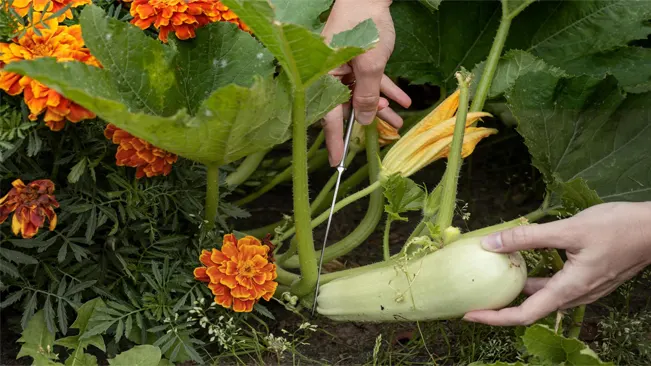
- Using a Sharp Knife or Pruners: Cut the squash from the vine with a sharp knife or a pair of pruning shears. It’s important not to pull or twist the squash as this can damage the plant and the fruit.
- Cut Gently: Make the cut about an inch above the fruit to avoid damaging the squash and the vine.
- Handle with Care: Summer squash is relatively delicate. Handle them gently to avoid bruising or damaging the skin.
Post-Harvest Care
- Immediate Use: Summer squash is best when used fresh. However, it can be stored for a short period.
- Storing: If you need to store them, keep summer squash in the refrigerator. They usually last for about one to two weeks when stored properly.
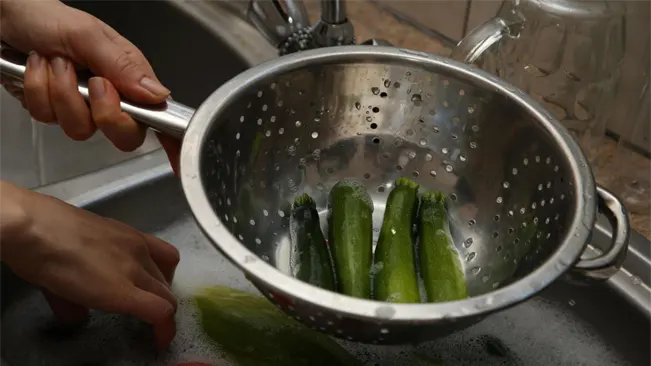
- Washing: Wash the squash only right before you intend to use them, as moisture can promote decay.
Usage in Cuisine
- Versatile Ingredient: Summer squash can be used in a variety of dishes. They can be grilled, sautéed, roasted, or even eaten raw in salads.
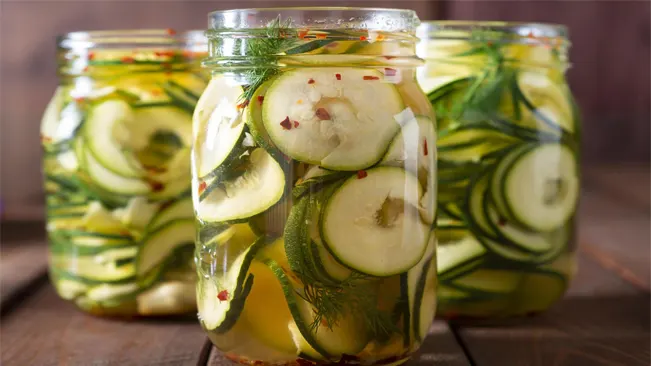
- Preservation: For long-term storage, summer squash can be frozen, canned, or pickled.
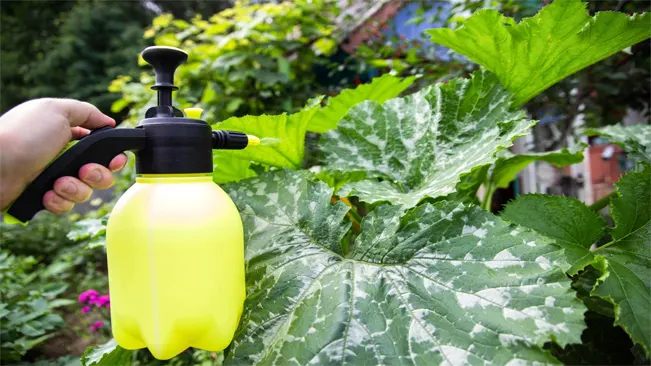
Pest and Disease Control
Keep an eye out for common pests like squash bugs and vine borers. Remove pests by hand or use organic pesticides if necessary. Rotate crops each year to prevent disease buildup in the soil.
Squash Bugs
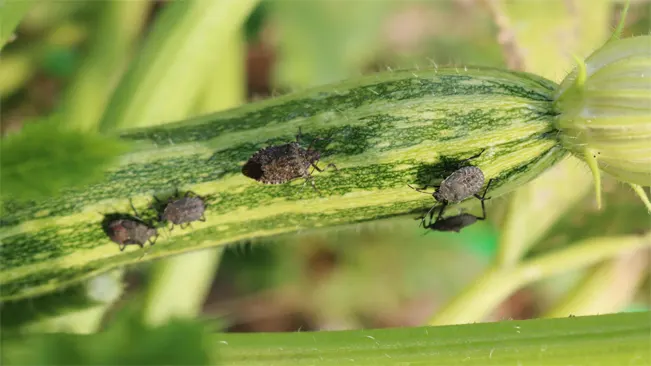
- Identification: Squash bugs are typically dark brown or gray insects, about 5/8 inch long. They have a flat back and are often found on the underside of leaves.
- Damage: They suck the sap out of the leaves, causing them to wilt, brown, and eventually die. They can also transmit plant diseases.
- Control Methods:
- Manual Removal: Check the undersides of leaves regularly and remove any eggs, nymphs, or adults by hand.
- Trap Crops: Plant trap crops (like early squash varieties) to attract bugs away from your main crop.
- Insecticidal Soap or Neem Oil: These organic options can be effective if applied early when bugs are young.
- Diatomaceous Earth: Sprinkle around the base of plants to deter adult bugs.
Vine Borers

- Identification: The squash vine borer is a moth in its adult stage. The larva, which does the damage, is a white caterpillar with a brown head, about 1 inch long.
- Damage: Larvae bore into the stem of the squash plant, causing the plant to wilt and eventually die.
- Control Methods:
- Monitoring: Look for signs of entry, like sawdust-like frass (excrement) at the base of plants.
- Physical Removal: If you catch them early, you can slit the stem and physically remove the borer, then cover the damaged stem with soil to promote healing.
- Beneficial Nematodes: Applying these to the soil can help control the larvae.
- Row Covers: Use them early in the season to prevent the moth from laying eggs on the plants.
- Pheromone Traps: Can help reduce the number of mating adults.
General Disease and Pest Prevention Strategies
- Crop Rotation: Avoid planting squash or related crops (like cucumbers and pumpkins) in the same location year after year to disrupt the life cycle of pests and diseases.
- Sanitation: Keep the garden free of plant debris where pests can overwinter.
- Healthy Soil: Maintain healthy soil with good organic matter, which can help plants resist pests and diseases.
- Water Management: Overhead watering can promote some diseases, so use soaker hoses or drip irrigation when possible.
- Companion Planting: Planting certain herbs or flowers can deter pests or attract beneficial insects.
Conclusion
Growing summer squash from seeds can be a fulfilling part of your gardening journey. With proper care, your summer squash plants will provide a bountiful harvest of fresh, flavorful vegetables. Enjoy the fruits of your labor in salads, sautés, and countless other delicious dishes.
FAQs (Frequently Asked Questions)
- When is the best time to plant summer squash seeds?
Plant after the last frost when the soil has warmed to at least 70°F (21°C). This is typically in late spring or early summer. - How deep should I plant summer squash seeds?
Plant seeds about 1 inch deep in the soil. - What kind of soil is best for summer squash?
Use well-drained soil rich in organic matter. Amend the soil with compost or aged manure before planting for best results. - How much space do summer squash plants need?
Space the seeds or seedlings about 2-3 feet apart in rows, or plant 2-3 seeds per hill with hills spaced about 4 feet apart. - How much sun does summer squash need?
Summer squash requires full sun, meaning at least 6-8 hours of direct sunlight each day. - How often should I water summer squash plants?
Water deeply once a week, ensuring the soil stays moist but not waterlogged. Increase frequency during very hot or dry periods. - Do I need to fertilize my summer squash plants?
Yes, a balanced fertilizer applied when the first fruits are the size of your finger can encourage growth. Avoid over-fertilizing. - How do I prevent pests and diseases in summer squash?
Regularly check for pests like squash bugs and vine borers. Use organic pesticides if necessary. Crop rotation and good soil health can help prevent diseases. - When and how should I harvest summer squash?
Harvest when they are young and tender, typically 6-8 inches long. Use a sharp knife to cut the squash from the vine. - Can I grow summer squash in containers?
Yes, summer squash can be grown in large containers. Ensure the container is big enough and has good drainage. Container plants may require more frequent watering.

Kristine Moore
Forestry AuthorI'm Kristine Moore, a seasoned garden landscaping professional with over 30 years of experience. My extensive career has been dedicated to transforming outdoor spaces into stunning, sustainable landscapes. With a deep understanding of horticulture, design principles, and environmental stewardship, I have become a respected figure in the field, known for creating harmonious, visually appealing, and eco-friendly gardens. My commitment to excellence and continuous learning in landscaping trends and techniques has solidified my reputation as an expert in garden design and implementation.


Leave your comment