How to Grow Tulips
- April 3, 2024
- 0 comment
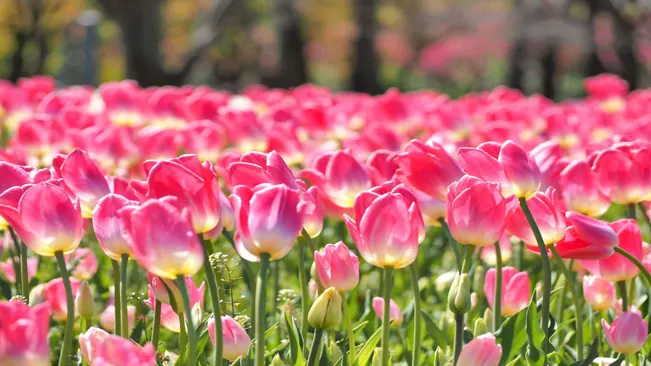
Tulips, celebrated for their dazzling hues and graceful contours, hold a special place in the hearts of garden lovers and floral admirers. These charming flowers, which first emerged in Turkey before captivating the Netherlands in the 16th century, are now emblematic of spring’s rejuvenation. In this article, we delve into the nuanced art of nurturing these exquisite blooms. Our guide offers detailed insights for both novice and seasoned gardeners on successfully cultivating tulips.
List on How To Grow Tulips
- Selecting Tulip Bulbs
- Best Time to Plant
- Preparing the Soil
- Planting the Bulbs
- Caring for Tulips
- After Bloom Care
- Dealing with Pests and Diseases
- Forcing Tulips Indoors
Selecting Tulip Bulbs
Choosing the right bulbs is crucial for growing beautiful tulips. Look for bulbs that are firm and free of damage. Larger bulbs often produce bigger flowers. Purchase bulbs from reputable nurseries or garden centers, and opt for a variety of colors and species to create a diverse display.
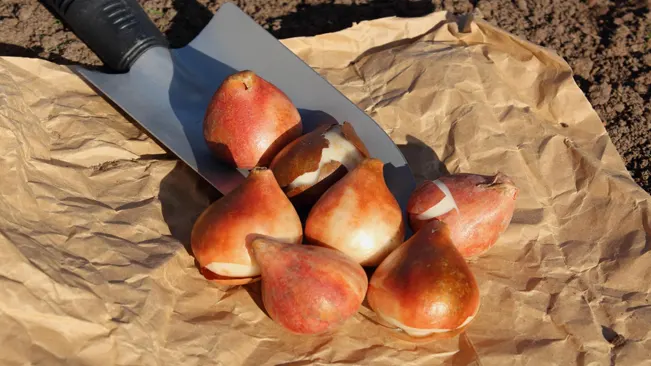
- Firmness and Health: A healthy tulip bulb should feel firm to the touch, indicating that it is not suffering from rot or disease. Avoid bulbs that feel soft, squishy, or show signs of mold or damage. These symptoms can indicate poor health, reducing the bulb’s chance of blooming successfully.
- Size Matters: Generally, larger tulip bulbs are more likely to produce larger and more robust flowers. This is because bigger bulbs have more stored energy, which the plant can use to produce a larger bloom. However, this doesn’t mean smaller bulbs won’t bloom; they might just produce smaller flowers.
- Variety is Key: Tulips come in a wide array of colors, shapes, and sizes. When purchasing, consider a mix of different types to create a more visually interesting and diverse display in your garden. From the classic cup-shaped tulips to the fringed and parrot varieties, each brings its unique charm.
- Reputable Sources: Buying bulbs from a reputable nursery or garden center ensures you get high-quality, disease-free bulbs. These vendors often provide a good selection of tulip varieties and can offer valuable advice on how to care for them.
- Timing of Purchase: Buy tulip bulbs in late summer or early fall. This timing is ideal because it’s just before the planting season for tulips, ensuring that the bulbs are fresh and haven’t been stored for too long.
Best Time to Plant
Tulip bulbs should be planted in the fall, a few weeks before the ground freezes. This timing allows the bulbs to establish roots before the winter. In most climates, this means planting in September or October. However, in warmer climates, you might need to chill the bulbs in a refrigerator for 6-8 weeks before planting to simulate a cold winter.
- Optimal Planting Time: Plant tulip bulbs a few weeks before the ground freezes, typically in September or October, depending on the region.
- Root Development Before Winter: The goal of autumn planting is to give bulbs enough time to establish strong roots before winter, vital for absorbing nutrients and water.
- Adjustments for Mild Winters:
- Cold Dormancy Requirement: Tulips need a period of cold dormancy to bloom properly.
- Artificial Chilling for Mild Climates: In areas without natural cold winters, simulate this condition by chilling tulip bulbs in a refrigerator for 6-8 weeks.
- Planting After Chilling: Post-chilling, plant the bulbs in the ground when temperatures are consistently cool, but before the onset of deep winter.
- Understanding Local Climate: It’s important to adapt planting strategies based on the local climate to ensure the tulips meet their natural growth requirements.
- Preparation for Spring Blooming: This strategic timing and preparation pave the way for a vibrant tulip display in spring.
Preparing the Soil
Tulips thrive in well-drained soil. Choose a sunny spot in your garden and prepare the soil by loosening it to a depth of 12 to 15 inches. Mix in compost or other organic matter to improve nutrient content and drainage. Ensure the planting site does not collect standing water.

- Soil Type: Tulips prefer well-drained soil. This is essential because poorly drained soil can cause bulb rot, particularly during wet seasons. If your garden soil is heavy or clay-like, consider amending it with sand or other materials to enhance drainage.
- Location: Select a sunny spot in your garden. Tulips need a good amount of sunlight to thrive – at least 6 hours of direct sun a day is ideal. They can tolerate partial shade, but this might affect the vibrancy and strength of the blooms.
- Soil Preparation: Loosening the soil to a depth of 12 to 15 inches is key. This depth is important for allowing the roots of the tulips to spread easily and for better water penetration. Use a garden fork or a spade to turn the soil, breaking up large clumps.
- Enriching the Soil: Adding compost or other organic matter greatly improves the nutrient content of the soil, which tulips will greatly benefit from. Organic matter also improves soil structure, enhances drainage, and maintains soil moisture levels. Well-rotted manure, leaf mold, or commercial garden compost are good choices.
- Drainage: Ensure that your chosen planting site does not hold water. After a rain, observe if water pools in the area. If it does, either find a new location with better natural drainage or consider building a raised bed to improve drainage conditions.
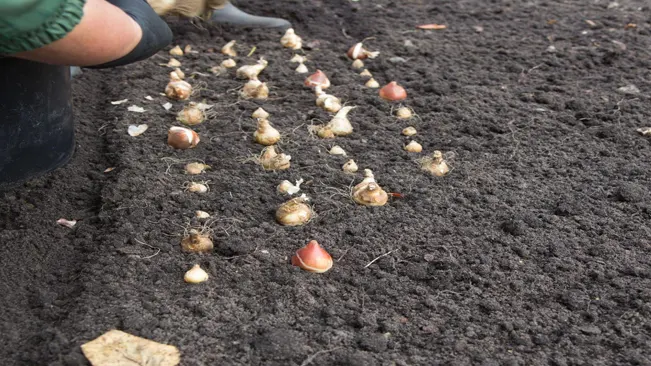
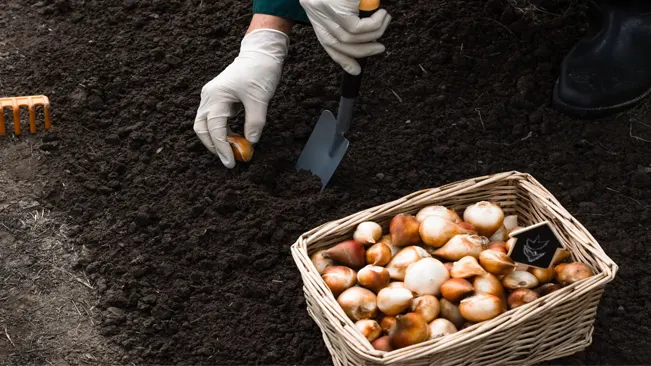
Planting the Bulbs
Plant tulip bulbs about 4 to 6 inches deep and 3 to 6 inches apart, with the pointed end facing up. The depth is important as it protects the bulbs from extreme temperatures and reduces the risk of being eaten by animals. After planting, water the bulbs thoroughly to settle the soil and initiate root growth.
- Planting Depth: Plant tulip bulbs approximately 4 to 6 inches deep. This depth provides insulation from harsh temperature fluctuations and protection from animals like squirrels, which may dig up shallower bulbs.
- Spacing: Space the bulbs 3 to 6 inches apart. Adequate spacing prevents overcrowding, allowing each bulb enough room for growth and access to nutrients, and reduces the risk of stunted growth or disease.
- Orientation: Position the bulbs with the pointed end facing up. This is the natural orientation for tulip growth, ensuring the stem and flower emerge correctly towards the surface.
- Initial Watering: Water the bulbs thoroughly after planting. This settles the soil, eliminates air pockets, and provides moisture for root development. Be cautious not to overwater, as excessive moisture can cause bulb rot.
Caring for Tulips
Tulips require relatively little care. During the growing season, make sure they receive adequate water, especially during dry spells. However, avoid overwatering as this can lead to bulb rot. Fertilize the tulips in the early spring as soon as new growth appears.
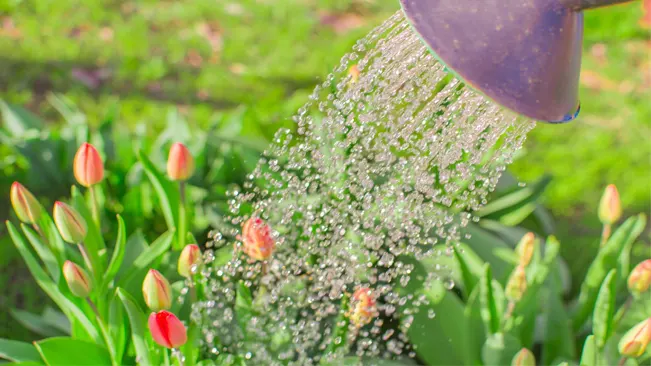
- Watering Needs While tulips aren’t high-maintenance in terms of watering, getting the balance right is key. During their active growth in the spring, they require sufficient moisture, particularly if the weather is dry. This means regular, but not excessive, watering. It’s important to avoid overwatering, as tulips are susceptible to bulb rot, especially in poorly drained soils. The goal is to keep the soil moist but not waterlogged.
- Soil and Drainage Tulips prefer well-drained, fertile soil. Before planting, it’s beneficial to work some compost or a balanced, slow-release fertilizer into the soil to improve its nutrient content. Good drainage is crucial to prevent water from pooling around the bulbs. Raised beds or planting in a slightly elevated position can help in areas with heavy soil or poor drainage.
- Fertilization Feeding tulips is an essential part of their care. The best time to fertilize is in early spring, as soon as you see new growth emerging. Use a balanced fertilizer suitable for flowering bulbs. This gives them a boost of nutrients that are essential for vibrant blooms. Some gardeners also recommend a second feeding right after the blooms have faded, to support the bulbs for the following season.
- Sunlight Requirements Tulips thrive in full sun, needing around 6 hours of direct sunlight daily. This exposure is essential for the bulbs to store enough energy for the following year’s bloom. If planted in too much shade, tulips may have weak stems or fail to flower optimally.
- Deadheading and Post-Bloom Care After tulips have finished blooming, it’s important to deadhead the flowers. This prevents the plant from expending energy on seed production. However, leave the foliage in place until it turns yellow and dies back naturally. The leaves are crucial for photosynthesis, which helps replenish the bulb for the next flowering season. Once the leaves have yellowed, you can safely cut them back to ground level.
- Protecting from Pests and Diseases Tulips can be susceptible to pests like aphids and diseases such as tulip fire or bulb rot. Regularly inspect your plants and practice good garden hygiene to reduce these risks. Removing any affected plant material promptly can help prevent the spread of disease.
- Winter Care In colder climates, tulip bulbs typically remain in the ground over winter. They require a period of cold dormancy to bloom in spring. In regions with mild winters, you may need to dig up the bulbs and refrigerate them for a few months to simulate winter conditions before replanting.
After Bloom Care
Once tulips have bloomed, deadhead the flowers but leave the foliage in place until it turns yellow and dies back. This process allows the plant to gather energy for the next year’s bloom. After the foliage has died, remove it to keep the garden tidy.
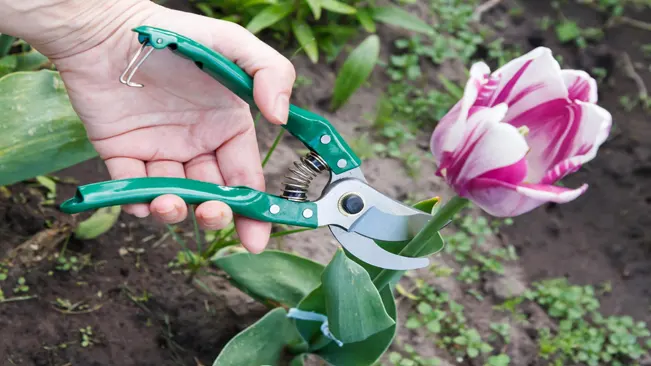
- Deadheading: Once tulips have finished blooming, it’s essential to remove the spent flower heads. This process, known as deadheading, prevents the tulips from expending energy on seed production. Instead, this energy is redirected to the bulb, strengthening it for the next year’s growth. When deadheading, be careful to only remove the flower head and not the surrounding leaves.
- Foliage Care: After the blooms have been removed, the remaining foliage may not look attractive, but it plays a crucial role. The leaves continue to photosynthesize, producing energy that is stored in the bulb. It’s vital to leave this foliage intact until it turns yellow and wilts. This process of senescence indicates that the plant has transferred all the energy it can to the bulb.
- Watering and Feeding: During this period, continue to provide regular watering, especially if the weather is dry, to support the foliage. However, avoid overwatering, as tulip bulbs are prone to rot in waterlogged soil. If you haven’t fertilized at planting, a light application of a balanced, slow-release fertilizer after blooming can benefit the bulbs, though it’s not strictly necessary.
- Removing Foliage: Once the foliage has turned yellow and dies back, which usually happens by early to mid-summer, it’s time to remove it. Gently pull or cut the dead foliage at the base. Be cautious not to disturb the bulbs underground if you plan to leave them in place for the next year.
- Preparing for Dormancy: After removing the foliage, the tulip bulbs enter a period of dormancy. In this phase, they require little care. In colder climates, the bulbs can remain in the ground. In warmer climates where there isn’t a significant cold period, you might need to dig up the bulbs, store them in a cool, dry place, and chill them before replanting in the fall.
Dealing with Pests and Diseases
Tulips are susceptible to pests like aphid and diseases such as tulip fire (Botrytis tulipae). Regularly inspect your tulips and treat problems early with appropriate fungicides or insecticides. Consider using barriers or repellents to protect from rodents and deer.
Pests
- Aphids: These small, soft-bodied insects can be green, black, brown, or pink and tend to cluster on new growth and the undersides of leaves. They suck plant sap, causing distorted leaves and a reduction in plant vigor. Control them by spraying with water to dislodge them, using insecticidal soap, or introducing natural predators like ladybugs.
- Rodents and Deer: Mice, voles, and squirrels may dig up and eat tulip bulbs. Deer find tulip flowers appetizing. To deter these animals, use physical barriers like wire mesh around the planting area or employ repellents. Also, planting bulbs deeper (up to 8 inches) can make it harder for rodents to reach them.
Diseases
- Tulip Fire (Botrytis tulipae): This fungal disease causes brown spots on leaves and flowers, which can lead to distorted and stunted growth. To prevent it, ensure good air circulation around plants and avoid overhead watering to keep foliage dry. Infected plants should be removed and destroyed to prevent the spread of the fungus.
- Basal Rot: This is another fungal problem that causes the base of the bulb to rot. Good drainage is essential to prevent it. Avoid over-watering and plant bulbs in well-draining soil. Infected bulbs should be discarded.
General Tips
- Regular Inspection: Frequently inspect your tulips for signs of pests or disease. Early detection is key to effective control.
- Clean Gardening Practices: Keep the area around tulips clean of plant debris to reduce the risk of disease. Practice crop rotation if tulips are grown in the same area each year.
- Chemical Treatments: When using fungicides or insecticides, follow the manufacturer’s instructions carefully. It’s preferable to use these treatments as a last resort, after cultural and physical control methods.
Forcing Tulips Indoors
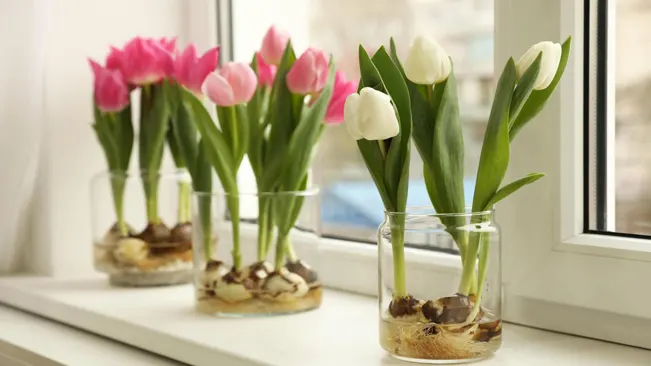
- Tulips can also be grown indoors in pots. To force tulip bulbs, chill them as you would for planting in warm climates, then plant in pots and place in a cool, dark place until shoots appear. Once they do, move the pots to a sunny window to enjoy their bloom.
Related Growing Guides:
Conclusion
In conclusion, cultivating tulips offers a delightful gardening adventure, suitable for beginners and experts alike. Adhering to these guidelines ensures a splendid showcase of vivid, colorful tulips enhancing your garden or indoor spaces. Embrace the joy of tulip gardening and revel in the beauty they bring. Wishing you a successful and enjoyable tulip-growing journey!
FAQs (Frequently Asked Questions)
- When is the best time to plant tulip bulbs?
Tulip bulbs should be planted in the fall, ideally 6-8 weeks before a hard frost is expected, which is typically September or October in most regions. - How deep and far apart should I plant tulip bulbs?
Plant tulip bulbs about 4 to 6 inches deep and 3 to 6 inches apart. The pointed end of the bulb should face upwards. - Do tulips need full sun or shade?
Tulips thrive in full sun but can tolerate partial shade. However, they will bloom best when they receive at least 6 hours of direct sunlight per day. - How often should I water tulips?
Water your tulips when planting and during active growth in the spring. They need regular watering if the weather is dry, but overwatering, especially when dormant, can cause bulb rot. - Do I need to fertilize tulips?
It’s recommended to use a balanced, slow-release fertilizer when planting and again in the spring when leaves emerge. - What should I do with tulips after they bloom?
After blooming, deadhead the flowers but leave the foliage until it turns yellow and dies back. This allows the plant to store energy for the next year. - How do I protect tulips from pests like squirrels or deer?
You can protect bulbs with wire mesh when planting, use repellents, or plant pest-resistant tulip varieties. - Can I grow tulips in containers?
Yes, tulips can be grown in containers. Ensure the pot is deep enough and has good drainage. Also, consider chilling the bulbs if you live in a warmer climate. - Why didn’t my tulips bloom?
Several factors could cause this: planting too shallow, poor soil conditions, inadequate sunlight, or the bulbs could be too old or damaged. - Can I leave tulip bulbs in the ground all year?
In colder climates, it’s often best to leave them in the ground. In warmer climates, you might need to dig them up and chill them in a refrigerator before replanting in the fall.
Emma Hudson
Forestry AuthorEmma's experience in farming shapes her detailed guides on gardening and farming tools, providing practical, actionable advice grounded in real-world experience. Her work targets both newcomers and experienced farmers, aiming to enhance their practices with a mix of traditional wisdom and modern techniques. By making complex agricultural concepts accessible, Emma's guides serve as valuable tools for those navigating the challenges of contemporary farming, offering strategies for sustainable success.


Leave your comment