How to Plant and Care for Bulbs: Master Techniques for Year-Round Beauty
- May 29, 2024
- 0 comment
Learn how to plant and care for bulbs with master techniques that ensure year-round beauty in your garden. Dive into the essential skills of bulb gardening. Transform your garden into a breathtaking oasis of blooms with our expert guide on how to plant and care for bulbs. This comprehensive journey through bulb gardening will not only teach you the foundational steps but also dive deep into the master techniques that ensure your flowers thrive beautifully across all seasons.
Whether you’re aiming for a riot of spring color or a serene winter arrangement, our strategies will help you cultivate a stunning garden that captivates and inspires year-round. Let’s get started on the path to creating your own floral masterpiece.
Table of Contents on How to Plant and Care for Bulbs
- Understanding Bulbs
- Pre-Planting Considerations
- Planting Techniques
- Care and Maintenance
- Seasonal Care Strategies
- Common Pitfalls and How to Avoid Them
- Advanced Techniques for Year-Round Beauty
- Conclusion
- FAQs
Understanding Bulbs
In the diverse world of horticulture, bulbs serve as a fascinating and integral component of many gardens. They are classified into several types based on their botanical structure and growth cycles: true bulbs, corms, tubers, and rhizomes. Each type has distinct characteristics and specific care requirements that influence their gardening applications.
- True Bulbs: These are complete storage units, encapsulating future plants within their structures. True bulbs, such as lilies and tulips, have a layered appearance, akin to an onion, and contain all the necessary nutrients to support initial growth. For instance, a typical tulip bulb contains about 30% starch, which provides the energy needed during early growth before photosynthesis begins.
- Corms: Appearing similar to true bulbs, corms like crocuses and gladioli are actually modified stem bases called basal plates, topped with growing points. Unlike true bulbs, corms do not have layers but instead use their entire structure for nutrient storage. Each year, the old corm dies and is replaced by one or more new corms that form on top.
- Tubers: These are thickened underground stems that store starches and proteins. Examples include begonias and anemones. Tubers are characterized by multiple growth points known as eyes, scattered across their surfaces. A potato is a common example of a tuber, with each eye capable of developing into a new plant.
- Rhizomes: These grow horizontally underground and often near the soil surface. Rhizomes, such as irises and ginger, spread out to propagate new plants at various points along their length. They are typically high in water content and sugars, facilitating rapid growth under suitable conditions.
- Seasonal Growth Patterns: Understanding the seasonal growth patterns of bulbs is crucial for optimal care and flowering. Spring-flowering bulbs, like tulips and daffodils, are typically planted in the fall. They require a cold period to initiate the biochemical processes necessary for spring blooming. In contrast, summer-flowering bulbs, such as lilies and dahlias, are planted in the spring after the threat of frost has passed and thrive in warmer growing conditions.
Here is a table summarizing the typical nutrient content and ideal planting times for each type of bulb:
| Bulb Type | Nutrient Content (% by weight) | Ideal Planting Time | Example Plants |
|---|---|---|---|
| True Bulbs | 30% starch, 3% proteins | Fall for spring flowering | Tulips, Lilies |
| Corms | 25% starch, 2% proteins | Fall for spring flowering | Crocuses, Gladioli |
| Tubers | 20% starch, 6% proteins | Spring for summer flowering | Begonias, Anemones |
| Rhizomes | 18% starch, 4% sugars | Spring for summer flowering | Irises, Ginger |
By tailoring your gardening practices to the specific type of bulb and understanding their unique biological needs, you can enhance both the health and beauty of your garden. This approach not only maximizes the aesthetic appeal of your landscape but also ensures the sustainability and vigor of your plantings.
Pre-Planting Considerations
Selecting the Right Bulbs
Selecting healthy bulbs is crucial for ensuring vigorous growth and vibrant blooms. When choosing bulbs, consider the following attributes:
- Firmness: Bulbs should be firm to the touch, as softness can indicate rot or disease.
- Appearance: Avoid bulbs with visible signs of mold, scars, or soft spots, which can impair growth.
- Size: Generally, larger bulbs are preferable because they have more stored energy, which translates into more robust blooms. For instance, a larger tulip bulb can store up to 50% more nutrients than a smaller one, significantly affecting bloom size and stem strength.
- Provenance: Source your bulbs from reputable suppliers to ensure they have been properly handled and stored. High-quality bulbs from reliable nurseries are less likely to carry diseases and are more adapted to climatic conditions similar to those in your garden.
Soil Preparation
Proper soil preparation is essential for the health of bulbs. Enhancing your garden soil involves several steps:
- Drainage: Bulbs thrive in well-drained soil. Poor drainage can lead to bulb rot, particularly in clay-heavy soils. Incorporating organic matter like compost or rotted manure can improve soil structure and drainage.
- Nutrient Content: Adding organic matter not only improves drainage but also enriches the soil with essential nutrients. For example, compost generally contributes a balanced mix of nitrogen, phosphorus, and potassium, which supports root and shoot development.
- pH Testing: Most bulbs prefer slightly acidic to neutral soil (pH 6.0 to 7.0). Testing soil pH can guide your amendments to create an ideal growing environment. For example, adding lime to raise the pH or sulfur to lower it can make a significant difference in plant health and bloom quality.
Choosing the Right Location
The growth and blooming of bulbs are heavily influenced by their planting location:
- Light Exposure: Most bulbs require full to partial sunlight to achieve optimal growth and flowering. The duration and intensity of sunlight affect not only bloom timing but also color intensity and plant vigor.
- Plant Spacing and Aesthetics: Consider the mature height and spread of the plants to prevent overcrowding. Overcrowded plants compete for light and nutrients, which can result in smaller blooms. Planting bulbs in groups or drifts can enhance the visual impact and ensure each bulb has sufficient space to flourish.
- Visual Design: Thoughtful placement can utilize bulbs for maximum impact, such as using early-spring bulbs to outline paths or frame garden beds.
| Bulb Type | Ideal Soil Type | pH Range | Nutrient Needs |
|---|---|---|---|
| True Bulbs | Loamy, well-drained | 6.0-7.0 | High in phosphorus |
| Corms | Sandy loam, well-drained | 6.5-7.5 | Moderate nitrogen |
| Tubers | Rich, well-aerated | 5.5-6.5 | High in potassium |
| Rhizomes | Moist, well-drained | 6.0-7.0 | Balanced NPK |
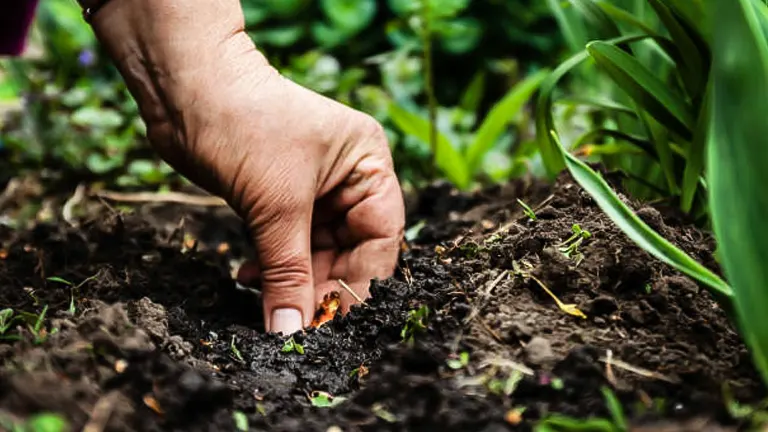
Planting Techniques
Proper planting is essential for ensuring the health and beauty of your bulb garden. Here’s a detailed guide to optimize your bulb planting technique for robust growth and spectacular blooms:
1. Timing
The timing of your planting plays a crucial role in the successful establishment and blooming of bulbs:
- Spring-flowering bulbs: Plant these in the fall, ideally six to eight weeks before the ground freezes. This timing allows the bulbs to undergo vernalization, a necessary cold treatment period that stimulates spring blooms.
- Summer-flowering bulbs: Plant these after the last frost in spring to avoid cold damage and ensure a favorable start in warmer soil.
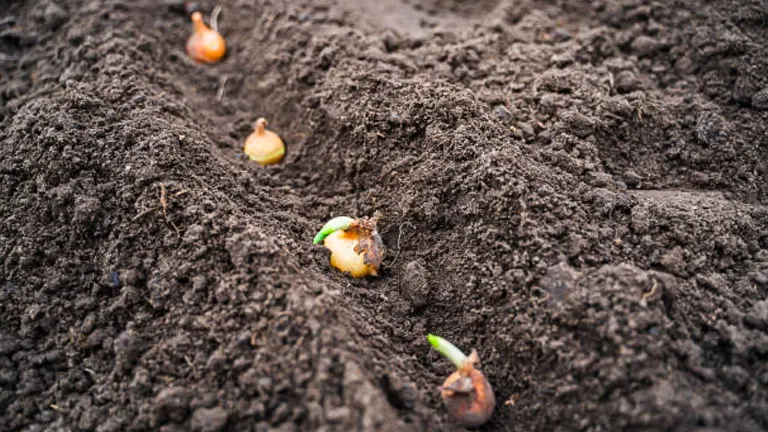
2. Planting Depth and Spacing
The depth and spacing of bulbs are critical factors that influence root and plant development:
- Depth: Plant bulbs at a depth three times their height. For example, a 2-inch tall bulb should be planted about 6 inches deep. This depth helps protect the bulb from temperature extremes and physical damage.
- Spacing: Space bulbs approximately three times their width apart. This allows adequate room for root expansion and reduces competition for nutrients. Proper spacing also ensures sufficient air circulation, which helps prevent fungal diseases.
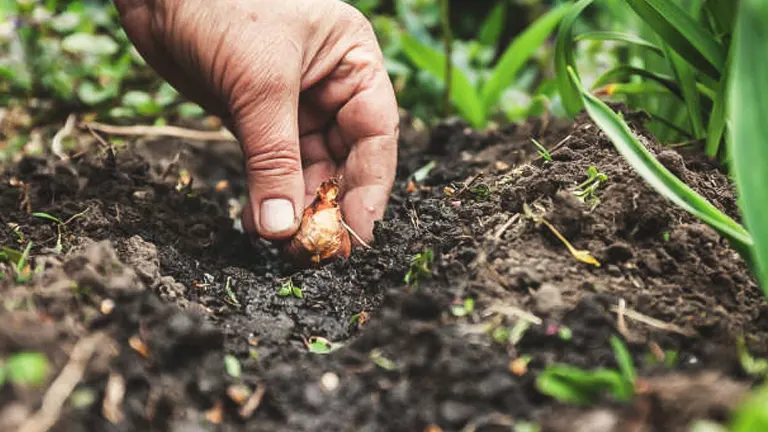
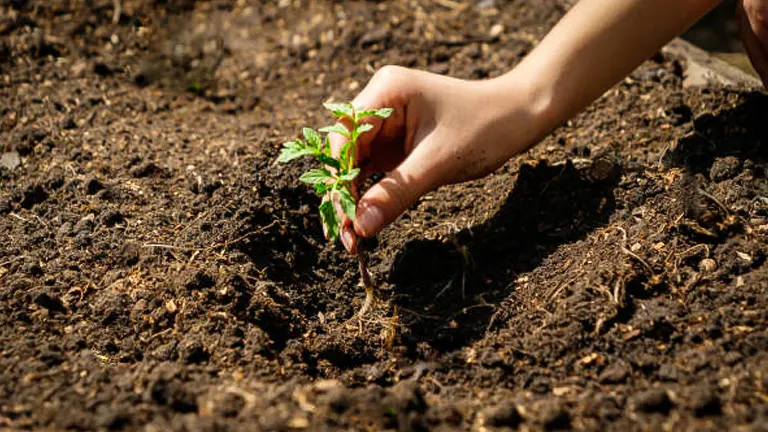
3. The Planting Process
- Prepare the Site: Choose a location that offers appropriate sunlight and has well-drained soil. Dig a hole or trench to the specified depth. For visual impact and ease, consider planting bulbs in groups or clusters rather than individually.
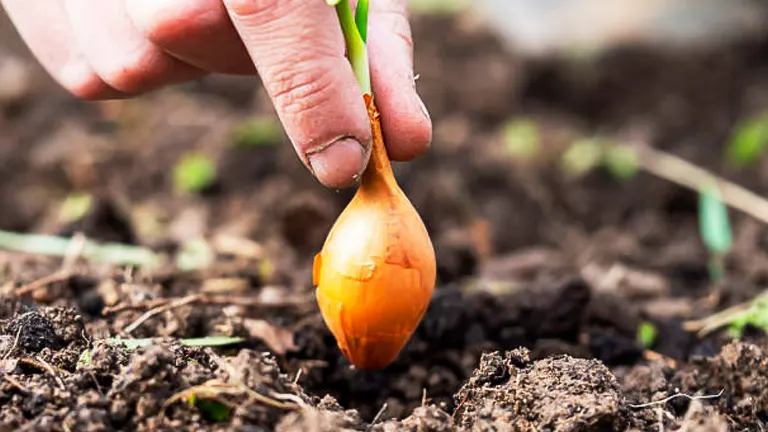
- Place the Bulb: Position the bulb with its pointy end up—the shoot end. This is the direction from which the green shoot will emerge. If it’s challenging to determine the top from the bottom, planting the bulb on its side is a safe alternative, as the shoot will naturally orient itself upwards.
- Cover and Water: Backfill the hole with soil, gently firming it to eliminate any air pockets which can dry out the bulb. Water thoroughly to settle the soil around the bulbs, which also provides the initial moisture needed to trigger root growth.
Additional Considerations:
- Soil Amendments: If your soil is heavy clay or very sandy, incorporate organic matter such as compost or peat moss to improve soil structure and nutrient content.
- Water Management: Post-planting, water the bulbs lightly once a week until the ground freezes, if there is no rain. Avoid overwatering, as this can lead to bulb rot.
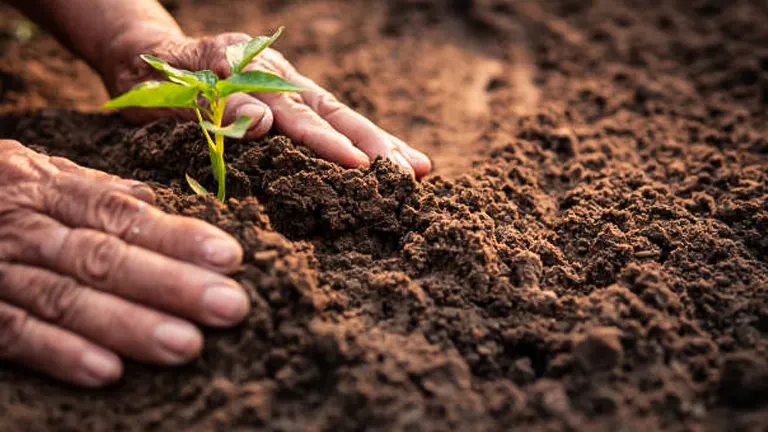
Care and Maintenance

Once your bulbs are in the ground, the next steps in their care are crucial for promoting vigorous growth and spectacular blooms.
Watering Needs
Immediately after planting, give your bulbs a good soaking. This initial watering is crucial as it helps to establish roots. After planting, bulbs typically require little water until they start to grow in earnest; overwatering can lead to bulb rot. During the growth period, keep the soil moist but not soggy. As flowering finishes, you can reduce watering to help the plants enter dormancy properly.
Fertilization Techniques
While bulbs store their own food, they benefit from a light application of a balanced fertilizer at planting time. Choose a fertilizer low in nitrogen and high in potassium and phosphate to support root growth and flowering. Apply according to package instructions to avoid over-fertilization, which can harm plant health.
| Aspect | Detail | Scientific Reasoning |
|---|---|---|
| Timing | Fall for spring bulbs, spring for summer bulbs | Aligns with plant biological cycles |
| Depth | 3 times the bulb height | Protects from extreme temperatures |
| Spacing | 3 times the bulb width | Reduces competition, enhances air circulation |
| Soil Amendment | Add organic matter if needed | Improves soil structure and nutrient availability |
| Initial Watering | Thoroughly after planting | Activates root growth processes |
By following these scientifically backed planting techniques, you ensure that your bulbs are set up for optimal growth, leading to a healthier and more visually appealing garden.
Seasonal Care Strategies
The cyclical nature of bulb growth demands attention to seasonal care to ensure health and vigor throughout the year. Here’s how to approach care in each season:
Spring Care
- Post-Bloom Nutrition: After flowering, bulbs continue to synthesize nutrients through their foliage. It is essential to allow the leaves to remain until they yellow and wither naturally. This process enables the bulbs to photosynthesize and store energy in the form of carbohydrates, primarily inulin, within their tissues for the next growing season.
- Fertilization: Applying a balanced, slow-release fertilizer after blooming can replenish nutrients that the bulbs will store and use the following year. Ensure the fertilizer is low in nitrogen to avoid stimulating foliage growth at the expense of the next year’s flowers.
Summer Care
- Moisture Retention: These bulbs typically require consistent soil moisture. Use mulch to help retain moisture in the soil, keep the roots cool, and suppress weeds. Organic mulches, like straw or bark chips, also contribute additional nutrients as they decompose.
- Temperature Management: Keep an eye on soil temperatures; bulbs can suffer in extreme heat. If temperatures rise significantly, additional watering may be necessary to maintain optimal soil moisture levels.
Fall Preparations
- Mulching: After the first frost, apply a thick layer of mulch to insulate your bulbs from extreme cold and temperature fluctuations, which can be detrimental to dormant bulbs.
- Bulb Division: For bulbs that tend to multiply or have grown too densely, fall is the ideal time to dig up and divide them. This helps prevent disease spread and encourages more vigorous growth by reducing competition.
Winter Care
- Protection From Freeze-Thaw Cycles: Mulch acts as an insulator to protect against freeze-thaw cycles that can push bulbs up from the ground and expose them to damaging cold.
- Watering: Container-planted bulbs require careful monitoring as they can dry out. Water sparingly, only when the soil is dry to the touch, to maintain minimal moisture levels without waterlogging.
Common Pitfalls and How to Avoid Them
Gardening with bulbs can be highly rewarding, but it also comes with its set of challenges. Here’s how you can proactively address and prevent common pitfalls, ensuring the health and beauty of your bulb garden:
Overwatering and Underwatering
- Scientific Insight: Bulbs require an initial moisture boost to activate root growth but are susceptible to fungal diseases if the soil is waterlogged. The ideal soil moisture content for bulbs should range between 20-30%.
- Practical Tips: Use a soil moisture meter to check levels before watering. During active growth phases, keep the soil consistently moist but not soggy. Reduce watering once the foliage begins to die back, as bulbs enter a dormant state.
Pest and Disease Management
- Scientific Insight: Bulbs are particularly prone to nematode infestations and fungal diseases like botrytis blight and tulip fire, especially when stressed or planted too densely.
- Practical Tips: Ensure proper spacing and plant depth to enhance air circulation. Regularly inspect plants for signs of distress, such as discoloration or unusual spots. Implement integrated pest management (IPM) strategies, including cultural, biological, and chemical controls, tailored to specific pests and diseases. Use insecticidal soaps and approved fungicides as needed, but always as a part of a broader management strategy.
Bulb Rot
- Scientific Insight: Bulb rot typically results from an overabundance of moisture around the bulb, creating an environment conducive to fungal growth, such as Fusarium and Penicillium molds.
- Practical Tips: Improve soil drainage by incorporating coarse sand or organic material. For areas with heavy clay, consider raised beds or planting in well-draining containers. If rot is observed, remove the affected bulbs immediately to prevent the spread. Consider applying a fungicide if the problem persists or is widespread.
Advanced Techniques for Year-Round Beauty
Utilizing advanced techniques in bulb gardening can dramatically enhance the beauty and longevity of your garden’s blooming periods. Here are some sophisticated strategies:
Forcing Bulbs Indoors
Forcing bulbs to bloom indoors allows gardeners to enjoy vibrant flowers out of their natural season.
- Scientific Insight: This technique manipulates the bulbs’ natural biennial cycles by creating artificial chilling conditions that mimic winter, tricking the bulbs into blooming early.
- Procedure: Select bulbs that are conducive to forcing, such as tulips, daffodils, and hyacinths. Chill them at approximately 4°C (39°F) for 12-16 weeks in a refrigerator. After chilling, plant the bulbs in shallow, well-draining pots and place them in a cool, dark area until shoots appear. Once shoots emerge, move the pots to a brighter area with indirect light to stimulate blooming.
- Result: This method allows the enjoyment of vibrant blooms like spring flowers during winter, brightening indoor spaces when outdoor gardens are dormant.
Layering Bulbs in Pots (“Lasagna Planting”)
Layering multiple types of bulbs in a single container can extend the blooming period significantly.
- Scientific Insight: Different bulbs have varying root depths and blooming times, which can be strategically used to create continuous displays.
- Procedure: Begin with a layer of large bulbs like daffodils or tulips at the bottom of a large pot, add a layer of soil, then a layer of medium bulbs such as hyacinths, more soil, and finally a top layer of small bulbs like crocuses. Each bulb type is planted at its ideal depth and will bloom sequentially, from the bottom layer upwards.
- Result: This technique ensures a continuous burst of color from early spring through late summer, as each layer takes its turn to bloom.
Replanting and Dividing Bulbs
Regularly replanting and dividing bulbs can prevent overcrowding and promote healthy growth.
- Scientific Insight: Over time, bulb clusters expand and can become too dense, which competes for limited resources and results in smaller blooms.
- Procedure: Every three to five years, dig up bulb clusters after the foliage has died back. Gently separate the bulbs and replant them at appropriate distances in nutrient-rich soil to allow ample room for growth.
- Result: This management practice rejuvenates your bulb garden, encouraging more vigorous growth and larger, healthier blooms in subsequent seasons.
Related Post
- How to Build a Barn: A Step-by-Step Guide for Beginners
- How to Build a Sustainable Compost Bin: Easy and Eco-Friendly DIY
- How to Fertilize Bougainvillea: A Complete Guide for Stunning Blooms
- How to Fertilize Apple Trees: Essential Tips for a Bountiful Harvest
- How to Fertilize Lemon Trees: Secrets for Thriving Citrus
- How to Fertilize Avocado Tree: A Step-by-Step Guide for Lush Growth
- 10 Best Bow Saws to Buy in 2024: Top Picks for the Money
- Best Miter Saw For Beginners
- Top 10 Pruning Saws to Buy in 2024: Best for the Money
- 7 Best Pocket Chainsaw
Conclusion
Mastering the art of planting and caring for bulbs is both a science and an art that rewards patience and attention to detail with spectacular floral displays. By following the techniques outlined in this guide—from selecting and planting to seasonal care and advanced practices—you can ensure that your garden remains a vibrant and inviting space year-round. Embrace the journey of bulb gardening, continuously learning and adapting, and you’ll find that your efforts culminate in a stunning, ever-evolving landscape that brings joy and beauty to every season.
FAQs
- What is the best time of year to plant spring-flowering bulbs?
Spring-flowering bulbs should be planted in the fall, ideally six to eight weeks before the ground freezes. This timing allows the bulbs to establish roots while the soil is still warm. - Can I plant bulbs in shady areas of my garden?
While most bulbs prefer full to partial sunlight, some varieties like snowdrops and bluebells can thrive in shady areas. Always check the specific light requirements for each type of bulb. - How deep should I plant my bulbs?
A general rule is to plant bulbs at a depth three times their height. For instance, if a bulb is 2 inches tall, it should be planted about 6 inches deep. - How can I prevent my bulbs from rotting during the winter?
Ensure good drainage in your planting beds and avoid overwatering. Adding organic matter to the soil can improve drainage. Consider mulching to protect the bulbs from extreme cold. - What should I do with bulb foliage after the flowers have died?
Allow the foliage to die back naturally. The leaves help gather sunlight, which nourishes the bulb for the next year. Once the leaves have yellowed and withered, they can be gently removed. - How often should I fertilize my bulbs?
Apply a balanced, slow-release bulb fertilizer at planting time and again as the flowers begin to fade. This helps prepare the bulbs for their next growing cycle. - Is it necessary to dig up bulbs each year?
Most bulbs do not need to be dug up annually. However, every three to five years, it’s beneficial to dig up and divide bulbs to prevent overcrowding and rejuvenate your plantings. - How can I protect bulbs from pests like squirrels and voles?
Consider installing a wire mesh barrier just below the soil surface or using bulb cages when planting. Sprinkling crushed gravel around and above the bulbs can also deter digging.
With these expert tips and techniques, you’re now equipped to cultivate a garden of stunning bulbs that will bring year-round beauty to your outdoor space. Happy gardening!

Kristine Moore
Forestry AuthorI'm Kristine Moore, a seasoned garden landscaping professional with over 30 years of experience. My extensive career has been dedicated to transforming outdoor spaces into stunning, sustainable landscapes. With a deep understanding of horticulture, design principles, and environmental stewardship, I have become a respected figure in the field, known for creating harmonious, visually appealing, and eco-friendly gardens. My commitment to excellence and continuous learning in landscaping trends and techniques has solidified my reputation as an expert in garden design and implementation.


Leave your comment