How to Plant Blackcurrants: A Straightforward Guide
- April 8, 2024
- 0 comment
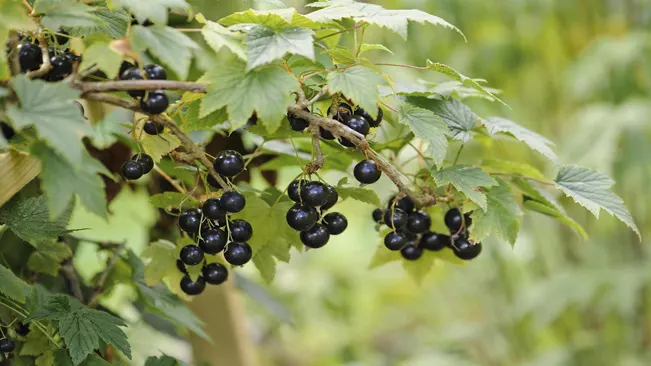
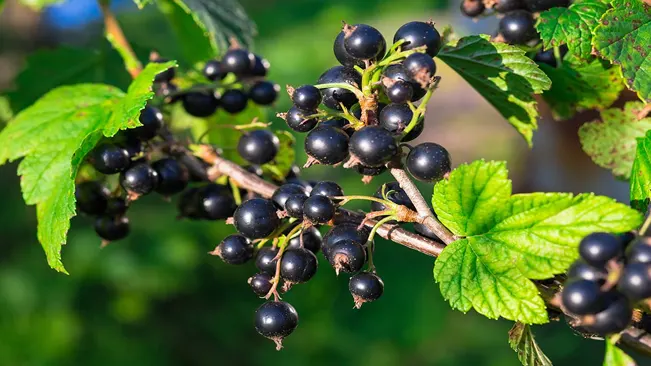
Blackcurrants (Ribes nigrum) are renowned for their rich flavor and high vitamin C content. They thrive in cooler climates and, with a little care, can produce a bountiful crop. This guide will take you through the steps of planting and caring for blackcurrants in your garden.
| Benefit | Description |
|---|---|
| High in Vitamin C | Blackcurrants are exceptionally rich in vitamin C, essential for immune system function and skin health. |
| Rich in Antioxidants | These fruits are packed with antioxidants, including anthocyanins, which help in reducing oxidative stress and may lower the risk of chronic diseases. |
| Good for Eye Health | The antioxidants in blackcurrants, particularly zeaxanthin and lutein, are known to promote eye health and may reduce the risk of age-related macular degeneration. |
| Anti-Inflammatory Properties | Blackcurrants have anti-inflammatory effects that can help in managing conditions like arthritis or skin inflammations. |
| Supports Digestive Health | Being a good source of fiber, they aid in digestion and can help in maintaining a healthy gut flora. |
| Potentially Good for Brain Health | Some studies suggest that the nutrients in blackcurrants may support brain health, improving memory and cognitive functions. |
| Cardiovascular Benefits | The flavonoids and other compounds in blackcurrants may help in reducing blood pressure and improving overall heart health. |
| Enhances Immune Response | Regular consumption of blackcurrants can boost the immune system, helping the body to fight off infections more effectively. |
| Skin Health and Vitality | Vitamin C and antioxidants in blackcurrants can contribute to skin health, aiding in collagen production and skin rejuvenation. |
| Source of Essential Minerals | They contain essential minerals such as potassium, iron, and manganese, which play crucial roles in various bodily functions. |
List on How To Plant Blackcurrants
- Choosing the Right Location
- Planting Time
- Selecting Blackcurrant Varieties
- Planting Process
- Aftercare
- Harvesting
- Pests and Diseases
Choosing the Right Location
Sunlight and Shade
- Sunlight: Blackcurrants thrive best when they receive full sun for at least part of the day. The sunlight helps in the production of sugars in the fruits, leading to sweeter berries.
- Partial Shade: While they can tolerate partial shade, too much shade can result in a lower yield and poorer fruit quality. In regions with very hot summers, some afternoon shade can be beneficial.
Soil Conditions
- Soil Type: The ideal soil for blackcurrants is fertile and well-drained. Heavy, clay soils should be avoided, as they can retain too much moisture and lead to root rot.
- Soil pH: The pH level of the soil should be slightly acidic to neutral, ideally between 6.5 and 7.0. If your soil is too alkaline or too acidic, you may need to adjust it.
- Soil Enrichment: Prior to planting, enriching the soil with organic matter like compost or well-rotted manure can significantly improve soil fertility and texture. This addition provides essential nutrients and improves soil drainage and aeration.
Wind Protection
- Sheltered Location: It’s important to choose a spot that is sheltered from strong winds. Wind can cause physical damage to the plants, dry out the soil, and hinder pollination.
- Natural Windbreaks: If possible, utilize natural windbreaks such as fences, hedges, or other structures. Not only do they protect against wind, but they can also offer some protection from harsh sunlight and frost.
Planting Time for Blackcurrants
Late Autumn Planting
- Why Late Autumn?: Planting in late autumn takes advantage of the still-warm soil, which promotes root development. At this time, the plant’s top growth has slowed down, allowing it to focus energy on root establishment.
- Soil Conditions: The soil is usually moist but not waterlogged, providing ideal conditions for roots to spread without the stress of summer heat.
- Pre-Winter Establishment: Establishing roots before winter means that the plant can start growing vigorously as soon as spring warmth hits, leading to stronger growth and potentially earlier fruiting.
Early Spring Planting
- Why Early Spring?: If late autumn planting is missed, early spring, just as the soil thaws and becomes workable, is the next best option. The cool temperatures are still conducive for root growth.
- Avoiding Frost Damage: Planting too early in spring might expose new growth to late frosts, so timing is crucial. The goal is to plant when the ground is workable, but the risk of severe frost has passed.
- Initial Growth Spurt: Early spring planting gives the plant a full growing season ahead, allowing it to establish both roots and top growth in the first year.
Selecting Blackcurrant Varieties
Selecting the right variety of blackcurrants is crucial for successful cultivation, as different varieties have distinct characteristics and are suited to different growing conditions. Here’s a more detailed look at some popular varieties and factors to consider:
Ben Nevis
- This variety is known for its high yield and resistance to frost, making it suitable for cooler climates. The berries are large and have a traditional blackcurrant flavor, ideal for jams and jellies.
Ben Lomond
- Another popular choice, ‘Ben Lomond’ is known for its strong resistance to mildew, which can be a common problem in damp climates. It produces medium-sized berries with a good balance of sweetness and acidity, making them excellent for cooking and fresh consumption.
Titania
- This is a hardy variety that’s resistant to both fungal diseases and pests, making it a good choice for organic gardeners. It yields large, tasty berries that are great for eating fresh and for culinary use.
When choosing a variety, consider the following factors
- Climate Suitability: Some varieties are more tolerant of cold or heat. Check the hardiness of the variety against your local climate conditions.
- Disease Resistance: Look for varieties that are resistant to common diseases in your area, like powdery mildew or leaf spot.
- Harvest Time: Different varieties mature at different times. Consider whether you want an early, mid, or late-season harvest.
- Use of Fruit: Some varieties are better suited for fresh eating, while others are ideal for cooking or making preserves.
- Bush Habit: Varieties differ in their growth habits. Some grow more upright, while others are more spreading. Choose a variety that fits well in your available space.
Planting Process
Planting Bare-Root Blackcurrants
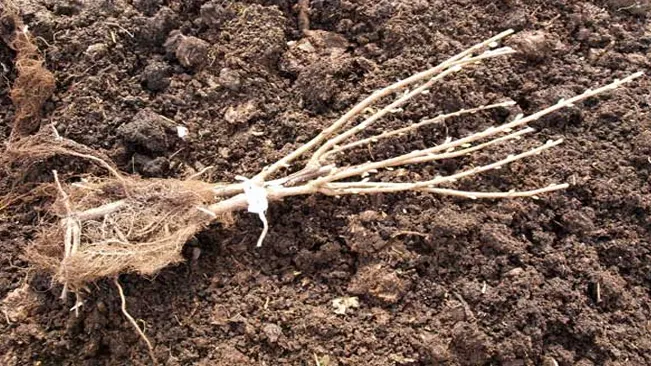
- Preparation: When you receive bare-root blackcurrant plants, they usually come without soil around their roots. It’s essential to plant them while they are dormant, typically between late autumn and early spring.
- Soaking the Roots: Before planting, soak the roots in a bucket of water for a few hours to rehydrate them. This step is crucial as it helps the plant recover from any loss of moisture during transportation or storage.
- Digging the Hole: The hole should be spacious enough to comfortably fit the roots without bending or crowding them. A general guideline is to make the hole twice as wide and just as deep as the roots spread.
- Planting Depth: Identify the soil mark on the stem, which indicates the depth at which the plant was grown in the nursery. Plant the bush slightly deeper than this mark, usually about 2 inches deeper. This encourages the formation of additional shoots from below the soil line, leading to a stronger, more productive plant.
- Filling the Hole: After positioning the plant, carefully spread out the roots and fill the hole with soil. Gently firm the soil around the roots to eliminate air pockets and ensure good contact between the roots and the soil.
- Watering: After planting, water the bush thoroughly to settle the soil around the roots and provide necessary moisture for the establishment.
Planting Container-Grown Blackcurrants
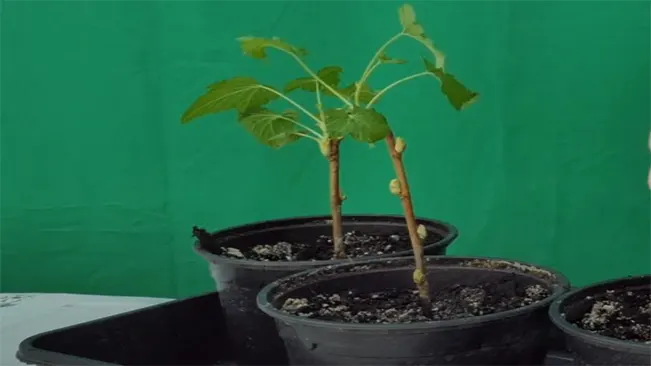
- Removing from the Pot: Gently remove the blackcurrant plant from its container, taking care not to damage the roots. Sometimes, the roots may be circling around the edge of the pot.
- Teasing Out the Roots: If the roots are densely packed or circling, gently tease them out to encourage them to grow outward into the surrounding soil. This step helps prevent the roots from continuing to circle, which can constrict the plant and limit its growth.
- Hole Preparation: As with bare-root plants, the hole should be large enough to accommodate the root ball. You don’t need it to be much deeper than the pot, but it should be wider.
- Planting at the Right Depth: Plant the bush at the same depth it was growing in the pot, which is usually identifiable by a soil line on the stem.
- Backfilling and Watering: Fill the hole with soil, gently firming it around the base. Water the plant well to settle the soil and eliminate air pockets.
Aftercare
Watering
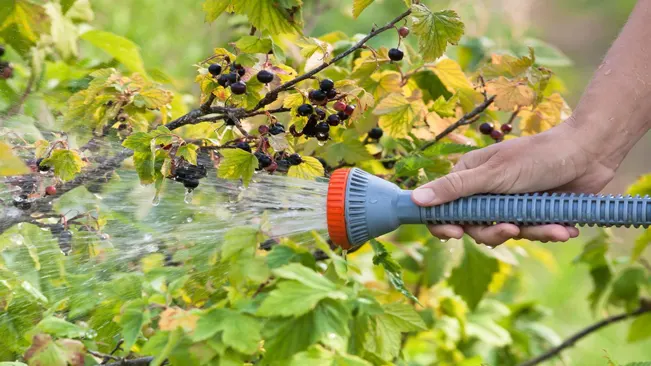
- Importance: Blackcurrants have a shallow root system, making them susceptible to drought. Regular watering ensures continuous growth and a healthy crop.
- Method: It’s best to water deeply rather than frequently. This encourages the roots to grow deeper into the soil, making the plants more drought-resistant.
- Frequency: During dry spells, water the plants once a week, ensuring the soil is moist but not waterlogged.
- Tip: Early morning or late evening watering reduces evaporation and helps the plant utilize the water more efficiently.
Mulching
- Purpose: Mulch conserves soil moisture, suppresses weeds, and adds organic matter as it decomposes.
- Materials: Use organic mulch like straw, well-rotted manure, compost, or wood chips.
- Application: Spread a 2-3 inch layer of mulch around the base of the plant, avoiding direct contact with the stems.
- Frequency: Refresh the mulch layer annually, ideally in spring or autumn.
Feeding
- Type of Fertilizer: A balanced, general-purpose fertilizer, either granular or liquid, is suitable. Organic alternatives like fish emulsion or bone meal can also be used.
- Application: Apply fertilizer in early spring as the plant starts to grow. Follow the manufacturer’s instructions for quantity.
- Additional Feeding: If growth seems sluggish or leaves are pale, a mid-season application of a nitrogen-rich fertilizer can help.
Pruning
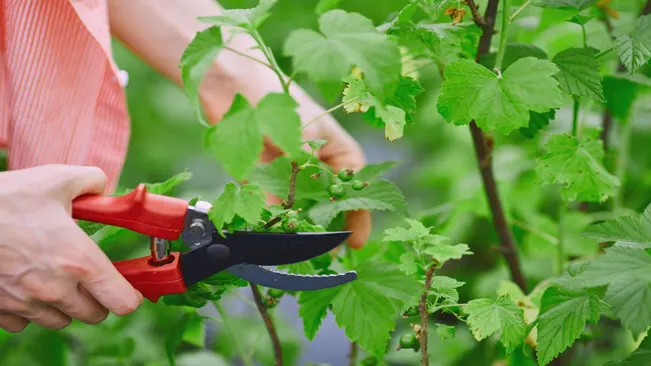
- Timing: Prune blackcurrant bushes in late winter while the plant is dormant.
- Method: Remove any dead or diseased wood first. Then, focus on thinning out crowded areas to improve air circulation.
- Fruiting Wood: Blackcurrants fruit best on one-year-old wood. Prune out older wood to make space for new growth.
- Renewal Pruning: Every few years, rejuvenate the bush by cutting a few of the oldest branches right back to the base.
- After Pruning Care: Apply a layer of compost or mulch after pruning to help the plant recover and grow vigorously.
Harvesting
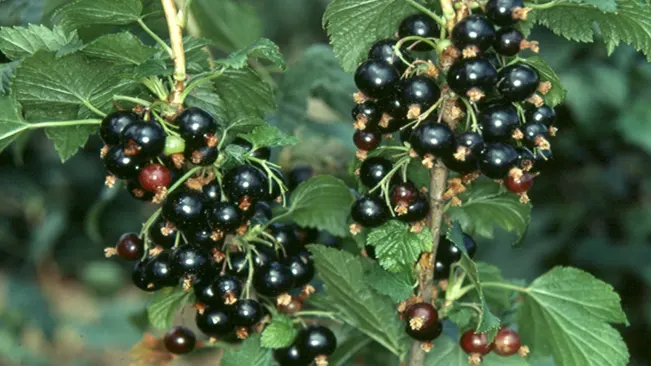
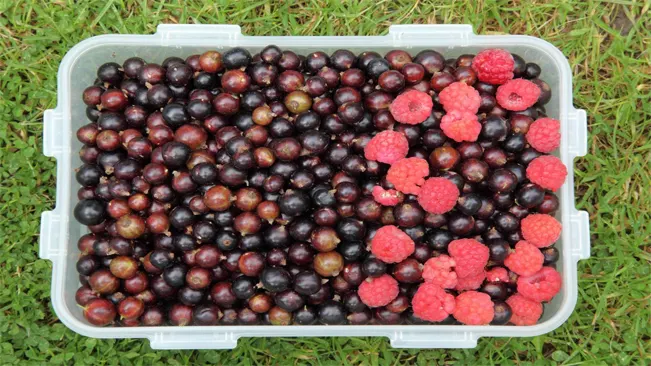
Blackcurrants are typically ready to harvest in mid-summer. The fruit should be full and rich in color. Harvest by stripping the fruit from the branches.
When to Harvest Blackcurrants
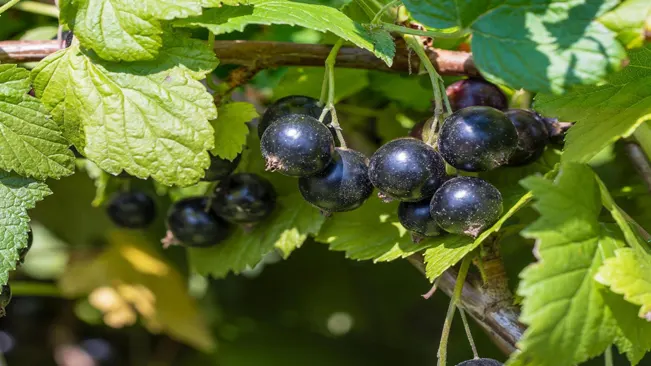
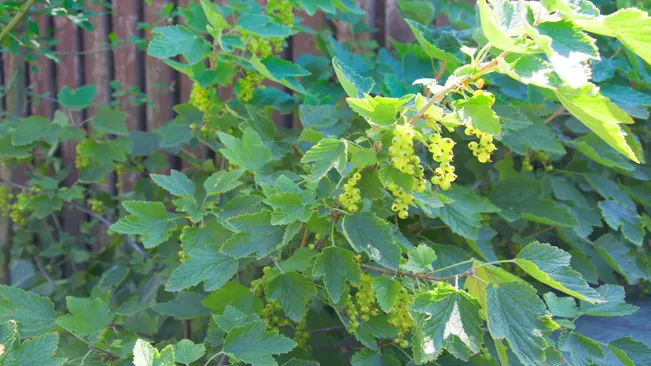
- Timing: Blackcurrants usually reach ripeness in mid-summer, but the exact timing can vary depending on your geographical location and the weather conditions during the growing season.
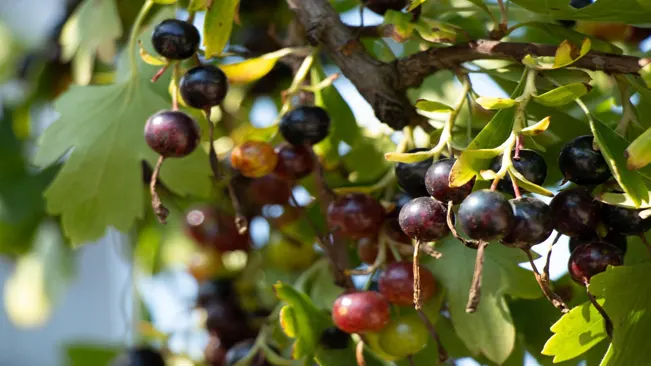
- Indicators of Ripeness: You’ll know the blackcurrants are ready to harvest when they are fully colored (deep purple or almost black) and plump. They should feel firm but give slightly under gentle pressure.
How to Harvest Blackcurrants
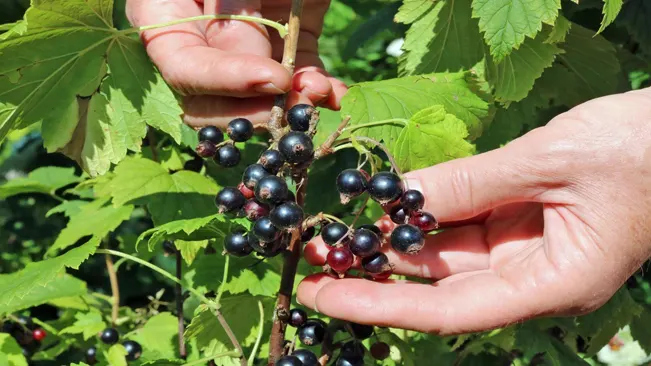
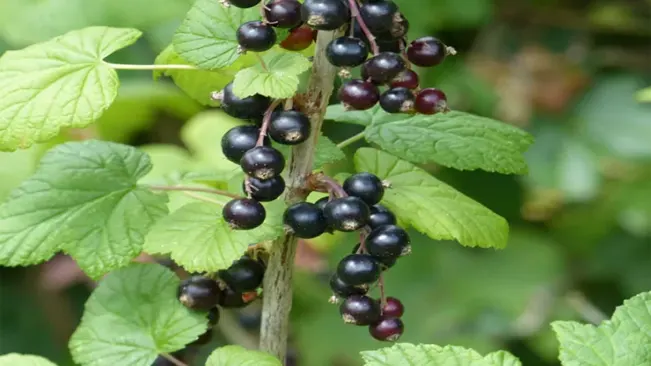
- Method of Harvesting: Unlike some other berries, blackcurrants are harvested along with the stem. You can do this by gently but firmly pulling the strigs (the strings of berries) from the branches. Another method is to use secateurs or scissors to cut the strigs.
- Be Gentle: It’s important to handle the fruit gently to avoid bruising, as damaged berries can spoil quickly and affect the quality of your harvest.
Tips for Harvesting
- Harvest in the Morning: If possible, harvest blackcurrants in the cool of the morning when they are firm. This makes them easier to handle and helps retain their quality.
- Ripe Berries First: Harvest the ripest berries first. Unripe berries can be left on the bush for a few more days to mature.
- Multiple Harvests: You might need to harvest your blackcurrants several times, as all the berries on a bush might not ripen simultaneously.
Post-Harvest Handling
- Storing: If you’re not using the blackcurrants immediately, store them in the refrigerator. They can keep for a few days when chilled.
- Freezing: For longer storage, blackcurrants can be frozen. Spread them out on a tray to freeze individually, and then transfer them into a freezer bag. This prevents the berries from sticking together.
- Preparation: Before using or storing, remove any stems or leaves that might have come off with the berries.
Uses of Harvested Blackcurrants

- Culinary Uses: Blackcurrants are versatile in the kitchen. They can be used in jams, jellies, syrups, desserts, or even in savory dishes.
- Health Benefits: They are rich in vitamins and antioxidants, making them a healthy addition to your diet.
Pests and Diseases
Common problems include aphids, leaf spot, and powdery mildew. Regular inspection and good hygiene practices can minimize these issues. Use appropriate organic or chemical treatments if necessary.
Aphids
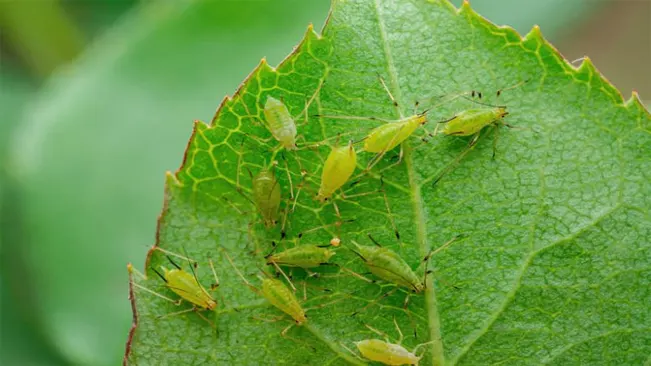
- Identification: Aphids are small, soft-bodied insects, often green or black, found on new growth and undersides of leaves.
- Impact: They suck sap from the plants, weakening them and possibly transmitting viruses.
- Management: Introduce natural predators like ladybugs or use insecticidal soaps. In severe cases, specific insecticides may be necessary.
Leaf Spot (Anthracnose)

- Identification: Appears as small, brown or black spots on leaves, which may eventually lead to leaf fall.
- Impact: Reduces the plant’s ability to photosynthesize, weakening it overall.
- Management: Prune and destroy affected leaves, improve air circulation around plants, and apply fungicides if the problem is severe.
Powdery Mildew
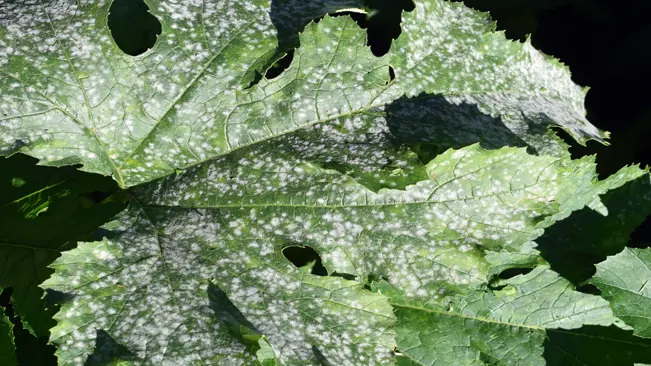
- Identification: A white, powdery fungal growth on the upper surface of leaves.
- Impact: Infected leaves may become distorted or discolored, affecting the plant’s vigor.
- Management: Use resistant varieties, ensure good air circulation, and apply sulfur-based or other appropriate fungicides.
General Preventive Measures
- Regular Inspection: Regularly check your blackcurrant bushes for signs of pests or diseases.
- Good Hygiene: Remove and destroy any affected plant parts. Avoid overhead watering to reduce the spread of fungal spores.
- Cultural Practices: Ensure adequate spacing between plants for air circulation. Use mulch to prevent splash-back of spores from the soil.
- Healthy Soil: Maintain healthy soil with proper pH and nutrient levels to support robust plant growth.
- Diverse Planting: Grow a mix of plants to encourage a healthy ecosystem in your garden, which can help control pests and diseases naturally.
Conclusion
Planting and caring for blackcurrants can be a rewarding endeavor. With proper attention to location, planting, and aftercare, these hardy shrubs will provide you with delicious fruit for years to come. Embrace the joy of gardening and enjoy the fruits of your labor!
FAQs (Frequently Asked Questions)
- What is the best time to plant blackcurrants?
- Blackcurrants are best planted in late autumn or early spring when the soil is moist and not frozen.
- Blackcurrants are best planted in late autumn or early spring when the soil is moist and not frozen.
- How much sun do blackcurrant bushes need?
- They prefer a sunny location but can tolerate partial shade. However, too much shade can reduce fruit yield.
- They prefer a sunny location but can tolerate partial shade. However, too much shade can reduce fruit yield.
- What type of soil is suitable for blackcurrants?
- Blackcurrants thrive in well-drained, fertile soil with a pH of 6.5 to 7.0. They do not perform well in very acidic or alkaline soils.
- Blackcurrants thrive in well-drained, fertile soil with a pH of 6.5 to 7.0. They do not perform well in very acidic or alkaline soils.
- How far apart should I plant blackcurrant bushes?
- Plant blackcurrant bushes about 4-5 feet apart to allow enough room for growth and air circulation.
- Plant blackcurrant bushes about 4-5 feet apart to allow enough room for growth and air circulation.
- How deep should I plant a blackcurrant bush?
- Plant them slightly deeper than they were in the nursery, indicated by a change in stem color near the base.
- Plant them slightly deeper than they were in the nursery, indicated by a change in stem color near the base.
- Do I need to prune blackcurrant bushes after planting?
- After planting, prune back the shoots to leave 3-4 buds above ground level to encourage healthy new growth.
- After planting, prune back the shoots to leave 3-4 buds above ground level to encourage healthy new growth.
- How often should I water blackcurrant bushes?
- Water them regularly, especially during dry periods, but avoid waterlogging the soil.
- Water them regularly, especially during dry periods, but avoid waterlogging the soil.
- When can I expect my blackcurrant bush to start fruiting?
- Blackcurrant bushes typically start fruiting one year after planting, with full production reached in their third year.
- Blackcurrant bushes typically start fruiting one year after planting, with full production reached in their third year.
- Do blackcurrants need any special fertilizer?
- Apply a general-purpose fruit bush fertilizer in early spring. You can also use well-rotted manure or compost.
- Apply a general-purpose fruit bush fertilizer in early spring. You can also use well-rotted manure or compost.
- Are there common pests or diseases I should look out for?
- Common issues include aphids, leaf spot, and powdery mildew. Regular inspection and good hygiene practices can minimize these problems.

Kristine Moore
Forestry AuthorI'm Kristine Moore, a seasoned garden landscaping professional with over 30 years of experience. My extensive career has been dedicated to transforming outdoor spaces into stunning, sustainable landscapes. With a deep understanding of horticulture, design principles, and environmental stewardship, I have become a respected figure in the field, known for creating harmonious, visually appealing, and eco-friendly gardens. My commitment to excellence and continuous learning in landscaping trends and techniques has solidified my reputation as an expert in garden design and implementation.


Leave your comment