How to Sharpen Wood Chipper Blades: Swiftly Enhance Cutting Power
- March 18, 2024
- 0 comment
Learn How to Sharpen Wood Chipper Blades with our expert guide to maintaining your tool’s efficiency and safety. Discover the essential steps to keep your blades razor-sharp, ensuring smooth operation and minimizing the risk of kickbacks and jams. To ensure optimal performance, it’s essential to keep the blades sharp. This article will guide you through the process of sharpening wood chipper blades effectively.
List on How to Sharpen Wood Chipper Blades
- Blade Inspection
- Secure the Blade
- Mark the Blade
- Grind the Blade
- Check Progress
- Switch to Diamond File
- Final Touches
- Inspect and Test
- Balance the Blades
Types of Wood Chipper Blades
Straight Blades
Straight blades are characterized by their cutting edge, which is perpendicular to the blade’s body, resulting in a straight cutting profile along the length of the blade. These blades provide a consistent and uniform cut, which can be beneficial for applications where a smooth finish is desired. They are generally easier to sharpen compared to angled blades, as the sharpening process involves maintaining a straight edge. Straight blades are well-suited for chipping softer materials such as green wood, softwood, and yard waste. They are commonly found in wood chippers used for residential purposes, such as maintaining backyard gardens or clearing small branches.
Angled Blades
Angled blades feature a cutting edge that is angled relative to the blade’s body, usually between 20 to 45 degrees, depending on the blade design. These blades offer a more aggressive cutting action compared to straight blades, making them more effective for chipping harder materials. The angled design can help reduce the risk of jamming, especially when chipping tougher materials such as hardwoods or branches with knots. Angled blades are often used in commercial wood chippers that are designed for heavy-duty and frequent use. They are well-suited for processing tougher materials commonly encountered in landscaping, forestry, and land clearing applications, where a more aggressive cutting approach is necessary.
Signs of Dull Blades
- Reduced Cutting Efficiency: Dull blades will struggle to cut through wood effectively, resulting in slower chipping speeds and more effort required from the engine.
- Uneven or Ragged Chips: Instead of producing clean, uniform chips, dull blades may create uneven or ragged pieces of wood, indicating a lack of sharpness.
- Increased Fuel Consumption: Dull blades can increase fuel consumption as the engine works harder to compensate for the lack of cutting efficiency.
- Vibrations or Shaking: As the blades become dull, they may cause the chipper to vibrate or shake more than usual, indicating a loss of balance or efficiency.
- Smoking or Overheating: Excessive heat or smoking from the chipper may indicate that the blades are dull and causing friction, leading to overheating.
- Difficulty Feeding Material: Dull blades may struggle to pull in branches or material, requiring more manual effort to feed material into the chipper.
- Increased Noise Levels: Dull blades can produce louder or more irregular noises compared to sharp blades, indicating that they are struggling to cut effectively.
- Visible Wear or Damage: Inspecting the blades for visible signs of wear, such as nicks, chips, or a dulled cutting edge, can indicate that they need sharpening or replacement.
Tools and Materials Needed
Angle Grinder with a Grinding Wheel
An angle grinder is a versatile handheld power tool featuring a rotating abrasive disc, or grinding wheel, that is pivotal for sharpening wood chipper blades. The grinding wheel can be chosen based on the required grit for the sharpening process, allowing for customization based on the blade’s condition and material.
Diamond File
A diamond file is a specialized tool with a surface coated in industrial diamonds, perfect for sharpening the blade and eliminating any remaining burrs or imperfections. This file is crucial for achieving a sharp, precise edge on the blade, ensuring optimal performance.
Ruler
The ruler serves a vital role in the sharpening process by providing a means to measure and mark the specific area of the blade that requires sharpening. This ensures a uniform and consistent sharpening process across the entire blade, leading to a more effective result.
Sharpie Marker
Before sharpening, a sharpie marker is used to mark the blade’s surface. This marking helps keep track of the sharpened areas, ensuring an even and thorough sharpening process and preventing over-sharpening in certain spots.
Clamp
A clamp is used to securely fasten the blade to a stable work surface during sharpening. This stability is crucial for maintaining the blade’s position and preventing movement, resulting in a more accurate and effective sharpening process.
Piece of Wood for Practice
A piece of wood is utilized for practicing the sharpening technique before working on the actual blade. This allows the user to become familiar with the sharpening process, ensuring they are comfortable and confident in their abilities before sharpening the actual blade.
Safety Glasses

Safety glasses are a critical safety measure during the sharpening process, protecting the eyes from potential hazards such as flying debris and sparks generated by the grinding wheel. Wearing safety glasses ensures a safe sharpening experience and prevents eye injuries.
Step-By-Step Sharpening Process
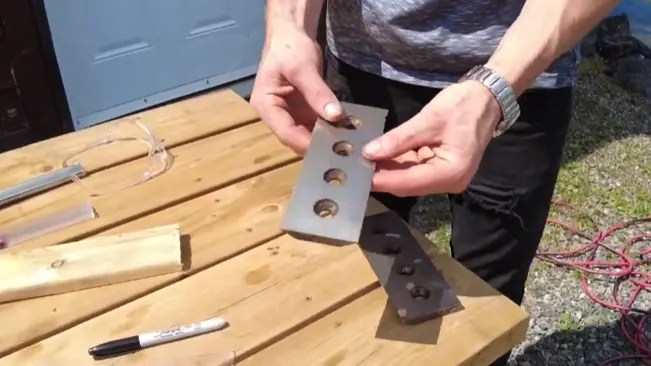
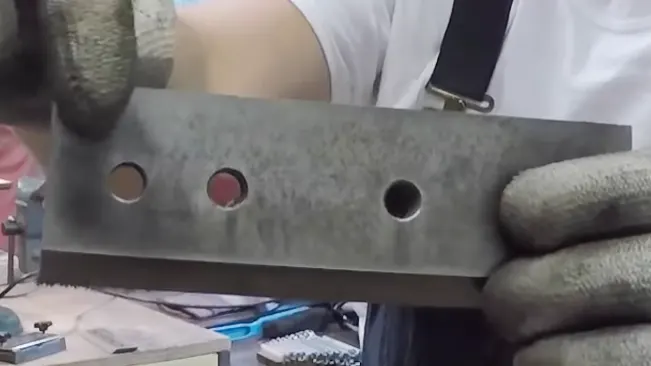
Blade Inspection
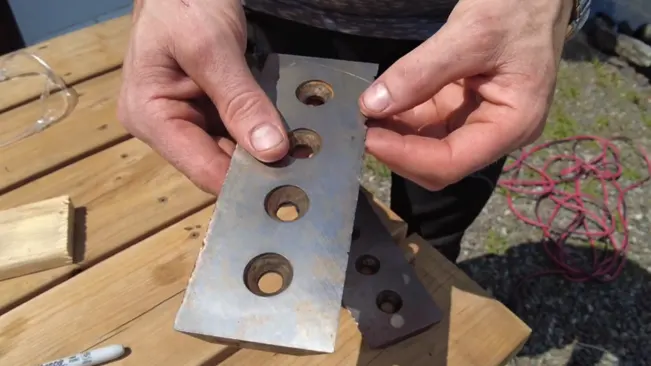
Before sharpening, carefully inspect the wood chipper blades for any damage, such as serious nicks and dings. Blades with significant damage may not be worth sharpening, as they may not perform effectively even after sharpening.
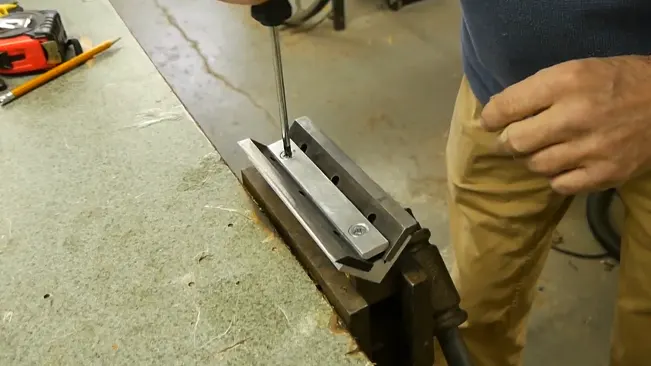
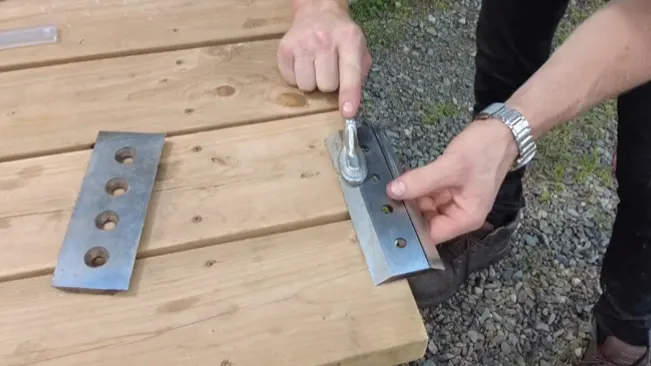
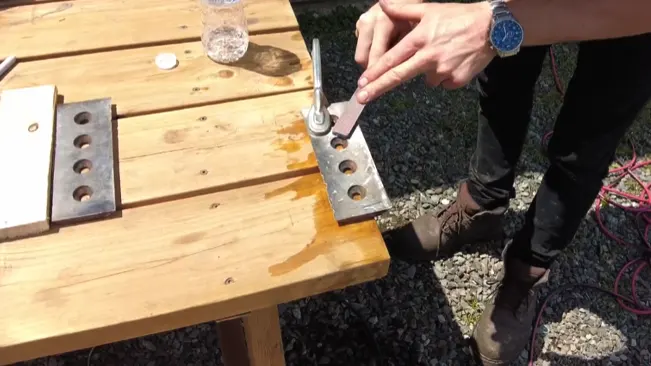
Secure the Blade
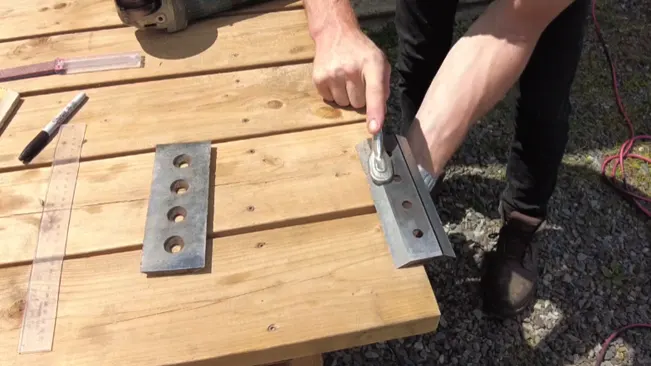
Use a clamp to securely fasten the blade to a work surface. Ensure that the blade is positioned in a way that allows easy access for the angle grinder during sharpening. This step is crucial for safety and precision during the sharpening process.
Mark the Blade
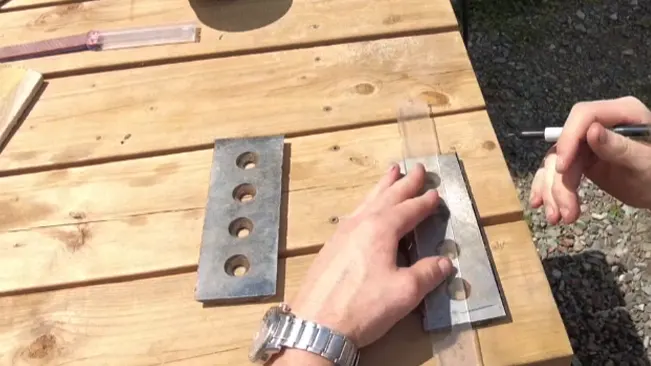
Use a sharpie marker to mark the area of the blade that you will be sharpening. This marking helps you keep track of your progress and ensures that you sharpen the blade evenly and consistently.
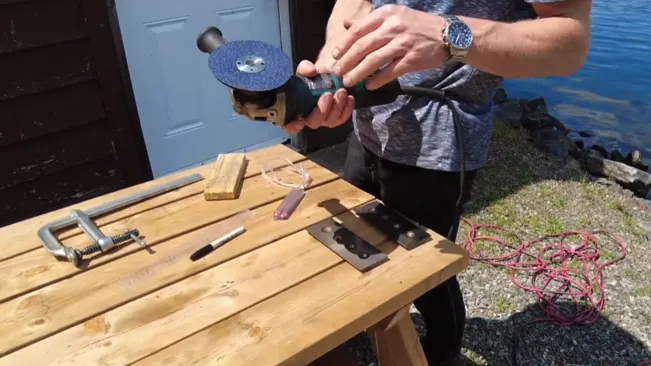
Grind the Blade

With the angle grinder equipped with a grinding wheel, carefully grind the marked area of the blade. Maintain a consistent angle and apply even pressure to achieve a uniform edge. Take your time and work slowly to avoid overheating the blade.
Check Progress
Periodically stop and check your progress while grinding the blade. Use the sharpie marker as a guide to see how much material you have removed and ensure that you are maintaining the correct angle throughout the sharpening process.
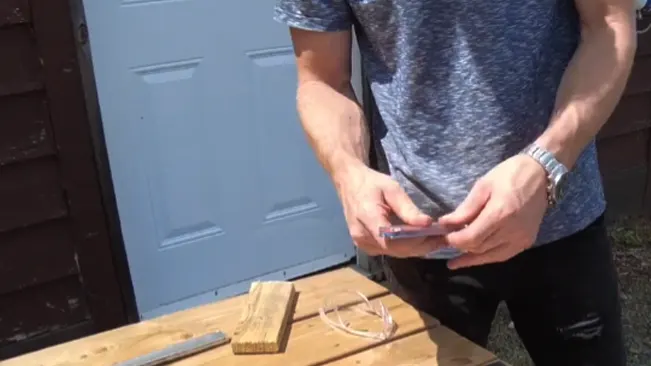
Switch to Diamond File
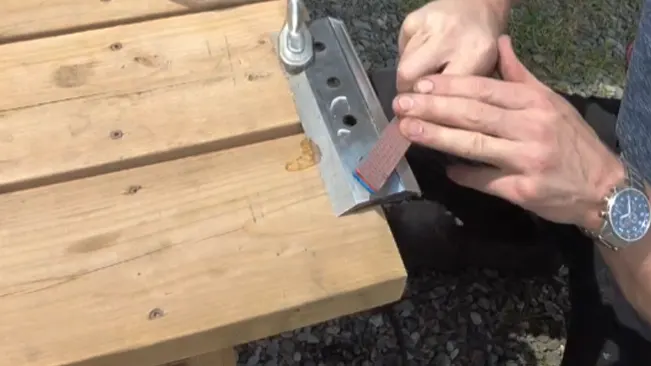
Once you are satisfied with the grinding, switch to a diamond file to smooth out the edge of the blade and remove any remaining imperfections. This step helps achieve a sharp, clean edge on the blade.
Final Touches
Use the diamond file to touch up the edge of the blade and ensure that it is sharp. Be cautious not to overdo it, as removing too much material can shorten the blade’s lifespan. Aim for a sharp edge that is suitable for chipping wood effectively.
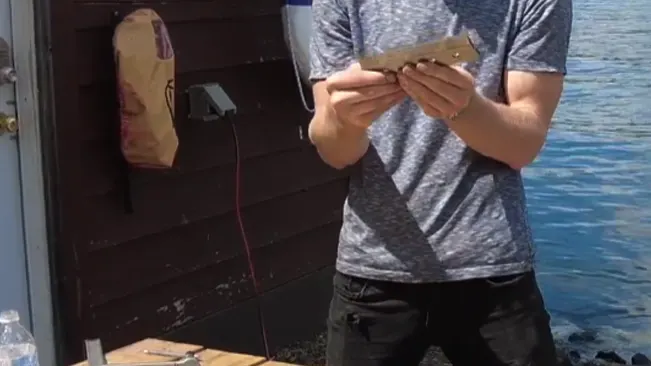
Inspect and Test
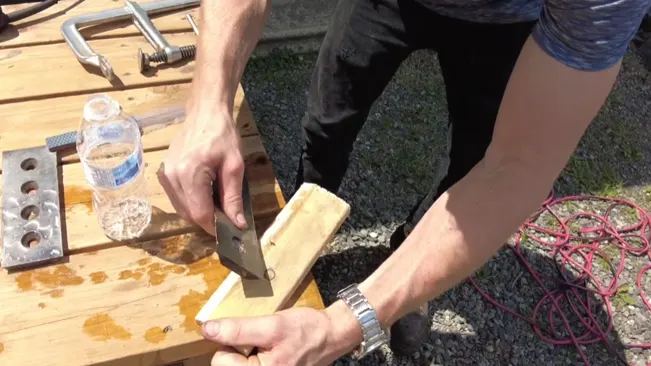
After sharpening, carefully inspect the blade for any remaining damage or imperfections. Test the blade by chipping a small piece of wood to ensure that it is sharp and cutting effectively. This step helps verify the quality of your sharpening job.
Balance the Blades
After sharpening, it is important to balance the blades to ensure that they rotate evenly. Use a gram scale to weigh each blade and make adjustments as necessary. Balanced blades help prevent vibration and ensure smooth operation of the wood chipper.
Importance of Sharp Blades
Sharp blades are essential for efficient wood chipping, as they can process wood more effectively, requiring less power and reducing strain on the chipper’s engine. This efficiency leads to smoother operation and decreased fuel consumption, benefiting both the user and the environment. Additionally, sharp blades produce clean cuts, resulting in uniform wood chips. This is crucial for various applications, including landscaping, gardening, and composting, where consistent chip size is desirable for optimal results.
Moreover, sharp blades reduce the likelihood of jamming in the wood chipper. They can easily cut through branches, twigs, and other materials, minimizing downtime and maintenance requirements. Regularly sharpened blades also have an extended lifespan compared to dull blades. By maintaining sharp edges, users can prolong the blades’ life and reduce the need for frequent blade replacement. Overall, sharp blades ensure safety during operation, as they are less likely to cause kickbacks or produce jagged cuts, thus reducing the risk of injury to the operator. This sharpness also contributes to the wood chipper’s optimal performance, ensuring it delivers the expected chipping capacity and output, which is crucial for professional use and large-scale chipping operations.
Maintenance Tips
- Regular Inspection: Inspect your blades regularly for any signs of damage, wear, or dullness. Addressing issues early can prevent further damage and ensure optimal performance.
- Sharpening Schedule: Develop a sharpening schedule based on your usage. Sharpen blades when they start to dull, rather than waiting until they are completely blunt. This will maintain their effectiveness and prolong their lifespan.
- Proper Storage: Store your wood chipper blades in a clean, dry area when not in use. Avoid storing them in areas where they can be damaged or exposed to moisture, which can lead to rust and corrosion.
- Cleaning: Clean your blades after each use to remove any debris or sap buildup. This will prevent buildup that can dull the blades and affect their performance.
- Balancing: Ensure that your blades are properly balanced after sharpening. Imbalanced blades can cause vibration and reduce the efficiency of your wood chipper.
- Replacement: Replace blades when they are worn beyond sharpening or damaged. Using dull or damaged blades can reduce the efficiency of your wood chipper and lead to further damage.
Conclusion
In conclusion, maintaining sharp wood chipper blades is essential for efficient and safe operation. Sharp blades not only improve chipping performance and reduce strain on the chipper’s engine but also produce clean, uniform cuts. Regular inspection, sharpening, and proper storage are key to keeping blades in optimal condition. Additionally, balancing blades and replacing them when necessary are crucial for ensuring smooth operation and prolonging the lifespan of your wood chipper. By following these maintenance tips, you can maximize the performance and longevity of your wood chipper blades, ultimately saving time and money in the long run.
FAQs
- How often should I sharpen my wood chipper blades?
The frequency of sharpening depends on how often you use your wood chipper and the type of wood you are chipping. As a general guideline, blades should be sharpened when they start to dull, rather than waiting until they are completely blunt. - Can I sharpen wood chipper blades myself?
Yes, you can sharpen wood chipper blades yourself using an angle grinder and a diamond file. However, it is important to follow the proper sharpening techniques to ensure the blades are sharpened evenly and effectively. - How do I know when my wood chipper blades need to be replaced?
Wood chipper blades should be replaced when they are worn beyond sharpening or damaged. Signs that blades need replacement include excessive dullness, chips or cracks in the blade, or uneven wear. - Can I use regular tools to sharpen wood chipper blades?
While regular tools can be used to sharpen wood chipper blades, it is recommended to use specialized tools such as an angle grinder and a diamond file for the best results. These tools are designed for sharpening blades and will provide a more precise and effective sharpening. - How can I prolong the life of my wood chipper blades?
Regular maintenance, including sharpening, cleaning, and proper storage, can help prolong the life of your wood chipper blades. Additionally, using the chipper according to the manufacturer’s guidelines and avoiding chipping materials that are too hard for the blades can also help extend their lifespan.

Joel Cunningham
Forestry AuthorI'm Joel Cunningham, an expert in pruning and weed management with over a decade of experience. My skills are rooted in formal training and extensive practice, focusing on advanced pruning techniques and efficient weed control. I'm known for my quality work, precision, and deep understanding of plant health and soil dynamics. My contributions extend to educational initiatives where I share sustainable practices and advice, establishing myself as a reliable and authoritative figure in the gardening community.


Leave your comment