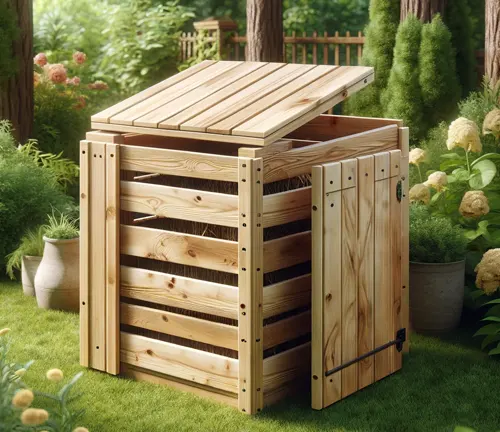
How to Build a Sustainable Compost Bin: Easy and Eco-Friendly DIY
- February 5, 2024
- 0 comment
In our quest for sustainability, reducing waste, and enriching the earth, composting emerges as a key player. It’s not just about disposing of kitchen scraps and yard waste; it’s about transforming what would be trash into treasure for our gardens.
The beauty of composting lies in its simplicity and the profound impact it has on our planet. By building a DIY compost bin, we can take a significant step toward a greener, more sustainable lifestyle right from our backyards or balconies.
List on How to Build a Sustainable Compost Bin
- Design and Layout
- Cutting Lumber to Size
- Assembling the Back and Side Frames
- Setting up the Base and Vertical Supports
- Installing Dividers and Front Panels
- Adding Reinforcements
- Final Touches
- Starting Your Compost
Understanding Composting
Composting is the natural process of recycling organic matter, such as leaves, vegetable scraps, and paper, into a valuable amendment for soil, which enhances plant growth and health. This process not only reduces the amount of waste sent to landfills but also enriches the soil, retains moisture, and suppresses plant diseases and pests.
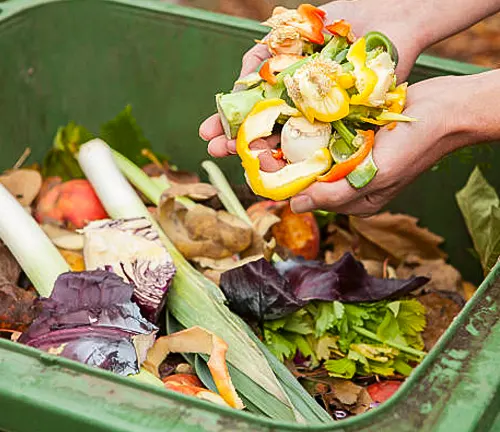
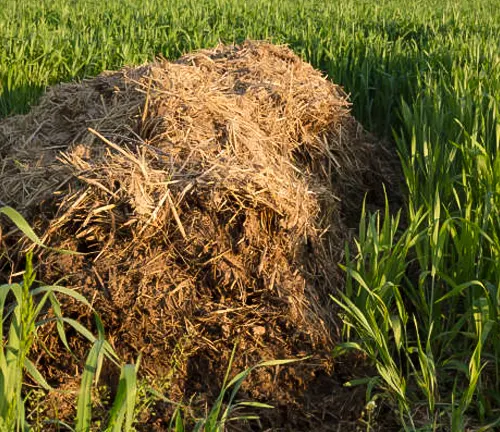
There are two main types of compostable materials: greens and browns. Greens are nitrogen-rich materials like vegetable scraps, coffee grounds, and grass clippings, which help speed up the decomposition process. Browns are carbon-rich materials like leaves, straw, and shredded paper, providing the necessary bulk and air pockets for a healthy compost pile. A balanced mix of these materials is crucial for effective composting.
Planning Your Compost Bin
Before diving into construction, consider the following:
- Determine the Right Size: The size of your compost bin should match the amount of organic waste you produce and the space available in your yard or garden. A bin that’s too large may be difficult to manage, while one that’s too small might not accommodate all your compostable materials. For an average household, a bin with a capacity of about one cubic yard is typically sufficient to start with.
- Select an Appropriate Location: Choose a location that’s convenient for adding materials and turning the compost, but also consider factors like sunlight, drainage, and proximity to your garden. A partially shaded spot is ideal, as it will keep the compost from drying out too quickly in summer and provide some warmth in winter. Good drainage is essential to prevent waterlogging, which can lead to anaerobic conditions and odors.
- Decide on the Type of Bin: There are several types of compost bins to choose from, including static bins, tumblers, and worm composting systems. Consider your composting goals, the effort you’re willing to put into maintenance, and your budget. Static bins are great for beginners and can be built inexpensively, tumblers offer ease of turning, and worm bins are perfect for small spaces and indoor composting.
- Plan for Ventilation and Drainage: Adequate airflow and drainage are critical to the composting process, helping to maintain the right moisture level and promote aerobic decomposition. Design your bin with ventilation holes or slats and ensure it’s raised off the ground or has a base that allows excess water to drain away without leaching nutrients.
- Consider Accessibility and Ergonomics: Your compost bin should be easy to use, with consideration given to how you will add materials, turn the compost, and remove the finished compost. If you’re building a static bin, think about incorporating a removable front panel for easy access. For tumblers, ensure the height and mechanism are user-friendly.
- Think About Materials: The materials you choose for your compost bin can impact its longevity and effectiveness. Recycled or repurposed materials are eco-friendly options. Wood is a popular choice but should be untreated to avoid chemicals leaching into your compost. Plastic bins are durable and low-maintenance but choose a food-safe plastic if possible.
- Future-Proofing: Consider how your composting needs might change in the future. Building a bin that can be easily expanded or adding multiple bins over time allows you to scale up your composting efforts as your garden grows or as you become more experienced.
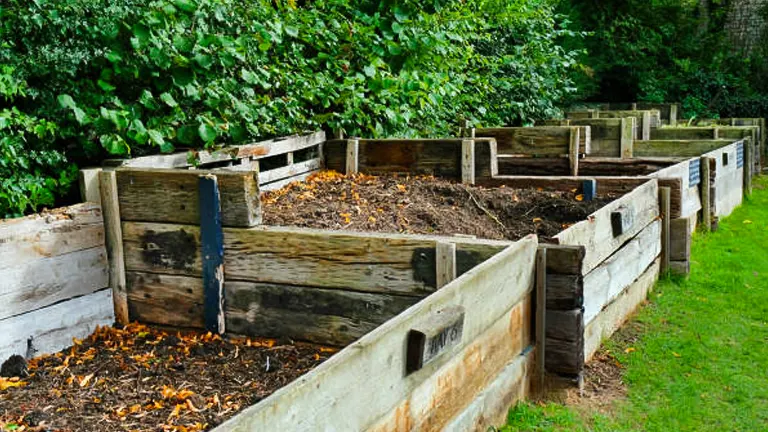
Designing Your Compost Bin
Static Bin

A static bin is a fixed structure designed for composting. It’s well-suited for beginners due to its straightforward design and minimal maintenance requirements. Users manually turn the compost to facilitate aeration and decomposition.
- Benefits: Easy to construct and manage, making it an excellent choice for those new to composting. It’s effective for processing yard waste and kitchen scraps over time.
- Considerations: Requires physical effort to aerate by turning the compost pile manually. Decomposition can take longer compared to more active systems.
Tumbler Bin

Tumbler bins are elevated composting systems mounted on a frame, allowing them to be rotated. This design simplifies the mixing and aeration of compost material.
- Benefits: Accelerates the composting process through easy aeration by turning the bin. It’s contained, reducing pests and odors, and is ideal for small spaces.
- Considerations: Typically more expensive than static bins. The capacity may be limited, making it less suitable for large gardens or high volumes of compostable material.
Worm Composting Bin
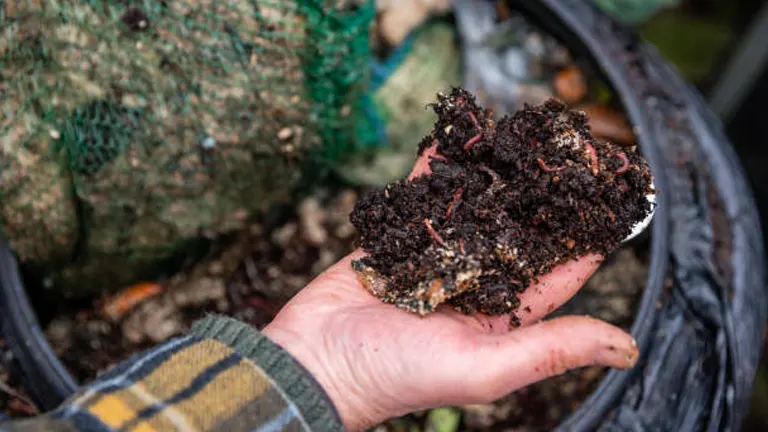
Worm composting bins, or vermicomposting systems, utilize red wiggler worms to decompose organic waste. These systems are highly efficient and can be used indoors.
- Benefits: Produces high-quality compost (worm castings) quickly. Suitable for indoor use, making it ideal for those with limited outdoor space.
- Considerations: Requires management of moisture and temperature to maintain worm health. Not suitable for all types of organic waste (e.g., meat and dairy products should be avoided).
Incorporate features like ventilation and drainage to aid in aerobic decomposition and prevent your compost from becoming too wet or smelly. Accessibility features, such as a hinged lid or a side door, make adding scraps and turning the compost easier.
Building Your Compost Bin
Materials List:
Lumber:
- (16) 2x4s for vertical supports (length depending on desired height, usually 3-4 feet)
- (80-100) 1x6s for slats (length depending on desired width and height of the bays)
Hardware:
- 3-inch exterior wood screws
- Hinges (if you wish to make the front slats removable or to add doors)
- Latch mechanisms (for securing front panels or doors, if applicable)
Tools:
- Saw (hand saw, circular saw, or miter saw)
- Drill with screw bit
- Tape measure
- Level
- Square
- Pencil for marking
- Safety gear (gloves, goggles)
To build a Compost Bin, follow these steps:
Step 1: Design and Layout
- Design Consideration: Determine the size of each bay (3x3x3 feet is standard). Consider your available space and composting needs.
- Layout: Mark the ground where your compost bin will be located. Ensure the area is level and accessible.
Pro Tip: Use string and stakes to outline the bin’s footprint, checking for squareness with a 3-4-5 triangle method (measure 3 feet along one side, 4 feet along the adjacent side, and the diagonal between these points should be 5 feet to ensure a right angle).
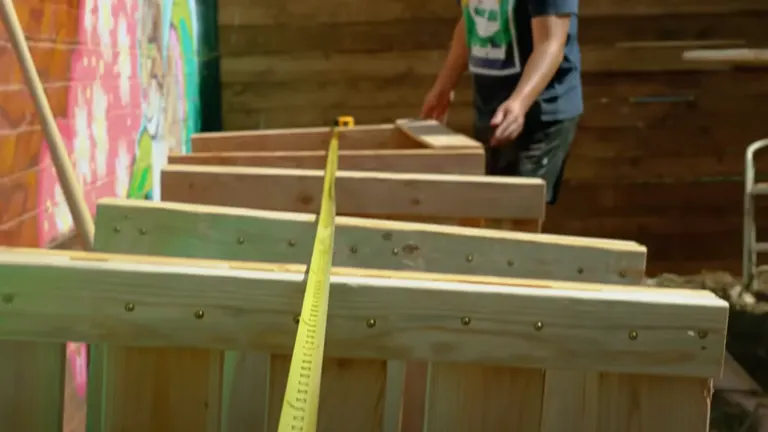
Step 2: Cutting Lumber to Size
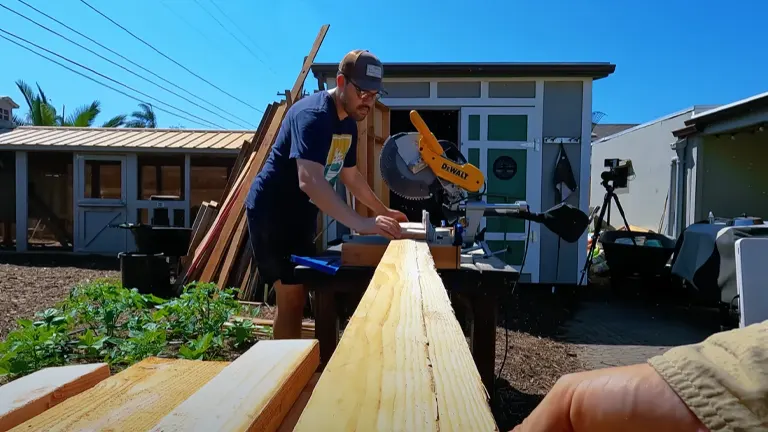
- Cut the 2x4s to the desired height for vertical supports. If opting for 4 feet tall, no cutting is needed for 8-foot 2x4s; simply divide in half.
- Cut 1x6s to the desired width of the bins. If each bin is 3 feet wide, and you’re using 6-foot 1x6s, each slat can be cut in half.
Pro Tip: Label each piece of cut lumber based on where it will be used (e.g., “side slats,” “front slats”) to streamline assembly.
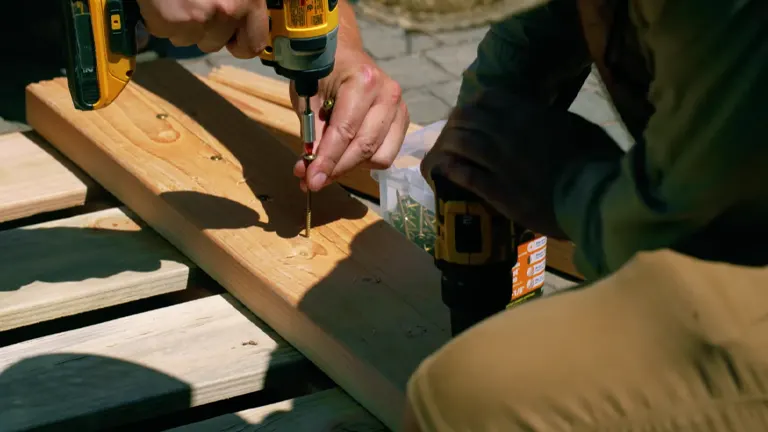
Step 3: Assembling the Back and Side Frames
- Construct the back frame first by attaching 1×6 slats to the vertical 2×4 supports, leaving about 1/2 inch gap between slats for airflow.
- Repeat the process for the side frames, ensuring they are perfectly square before securing the slats.
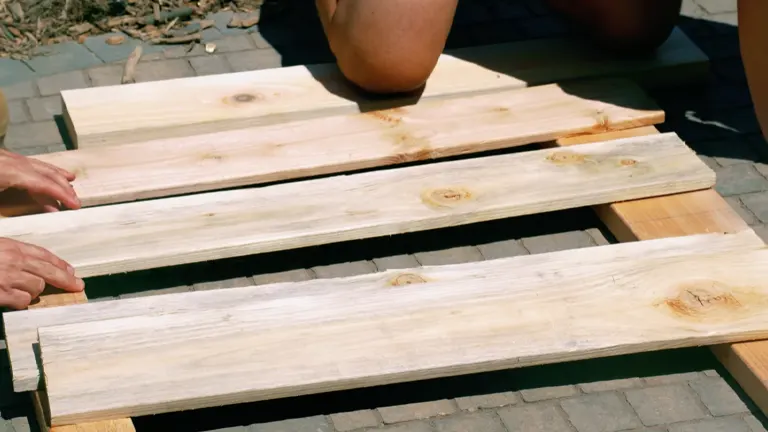
Pro Tip: Assemble these frames on a flat surface to keep everything level and square.
Step 4: Setting up the Base and Vertical Supports
- Secure the bottom 2×4 supports to the ground if possible, using concrete anchors or metal stakes. This adds stability to the structure.
- Erect the back and side frames, attaching them at the corners with screws. Ensure they are vertical with a level.
Pro Tip: For added durability, bury the base of the vertical supports slightly in the ground or set them in concrete footings.
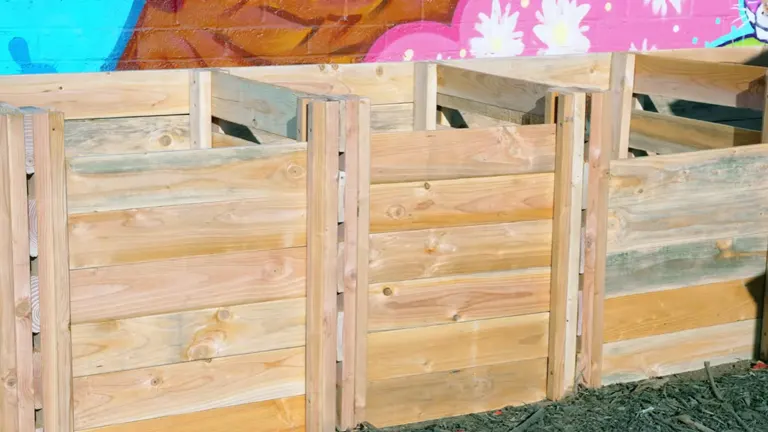
Step 5: Installing Dividers and Front Panels
- Install dividers between bays using the same method as the sides and back, ensuring even spacing.
- For the front, either attach slats fixedly with screws or install hinges at the top for removable panels. If using latches, install them now.
Pro Tip: Removable front panels simplify compost turning and removal. Use sturdy hinges and latches for frequent use.
Step 6: Adding Reinforcements
- To ensure the structure can withstand the weight of the compost, add horizontal 2×4 braces between the vertical supports in the back and sides of the bin.
- Consider diagonal bracing in the corners for extra stability.

Pro Tip: Place a horizontal 2×4 support midway up the bin to prevent the sides from bulging out under the weight of the compost.
Step 7: Final Touches
- Sand any rough edges to prevent splinters.
- Optionally, apply a non-toxic, eco-friendly wood sealant to protect the wood from moisture and decay.
Pro Tip: For a natural look, use linseed oil as a safe, effective sealant that won’t harm your compost.
Step 8: Starting Your Compost
- Begin with a layer of browns (e.g., dry leaves) at the bottom of the first bay to absorb excess moisture.
- Add your greens (kitchen scraps) and more browns in alternating layers, maintaining a balance for optimal decomposition.

Pro Tip: Keep a small container of browns next to your compost bin to cover new additions of greens, reducing odors and pests.
Customize your bin to fit your needs and preferences, whether it’s painting it to match your garden decor or adjusting the size to accommodate more compost.
Disclaimer: The instructions and details provided for building a four-bay compost bin are intended as a general guide and serve to offer a comprehensive overview of the process involved in constructing a sustainable and functional composting system. It is important to note that the exact specifications, including dimensions, materials used, and overall design, may need to be adjusted to fit your specific requirements, available space, and composting goals.
Starting Your Composting Journey
Embarking on composting begins with understanding how to layer and maintain your compost bin effectively. The process is straightforward yet requires attention to detail to ensure optimal decomposition and nutrient-rich compost for your garden.
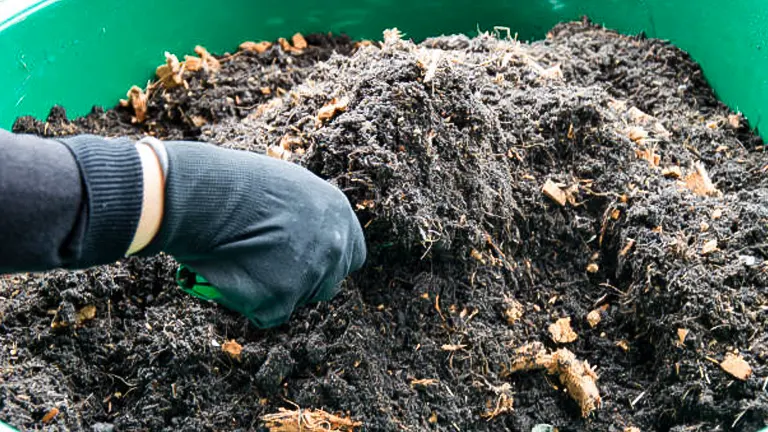
- Initial Layering for Moisture Management: Start with a layer of brown materials at the bottom of your bin. This could include dry leaves, straw, or shredded newspaper. The purpose of this layer is to improve drainage and absorb any excess moisture that accumulates from the green materials. A good foundation prevents the compost from becoming too wet and starting to smell.
- Balancing Greens and Browns: Achieving the right balance between green (nitrogen-rich) and brown (carbon-rich) materials is crucial for a healthy composting process. Green materials include kitchen scraps like fruit and vegetable peels, coffee grounds, and fresh lawn clippings. Brown materials, as mentioned, help add bulk and allow air to flow through the compost. Aim for a ratio of about 3 parts brown to 1 part green by volume. This balance helps to speed up the decomposition process by providing the microorganisms with the right mix of nutrients they need to thrive.
- Regular Aeration: Turning your compost pile is essential for introducing oxygen, which is needed by the aerobic bacteria to break down the organic material. Lack of oxygen can lead to anaerobic conditions, slowing down the decomposition process and causing unpleasant odors. Use a garden fork or a compost turner to mix the pile every 2-4 weeks, bringing materials from the edges into the center.
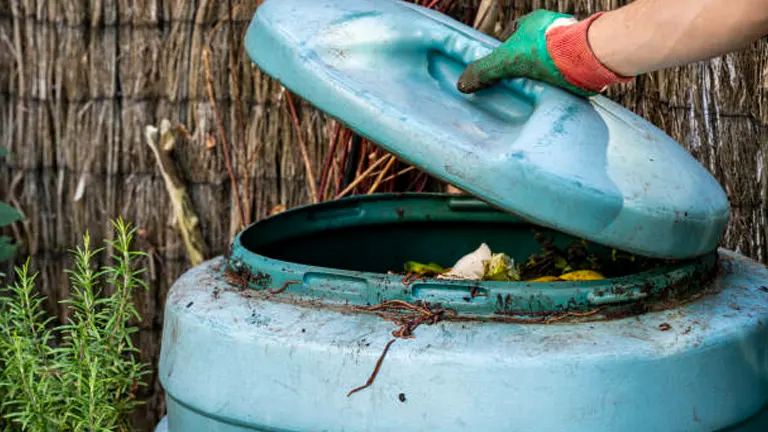
- Moisture Control: Your compost pile should be moist, but not soaking wet, to support the decomposition process. The consistency of a wrung-out sponge is what you’re aiming for. In dry conditions, you may need to add water to your compost, while in wet conditions, adding more brown materials can help absorb excess moisture. Covering your compost bin with a lid or tarp can help manage moisture levels by protecting it from heavy rain or drying out too quickly in the sun.
By following these guidelines, you’re well on your way to creating a thriving compost bin that will reduce waste and enrich your garden soil. Remember, composting is a journey that rewards patience and attention to detail, leading to sustainable gardening practices that benefit the environment.
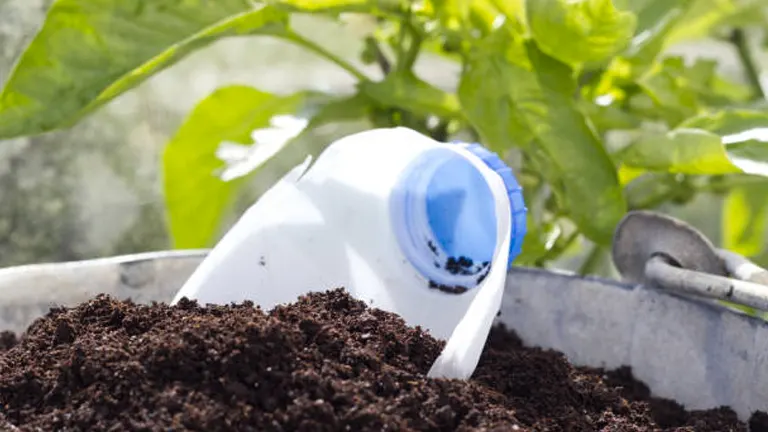
Using Your Compost
The readiness of your compost is marked by its transformation into a dark, crumbly material with a fresh, earthy odor. This maturation process varies, typically spanning a few months to a year, influenced by factors such as local climate conditions and the diversity of materials included in your compost pile.
Upon reaching this stage, your compost is primed for application, serving multiple purposes in garden care and plant cultivation:
- Soil Amendment: Integrate your compost into garden beds to enhance soil structure and fertility. This incorporation not only boosts the soil’s nutrient content but also improves its water retention and aeration properties, promoting robust plant growth.
- Mulching: Applying a layer of compost around your plants acts as a natural mulch, offering benefits such as moisture conservation, temperature regulation, and weed suppression. This protective barrier also gradually releases nutrients into the soil, providing a sustained feed to your plants.
- Potting Mix Component: For container gardening, enrich your potting mix with compost to nourish seedlings and potted plants. A blend of compost with traditional potting materials can create a nutrient-rich, well-draining medium ideal for various plants.
Utilizing your compost in these ways not only maximizes the health and beauty of your garden but also underscores the value of recycling organic waste into a resource that supports sustainable gardening practices.
Maintenance and Care Tips for your Compost Bin
1. Regular Turning
Turning your compost regularly is essential for aerating the pile, which helps to speed up the decomposition process. A well-aerated pile encourages beneficial microbial activity and prevents the compost from becoming compacted and smelly. Aim to turn your compost every 2-4 weeks using a garden fork or compost turner. This action redistributes the materials, ensuring that outer parts are moved to the center where they can decompose more quickly.
2. Moisture Control
Compost should be moist, but not waterlogged. The ideal moisture level is similar to a wrung-out sponge. If the compost is too dry, microbial activity will slow down, delaying decomposition. If it’s too wet, it can lead to odors and a lack of oxygen. Check moisture levels regularly, especially during hot or dry weather, and add water if the compost feels dry. Conversely, if the pile is too wet, add dry brown materials like leaves or straw to absorb excess moisture.
3. Balance Green and Brown Materials

A healthy compost pile needs a balance of green (nitrogen-rich) and brown (carbon-rich) materials. Greens include kitchen scraps and grass clippings, while browns can be leaves, straw, or shredded paper. Maintaining a roughly 3:1 ratio of browns to greens by volume helps to ensure a balanced nutrient mix for microbial activity and prevents odors. If you notice your compost is too wet or smells, add more browns. If it’s too dry or decomposing slowly, add more greens.
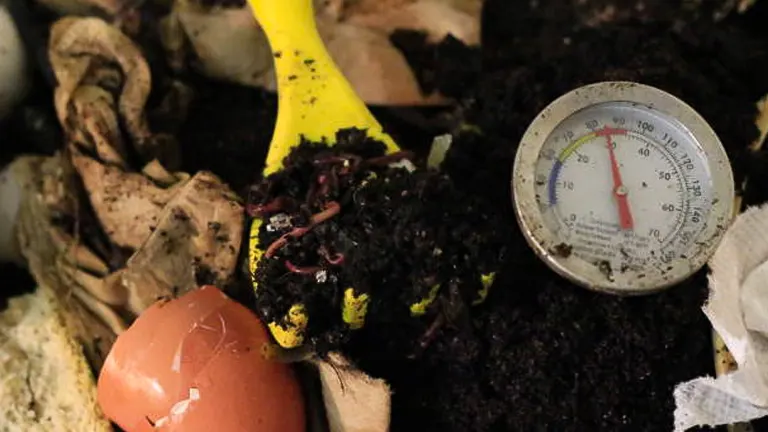
4. Monitor Temperature
The temperature of your compost pile is a good indicator of microbial activity. A healthy, active compost pile will generate heat. If you notice that your pile is not heating up, it may need more green materials, water, or turning to re-activate decomposition. Conversely, if the pile is too hot (exceeding 160°F), it might need to be turned more frequently to prevent killing beneficial microbes.
5. Keep Out Pests

Properly managing your compost bin can help deter pests like rodents and insects. Ensure that your bin has a secure lid or cover and avoid adding meat, dairy, or oily foods, which can attract pests. If you notice pests, consider adding a layer of soil or finished compost on top of new additions to mask the smell, or use a compost bin with a finer mesh to prevent access.
6. Harvest Compost at the Right Time
Compost is ready to use when it’s dark, crumbly, and has an earthy smell. This process can take anywhere from a few months to over a year, depending on the conditions. Use a sieve to separate unfinished materials, which can be returned to the bin for further decomposition. Harvested compost can be used in gardens, potted plants, or as a lawn top dressing.
7. Clean and Inspect the Bin Regularly

Regularly cleaning and inspecting your compost bin helps maintain its condition and functionality. Check for cracks, leaks, or signs of wear, especially if you use a plastic bin. Wooden bins may require occasional treatment with a safe, non-toxic preservative to extend their life. Keeping the bin clean also reduces the likelihood of unpleasant odors and pests.
Conclusion
Constructing a sustainable compost bin is a straightforward and eco-friendly project that reduces waste and enhances soil health. By adhering to basic principles and regular upkeep, anyone can establish a compost system tailored to their needs. This practice supports garden vitality and contributes to broader environmental sustainability. Building your compost bin is a rewarding step towards a greener lifestyle, valuable for both experienced gardeners and beginners alike.
FAQs
- What makes a compost bin “sustainable”?
A compost bin is considered sustainable if it’s constructed from eco-friendly or recycled materials, minimizes waste, and efficiently turns organic scraps into compost. Using untreated wood or recycled plastic, and ensuring the composting process doesn’t harm the environment, contributes to its sustainability. - Can I build a compost bin if I have limited outdoor space?
Absolutely! Many compost bin designs are suitable for small spaces, such as balcony-sized worm composting bins or compact tumblers. The key is to choose a design that fits your available space while meeting your composting needs. - What materials should I avoid putting in my compost bin?
To maintain a healthy composting process, avoid adding meat, dairy, oils, diseased plants, and non-biodegradable materials. These can attract pests, cause odors, or disrupt the composting balance. - How can I keep pests away from my compost bin?
Ensure your bin has a tight-fitting lid and a base that prevents animals from entering. Also, regularly turn your compost and balance green and brown materials to minimize odors that attract pests. - Do I need special tools to build a compost bin?
Basic tools such as a saw, drill, screwdriver, and measuring tape are usually sufficient. The exact tools depend on your chosen design and materials, but most DIY compost bins can be constructed with common household tools. - How do I know when my compost is ready to use?
Compost is ready when it’s dark, crumbly, and smells earthy. It should no longer resemble the original materials. This process can take anywhere from a few months to a year, depending on factors like material balance, temperature, and turning frequency. - Can compost bins attract rodents or insects?
If managed properly, compost bins should not attract pests. Avoiding meat and dairy products, ensuring the bin is securely covered, and maintaining a proper balance of materials can all help prevent rodents and insects. - Is it necessary to turn the compost, and how often?
Yes, turning the compost introduces oxygen, which is crucial for the composting process. Aim to turn your compost every 2-4 weeks. This frequency can vary based on the size of your bin, the materials included, and environmental conditions.
Building your own sustainable compost bin is a rewarding step towards eco-friendly living. With simple tools, recycled materials, and a bit of effort, you can transform kitchen scraps and yard waste into rich soil for your garden. This DIY project not only helps reduce waste but also nurtures your green space, making it a practical choice for gardeners of all levels. Start your composting journey today and contribute to a healthier planet right from your backyard.

Benjamin Brooks
Forestry AuthorGreetings! I'm Benjamin Brooks, and my journey over the past 15 years has revolved around the fascinating realms of content creation, expertise in snow clearing, and the intricate world of lumberjacking and landscaping. What began as a simple curiosity about the natural world and heavy machinery has evolved into a passionate profession where my love for crafting words intertwines seamlessly with my lumberjacking and garden skills.


Leave your comment