How to Install a Wood Stove in the Basement 2024
- October 5, 2023
- 0 comment
Installing a wood stove in the basement can be a wonderful way to make your home cozier and reduce heating costs. However, the process involves careful planning to ensure safety and efficiency. Follow the steps below to install your wood stove correctly.
1. Check Local Regulations
The process of installing a basement wood stove goes beyond purchasing the right unit and setting it up. An essential and often overlooked step is ensuring compliance with local regulations. The emphasis on this step is not merely procedural; it stems from genuine concerns around safety, environmental impact, and communal considerations.
Why Check Local Regulations?
- Safety Protocols – Entrusted with the well-being of its residents, local authorities derive standards from extensive safety research and insights from past incidents. Complying with these guidelines isn’t just about ticking off a checklist; it’s about safeguarding your home and its inhabitants. Given the distinct nature of basements — often confined with unique ventilation challenges — they might be subject to specific installation requirements.
- Environmental Concerns – As we become more environmentally conscious, many municipalities are tightening regulations around wood-burning appliances. These devices have the potential to emit pollutants, which can compromise air quality. As such, there might be preferences or mandates for stoves of certain types or those meeting specific emissions criteria.
- Property Insurance – Overlooking local regulations can have tangible financial repercussions. For instance, non-compliance can lead to your home insurance being voided, particularly if any related mishap occurs. It’s also prudent to liaise with your insurance provider before making structural changes to your home to understand any conditions or implications they might have.
- Resale Value – For homeowners considering the long game, ensuring compliance can also enhance the resale value of your property. Future buyers are more inclined towards homes that adhere to local codes, as it assures them of safety and eliminates potential legal hassles.
How to Check Local Regulations?
- Local Municipal Office – Your first point of contact should ideally be your local city or municipal office. They typically house building and safety departments responsible for overseeing wood stove installations.
- Fire Department – An often-underutilized resource is the local fire department. Their insights on safe installation distances, protective measures, and even recommendations on certified installers can be invaluable.
- Online Resources – With the digital age in full swing, numerous municipalities and fire departments have moved their resources online. This trove of information, ranging from guidelines to permit applications, offers residents an easily accessible platform to understand their local requirements.
- Local Wood Stove Retailers – Local businesses, particularly established wood stove retailers, can be treasure troves of localized insights. Drawing from their experiences with prior installations in the community, they can guide newcomers on the nuances of local regulations.
Potential Requirements:
- Permits – Embarking on your installation journey might first necessitate obtaining a permit. The process typically entails submitting a detailed plan, highlighting the installation methodology, the stove’s specifications, and any safety protocols in place.
- Inspections – After you’ve installed the stove, you’re not quite done. An inspection is often mandated to ensure the installation aligns with local codes. This scrutiny could either be undertaken by an official municipal inspector or a locally certified professional.
- Certifications – As the environmental spotlight intensifies on wood stoves, some localities have started insisting on specific efficiency or emissions standards. A common certification to look out for is one from the Environmental Protection Agency (EPA), a testament to the stove’s eco-friendliness.
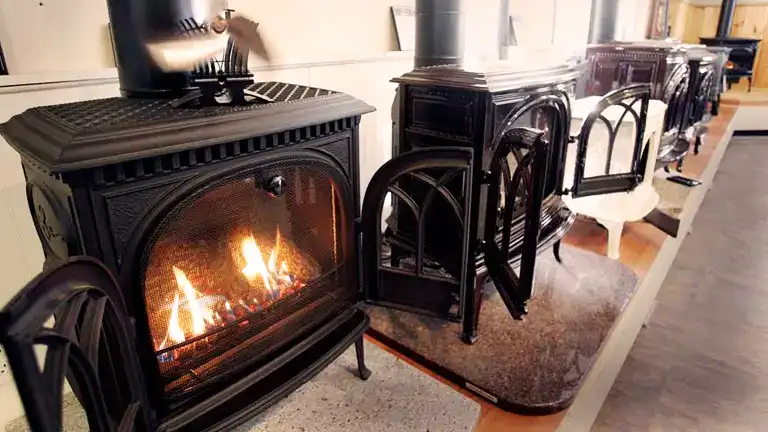
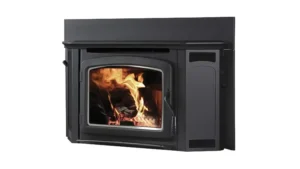
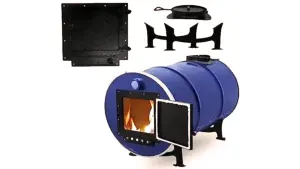
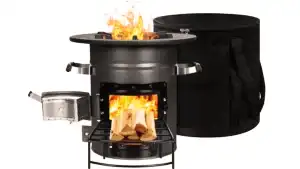
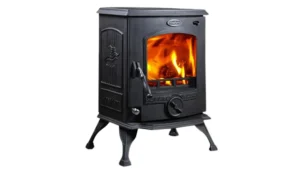
2. Choose the Right Stove
The decision to install a wood stove in your basement is only the beginning. Choosing the right stove is crucial to ensure safety, efficiency, and satisfaction in the long run. It’s not just about aesthetics, but about aligning the stove’s specifications with the demands of your space and home.
- Understanding Your Space – Your basement’s dimensions and insulation quality are fundamental in determining the kind of wood stove you need. A spacious, poorly insulated area might necessitate a stove with a higher heat output. Conversely, a compact, well-insulated room can be effectively heated with a stove of lesser output. It’s vital to gauge the specifics of your basement to ensure optimal heating without wasting energy.
- Efficiency Ratings – The efficiency of a wood stove signifies how effectively it can convert wood into heat. A higher efficiency implies that the stove generates more warmth using less wood, offering the dual benefits of reduced wood consumption and consistent heating. For those environmentally inclined, it’s good to note that efficient stoves usually emit fewer pollutants. One way to ensure you’re getting an efficient model is by checking for an EPA certification, as they generally rate between 60-80% for efficiency.
- Heat Output – Heat output, typically measured in British Thermal Units (BTUs), indicates the amount of heat a stove can produce hourly. To determine the right BTU for your space, a general guideline suggests needing roughly 20-25 BTUs per square foot for a well-insulated area. However, this can change based on various factors, including insulation quality and ceiling height. It’s crucial not to overcompensate; an overly potent stove can make the environment too warm and lead to wasted energy.
- Fresh Air Intake – In the context of modern, energy-efficient homes that are tightly sealed, ensuring a wood stove has adequate air for combustion becomes paramount. A limited supply of indoor air can hinder the stove’s efficiency and pose safety risks. Some contemporary stoves address this issue with an external air intake system, drawing air directly from outside. This design ensures a consistent fresh air supply for combustion, leading to safer and more efficient burning. Moreover, by not depleting indoor air, such systems prevent the stove from drawing in cold drafts and maintain indoor air quality.
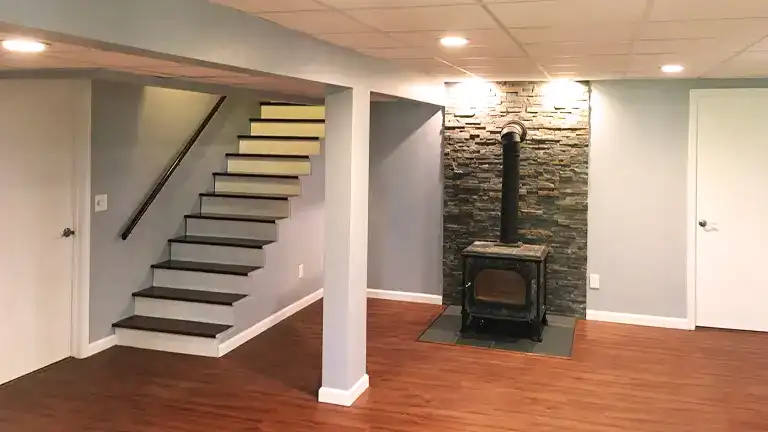
3. Select the Location
Choosing the right location for your wood stove is a blend of practicality and safety. While the allure of a wood stove centers around its aesthetic appeal and warmth, its placement within your basement should be governed by certain crucial factors to ensure optimal functioning and reduce potential risks.
- Proximity to Flammable Materials – At the core, a wood stove is an open flame, and its radiant heat can be a hazard if too close to combustible materials. This includes not just obvious items like drapes, furniture, or stored items, but also structural elements like wooden walls or support beams. Ensuring a safe distance helps mitigate the risk of unintended fires.
- Ample Spacing – The space around the stove serves a dual purpose. For one, it allows for effective heat radiation, ensuring warmth disperses evenly around the room. Moreover, the space acts as a safety buffer, reducing the chances of accidental contact with the stove, which can be exceptionally hot. While a general guideline suggests a minimum of 36 inches of clearance around most stoves, specific requirements can vary based on the stove’s design, size, and heat output. Always consult the manufacturer’s guidelines to determine the appropriate clearance for your specific model.
- Positioning Near an Exterior Wall – This is predominantly a matter of convenience and efficiency. Locating your stove close to an exterior wall simplifies the chimney installation process. A straighter and shorter chimney run is more efficient in terms of drawing out smoke and requires less material, reducing installation costs. Additionally, a shorter chimney is easier to maintain and clean, and there’s less risk of creosote buildup, which can be a fire hazard.
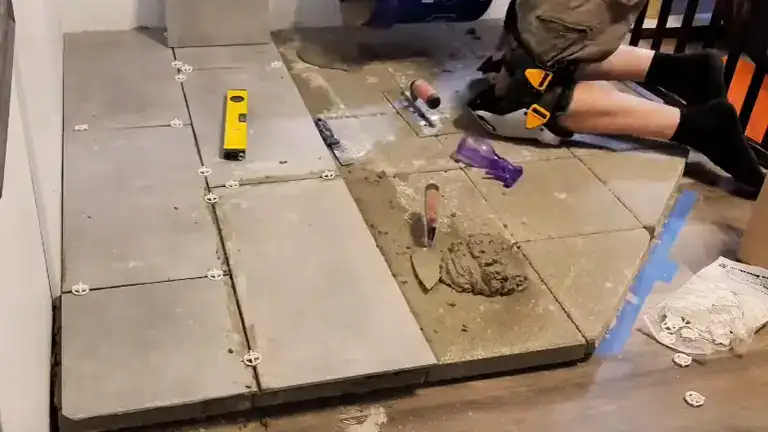
4. Prepare a Hearth Pad
One of the unsung heroes in a wood stove installation is the hearth pad. Often overshadowed by the more prominent stove, its significance in terms of safety and aesthetic appeal is paramount. Essentially, the hearth pad acts as a protective barrier, shielding your floor from the intense heat of the stove and potential stray embers that could cause harm.
- Protection Against Heat and Embers – The primary function of a hearth pad is to serve as a heat shield. Wood stoves, especially during peak operation, can get exceedingly hot. This heat can be detrimental to certain floor materials and might even pose a fire risk in extreme cases. Furthermore, as you load or clean your stove, stray embers or ash could escape. A hearth pad ensures that these embers don’t come in direct contact with your flooring, thereby preventing potential scorch marks or fire hazards.
- Size and Extension – The size of the hearth pad isn’t just about covering the footprint of the stove. It’s essential to have an extended boundary, especially in front of the stove door where most human interaction occurs. A general recommendation suggests that the pad should protrude at least 18 inches in front of the stove door and 8 inches on the other sides. However, always consult the stove’s manual or manufacturer’s recommendations, as specific requirements can vary based on the stove model.
- Material Selection – When it comes to choosing materials for a hearth pad, the key is to opt for non-combustible options. Materials such as tile, brick, or stone are popular choices. Not only are these materials effective in preventing heat transfer, but they also offer a wide range of aesthetic choices, allowing homeowners to select a design that complements the décor of the basement.
- Level and Stability – While it’s essential for the hearth pad to be heat-resistant, it’s equally crucial for it to offer a stable platform. The wood stove, once loaded with wood, can be hefty. Any unevenness or instability in the hearth pad can pose risks. Therefore, during installation, ensure that the pad is level, firm, and can adequately support the weight of the stove.
5. Plan the Venting
Proper venting is vital when setting up a wood stove. It ensures efficient operation, prevents the backflow of smoke into the living space, and reduces the risk of fire hazards. Particularly in basements, which are below ground level and might present unique challenges, careful planning is essential to establish effective venting.

- Type of Chimney – For basement installations, the chimney choice becomes particularly crucial. A class-A insulated chimney is often recommended. What makes this chimney ideal is its insulation, which guards against the naturally cooler temperatures found underground. This insulation ensures that the smoke inside the chimney remains warm, allowing for efficient drafting and preventing the condensation of creosote, a potential fire hazard.
- Chimney Placement – The principle behind a wood stove’s chimney is simple: hot air rises. Thus, the ideal chimney placement involves a straight vertical run up and out through the house. This setup provides the best draft, drawing smoke and gases efficiently out of the stove and preventing them from lingering or backflowing into the living space. However, architectural or design constraints might not always allow for a perfectly straight chimney. In such scenarios, it’s advisable to minimize horizontal runs as they can hamper the natural draft. If bends are unavoidable, opting for 45-degree angles over 90-degree turns helps maintain a smoother and more effective draft.
- Exit Point – The chimney’s exit point, or its terminus, is where it releases the smoke into the atmosphere. For optimal function and safety, the chimney should rise at least 3 feet above the highest point where it passes through the roof. This height ensures that the chimney draws well and prevents downdrafts caused by wind. Additionally, to avoid creating pockets where the smoke might get trapped or redirected downwards, the chimney should be at least 2 feet taller than any part of the building within a 10-foot radius.
6. Install the Chimney
The chimney, essential for safely directing the smoke and fumes from the wood stove outside your home, demands meticulous attention during installation. From its inception point in the basement to its terminus outside, every segment and joint matters. Here’s a step-by-step guide to ensure a sound chimney installation:
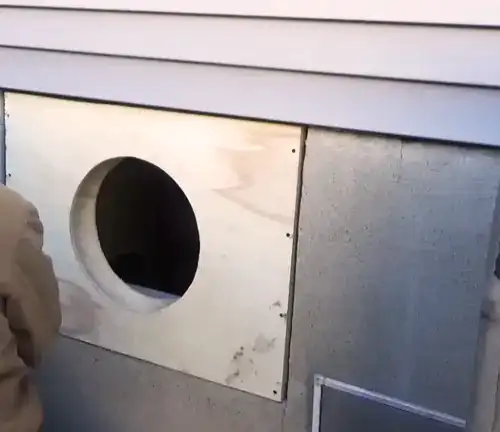
Cutting the Hole for the Chimney Thimble
Before making any cuts, double-check the required dimensions for the chimney thimble—the protective sleeve that will interface between the chimney pipe and the combustible wall or ceiling. Utilize precise measurements and tools to cut the hole, ensuring a snug fit for the thimble. It’s essential that this hole aligns properly with the stove’s exit point and the projected chimney path. When in doubt, always err on the side of caution; it’s easier to enlarge a hole slightly than to repair a miscalculated cut.
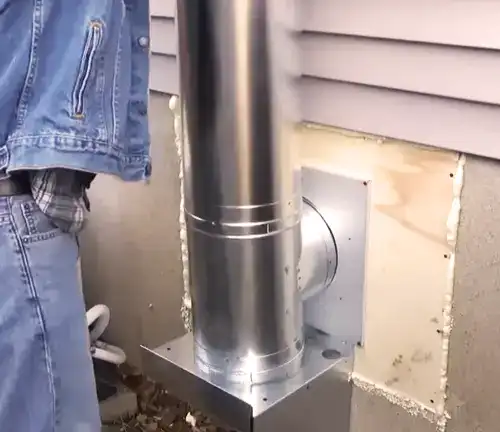
Assembling the Chimney
With the hole prepared, begin assembling the chimney, always deferring to the manufacturer’s instructions. Modern chimney kits usually come with sections designed to fit together seamlessly.
As you assemble, prioritize sections that have locking bands. These bands not only make the installation process more straightforward but also significantly enhance the chimney’s safety. They ensure that sections don’t inadvertently separate, especially under the influence of strong winds or external pressures.
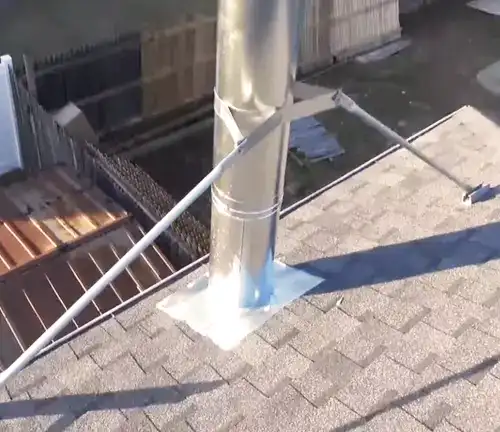
Supporting the Chimney
The importance of adequately supporting the chimney cannot be overstated. Especially as the chimney extends through the house and beyond the roof, it can become top-heavy, making it susceptible to swaying or toppling.
Utilize brackets or braces, which are often provided in chimney installation kits, to secure the chimney at intervals. These supports typically anchor the chimney to adjacent walls or joists.
For chimneys that protrude substantially above the roofline, consider adding a stabilizing brace to counteract the effects of wind and to bear the chimney’s weight. Such reinforcement ensures the chimney remains vertical and stable over time.
7. Install the Stovepipe
The stovepipe, while often perceived as a mere conduit between the stove and the chimney, plays a critical role in ensuring efficient and safe operation. Proper installation and maintenance of the stovepipe are paramount in minimizing risks of leaks, ensuring efficient exhaust flow, and promoting the longevity of your heating system.
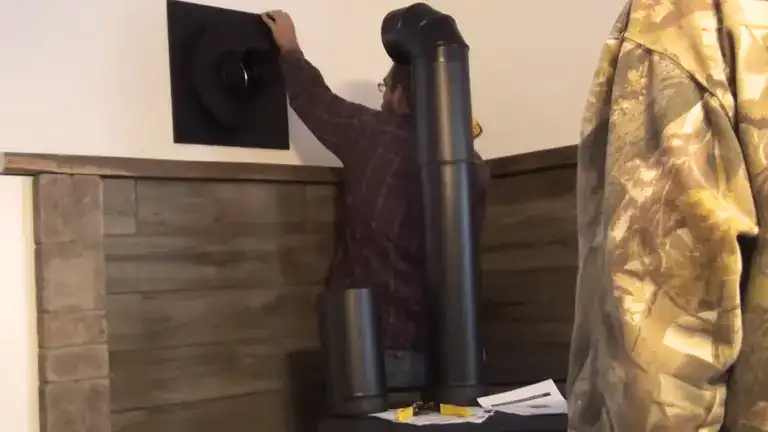
- Connecting the Stovepipe – Begin by connecting one end of the stovepipe to the flue collar of the stove, which is the designated exit point for the smoke and gases. The other end should be connected to the chimney thimble, ensuring a seamless flow from the stove to the chimney.
- Maintain Clearance from Combustibles – Safety is paramount when dealing with high temperatures. To prevent any inadvertent fire hazards, it’s crucial to maintain at least a 1-inch clearance between the stovepipe and any combustible materials. This includes walls, ceilings, or any wooden structures. Such a buffer ensures that the radiant heat from the stovepipe doesn’t inadvertently ignite nearby materials.
- Ensuring Tight Joints – As the stovepipe channels hot gases and smoke, any gaps or loosely fitted joints can lead to leaks, compromising indoor air quality and posing potential fire hazards. Ensure that each joint where sections of the stovepipe connect fits snugly.
- Securing the Joints – Beyond ensuring a tight fit, it’s vital to add an extra layer of security to each joint. Typically, using three screws evenly spaced around the circumference of the joint will ensure a firm connection. This prevents any accidental dislodging or separation of the pipe sections, especially when cleaning or during thermal expansion and contraction.
- Using Fire-Safe Sealant – To further enhance the airtightness of the connections and mitigate any risk of leaks, apply a fire-safe sealant around each joint. These sealants are specially formulated to withstand the high temperatures encountered in stovepipes, ensuring that the seal remains intact even under intense heat.
8. Provide Outside Air for Combustion
Modern home designs emphasize energy efficiency, often leading to houses that are exceptionally well-sealed. While beneficial for temperature regulation and energy savings, such tight seals can pose challenges for appliances like wood stoves that require a consistent and ample supply of air for effective combustion. Ensuring your stove has access to sufficient air is vital for its efficient operation, safety, and overall indoor air quality. Here’s how you can manage this:
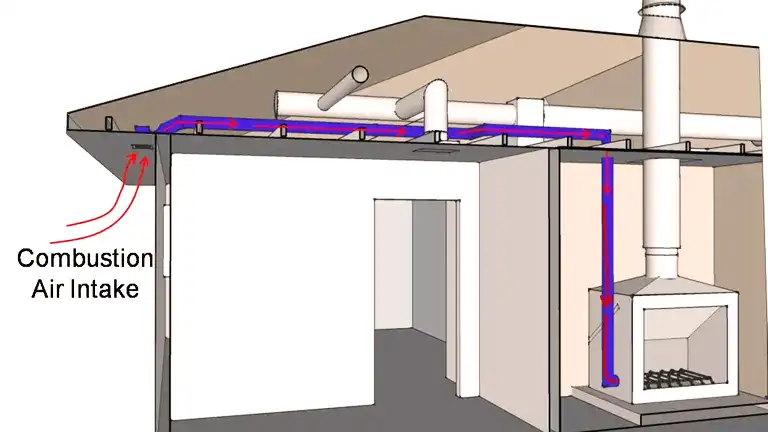
- The Challenge with Well-Sealed Homes – A wood stove burns wood to produce heat, and for this combustion process to occur, oxygen is essential. In homes that are tightly sealed, the volume of incoming fresh air is limited, which can lead to incomplete combustion in the stove. This not only results in inefficient burning but can also produce harmful by-products, including carbon monoxide. If the stove is competing for air with other household appliances, this problem can be further exacerbated.
- Installing an Outside Air Intake – Many modern wood stoves come with a feature or an accessory that allows them to draw combustion air directly from outside the home, bypassing the indoor environment entirely. This is especially useful in well-sealed homes where indoor air might be in short supply. If your stove has an inlet for this purpose, it’s advisable to set up an outside air intake. This system usually involves a duct or a pipe that channels fresh air from the home’s exterior directly to the stove’s combustion chamber.
- Ensuring Unobstructed Airflow – Once the outside air intake system is in place, it’s crucial to ensure its optimal functioning by keeping the air path unblocked. Regularly inspect the intake for any obstructions like leaves, debris, or even snow in colder months. An obstructed intake can compromise the stove’s combustion efficiency and pose potential safety risks. Depending on your location, you might also want to install a mesh or grille to prevent small animals or insects from entering the duct.
9. Test the Stove
After meticulously installing your wood stove and ensuring all components are in place, the final crucial step before regular use is to test the stove. This initial run serves as a diagnostic phase, helping you identify any potential issues or tweaks that might be necessary to optimize performance. Here’s a step-by-step guide to effectively testing your newly installed stove:
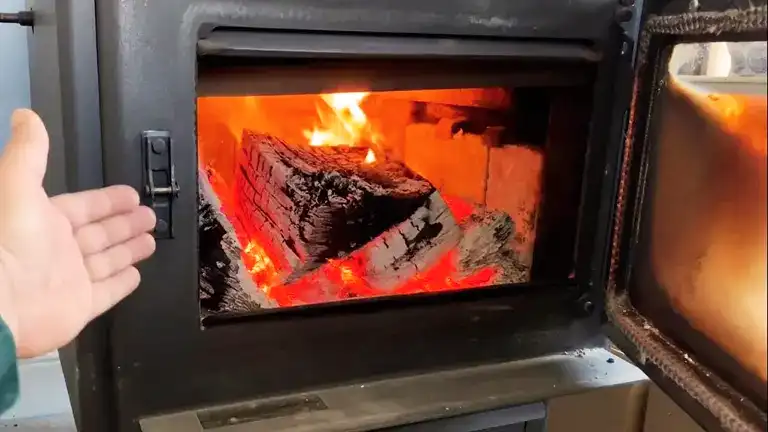
- Start with a Small Fire – For your initial test, it’s advisable to start modestly. Use a small amount of dry, seasoned wood to ignite a controlled fire. This allows you to observe the stove’s operation without pushing it to maximum capacity. The reduced intensity makes it easier to identify and rectify issues without the risk of overheating or causing damage.
- Check for Smoke Leaks – As the fire burns, carefully observe the stove and the connected stovepipe and chimney system for any smoke leaks. Any smoke escaping outside the intended exhaust pathway can indicate gaps, loose joints, or issues with the seals. Addressing these early ensures a safer and more efficient operation in the long run.
- Observe the Draft Performance – The draft refers to the stove’s ability to draw air into the combustion chamber and efficiently expel smoke and gases out through the chimney. A good draft ensures complete combustion and reduces the risk of smoke backflow into the living space. During the test, ensure that smoke is smoothly channeled through the stovepipe and out the chimney. If you notice sluggish smoke movement or backflow, it might indicate blockages, an inadequate air supply, or issues with the chimney’s height or positioning.
- Adjust the Air Intake and Damper – Familiarize yourself with the stove’s controls. Play around with the air intake settings and the damper to see how they influence the fire’s intensity and the smoke’s exhaust rate. Understanding how these controls affect the stove’s operation will allow for more efficient and safer use in various conditions.
10. Safety Precautions
While a wood stove can be a wonderful addition to a home, offering warmth and a cozy ambiance, it’s essential to prioritize safety at every step. The very nature of its operation — burning wood — means that without the right precautions, there’s potential for harm. Here are some pivotal safety measures every homeowner should adopt when integrating a wood stove into their living space:
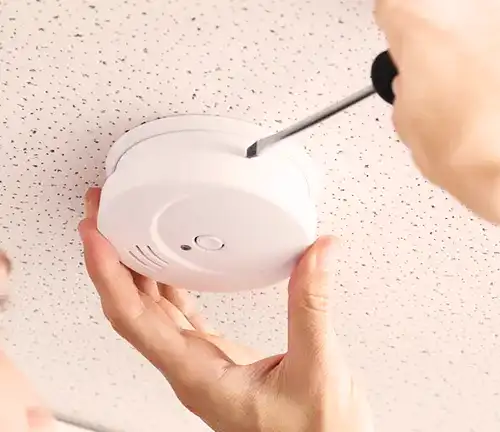
Install Smoke and Carbon Monoxide Detectors
These detectors are your first line of defense against potential hazards. While the wood stove is designed to channel smoke out, issues like blockages or backdrafts can lead to smoke accumulation. More insidiously, incomplete combustion can lead to carbon monoxide, a colorless and odorless gas that can be harmful, even in small quantities. Installing detectors not just in the basement but throughout the home ensures timely alerts, allowing for quick remedial action.
Maintain Distance from Flammables
The radiant heat from a wood stove can ignite any nearby flammable items. Ensure there’s a safe distance between the stove and items like furniture, curtains, stored papers, or any combustible materials. This not only prevents potential fire hazards but also ensures efficient heat distribution throughout the space.

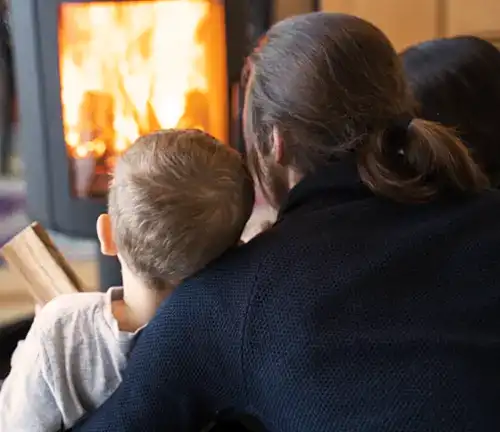
Educate Family Members
Knowledge is one of the best safety tools. Ensure all family members, especially children, are educated about the safe operation of the stove. This includes basics like not touching the hot surface, ensuring the fire is out before retiring for the night, and understanding the stove’s controls.
Regular Inspection and Cleaning
Over time, as wood burns, it releases compounds that can condense into creosote, a tar-like substance that adheres to the stovepipe and chimney walls. Creosote is flammable and can lead to chimney fires if it accumulates in significant amounts. To prevent this, regularly inspect your stove and chimney for any buildup. Cleaning, either by yourself or through professional chimney sweeps, should be done as needed based on the level of buildup and usage frequency.
11. Final Touches
After meticulous planning, installation, and safety checks, the final touches can elevate your wood stove experience, maximizing comfort and utility. These refinements are about streamlining the daily operation and enhancing the stove’s integration into the broader household ecosystem. Here are some suggestions to consider:
Install a Fan or Vent System
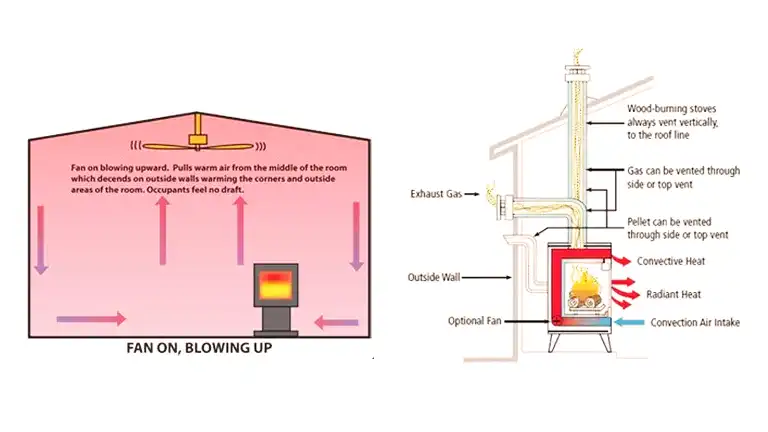
To maximize the distribution of warmth emanating from your wood stove, especially in expansive spaces or multi-story homes, consider enhancing airflow. While the stove’s natural radiation provides immediate warmth, a fan or vent system can help circulate this heat more uniformly. Simple solutions like ceiling fans, set to push warm air downwards, can make a difference. For a direct approach, stove fans, which are powered by the heat of the stove itself, can be positioned atop the stove to disseminate warmth. For those seeking a more integrated solution, vent systems can channel the stove’s heat to other rooms, ensuring every corner of the home benefits from the stove’s comforting embrace.
Wood Storage
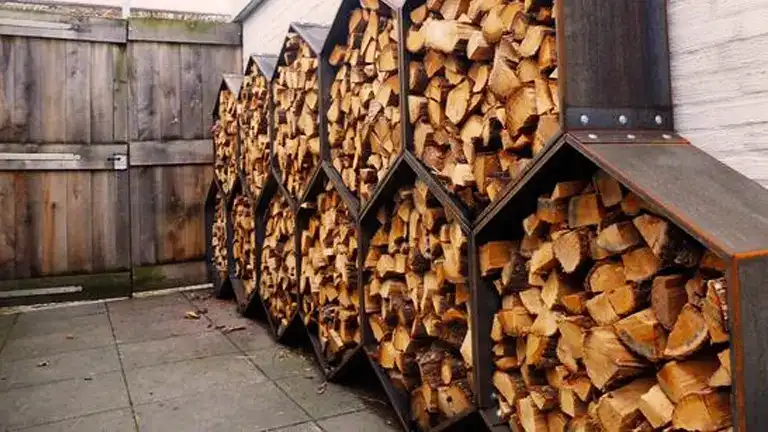
The efficiency and safety of a wood stove are heavily influenced by the quality of the wood it burns. Optimal combustion requires dry, seasoned wood, which produces a hotter flame and minimizes creosote formation. Therefore, how and where you store your wood is paramount. While having a small stack nearby offers convenience, the majority of your wood should be stored at a safe distance from the stove to avoid accidental fires. Protecting this wood from the elements is crucial, and covered storage solutions like woodsheds or canopies are ideal. Elevating the wood slightly off the ground also ensures the logs remain dry and prevents pests, ensuring every log you place in the stove is primed for perfect burning.
Conclusion
Installing a wood stove in the basement can be a rewarding project. However, it requires careful attention to safety and details. If you feel uncertain at any step, consult with professionals or consider hiring one for the installation. With proper installation and maintenance, your wood stove can provide warmth and comfort for many years.
Related Articles:
- How To Deal With Backdraft Issues in Wood Stoves and Fireplaces
- How to Ensure Proper Ventilation and Airflow for Your Wood Stove
- How to Move a Wood Stove Safely and Securely
- How to Get Wood Stove Heat to Other Rooms: A Comprehensive Guide
- How to Choose the Best Wood Stove Pipe
- How To Clean Your Chimney
FAQs
- Why is the basement a popular choice for wood stove installation?
Many homeowners find the basement appealing due to its natural insulation properties, allowing heat to rise and warm the entire home. Additionally, it can transform an otherwise chilly space into a cozy retreat. - Can I use my existing chimney for my basement wood stove?
While an existing chimney can sometimes be repurposed, it must be inspected for compatibility, structural integrity, and safety. The chimney lining, size, and material need to be compatible with the stove’s requirements. - How does a basement’s humidity level affect a wood stove’s operation?
Basements are often more humid. A wood stove can help reduce this humidity, but excessive moisture can also affect the efficiency of wood combustion and increase creosote buildup. - Will the wood stove make my basement floor too hot?
Properly installed hearth pads ensure that the floor underneath the stove remains protected from excessive heat, preventing any damage or safety concerns. - What’s the best way to distribute the heat from my basement stove to the upper floors?
Besides natural heat convection, homeowners can use vent systems, fans, or even stovepipe heat reclaimers to channel and distribute warmth more effectively throughout the home. - Is a basement wood stove safe in flood-prone areas?
If your basement is susceptible to flooding, it’s essential to ensure the stove is elevated and precautions are taken to protect the wood supply and other components from potential water damage. - How do I ensure a good air supply for my stove in a tightly sealed basement?
Modern homes, especially basements, can be well-sealed. Using an outside air intake system ensures that the stove gets adequate air for combustion without competing with other home appliances. - Can I use any wood in my basement stove?
While technically any wood can burn, it’s best to use dry, seasoned wood. This ensures cleaner burning, higher heat output, and reduced creosote buildup. - Is there a risk of carbon monoxide accumulation when using a wood stove in the basement?
Proper installation and ventilation minimize this risk. However, as a safety measure, it’s crucial to install carbon monoxide detectors in the basement and throughout the home. - How often should I clean the chimney of a basement wood stove?
The frequency depends on usage and the type of wood burned. However, given the potential for creosote buildup, a general recommendation is to inspect and clean it at least once a year.
Hey there, thanks for sticking around and reading our guide on How to Install a Wood Stove in the Basement 2024! We’re eager to hear your thoughts and personal stories. Maybe you’ve already added that cozy wood stove to your basement, or perhaps you’re just daydreaming about it for now. Either way, let’s chat! Drop a comment below with your experiences, questions, or any nifty tips you might have. And if you found any nugget of wisdom helpful, share it forward so more folks can benefit. Warm basements and shared stories make the world a cozier place. Let’s keep the conversation burning bright!

David Murray
Forestry AuthorI'm David Murry, a forestry equipment specialist with a focus on chainsaw operation. With over 13 years of experience, I've honed my skills in operating and maintaining a wide range of machinery, from chainsaws to log splitters. My passion for the outdoors and commitment to sustainable forestry drive my work, which emphasizes safety, efficiency, and staying updated with industry advancements. Additionally, I'm dedicated to sharing my expertise and promoting environmental awareness within the forestry community.


Leave your comment