How to Make a Chicken Coop Out of Pallets
- January 19, 2024
- 3 comment
Being a fervent advocate for eco-friendly lifestyles and a devotee of do-it-yourself endeavors, I recently took up the substantial and gratifying task of constructing a chicken coop, using solely repurposed wooden pallets. This endeavor not only aligned with my sustainable living principles but also presented an opportunity to challenge and enhance my crafting skills.
Why Pallets?
Opting for pallets as the primary material for my chicken coop project was a decision rooted in their widespread availability, cost-effectiveness, and alignment with sustainable living. These readily available and often free materials are a boon for DIY projects, offering an economical solution for substantial undertakings.

Repurposing pallets not only echoes my commitment to eco-friendliness by reducing waste and preventing landfill accumulation but also meets practical needs due to their inherent sturdiness and weather resistance. Pallets’ robustness ensures a durable and safe chicken dwelling, while their modularity invites creative freedom in design, allowing for a customized, practical, and visually appealing chicken coop. This choice embodies a harmonious blend of environmental responsibility, affordability, and the pleasure of hands-on, inventive construction.
List on How to Make a Chicken Coop Out of Pallets:
- Sourcing Pallets
- Laying the Groundwork and Architectural Blueprinting
- Constructing the Coop’s Core Framework and Dimensions Capacity
- Assembling the Roof and Walls
- Creating the Nesting Area and Installing the Perches
Step 1: Sourcing Pallets
The first and most crucial stage of building my chicken coop was selecting the right pallets, with a keen eye on safety and suitability for animal living spaces. It was imperative to use pallets free of harmful chemicals, ensuring the health and safety of the chickens.
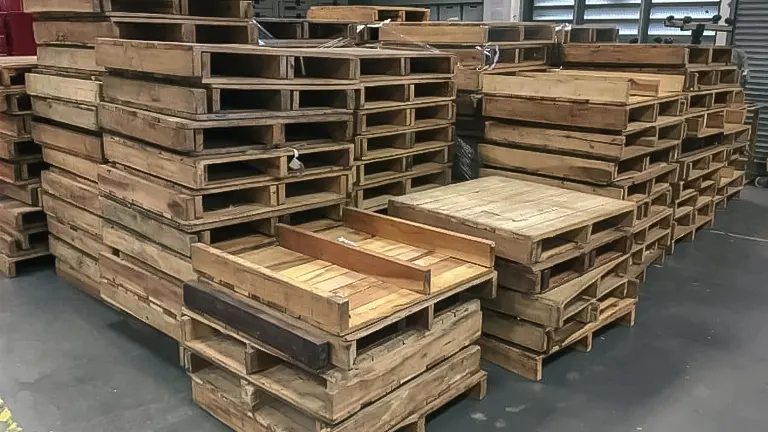
I specifically sought out pallets marked with an “HT” stamp, denoting heat treatment rather than chemical treatment. This process, where wood is sterilized using heat instead of chemicals, is safer for animal enclosures and ensures the materials wouldn’t harm the chickens or affect the coop’s integrity over time.

In my search for these pallets, I reached out to local businesses and warehouses, places typically rich in discarded pallets. By explaining my project’s eco-friendly nature, I not only acquired the necessary materials but also engaged the community in this sustainable endeavor. After gathering enough HT-stamped pallets, I rigorously inspected each one for wear, damage, or protruding nails, a vital step to guarantee that these reclaimed materials were safe and robust. This careful selection and preparation of pallets laid a strong, responsible foundation for building a sustainable chicken coop.
Step 2: Laying the Groundwork and Architectural Blueprinting
Choosing the right location for my chicken coop was pivotal, ensuring both compliance with local ordinances and maintaining neighborly relations.
I selected a level spot that was appropriately distanced from both my house and my neighbor’s, in line with regulations typically requiring a 30-foot separation from residential dwellings. Preparing the site involved clearing vegetation and rocks, and in some cases, leveling the ground to ensure the stability of the coop and the comfort of the chickens.

The construction phase commenced with meticulous groundwork, involving measuring and marking the site, followed by trench digging for a solid foundation. These trenches, 8 inches wide and 12 inches deep, were filled with concrete and topped with bricks to form the base for the coop’s walls. My design, developed through extensive research, aimed for a simple yet functional structure, incorporating a nesting area, perches, and an enclosed run, all designed to ensure the safety and well-being of the chickens in their new habitat.
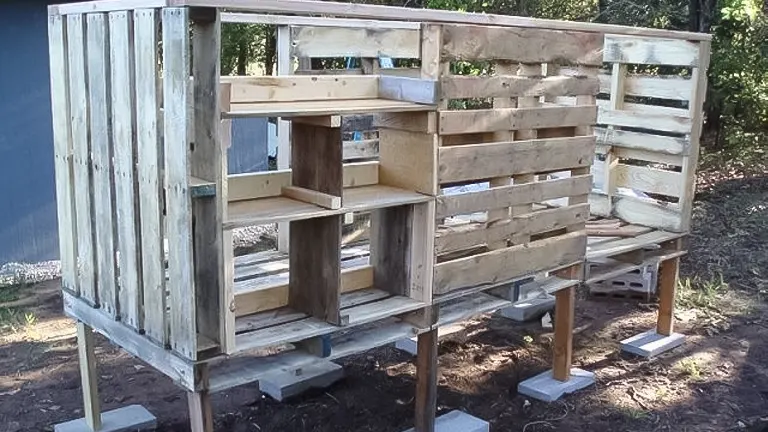
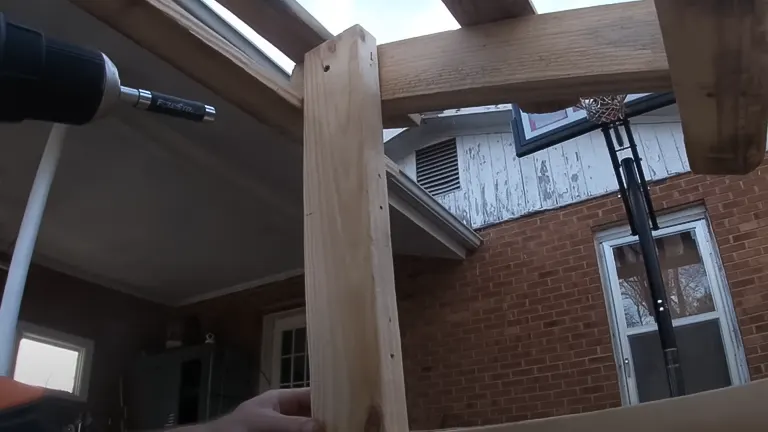
Step 3: Constructing the Coop’s Core Framework and Dimensions Capacity
Constructing the core framework of the chicken coop demanded precision and attention to detail. I carefully selected and cut the necessary lumber: six 2″x3″ boards for the top and bottom beams, along with various 2″x2″ and 2″x3″ boards for the vertical studs and floor joists.
Assembling these pieces, I ensured every corner was perfectly angled at 90 degrees using a speed square, a crucial step for the coop’s structural integrity and level alignment. This meticulous process formed the foundation of the coop, setting the stage for further construction.
The final structure measured approximately 8 feet by 6 feet, thoughtfully designed to comfortably house up to 8 chickens. This size was deliberately chosen to provide ample space for each chicken, crucial for their well-being, and to facilitate good air circulation and minimal conflicts.

The design focused on creating not just a shelter but a comfortable living space that met the chickens’ natural needs, including nesting areas and perches. Additionally, this size allowed for easy maintenance and cleaning, making it a practical and efficient habitat for both the chickens and me as the caretaker.
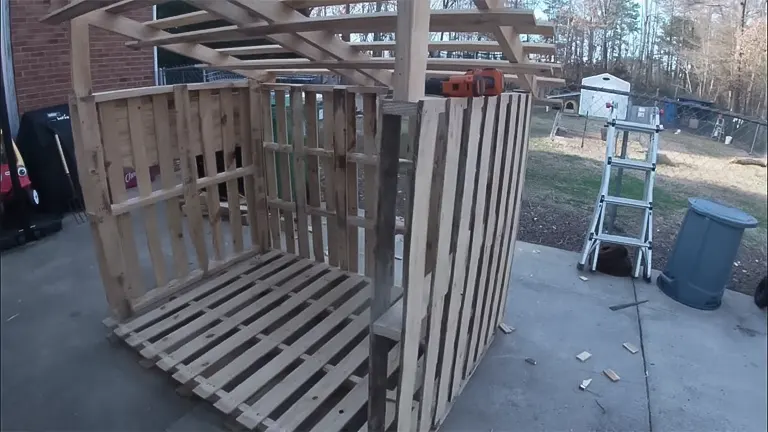
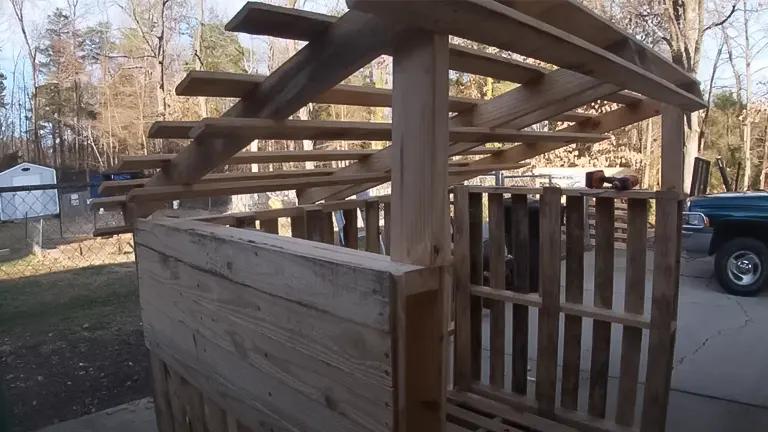
Step 4: Assembling the Roof and Walls
Assembling the roof and walls marked a critical stage in building my chicken coop, focusing on the chickens’ protection and comfort. I began with the flooring, meticulously cutting and installing thirteen 1″x4″ boards, each 3 feet long, to create a sturdy, even surface.
This task demanded precision, ensuring each board was snugly fitted and securely attached to the joists. A detailed diagram guided the accurate placement and alignment of these floorboards, crucial for both the coop’s structural integrity and the chickens’ safety.
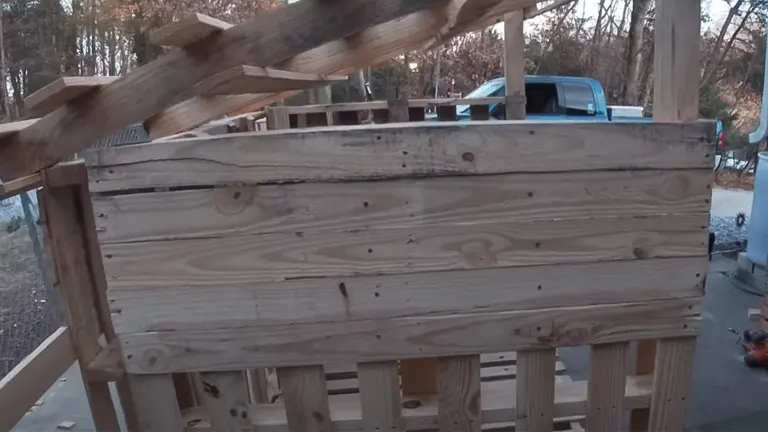
For the walls, I prepared the lumber for sheathing rails, cutting the boards to specific lengths for a structured framework. Careful installation and alignment according to design specifications were key, with every rail checked to ensure proper positioning and a 90° angle at each corner.
This meticulous assembly of the walls and roof was essential for a square, stable, and aesthetically pleasing chicken coop, ultimately providing a robust, safe, and comfortable environment for the chickens.
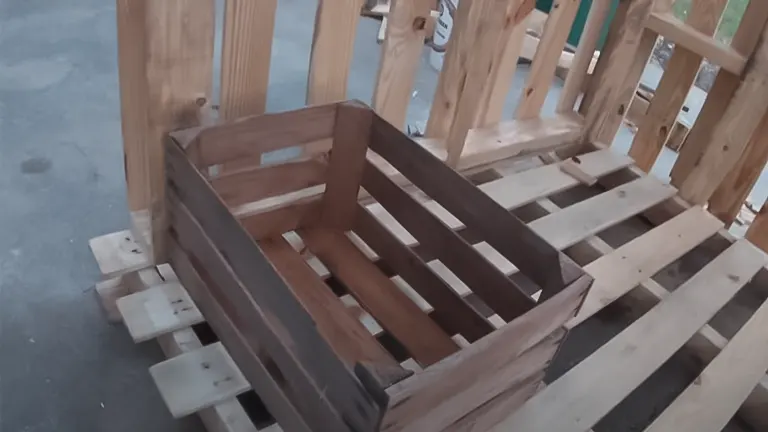
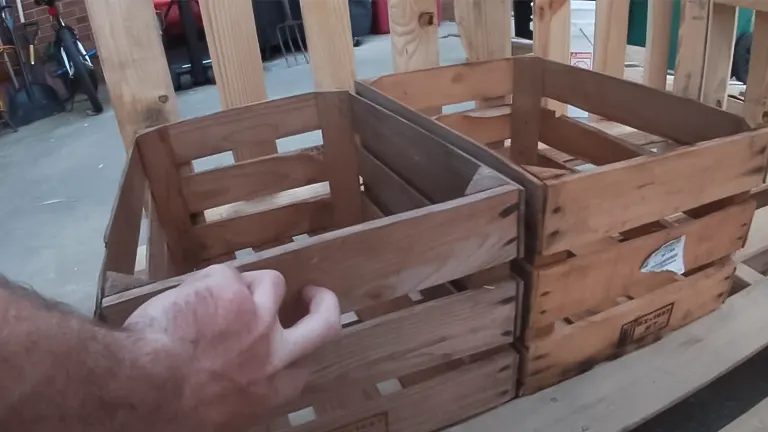
Step 5: Creating the Nesting Area and Installing the Perches
In constructing my chicken coop, the creation of the nesting area was pivotal, directly influencing the hens’ well-being and egg-laying. Using additional pallet wood, I fashioned nesting boxes that were eco-friendly and sustainable, each sized about 12 inches by 12 inches, a comfortable fit for most chicken breeds.
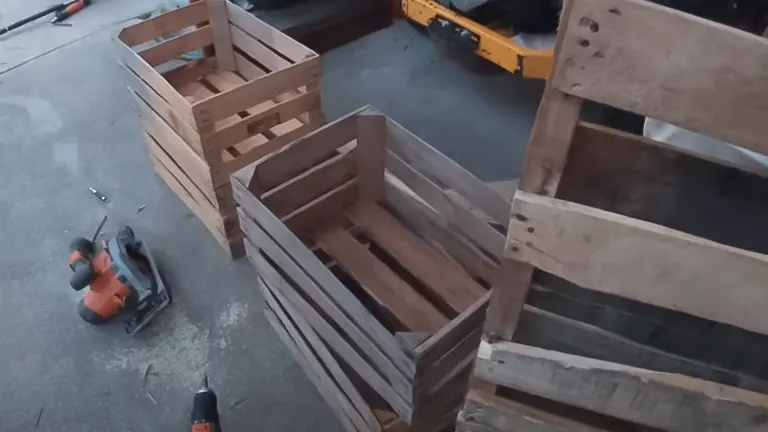
These boxes were strategically placed in a quiet, dimly lit corner of the coop for privacy, enhancing the hens’ sense of security, which is essential for effective egg-laying. Additionally, I designed the boxes for easy external access, simplifying the egg collection process without disturbing the hens.
Equally important were the perches, providing the chickens with a natural spot for rest and sleep. I installed these at a height that allowed easy roosting, made from smooth, sturdy materials to ensure the chickens’ comfort and safety.
The perches were spaced to avoid overcrowding and strategically positioned to prevent droppings from contaminating food or water sources. This careful placement of the perches and nesting boxes was designed not just for functionality but to cater to the chickens’ natural behaviors, ensuring a harmonious and stress-free environment within the coop.
Pros
- The primary cost was in the hardware. The pallets were free.
- Reusing materials felt rewarding and aligned with my eco-friendly goals.
- Building from scratch allowed me to tailor the coop to my space and needs.
Cons
- Dismantling and prepping the pallets took significant time.
- Basic carpentry skills are needed, which might be a barrier for some.
- Working with old wood and nails can be hazardous. Proper safety gear is a must.
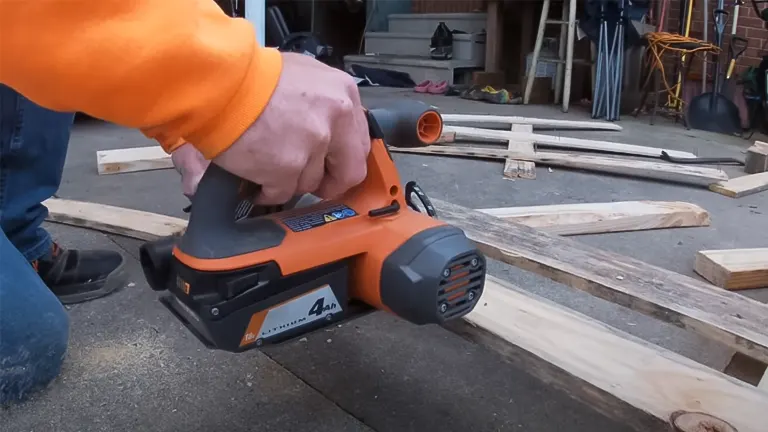
Disassembling Wood Pallets While Preserving the Timber
The task of dismantling wood pallets, while ensuring the wood remains intact and undamaged, can indeed pose a bit of a challenge. However, with the right approach and a bit of finesse, it’s certainly achievable. A popular method involves using a reciprocating saw, which is ideal for this purpose. The key here is to delicately saw through the nails that are holding the pallet slats in place.
It’s crucial to maintain a steady hand during this process to avoid cutting into the wood itself. Once the nails are cut, the slats can usually be pried off relatively easily using a crowbar or the back end of a hammer. This method is particularly effective for preserving the integrity of the wood.
Maintenance and Durability
Several months post-construction, the pallet-built chicken coop has proven its resilience and sturdiness. To maintain its integrity and safety, regular maintenance checks are essential. These inspections involve a thorough examination for any loose nails or weakened joints, which could pose a risk to the chickens or compromise the coop’s structural integrity.
Additionally, ensuring that the coop remains predator-proof is a continuous task. This includes checking for potential entry points or signs of attempted intrusion by predators. Regular maintenance not only prolongs the lifespan of the coop but also ensures a safe and secure environment for the chickens, safeguarding them against both the elements and potential predators.
Comparison to Pre-Built Coops
Building a chicken coop from pallets contrasts notably with purchasing pre-built options, each presenting unique pros and cons. Pre-built coops offer convenience and immediate use but often come at a higher cost and with limited customization options. Conversely, a DIY pallet coop allows for extensive personalization, enabling builders to tailor the coop to specific needs and preferences. This approach is ideal for those who relish hands-on projects and can invest the time, offering a rewarding experience and the satisfaction of creating a custom space for chickens at a potentially lower cost. However, it requires a time commitment and basic carpentry skills, important considerations when deciding between a self-built project and a ready-made solution.
Final Thoughts
Building a chicken coop from pallets was a challenging yet fulfilling project. It’s a fantastic option for those who are DIY-inclined and looking for an eco-friendly, cost-effective solution. The satisfaction of building something functional and sustainable for my feathered friends has been unparalleled. Remember, the key factors are the safety and comfort of your chickens, and ensuring you have the right tools and skills for the job.
Frequently Asked Questions
- Where can I find pallets suitable for building a chicken coop?
Look for pallets at local businesses, warehouses, or shipping docks. Ensure they are marked with “HT” for heat-treated and free from harmful chemicals. - How many pallets do I need to build a chicken coop?
The number of pallets depends on the size of the coop you plan to build. On average, a small to medium-sized coop might require 10-15 pallets. - What tools are necessary for constructing a coop from pallets?
Essential tools include a hammer, saw, drill, pry bar, nails, screws, and a measuring tape. - Do I need carpentry skills to build a coop from pallets?
Basic carpentry skills are helpful. Familiarity with using tools and following construction plans is advantageous. - How do I ensure the coop is predator-proof?
Use sturdy materials for the walls and floor, secure all doors and windows with latches, and consider adding wire mesh for additional security. - What should be the dimensions of a pallet-built chicken coop?
A general rule is to provide about 2-3 square feet per chicken inside the coop and about 8-10 square feet per chicken in the outdoor run. - How do I protect the pallet coop from weather elements?
Treat the wood with a non-toxic sealant, ensure proper roofing, and provide adequate ventilation while preventing water ingress. - Can I customize the design of my pallet chicken coop?
Absolutely! One of the benefits of building from pallets is the ability to customize the size, shape, and features of your coop. - What is the best way to clean and maintain a pallet chicken coop?
Regularly remove waste, refresh bedding, and check for any structural damages or exposed nails that need fixing. - Is it more cost-effective to build a coop from pallets than to buy a pre-made one?
Generally, yes. Using pallets can significantly reduce costs, especially since they can often be sourced for free or at a low cost. However, remember to account for the cost of additional materials like nails, screws, and tools.
We’d love to hear from you! Share your personal experiences and thoughts about building a chicken coop out of pallets in the comments section below. Your insights, tips, and stories could greatly benefit others embarking on this sustainable and creative endeavor. Whether you’re a seasoned DIYer or a beginner, your unique perspective can help fellow enthusiasts make informed and inspired decisions!

Edward Smith
Forestry AuthorWoodworking is about more than crafting; it's a harmonious connection with nature, mastering tools, and preserving our environment. I'm here to share my knowledge and experiences with you, forging a future where we can embrace wood's beauty and utility while safeguarding our forests' health and diversity.
3 comments
Looks like it's pretty cool to use pallets this way! Thanks
Samantha Rittenhouse
January 23, 2024 6:31 amYou have given information and I very thankful.


I build coop out of 100% recycled materials a 80" x 120" out of pallets. It has a slanted flat roof one side is 8' and the short side is 6' so I can stand inside. The floors and walls are made of pallets. The pallets came from a local garden center and transport center. So I was able to get 2x4's to use between the pallets to make the walls rigid and the roof rafters. The roof was used polycarbonate panels. I put used siding on the walls. The I used a louvered door from the side of the road.
Steve
January 23, 2024 1:37 pm