How to Replace the Gasket on a Wood Stove 2024
- October 2, 2023
- 0 comment
Replacing the gasket on your woodstove not only ensures safe operation but also maximizes its efficiency. If you’ve noticed a decrease in your woodstove’s performance or if the gasket looks frayed and worn out, it might be time for a replacement.
Here’s a detailed step-by-step guide to help you seamlessly replace the gasket on your wood stove.
Tools and Materials You’ll Need
- Replacement Gasket – The heart of this entire operation is the replacement gasket. Acting as the barrier between your woodstove and the external environment, the gasket ensures that smoke, harmful gases, and intense heat remain contained. Choosing the right size and type for your specific woodstove is paramount. Measurements should be made of the old gasket’s thickness and diameter, and always refer to the stove’s manual or manufacturer’s guidelines. With various shapes like flat or round, the replacement gasket’s type needs to be spot on.
- Stove Adhesive or Gasket Cement – This isn’t your everyday glue. Specially designed to secure the gasket in its channel, this adhesive can withstand the high temperatures that woodstoves can generate. Proper application is crucial—always apply in a well-ventilated area, and a little often goes a long way. Too much can result in an improper seal or a messy overflow. This adhesive ensures that once the gasket is in place, it stays there, come hell or high water.
- Screwdriver or Wrench – Every woodstove has its unique quirks and designs, and this is where the trusty screwdriver or wrench comes into play. These tools are pivotal in detaching and later reattaching the stove’s door. Depending on whether your stove uses screws or bolts, you’ll opt for one over the other. Always ensure they’re the right fit to prevent damage.
- Utility Knife or Scissors – Precision and care are the names of the game here. The utility knife or scissors serve a dual purpose: trimming the new gasket to the perfect length and aiding in the old gasket’s removal if stubbornly adhered. Safety first—always make sure to cut away from your body and keep these sharp tools securely stored away from curious hands.
- Wire Brush – The unsung hero of the operation, the wire brush ensures that your new gasket has a clean and receptive surface to adhere to. Old adhesive residues, corrosion, or any other debris need to be thoroughly scrubbed away. This step is pivotal; the new adhesive needs a clean slate to work effectively, ensuring the gasket’s longevity and effectiveness.
- Gloves – Safety can’t be emphasized enough, and gloves are your first line of defense. From protecting against potential sharp edges, any lingering heat, or even the caustic remnants of old adhesive, gloves ensure your hands remain unscathed. Opt for heavy-duty work gloves, preferably those that are resistant to both heat and chemicals.
- Cleaning Rags or Paper Towels – Every craftsman needs to keep their workspace tidy, and that’s where cleaning rags or paper towels come in. Whether it’s wiping away residue, old adhesive, or even cleaning up a small spill of the new adhesive, these are indispensable.
- A Pro Tip: a damp rag can be a lifesaver for quick cleanups.
- A Well-Ventilated Workspace – Last but not least, your workspace’s environment can’t be overlooked. The fumes from the adhesive, while crucial for the gasket replacement, can be harmful if inhaled in large quantities. Whether you’re working indoors, where windows should be opened, or outdoors in an open garage, ensuring proper ventilation is crucial for your safety.
1. Safety First
Embarking on any maintenance or repair task requires a clear understanding of safety precautions, and replacing the gasket on a woodstove is no exception.
First and foremost, patience is vital. Your woodstove must be completely cool to the touch before you commence any work. Live embers, however small or insignificant they may seem, pose a risk. Not only can they cause burns, but they can ignite materials in your workspace, making the seemingly innocuous task of gasket replacement a potential hazard. Waiting for the stove to cool down not only ensures your safety but also makes the replacement process more manageable.
Furthermore, protective gloves are a must. While they shield your hands from potential burns, they also serve another essential function. Woodstoves, especially older models, may have sharp or rough edges, or even tiny splinters of metal. A quality pair of gloves can prevent painful cuts or scratches.
In essence, starting with safety in mind sets the tone for the entire process. By ensuring the stove is cold and your hands are adequately protected, you’re setting the stage for a smooth, efficient, and safe gasket replacement. Always remember, no shortcut is worth compromising safety.
2. Open the Stove Door
Access is everything when working on a repair, and in the context of a woodstove, this means opening up its very heart: the door.
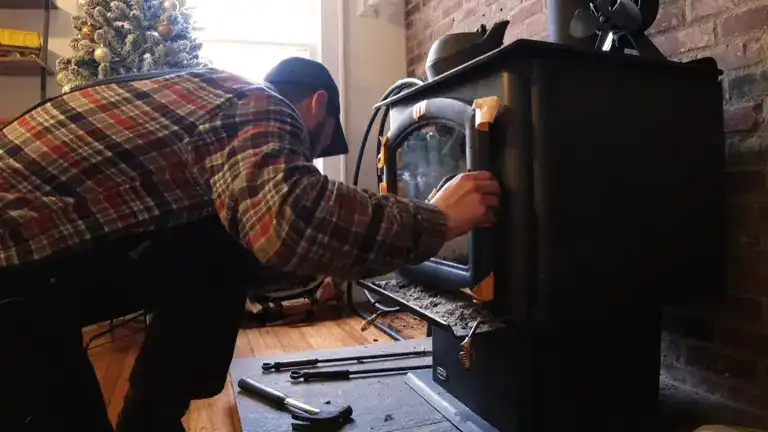
To begin, identify the fastening mechanism of your stove door. Depending on your woodstove’s design and age, this could involve screws, bolts, or even latches. Typically, screws or bolts will be located at the hinge of the door or in the corners, securing the door to the stove’s body.
Arm yourself with either a screwdriver or a wrench, based on your observations. When selecting the appropriate tool, ensure a snug fit. Using a tool that’s too large or too small can strip the fasteners, making them difficult to remove and potentially damaging the stove.
Once equipped, gently and steadily loosen the fasteners. It’s advisable to maintain support on the door as you’re doing this, especially when working on the last couple of fasteners, to prevent the door from suddenly falling or swinging uncontrollably.
With the fasteners removed, carefully lift or swing the door open, depending on its design. Some doors might be heavier than they appear, so always be prepared for the weight. By removing the door, you’ve now granted yourself unobstructed access to the gasket, facilitating a more comfortable and more efficient replacement process.
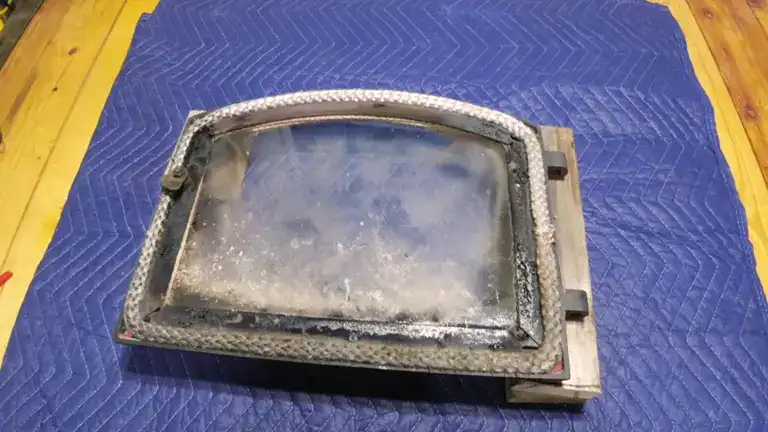
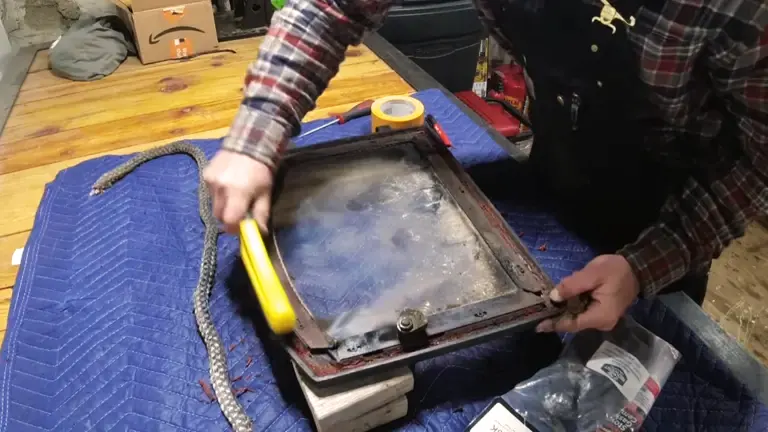
3. Remove the Old Gasket
The removal of the old gasket is a pivotal step in ensuring your woodstove operates efficiently and safely. Over time, gaskets can deteriorate and lose their sealing capability, making their replacement vital.
Initial Extraction
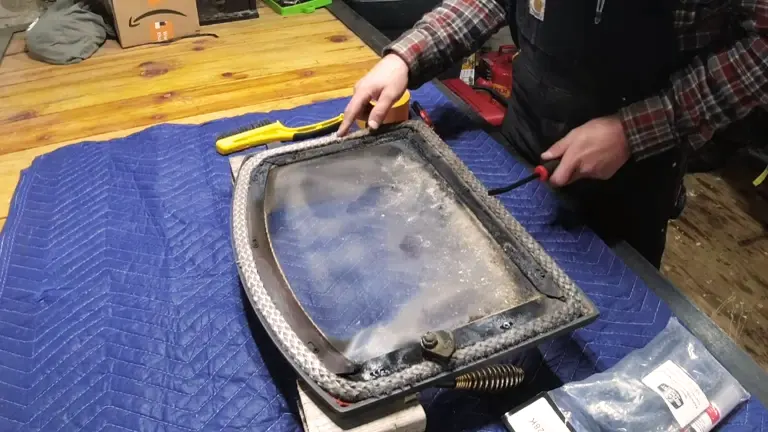
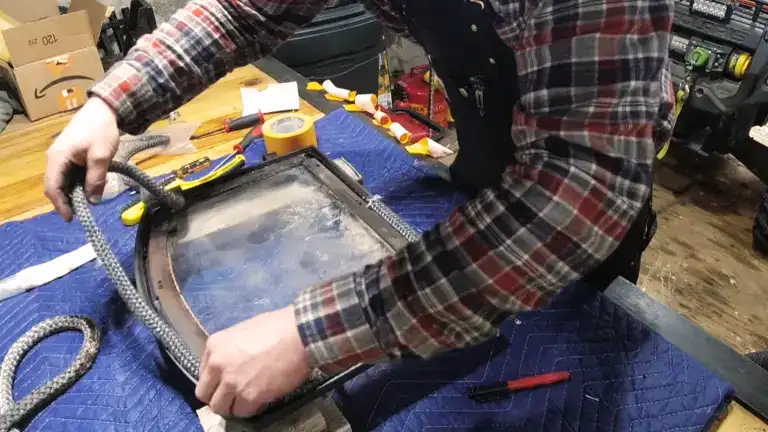
Start by identifying an end or a loose section of the gasket. Using your fingers or a pair of pliers for added grip, gently begin pulling the gasket out of its groove. The gasket should typically come out in a continuous strand, but depending on its condition, it might break apart in places.
Dealing with Adhesive
Over the years, the gasket might bond more firmly to the stove due to the adhesive used during its initial placement. If you find that the gasket is stubbornly sticking and not coming off easily, it’s time for the utility knife. Carefully insert the blade beneath the gasket, taking care not to scratch the surface of the stove or the groove. With gentle upward pressure, slice through the glued sections, freeing the gasket. Remember always to cut away from yourself to prevent any accidental injuries.
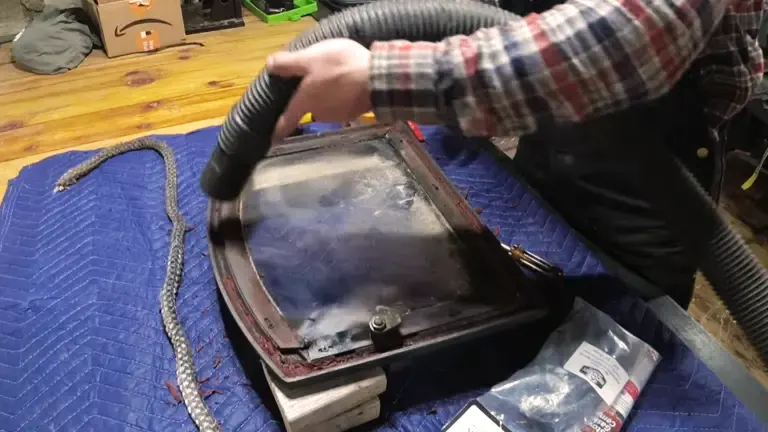
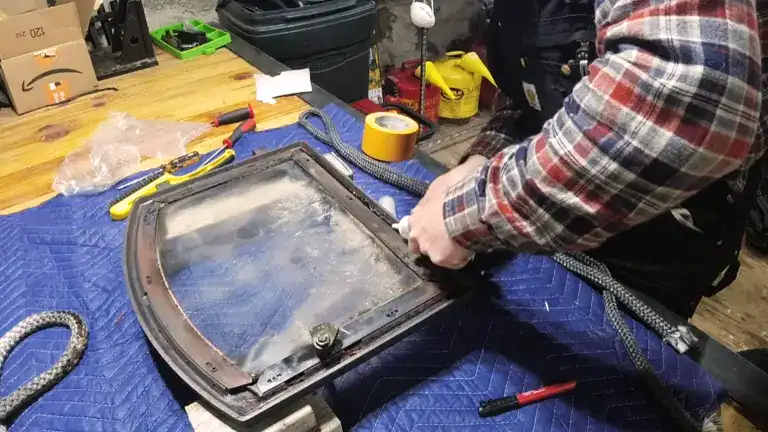
Thorough Cleanup
Once the old gasket has been removed, remnants of the former adhesive might still line the groove. This leftover residue can hinder the correct placement of the new gasket, potentially affecting the bond with the fresh adhesive. Start by using a wire brush to rigorously scrub the groove, dislodging the stubborn adhesive. The brush’s bristles are adept at reaching into every nook, ensuring a comprehensive cleanup. For particularly tenacious spots of adhesive, a flat-head screwdriver can be gently employed to scrape off the residue, but caution should be exercised to avoid damaging the groove. After all the scraping and brushing, it’s essential to wipe the area with cleaning rags or paper towels, removing any debris or dust, and preparing the surface for the new gasket.
Prepping for the New Gasket
The success of your new gasket’s placement rests largely on the cleanliness of the groove. It’s imperative that no traces of the old adhesive or gasket debris remain. A pristine groove ensures that the new adhesive will bond effectively, creating an airtight seal when the stove is in operation.
4. Measure and Cut Your New Gasket
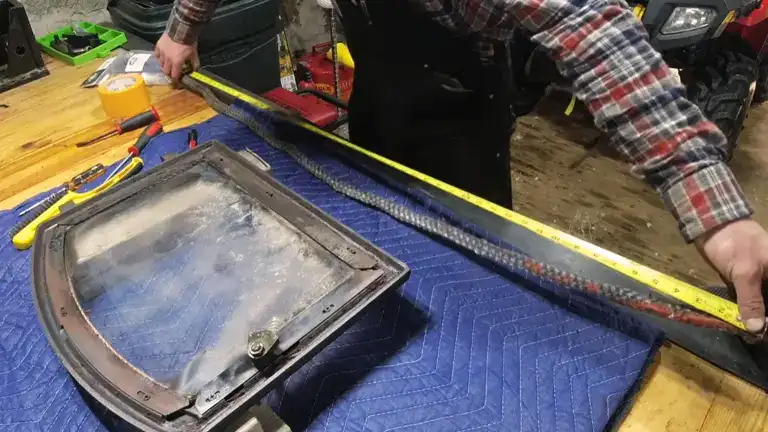
Achieving the perfect fit for your new gasket is paramount. A well-fitted gasket ensures a tight seal, preventing heat loss, and safeguarding against any potential leaks. Here’s how to make certain your new gasket measures up perfectly:
- Lay It Out: Start by unrolling your new gasket material on a flat, clean surface. This not only helps in taking accurate measurements but also allows you to inspect the gasket for any potential defects or inconsistencies.
- Compare with the Groove: Extend the gasket material alongside the groove where the old one was seated. This direct comparison is the most reliable way to gauge the required length. For doors with rounded corners, ensure you account for the extra material you’ll need to navigate these curves.
- Precision is Key: Measure the length carefully using a measuring tape or ruler. Remember, it’s better to have a slightly longer gasket that you can trim down later, rather than one that’s too short. When measuring, take note of where you’ll need to make your cut, marking the spot with a pencil or chalk for clarity.
- Making the Cut: Depending on your preference and the thickness of the gasket material, use either a utility knife or scissors. If using a utility knife, place the gasket on a cutting board or another protective surface to avoid any damage to underlying surfaces. Ensure your cuts are clean and straight. Scissors might be more appropriate for thinner gasket materials, offering a quick and easy snip.
- Double-Check: Before proceeding, align your freshly cut gasket with the stove door’s groove once more. This double-check ensures that your measurements are accurate and that the gasket will sit perfectly.
5. Apply the Adhesive
Securing the new gasket requires an adhesive specifically designed for the high temperatures and conditions inside a wood stove. Properly applying this adhesive is crucial to ensure the gasket remains in place, providing an effective seal. Here’s how to achieve that perfect bond:
- Preparation: Before starting, ensure the groove is clean and free from any old adhesive or debris. Any leftover residue can interfere with the bonding process.
- Follow Manufacturer’s Instructions: Different stove adhesives or gasket cements might have specific application methods. Always read the manufacturer’s guidelines on the product packaging. This will provide insights into the quantity to use, drying time, and any safety precautions.
- Steady Application: Using the adhesive’s nozzle or an applicator, apply a consistent bead of the adhesive inside the groove where the gasket will sit. Aim for a continuous, even line, ensuring the entire groove has a thin layer of adhesive.
- Avoid Over-application: While you might be tempted to use a generous amount of adhesive to ensure a tight fit, less is often more in this scenario. Using too much adhesive can cause it to ooze out once the gasket is pressed into place. Not only can this create a mess, but excessive adhesive can also interfere with the stove door’s seal. If you do happen to apply too much, quickly wipe away the excess with a rag before it sets.
- Allow for Tackiness: Depending on the adhesive’s brand and type, it might be beneficial to let it become slightly tacky before placing the gasket. This can often improve the bond. Again, refer to the manufacturer’s instructions for any specific guidance on this.
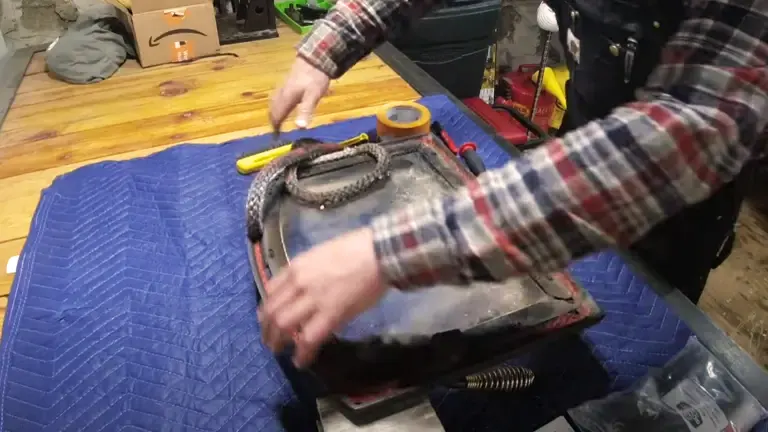
6. Place the New Gasket
After preparing the surface with adhesive, the next step is the careful placement of the new gasket. This phase is crucial, as it determines the efficiency and safety of the seal your stove will have. Here’s how to do it right:
- Begin at One End: Holding the gasket at one end, align it with the beginning of the adhesive-filled groove. This will be your starting point, and from here, you’ll work your way around the entire groove.
- Gentle Press: As you lay the gasket into the groove, apply gentle pressure with your fingers to ensure it embeds into the adhesive. The goal is to have the gasket sit snugly and evenly throughout its length. The adhesive should grip the gasket but not ooze out excessively.
- Navigate Curves with Care: If your woodstove door has rounded corners or any unique contours, take extra care when laying the gasket in these areas. You might need to apply slight tension to the gasket to ensure it conforms to the shape without bunching up or leaving gaps.
- Adhesive-Backed Gaskets: Some gaskets come with a pre-applied adhesive layer, protected by a peel-off backing. If you’re using such a gasket, remember to remove this protective layer as you go. This will expose the sticky layer, allowing it to bond with the groove and the adhesive you’ve applied.
- Check for Consistency: Once the gasket is fully in place, inspect the entire length to ensure it’s consistently seated in the groove. There shouldn’t be any areas where the gasket is raised, twisted, or has gaps.
- Trim Excess, If Needed: If you find that you have a bit of extra gasket material once you reach the end, use your utility knife or scissors to trim it off. It’s essential for the ends to meet without significant overlap to ensure a proper seal.
7. Reattach the Door
The culmination of your gasket replacement process involves putting the woodstove door back in its rightful place. Proper reattachment not only ensures safety but also guarantees that the stove operates at its optimum efficiency. Here’s how to do it seamlessly:
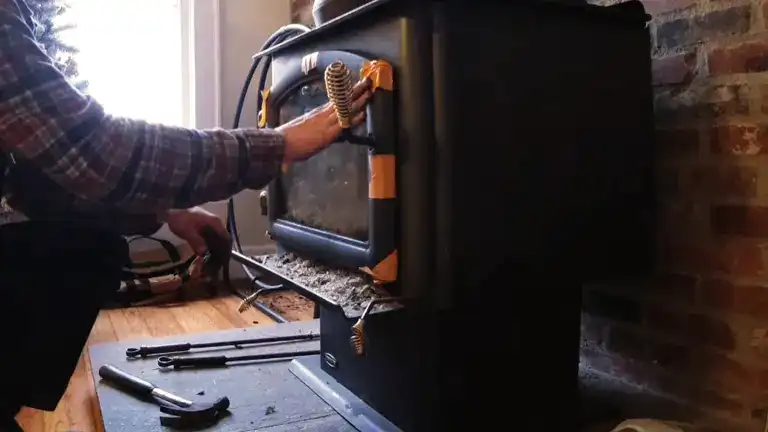
- Positioning the Door: Hold the door up and align it with the hinges or mounting points on the wood stove. Depending on the weight and size of the door, you might need assistance to ensure it’s held steady during this step. If the door is hefty, consider using a support like a wooden block or have a second person assist you.
- Start with Initial Fasteners: Before fully tightening all screws or bolts, it’s wise to start by inserting and lightly fastening one or two. This holds the door in place and makes it easier to align other screws or bolts without the door shifting.
- Tighten Gradually: Using the screwdriver or wrench, methodically tighten each screw or bolt. Instead of fully tightening each one as you go, aim to snug them down gradually in a crisscross pattern. This ensures even pressure and alignment, preventing potential warping or misalignment of the door.
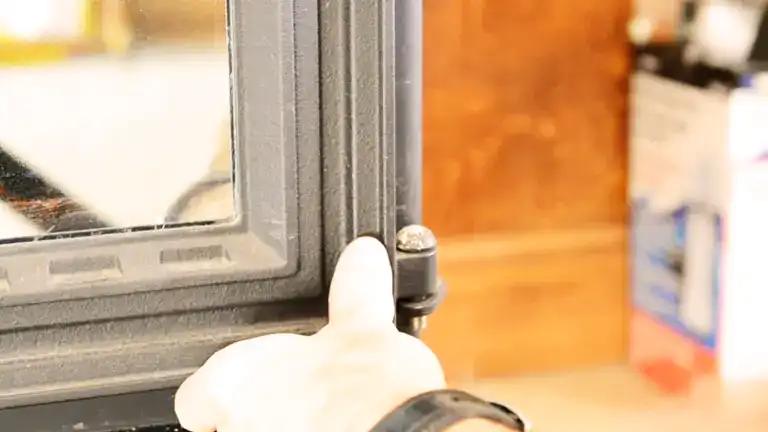
- Inspect the Seal: With all fasteners securely tightened, close the stove door. Examine the seal formed by the new gasket. It should appear consistent, with no visible gaps. If you notice any areas where the gasket is compressed too thinly or appears bulging, it might require minor adjustments.
- Test the Door: Open and close the door several times to ensure smooth operation. The door should close securely, latching if necessary, without requiring excessive force. This is a good indication that the gasket is seated well and is effectively sealing the door.
- Final Safety Check: Ensure all fasteners are tightly secured, and there are no loose components. This final check is vital for your safety and the efficient operation of the stove.
8. Let it Dry
After the meticulous process of replacing the gasket and ensuring everything fits perfectly, the final and perhaps one of the most critical steps is exercising patience. The adhesive that bonds the gasket to the stove requires time to set, and here’s what you should know about this drying period:
- Understanding the Cure Time: The adhesive or gasket cement used for woodstove gaskets is formulated to withstand high temperatures. For it to achieve its maximum strength and heat-resistant properties, it has to undergo a curing process. This process involves the adhesive setting and hardening, forming a robust bond that can endure the intense heat produced by the stove.
- Avoid the Temptation: Especially during colder periods, the temptation to fire up the stove shortly after the replacement can be strong. However, igniting the stove prematurely can interfere with the adhesive’s curing process. It might not bond as strongly as it should, leading to potential leaks or a shortened gasket lifespan.
- 24-Hour Rule: A general rule of thumb is to allow the adhesive to cure for at least 24 hours. Depending on the specific adhesive brand and the environmental conditions (like humidity and temperature), the exact time might vary. Always refer to the manufacturer’s guidelines provided on the adhesive packaging for precise instructions.
- Maintain Proper Ventilation: While the adhesive is curing, it might release fumes. It’s essential to ensure the area remains well-ventilated during this period. This not only accelerates the drying process but also maintains a safe environment, free from any potential inhalation hazards.
- Inspect After Drying: Once the 24-hour period (or manufacturer-recommended time) has elapsed, inspect the gasket. It should feel firm to the touch, with no tacky sections. This indicates that the adhesive has been set correctly.
Conclusion
Maintaining the efficiency and safety of your woodstove is paramount. Regularly inspecting and replacing worn-out parts, such as the gasket, can save you money in the long run and ensure your stove operates at its best. So, with these steps in hand, you are all set to keep your woodstove in top-notch condition!
Feel free to explore our other articles to dive deeper into the world of woodstoves.
- How to Choose the Right Wood Cooking Stoves for Your Needs
- Best Camping Wood Stoves 2023
- How to Keep a Wood Stove Burning All Night 2023
- Best Wood Stove Thermometer on Amazon 2023
- When to Replace Your Wood Stove 2023
- Choosing a Wood Stove 2023
- Best Small Wood Stoves on Amazon 2023
- How to Keep Wood Stove Glass from Getting Black 2023
- How to Remove Creosote from a Wood Stove 2023
- How to Clean and Maintain Your Wood Stove 2023
- Wood Stove Guide 2023
- Wood Stove vs. Pellet Stove 2023
- Common Wood Stove Problems: Solved 2023
- How to Maximize Your Wood Stove Uses 2023
- Wood Stove Ash For Garden in 2023
- Wood Stoves for Different Home Size 2023
FAQs
- Why do woodstoves have gaskets?
Gaskets create an airtight seal that ensures the stove operates efficiently. They ensure that air only enters the stove through the designed vents, allowing for precise combustion control. - How can I tell if my woodstove gasket needs replacing?
Over time, gaskets can become compressed, brittle, or frayed. If you notice excessive smoke leakage or decreased stove efficiency, it may be time to inspect and potentially replace your gasket. - What materials are gasket replacements typically made of?
Most gaskets for woodstoves are made from fiberglass or graphite-impregnated rope. They are designed to withstand high temperatures and maintain an airtight seal. - Can I use any adhesive for attaching the new gasket?
No. It’s crucial to use a high-temperature adhesive specifically designed for woodstove gaskets. Regular adhesives can emit harmful fumes or fail under high temperatures. - Is there a ‘break-in’ period for a new gasket?
After installing a new gasket, it’s recommended to have several smaller fires initially. This helps the adhesive cure properly and ensures a long-lasting seal. - Do all woodstoves have the same size gasket?
No, gaskets come in various sizes and profiles. Always measure and check your stove’s specifications before purchasing a replacement. - Can I replace a woodstove gasket on my own?
Yes, with the right tools and materials, replacing a gasket is a DIY-friendly project. However, if you’re unsure, it’s always best to consult with a professional. - How often should I check my gasket’s condition?
It’s good practice to inspect your gasket at least once a year, preferably before the heating season begins. - How do I measure and cut the gasket accurately?
Measure the groove’s length where the gasket will sit, ensuring you allow an extra inch for a snug fit. Always use a sharp pair of scissors or a utility knife for a clean cut. - Is there an optimal time of year to replace my woodstove gasket?
Replacing a gasket during warmer months ensures your stove is ready for the cold season. It also allows any adhesive fumes to dissipate before the stove is used heavily.
And there we have it, a wrap on How to Replace the Gasket on a Woodstove 2024! We truly hope this guide brought some warmth and clarity to your woodstove maintenance journey. Now, we’d absolutely love to hear from you! Whether you’ve got a funny anecdote, a handy tip, or even a tiny question, your feedback lights up our community. So why not drop a comment below? Let’s create a cozy, chit-chat corner right here. After all, the best part of sharing is hearing back from friends like you. Can’t wait to see what you have to say!

David Murray
Forestry AuthorI'm David Murry, a forestry equipment specialist with a focus on chainsaw operation. With over 13 years of experience, I've honed my skills in operating and maintaining a wide range of machinery, from chainsaws to log splitters. My passion for the outdoors and commitment to sustainable forestry drive my work, which emphasizes safety, efficiency, and staying updated with industry advancements. Additionally, I'm dedicated to sharing my expertise and promoting environmental awareness within the forestry community.


Leave your comment