How to Replace Wood Stove Fire Brick 2024
- October 3, 2023
- 0 comment
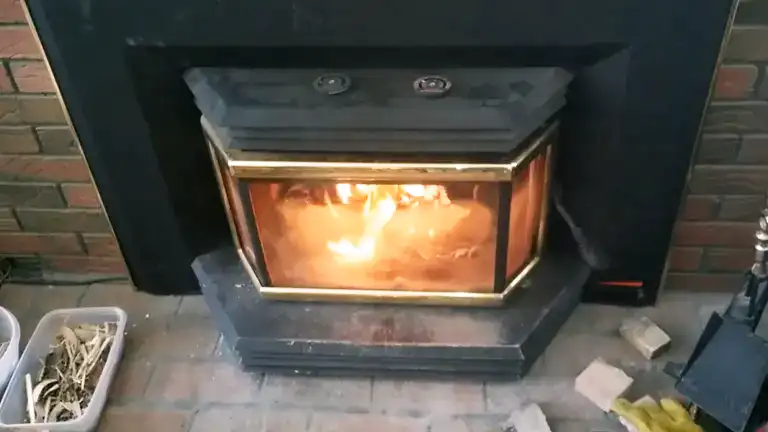
The gentle crackle of a wood stove brings warmth and nostalgia to cold evenings. But as seasons change, the hidden fire bricks inside your stove may wear out, compromising both safety and ambiance. Fear not! Reviving that comforting hearth is simpler than you might think. Let’s delve into the steps to refresh and replace those essential bricks, ensuring many more cozy nights by the fire.
Step by Step on How to Replace Wood Stove Fire Brick:
- Understanding the Importance of Fire Bricks
- Gather Your Supplies
- Safety First!
- Remove the Old Bricks
- Clean the Area
- Measure and Fit the New Brick
- Install the New Brick
- Inspect Your Work
- Maintenance & Care
- Dispose of Old Bricks Properly
Let’s delve into the steps to refresh and replace those essential bricks, ensuring many more cozy nights by the fire.
1. Understanding the Importance of Fire Bricks
In the world of wood stoves, fire bricks play a quiet yet essential role. Here’s a breakdown of their job, in simpler terms.
- Heat Shield: Fire bricks sit between the fire and the stove’s metal interior. Their job? To protect the metal from getting too hot and wearing out. It’s like a barrier that keeps the intense heat of the fire away from the stove’s walls, ensuring it doesn’t get damaged.
- Warmth Holder: These bricks have a knack for holding onto heat. When the fire burns, the bricks soak up some of that warmth. Even after the fire dies down a bit, those bricks continue to release heat, helping keep the room warm without a roaring fire.
- Stove Saver: Thanks to fire bricks, the stove’s lifespan is extended. They prevent the metal parts from warping or getting damaged from the heat. It’s a bit like how using coasters can help your wooden tables avoid rings and stains – a small effort that pays off in the long run.
So, in the grand scheme of things, fire bricks might not be the star of the show, but they’re indispensable backstage heroes, ensuring every performance by your wood stove is safe, efficient, and cozy.
2. Gather Your Supplies

Before you roll up your sleeves and get to work, it’s essential to have everything you need within arm’s reach. Here’s your checklist for a smooth fire brick replacement process:
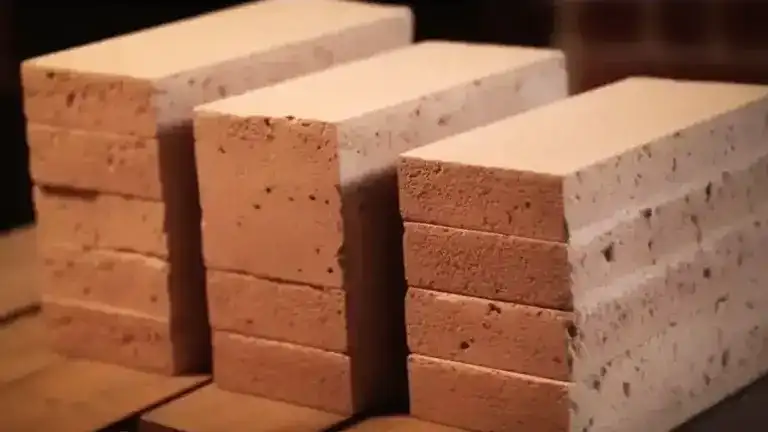
The Right Bricks
Make sure you have replacement fire bricks that fit your stove. They should either match your stove’s specific model or be a generic size that suits most stoves. Remember, it’s like finding the right puzzle piece—it needs to fit just right!
Looking for the perfect Fire Bricks for your Wood Stove? Check it out Here!
Tools for the Job
Using a chisel or screwdriver can simplify the removal of old bricks. If a brick needs custom fitting, a circular saw is useful, though caution is advised due to its power. Alternatively, pairing a hammer with a chisel can help in breaking or modifying bricks.
Looking for the perfect circular saw? Explore our article here! 10 Best Circular Saw Blades of 2023
Safety First
Wear protective gloves to keep your hands safe from sharp or rough edges, and eyewear to shield your eyes from any dust or debris. Safety should always be a priority!
Stay protected from sharp and rough edges – wear safety gloves! Discover more Here!
Cleanup Crew
You’ll undoubtedly encounter dust, ash, and small debris. Have a brush on hand for a quick sweep or a vacuum cleaner for a more thorough cleanup.
To easily sweep the dust and ash buy a Vacuum Cleaner now! Check it out Here!
Measuring Up
A measuring tape is crucial. You’ll need it to ensure the replacement bricks are the right size, and if any adjustments need to be made, accurate measurements will be your best guide.
Looking for the perfect Measuring Tape for your accurate measurements? Check it out Here!
With all these tools and materials ready, you’re set to tackle the job efficiently and, more importantly, safely. Onwards to a revitalized wood stove!
3. Safety First!
When diving into the task of replacing fire bricks, safety isn’t just a suggestion—it’s a requirement. Here are some safety steps to keep in mind:
- Cooling Period: If you’ve used the stove recently, give it plenty of time to cool down. Touch the stove gently to ensure there’s no residual warmth. It’s important to work on a cold stove to prevent any burns or injuries.
- Tidy Up: Look around your stove and make sure there aren’t any flammable items like papers, curtains, or any household products. A clear workspace not only ensures safety but also gives you ample room to maneuver and work comfortably.
- Dress for the Task: Think of protective gloves and eyewear as your armor. Gloves protect your hands from sharp edges, hot surfaces, and splinters. Eyewear, on the other hand, is a shield against any flying debris or ash. They’re not just accessories—they’re necessities.
Remember, the goal is to revive your wood stove. But doing it safely ensures you can enjoy its warmth without any worries. Always put safety first, and the task becomes smoother and hassle-free.
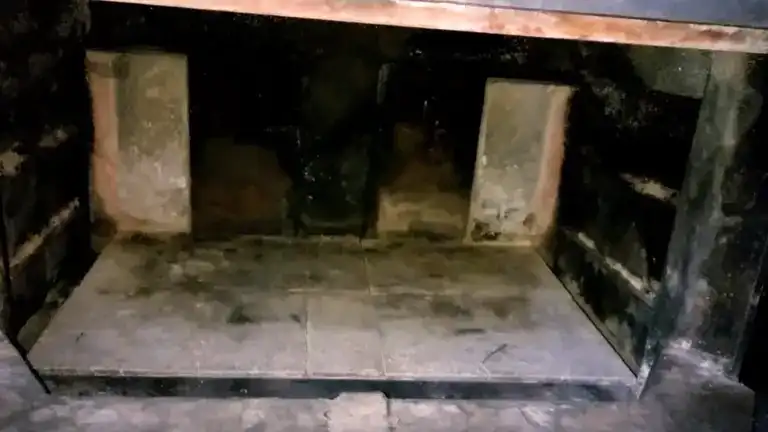
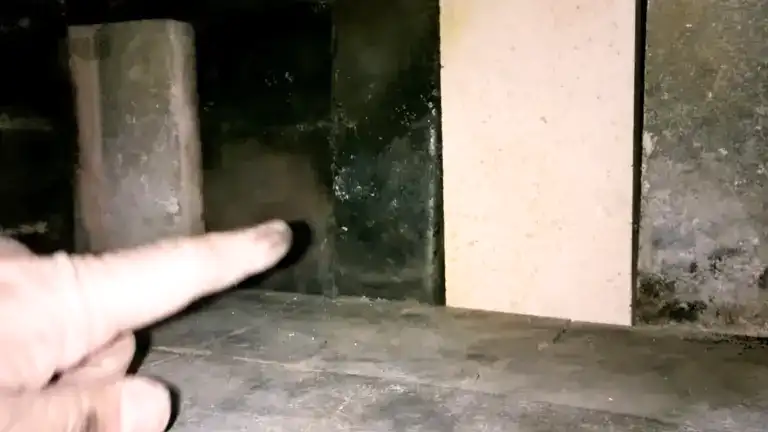
4. Remove the Old Bricks
When the time comes to swap out those old fire bricks, it’s crucial to do so with care. Here’s a step-by-step approach to ensure the process is effective and protects your wood stove from unnecessary damage:
- Accessing the Bricks: Begin by opening the stove door. This gives you direct access to the fire bricks lining the inside. Make sure you have adequate lighting to clearly see the bricks and their positions.
- Gentle Persuasion: Identify the damaged brick you want to remove. With your chisel and hammer, softly tap on the brick. Your goal here isn’t to break the brick but to gently loosen it from its setting. Think of it like trying to get a cookie out of a tight jar without breaking it.
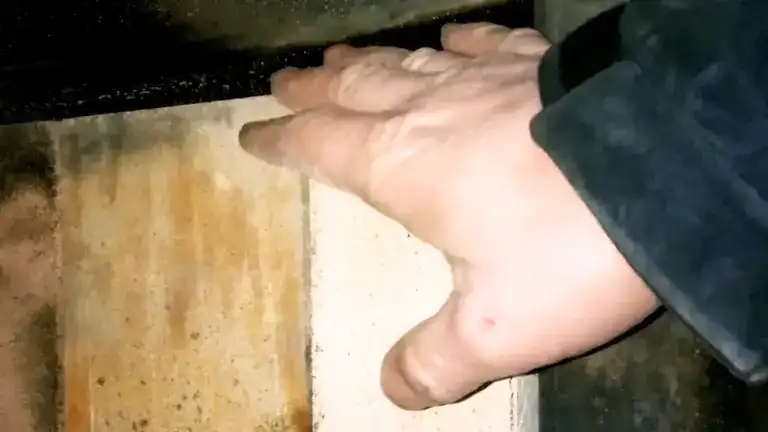
- Lifting It Out: Once the brick has been sufficiently loosened, use your gloved hands to lift it out. Sometimes, the brick might be a bit stubborn—just like that tricky jar lid that refuses to budge. If that happens, position your chisel on one side of the brick and tap lightly with the hammer, creating a wedge action. This should give you better leverage to lift the brick.
Take your time and be patient. While it might seem straightforward, being cautious ensures you remove the bricks without causing additional damage to the surrounding ones or the stove itself.
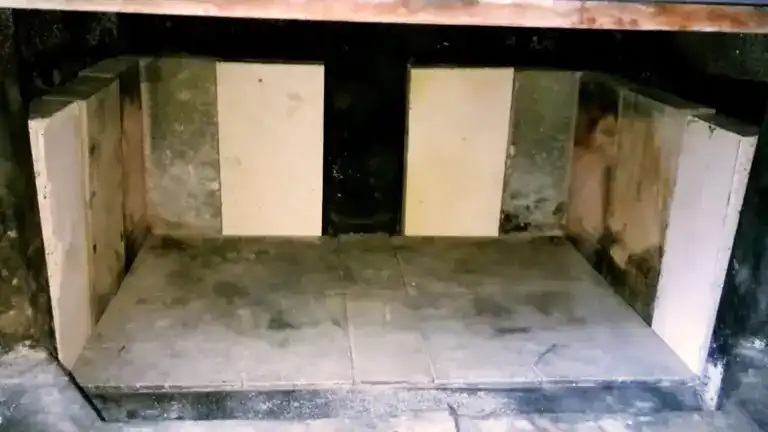
5. Clean the Area
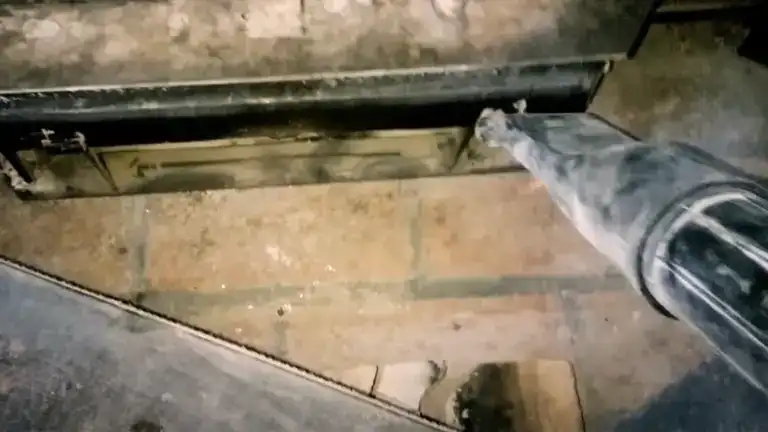
A fresh start requires a clean slate. After removing the old bricks, it’s imperative to tidy up the space they once occupied. Here’s how to ensure a clean foundation for the new bricks:
- Clear Out the Debris: Over time, ashes, bits of old bricks, and other tiny fragments accumulate in the stove. Begin by brushing away these loose particles. A simple hand brush can effectively sweep away the bulk of this debris.
- Deep Cleaning: While a brush can get rid of most residues, for a thorough cleaning, a vacuum cleaner is your best ally. Use the hose attachment to suck up even the finest ash particles, ensuring a truly clean base. It’s like using a dustpan after sweeping—it captures every last bit.
- Inspect the Area: Once cleaned, give the area a quick inspection. Make sure there are no lingering pieces that might obstruct the placement of the new brick. It’s all about setting the stage for a seamless replacement.
By ensuring a clean and debris-free zone, you’re not just facilitating easier placement of the new fire bricks, but you’re also optimizing the environment inside the stove for better heat efficiency and safety.
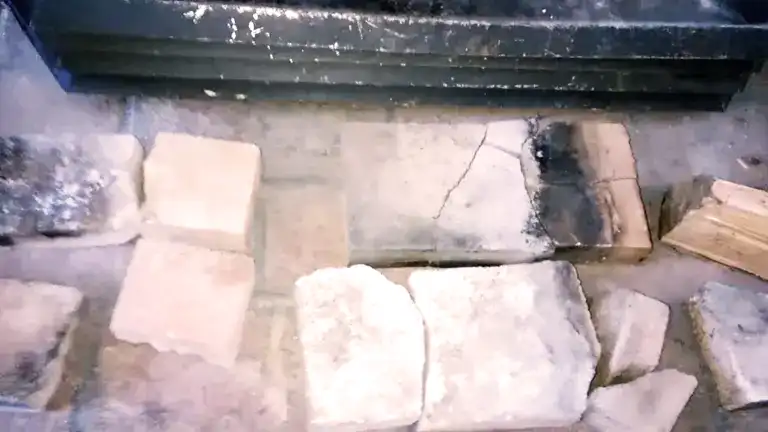
6. Measure and Fit the New Brick
Laying down the new fire bricks might seem straightforward, but ensuring a precise fit is crucial for the longevity and efficiency of your wood stove. Here’s a quick guide to getting it right:
- Re-check the Dimensions: Even if you measured the space before buying the bricks, it’s wise to double-check now that the old bricks are out. Using your measuring tape, get the exact length, breadth, and depth of the space. It’s like measuring twice before cutting—ensuring perfection in your fit.
- Test the Waters (or Bricks, in this case): Before permanently placing the brick, do a test-fit. Gently lay the new brick into the space without pressing it in. This helps you ensure two things: that the brick fits comfortably within the dimensions, and that it sits level with the surrounding bricks.
If the brick doesn’t quite fit or feels a bit too snug, you might need to do minor adjustments. Remember, a snug fit is good, but forcing a brick that’s too large for the space can cause stress on the surrounding bricks or the stove’s structure.
7. Install the New Brick
Now comes the fulfilling part – giving your wood stove its fresh new brick. Installing it properly is key to ensuring your stove operates efficiently and safely. Here’s how:
- Slide It In: With the space clean and measurements double-checked, take the new brick and carefully slide it into its designated position. Ensure it aligns well with any adjacent bricks and sits flush against the stove’s interior.
- Settle It Down: Once in place, gently press down on the brick, ensuring it’s seated evenly and securely. The idea is to make sure the brick sits snugly without gaps or wobbles, much like setting a book into a tight bookshelf space.
Take a moment to inspect the brick once more, ensuring it’s aligned properly and sits flush with the surrounding bricks. Proper installation means not only a better-looking stove interior but also optimal heat protection and distribution for those cozy nights ahead.
8. Inspect Your Work
After the installation, it’s essential to take a step back and review what you’ve done. This final check ensures longevity, safety, and efficiency. Here’s what to look for:
- Flush Fitting: The newly installed brick should sit perfectly level with the adjacent bricks. There shouldn’t be any raised edges or recesses. It’s like piecing together a jigsaw puzzle; every piece should fit seamlessly with its neighbors.
- Stability Check: Gently press down on the new brick. There shouldn’t be any wobble or significant movement. It should feel as firm and steady as the older bricks around it.
- Consistent Gaps: While the brick should fit snugly, ensure there aren’t any unusually large gaps or spaces between bricks. These could compromise the stove’s efficiency.
9. Maintenance & Care
Like any cherished household item, your wood stove thrives with regular care and attention. By maintaining it, you’re not only ensuring safety but also prolonging its service to you. Here’s how to show some love to your stove and its bricks:
- Mind the Load: While it’s tempting to stack up logs for a roaring fire, overloading your stove can do more harm than good. Excessive wood can produce intense heat, which may lead to the bricks deteriorating faster than usual. Think of it as a marathon, not a sprint—steady, consistent warmth is the goal.
- Keep It Clean: Regular cleaning not only makes your stove look good but also enhances its efficiency. Ash and soot can accumulate over time, so ensure you clean the stove, especially the bricks. A simple brush can help sweep away most of the debris. Remember, a clean stove is a happy stove.
- Routine Check-Ups: Every now and then, especially after cleaning, inspect the bricks for any signs of wear or damage. Look out for cracks, chips, or any brick that seems loose. Catching issues early can help in timely replacements, preventing potential larger problems down the road.
Curious about handling your wood stove ash? Find out here! Best Uses for Wood Stove Ash 2023
10. Dispose of Old Bricks Properly
While out with the old and in with the new is the general theme when replacing bricks, it’s crucial to ensure that the “out” part is handled responsibly. Here’s how to manage the disposal of old fire bricks:
- Local Regulations: Before tossing them into the bin, check with your local municipality or waste disposal service. Some regions may have specific guidelines or facilities for disposing of fire bricks, given their composition and potential for reuse.
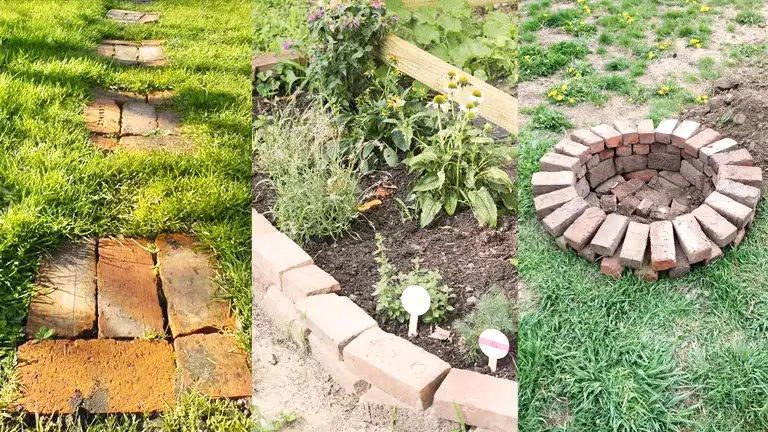
- Repurpose and Reuse: Don’t be too quick to consider old fire bricks as waste. With a bit of creativity, they can be repurposed:
- Garden Stepping Stones: They can be laid down in gardens as paths or stepping stones.
- Landscaping: Use them for borders in flower beds or as part of a rock garden.
- DIY Projects: Think of creating outdoor fire pits or barbecue bases. Their heat-resistant properties come in handy!
- Recycle: Some recycling centers may accept fire bricks. It’s always worth a call to see if they can be processed and used in other applications.
- Safe Disposal: If all else fails and you do need to dispose of them, ensure they’re wrapped or contained to prevent any sharp fragments from causing harm.
Remember, proper disposal isn’t just about decluttering. It’s about being responsible and ensuring that what’s no longer needed is dealt with in an environmentally friendly and thoughtful manner.
Tips & Tricks for Replacing Wood Stove Bricks
- Choose High-Quality Bricks: While it might be tempting to save a few bucks on cheaper bricks, investing in high-quality fire bricks ensures longevity and better performance.
- Cutting to Size: Sometimes, you might not get the exact size of brick for your stove. In such cases, you can cut them. When cutting fire bricks:
- Measure the required size with tape, marking the cutting line clearly.
- Use a masonry blade or a diamond blade for the best cuts. Remember, always wear protective gear like gloves and safety goggles.
- Ensure a steady hand and a stable surface. It’s advisable to use about 2-3mm allowance as the brick can slightly reduce in size due to the cutting.
- Brick Spacers: If you find a small gap after fitting a brick, don’t fret! Use thin refractory or metal spacers to fill in small gaps, ensuring a snug fit.
Troubleshooting Common Problems When Replacing Wood Stove Bricks
1. Stubborn Old Bricks
- Problem: Sometimes old bricks refuse to budge, making removal a challenge.
- Solution: Start by tapping around the edges of the brick with a chisel and hammer. If that doesn’t work, you can moisten the surrounding area with a little water to loosen any ash or debris acting like a binder.
2. Brick Doesn’t Fit Properly
- Problem: Even after measuring, you find that the new brick doesn’t fit perfectly.
- Solution: First, double-check your measurements. If the brick is slightly larger, use sandpaper or a masonry tool to shave off the excess. If the brick is smaller, refer to the above tip on using spacers.
3. Bricks Cracking Soon After Replacement:
- Problem: New bricks are cracking or chipping shortly after installation.
- Solution: Ensure you’re using high-quality, stove-specific fire bricks. Avoid rapid temperature changes in the stove, and ensure wood logs aren’t thrown or dropped hard against the bricks.
4. Loose Bricks After Installation:
- Problem: Bricks do not stay snug and tend to shift or come loose.
- Solution: Check if the floor of the stove is even. If needed, level it using a thin layer of sand or ash. If the bricks are still loose, consider using spacers or refractory cement to secure them.
In Conclusion
Replacing wood stove bricks is a practical skill every wood stove owner should be familiar with. Regular maintenance, including replacing worn-out bricks, ensures the safety and efficiency of your stove. With this guide in hand, you’re now prepared to give your beloved wood stove the care it deserves.
FAQs
- Why can’t I just use regular bricks instead of fire bricks in my wood stove?
While regular bricks might look similar, fire bricks are specially designed to handle and retain high temperatures, ensuring both efficiency and safety in your wood stove. - Do the colors of fire bricks matter, or is it just aesthetic?
Typically, the color is just aesthetic. However, some colors might show wear, ash, or soot more than others. The primary consideration should be the brick’s material and heat resistance. - Can I cut fire bricks to fit them better?
Yes, with the right tools like a masonry blade, fire bricks can be cut. However, ensure you wear safety equipment and measure accurately to get the right fit. - How often should I be replacing my wood stove bricks?
There’s no hard and fast rule, but you should replace them when they show signs of cracking, crumbling, or significant wear. Regular inspections can help determine their health. - Does moisture affect fire bricks?
Fire bricks can absorb moisture, which can cause them to crack when exposed to high temperatures. Always store replacement bricks in a dry place. - Are there eco-friendly fire bricks available?
Yes, some fire bricks are made with eco-friendly materials and processes. Check with manufacturers or suppliers for these options. - If one brick is damaged, do I need to replace all of them?
Not necessarily. While it’s a good idea to inspect all bricks if one is damaged, you only need to replace the ones that are visibly worn out or cracked. - Why do my fire bricks have a whitish layer on them?
This whitish layer is likely a buildup of creosote. It’s essential to clean it regularly and ensure proper ventilation in your wood stove to reduce such buildup. - Can I paint or decorate my fire bricks?
It’s not recommended. While there might be high-temperature paints available, adding any layer to the brick can affect its heat retention and radiation properties. - Do fire bricks change in efficiency as they age?
Over time, as fire bricks wear, they might not retain or radiate heat as efficiently as when they were new. Regular inspection and timely replacement ensure your stove remains efficient.
Hey there, fellow wood stove enthusiast! As we conclude our How to Replace Wood Stove Bricks 2024 guide, we’d love to hear from you. Whether you’ve got a fun anecdote, a handy tip, or maybe a question or two, your insights make our community warmer and more vibrant. Drop a comment below and let’s chat. After all, there’s no better way to learn than from each other. Can’t wait to hear your stories and thoughts!

David Murray
Forestry AuthorI'm David Murry, a forestry equipment specialist with a focus on chainsaw operation. With over 13 years of experience, I've honed my skills in operating and maintaining a wide range of machinery, from chainsaws to log splitters. My passion for the outdoors and commitment to sustainable forestry drive my work, which emphasizes safety, efficiency, and staying updated with industry advancements. Additionally, I'm dedicated to sharing my expertise and promoting environmental awareness within the forestry community.


Leave your comment