How to Grow Vanilla Beans: Cultivating the Vanilla Orchid
- February 20, 2024
- 0 comment
Vanilla beans, known for their aromatic and flavorful characteristics, are derived from the orchids of the genus Vanilla. Primarily grown in tropical regions, these beans are a prized ingredient in culinary and fragrance industries. This guide provides insights into growing vanilla beans, particularly suited for beginners eager to embark on this rewarding journey.
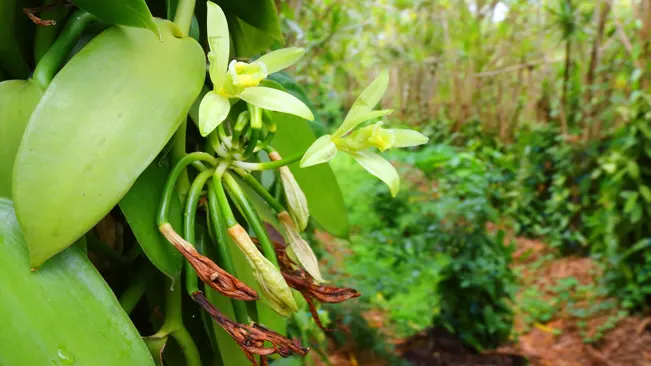
Understanding Vanilla Bean Orchids: Vanilla bean plants are a type of climbing orchid, native to tropical environments. The most commonly cultivated species is Vanilla planifolia. These plants thrive in warm, humid conditions with ample support for climbing.
Choosing the Right Environment
Climate Needs for Vanilla Orchids
- Tropical/Subtropical Climate: Vanilla orchids naturally grow in tropical and subtropical regions. These climates provide the consistent warmth that vanilla orchids need.
- Temperature Range: The ideal temperature range is between 60-95°F (15-35°C). Temperatures outside this range can stress the plant, leading to poor growth or lack of flowering.
- Consistency: Temperature consistency is key. Sudden changes in temperature, especially cold snaps, can be detrimental.
Lighting Conditions
- Indirect Light: Vanilla orchids prefer bright but indirect light. In their natural habitat, they are typically shaded by taller trees.
- Avoiding Direct Sunlight: Direct sunlight can be harsh on the leaves, causing them to burn or yellow. A north-facing window or a spot with filtered light is ideal.
- Artificial Lighting: If natural light is insufficient, especially in non-tropical regions, grow lights can be used. Ensure that the light is not too intense and is positioned at a suitable distance to mimic natural, indirect sunlight.
Managing Humidity
- High Humidity Levels: Aim to maintain a humidity level of 80-85%. This mimics the moist, humid air of tropical forests.
- Methods to Increase Humidity:
- Humidifiers: A room humidifier can help maintain constant humidity levels, especially in drier climates or during winter months.
- Misting: Regular misting of the orchid’s leaves can help, but it’s usually not sufficient on its own to maintain the high humidity levels required.
- Trays with Pebbles and Water: Placing the pot on a tray filled with pebbles and water can increase the surrounding humidity as the water evaporates.
- Monitoring Humidity: Use a hygrometer to monitor the humidity levels around your vanilla orchids to ensure they are in the optimal range.
Planting and Support
Soil Requirements
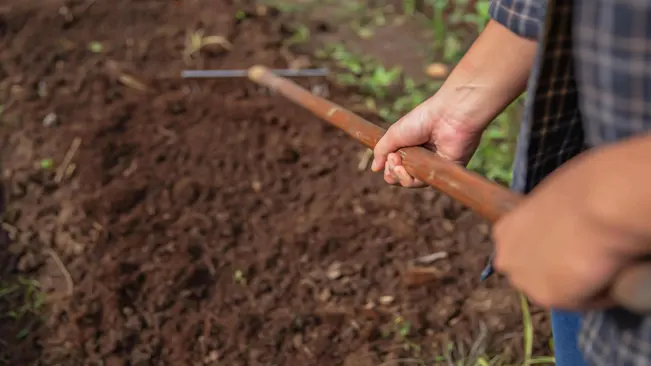
- Composition: The ideal soil for vanilla orchids should be light, airy, and rich in organic matter. A mix of bark, coconut husk, and perlite or vermiculite is often recommended. This combination ensures good drainage and aeration, critical for the health of the orchid’s roots.
- pH Level: Vanilla orchids prefer slightly acidic to neutral soil, with a pH range of 6.0 to 7.5. Regularly check the pH level of your soil and adjust as needed.
- Drainage: Excellent drainage is crucial. Vanilla orchids are susceptible to root rot, which is often caused by waterlogged soil. Ensure the planting medium allows excess water to drain away quickly.
- Nutrient Content: Incorporate compost or well-rotted manure into the soil to enhance its nutrient content. Vanilla plants are moderate feeders and benefit from the slow release of nutrients from organic matter.
Support Structure
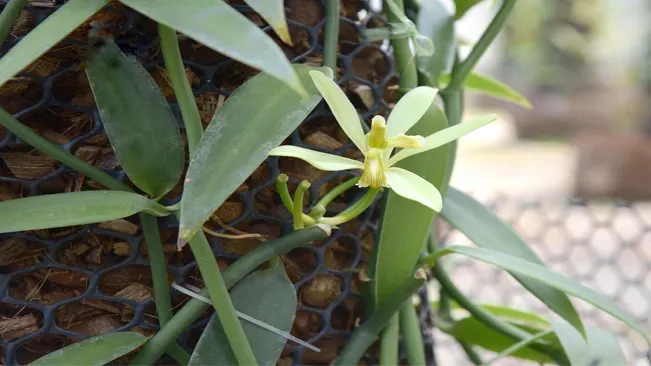
- Importance of Support: Vanilla plants are climbing orchids that need a support structure to grow optimally. In their natural habitat, they climb trees. Providing a similar environment helps them thrive.
- Types of Support Structures:
- Tree Trunks: If available, tree trunks are ideal for vanilla orchids, as they mimic the plant’s natural environment.
- Trellises: Wooden or metal trellises are great alternatives. They should be sturdy enough to support the weight of the plant as it grows.
- Other Structures: Bamboo poles, garden stakes, or even PVC pipes can be used. The key is to provide a surface that the vanilla vine can cling to and climb.
- Training the Vine: Initially, you may need to gently tie the vine to the support structure. As it grows, the vine will naturally cling to the structure. Regularly guide and attach new growth to the support.
- Height Considerations: Vanilla vines can grow quite long (up to several meters). Ensure the support structure is tall enough to accommodate this growth. Pruning can be done if space becomes an issue, but it’s generally better to allow the vine to grow naturally.
- Positioning: Place the support structure where it will receive appropriate light and is protected from strong winds. The structure should also be accessible for maintenance, such as watering, fertilizing, and pollinating.
Watering and Feeding
Watering Vanilla Bean Orchids
The watering regime for vanilla bean orchids is crucial for their health and growth. These plants prefer a consistent level of moisture in the soil, but it’s vital to avoid waterlogging as this can lead to root rot, a common issue in orchid care.
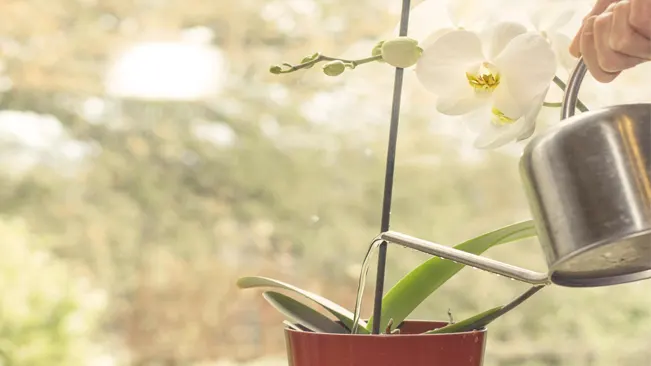
- Consistent Moisture: Vanilla orchids need a soil environment that is consistently moist. This doesn’t mean the soil should be wet or soggy, but it should never completely dry out. Regular checks of the soil’s moisture level are recommended.
- Method: Watering should be done deeply, ensuring that the water reaches the roots. However, allow the top layer of the soil to slightly dry out before the next watering. This method helps in maintaining the right moisture balance.
- Drainage: Good drainage is essential. Ensure that your planting medium and container (if used) allow for excess water to drain away effectively.
- Seasonal Adjustments: In cooler months or during less active growth periods, the plant’s water needs decrease. Hence, reduce the frequency of watering during these times. Overwatering in cooler temperatures can be particularly harmful as it increases the risk of root rot.
Fertilizing Vanilla Bean Orchids
Feeding is another critical aspect of growing vanilla orchids. These plants benefit from regular fertilization, but it’s essential to use the right type and amount to avoid damaging the plants.
- Type of Fertilizer: A balanced, slow-release fertilizer is ideal for vanilla orchids. Look for a fertilizer that has an equal ratio of nitrogen, phosphorus, and potassium (NPK), such as a 20-20-20 blend.
- Frequency: Applying the fertilizer every few months is typically sufficient. The slow-release formula ensures a steady supply of nutrients over time, which is beneficial for the steady growth of the orchid.
- Application Method: Follow the instructions on the fertilizer package for proper application. Generally, the fertilizer is applied to the soil surface and watered in. Be cautious not to over-fertilize, as this can lead to nutrient burn.
- Organic Options: For those preferring organic gardening practices, well-composted organic matter, fish emulsion, or seaweed extracts are good alternatives. These natural options also support the overall health of the soil.
Pollination

The Significance of Hand Pollination
- Natural Pollination Rarity: In their native habitat, vanilla orchids are typically pollinated by specific species of bees or hummingbirds. However, outside their native range, these natural pollinators are often absent, necessitating human intervention.
- High Value of Vanilla Beans: Given the commercial value of vanilla beans and the necessity for hand pollination, this process is crucial in vanilla cultivation.
The Process of Hand Pollination
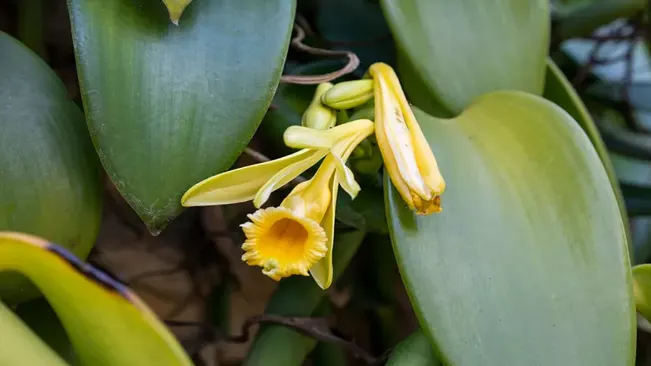
- Identifying the Flower: Vanilla flowers are greenish-yellow and have a distinct lip, called the labellum, which covers the reproductive parts.
- Tools Required: A simple tool like a toothpick, a small, pointed stick, or a special pollination instrument can be used.
- Technique: The process involves gently lifting the labellum to expose the anther (male part) and the stigma (female part). Pollen from the anther is then carefully transferred to the stigma. This mimics the natural pollination process.
- Gentleness and Precision: It’s essential to be gentle and precise to avoid damaging the delicate flower parts.
Growth and Maturation
Growth Period
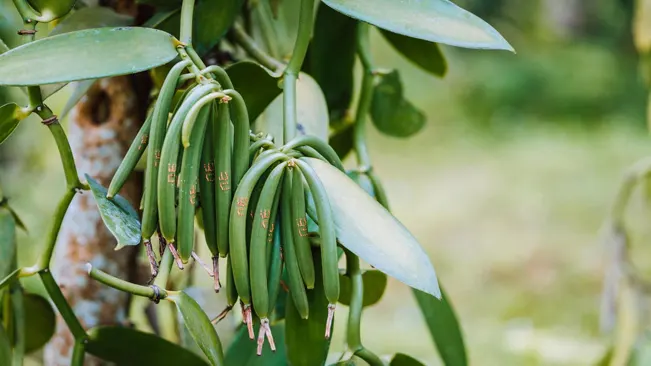
- Duration: After successful pollination, vanilla beans typically take 8 to 9 months to mature. This period can vary slightly depending on the environmental conditions and the specific variety of the vanilla orchid.
- Development Stages: During this time, the beans gradually grow in size. They start as small, light green pods and slowly elongate and thicken.
- Monitoring: Regular monitoring is crucial during this period. The beans are sensitive to environmental changes, so maintaining consistent temperature, humidity, and light is vital for their proper development.
Harvesting
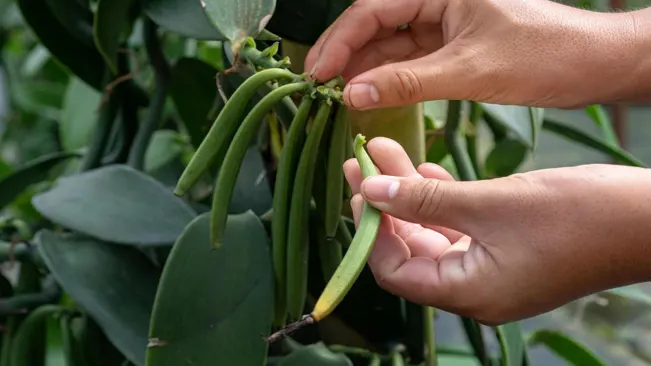
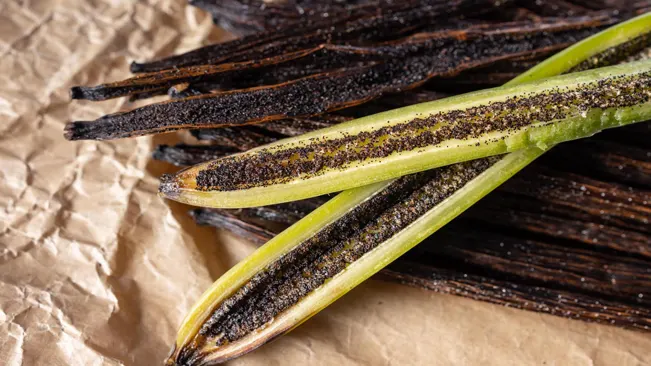
- Optimal Time: The timing of the harvest is critical for the quality of the vanilla beans. Beans are usually harvested when they begin to show a slight yellowing at the tip but are still predominantly green. This slight yellowing is an indicator that the beans have developed their full size and are starting to mature.
- Physical Characteristics: A mature vanilla bean is typically 6 to 10 inches long and has a greasy sheen. The bean should still be firm to the touch but not hard.
- Method: Harvesting is done by hand, carefully cutting the bean from the vine with a sharp knife or scissors. It’s important to handle the beans gently to avoid bruising them, as bruises can affect the quality of the final product.
- Timing Matters: If beans are harvested too early, they will lack the full spectrum of flavor compounds. If left too long on the vine, they can split open, which can lead to a loss of essential oils and decrease in quality.
Post-Harvest Processing
- Curing Process: After harvesting, beans undergo a curing process that can take several months. This process is essential to develop the characteristic vanilla flavor and aroma.
- Stages of Curing: The process includes blanching, sweating, slow drying, and conditioning. Each stage contributes to the development of the beans’ flavor and aroma profiles.
- Monitoring During Curing: Throughout the curing process, beans need to be regularly inspected and handled carefully to ensure they dry uniformly and develop the desired qualities.
Curing and Drying
Blanching

- The harvested green vanilla beans are first subjected to a blanching process. This is typically done by immersing them in hot water (around 65°C or 150°F) for a brief period, usually about 2 to 3 minutes.
- Blanching stops the vegetative growth of the beans and initiates the enzymatic reactions necessary for developing the flavor and aroma.
Sweating
- After blanching, the beans are quickly transferred to a sweating process. This step involves wrapping the beans in woolen blankets or placing them in airtight containers to allow them to sweat.
- During sweating, the beans undergo fermentation and heat up, which aids in the development of their characteristic flavors and colors. This process can last for 7 to 10 days, and the beans are regularly inspected and aired.
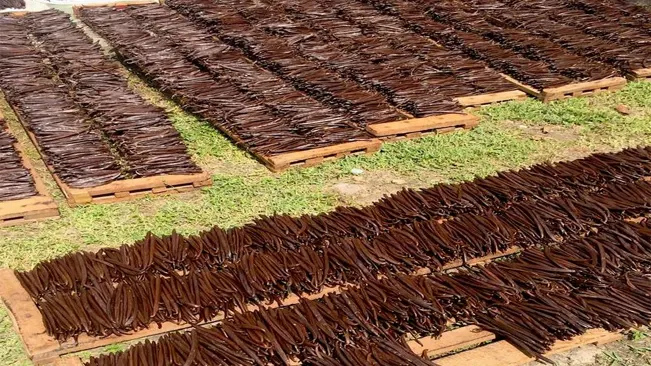
Drying
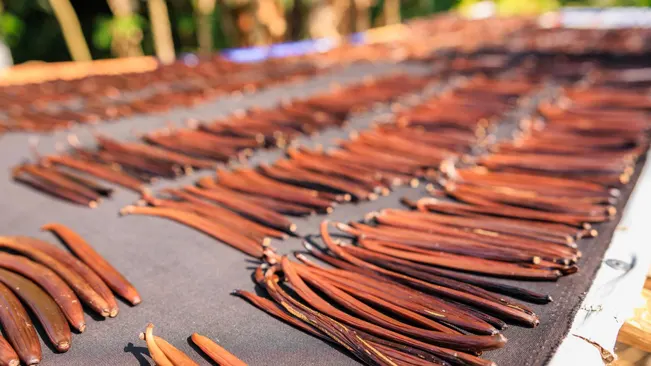
- Post sweating, the beans are spread out in the sun to dry. This stage is critical for reducing the moisture content in the beans gradually. Sun drying is typically done during the day, and the beans are brought indoors or covered at night to prevent dew accumulation.
- Sun drying can last for several weeks, depending on the weather conditions. The goal is to bring down the moisture content to about 25-30%.
Air Drying
- Following sun drying, the beans are moved to a well-ventilated space for air drying. This stage further reduces moisture and allows the beans to dry evenly.
- Air drying can take several weeks to months, during which the beans slowly shrink and develop a deep brown color.
Conditioning
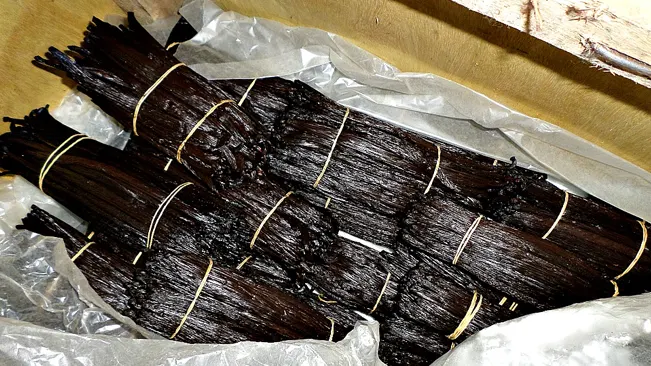
- The final step in the curing process is conditioning. The dried beans are stored in closed boxes or containers for several months. This period allows the flavors to mellow and the aroma to intensify.
- Conditioning also helps in achieving a uniform quality and further reducing the moisture content to about 20%.
Quality Control
- Throughout the curing process, beans are regularly inspected for quality. Any beans showing signs of mold or spoilage are removed.
- The beans’ size, color, and aroma are key indicators of their quality and readiness for the market.
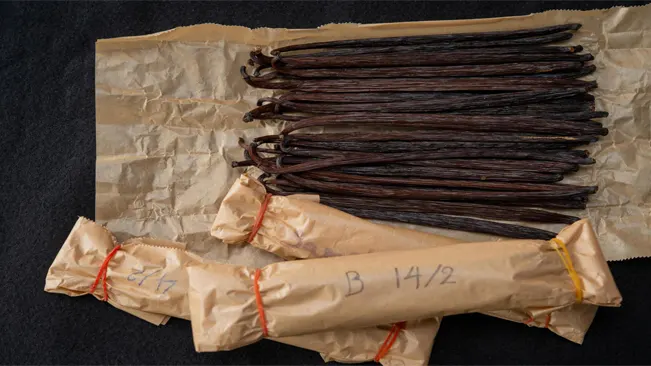
Packaging
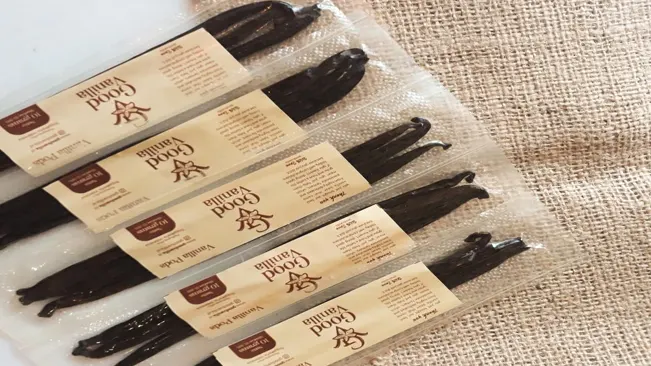
- Once the beans have completed the curing process, they are graded based on quality and size. High-quality beans are often bundled and wrapped in wax paper before being packed in airtight containers for shipment.
Challenges and Pests
Challenges and Pests in Growing Vanilla Beans
Pests
- Slugs and Snails: These pests are attracted to the moist environment that vanilla plants thrive in. They can damage the leaves and stems by chewing on them. To control slugs and snails, use environmentally friendly slug bait or set up barriers. Regularly inspecting the plants during the evening, when these pests are most active, can also help in early detection and control.
- Spider Mites: These tiny pests can be hard to spot but cause significant damage by sucking sap from the leaves, leading to yellowing and weakening of the plant. High humidity can help deter spider mites. If infestation occurs, use a miticide or introduce natural predators like ladybugs. Regularly rinsing the leaves with water can also help in controlling spider mites.
Diseases
- Root Rot: This is often caused by overwatering or poor drainage. Vanilla plants need moist soil, but it’s crucial to avoid waterlogging. To prevent root rot, ensure your planting medium is well-draining and reduce watering during cooler or less sunny periods.
- Fungal Diseases: Fungi thrive in humid conditions, which are also ideal for vanilla plants. To prevent fungal infections, good air circulation is essential. This can be achieved by spacing the plants appropriately and pruning them to allow air flow. If a fungal infection is spotted, treat the plant with a suitable fungicide. It’s important to identify and treat fungal infections early to prevent them from spreading.
Preventive Measures
- Regular Inspection: Regularly inspecting your vanilla plants is key to early detection and management of pests and diseases.
- Environmental Control: Maintaining the right balance of humidity and soil moisture is critical. Using tools like hygrometers and moisture meters can help in monitoring these conditions.
- Cleanliness: Keeping the growing area clean and free from plant debris can reduce the likelihood of pest infestations and fungal diseases.
- Quarantine New Plants: Always quarantine new plants before introducing them to your growing area to prevent the spread of pests and diseases.
Conclusion
Growing vanilla beans is a labor-intensive but rewarding process. It requires patience, attention to detail, and a suitable environment. The effort invested in cultivating and curing vanilla beans culminates in the rich, aromatic flavor that enhances a wide array of dishes and products.
FAQs (Frequently Asked Questions)
- What climate is best for growing vanilla beans?
Vanilla beans thrive in tropical or subtropical climates with high humidity and temperatures ranging from 60-95°F (15-35°C). - How long does it take for a vanilla plant to produce beans?
It typically takes about 3-4 years for a vanilla plant to mature enough to start producing beans. - Can I grow vanilla beans indoors?
Yes, vanilla beans can be grown indoors if they are provided with sufficient humidity, warmth, and indirect sunlight. - How do I pollinate vanilla flowers?
Vanilla flowers must be hand-pollinated. This involves transferring pollen from the anther to the stigma of the flower, usually with a small tool like a toothpick or a brush. - How often should I water my vanilla plant?
Vanilla plants require consistently moist soil. Water them enough to keep the soil moist, but not waterlogged, and reduce watering in cooler months. - What type of support does a vanilla plant need?
Vanilla plants are climbing vines and require a support structure to climb on, such as a tree trunk, trellis, or a similar sturdy object. - When is the right time to harvest vanilla beans?
Vanilla beans are ready for harvest when they begin to yellow at the tip but are still predominantly green. This usually occurs 8-9 months after pollination. - How do I cure vanilla beans?
Curing vanilla beans involves a multi-step process including blanching, sweating, drying, and conditioning over several months to develop their flavor and aroma. - What are the common pests and diseases that affect vanilla plants?
Common pests include slugs, snails, and spider mites. Diseases like root rot and fungal infections can also affect vanilla plants, often due to overly wet conditions. - Can vanilla plants be grown from seeds?
While it’s possible, growing vanilla plants from seeds is extremely challenging and rarely successful. Commercially, they are usually propagated from cuttings.
Kristine Moore
Forestry AuthorI'm Kristine Moore, a seasoned garden landscaping professional with over 30 years of experience. My extensive career has been dedicated to transforming outdoor spaces into stunning, sustainable landscapes. With a deep understanding of horticulture, design principles, and environmental stewardship, I have become a respected figure in the field, known for creating harmonious, visually appealing, and eco-friendly gardens. My commitment to excellence and continuous learning in landscaping trends and techniques has solidified my reputation as an expert in garden design and implementation.


Leave your comment