Timing Your Harvest: When to Begin Your Vegetable Garden
- February 1, 2024
- 0 comment
Discover the best timing for your vegetable garden, aligning with climate and seasonal tips for a bountiful, successful harvest. Starting a vegetable garden is an exciting journey, but knowing when to begin is key to your success. The right timing can make the difference between a thriving garden and one that struggles.
In this article, we’ll explore the essential factors that determine the best time to start your garden, from understanding your local climate to choosing the right vegetables for your season. Whether you’re a beginner or a seasoned gardener, these insights will help you align your gardening efforts with nature’s rhythm for a fruitful harvest.
Table of Contents
- Understanding Your Climate and Soil
- Guidelines for Soil Preparation
- Deciding What to Plant
- The Science of Planting Dates
- Watering Techniques for New Seedlings
- Implementing Companion Planting
- Pest and Disease Monitoring
- Season Extension Techniques
- Tools and Resources for Timing
- Practical Tips for Early Planting
- Monitoring and Adjusting Your Garden Schedule
- Harvesting: Reaping the Rewards at the Right Time
- Conclusion
- FAQs
Understanding Your Climate and Soil

Understanding your climate and soil is fundamental in gardening, as these factors greatly influence what and when you can plant. Climate dictates the length of your growing season, susceptibility to frost, and the intensity of sun and rain your garden will receive, all of which are critical to plant selection and care. Meanwhile, soil type – whether it’s sandy, loamy, or clay-rich – affects water retention, nutrient availability, and root growth. Conducting a soil test for pH and nutrient levels helps in amending the soil to suit the needs of your chosen plants. Familiarizing yourself with your local climate zone and understanding your soil’s characteristics are key steps in creating a thriving garden, ensuring that you work with, rather than against, the natural environment of your garden space.
Guidelines for Soil Preparation
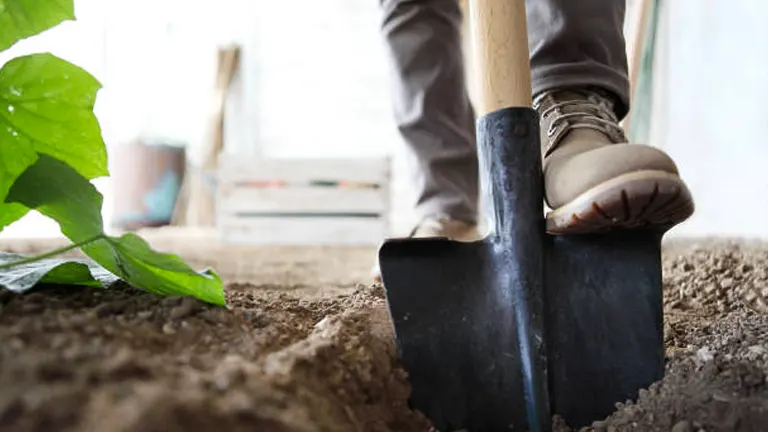
Before planting, it’s crucial to prepare your soil effectively. Test the soil for pH levels, nutrients, and drainage capabilities. Amend your soil with compost or organic matter to improve fertility and texture. Ensure that the soil is loosened and aerated, allowing roots to penetrate easily and access necessary nutrients and water. Here’s a list of guidelines for soil preparation:
- Soil Testing: Before any planting begins, testing your soil is a crucial first step. It helps you understand the pH level and nutrient content of your soil. This knowledge guides you in amending the soil appropriately, ensuring that it has the right balance of nutrients for the vegetables you plan to grow. Soil testing kits are readily available at garden centers or through local cooperative extensions.
- Organic Matter Enrichment: Adding organic matter, such as compost or well-rotted manure, is essential for improving soil fertility and structure. Organic matter boosts nutrient levels and enhances the soil’s ability to retain water, which is beneficial for plant roots. Incorporate a generous amount into your garden bed before planting to promote healthy plant growth.
- Proper Tilling: Tilling the soil is important for aerating it and breaking up compacted layers. This process allows for better root growth and improved water infiltration. Be careful not to over-till, as this can disturb soil structure and harm beneficial microorganisms. A one-time tilling before planting is usually sufficient.
- Weed Management: Clearing the garden area of weeds is vital before planting. Weeds compete with your vegetables for nutrients, water, and sunlight. Remove weeds by hand or use organic mulching to suppress them. Keeping your garden weed-free from the start sets a strong foundation for your plants.
- Soil Moisture Control: Maintaining the right moisture level in your soil is key. The soil should be moist but not waterlogged. Overly wet soil can lead to root rot and other diseases, while dry soil can stunt plant growth. Use mulch to help retain soil moisture and reduce water evaporation.
- Soil Amendment Based on Test Results: If your soil test reveals deficiencies, amend the soil accordingly. For acidic soil, add lime to increase the pH; for alkaline soil, use sulfur to lower the pH. Adjust the levels of nutrients like nitrogen, phosphorus, and potassium as needed, based on the test results and the specific needs of the plants you intend to grow.
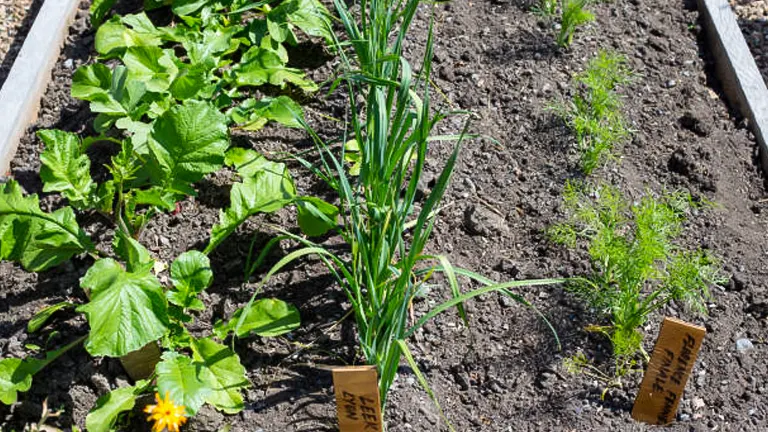
Deciding What to Plant
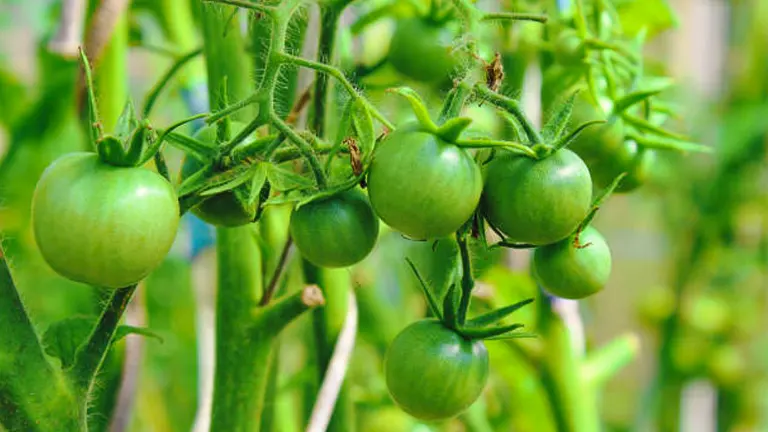
Choosing what to plant in your vegetable garden is both exciting and strategic. Seasonal vegetables have specific planting times for optimal growth. For instance, cool-season vegetables like lettuce and peas thrive when planted in early spring. Warm-season veggies like tomatoes and peppers need warmer soil temperatures. Consider your garden’s specific conditions and your dietary preferences when selecting your plants. Here’s a column table for more information:
| Vegetable Type | Season | Ideal Planting Conditions | Tips |
|---|---|---|---|
| Lettuce | Cool | Moist, well-drained soil; partial shade | Plant in early spring or fall; can tolerate light frost |
| Tomatoes | Warm | Warm, well-drained soil; full sun | Plant after last frost; needs staking or cages |
| Peas | Cool | Cool, moist soil; full sun to light shade | Plant in early spring; provide support for climbing varieties |
| Cucumbers | Warm | Warm, fertile soil; full sun | Plant after last frost; use trellises for vine types |
| Spinach | Cool | Rich, moist soil; full or partial sun | Plant in early spring or fall; fast-growing |
| Peppers | Warm | Warm, well-drained soil; full sun | Plant after last frost; requires consistent moisture |
| Carrots | Cool | Deep, well-drained soil; full sun | Plant in spring or fall; thin seedlings for proper growth |
| Zucchini | Warm | Fertile, well-drained soil; full sun | Plant after last frost; needs ample space to grow |
| Radishes | Cool | Loose, well-drained soil; full sun | Plant in spring or fall; quick to harvest |
| Eggplant | Warm | Fertile, well-drained soil; full sun | Plant after last frost; needs warm temperatures |
This table effectively categorizes vegetables into cool and warm-season crops, highlighting their ideal planting conditions and practical growing tips. Cool-season vegetables like lettuce and peas flourish in early spring or fall, tolerating light frost, while warm-season crops such as tomatoes and cucumbers need planting after the last frost and thrive in warmer, well-drained soil. The table underscores the importance of aligning planting times with seasonal temperature shifts and specific soil and sunlight requirements for each vegetable, ensuring a successful and productive garden.
The Science of Planting Dates
Planting dates are not just random choices; they’re based on science. Frost dates, which mark the average dates of the last spring frost and first fall frost, are key to determining planting times. Additionally, understanding the growth cycles and maturation periods of your chosen vegetables will help you plan your planting schedule effectively, ensuring that your plants have enough time to mature before the weather becomes unfavorable.
| Vegetable | Frost Sensitivity | Soil Temperature | Sunlight Needs | Growth Cycle (Days) |
|---|---|---|---|---|
| Tomatoes | Sensitive | Above 60°F (15°C) | Full sun | 60-80 |
| Peas | Tolerant | 45°F (7°C) and above | Full sun/Partial shade | 60-70 |
| Lettuce | Tolerant | 40-65°F (4-18°C) | Partial shade | 45-55 |
| Cucumbers | Sensitive | Above 60°F (15°C) | Full sun | 50-70 |
| Carrots | Tolerant | 45-85°F (7-29°C) | Full sun | 70-80 |
| Peppers | Sensitive | Above 65°F (18°C) | Full sun | 60-90 |
| Spinach | Tolerant | 40-75°F (4-24°C) | Full sun/Partial shade | 40-50 |
| Zucchini | Sensitive | Above 60°F (15°C) | Full sun | 45-55 |
| Green Beans | Sensitive | Above 60°F (15°C) | Full sun | 50-60 |
| Broccoli | Tolerant | 40-70°F (4-21°C) | Full sun/Partial shade | 65-80 |
This table concisely illustrates the varying needs of popular vegetables, emphasizing the importance of frost sensitivity, soil temperature, sunlight requirements, and growth cycles in garden planning. Frost-sensitive plants like tomatoes and cucumbers require warmer soil and are best planted after the last frost, while hardier crops like peas and lettuce can tolerate cooler conditions for earlier planting. Understanding these specifics, from the ideal temperature ranges to the amount of sunlight needed, is crucial for ensuring healthy growth and optimizing harvest times, catering to each vegetable’s unique lifecycle.
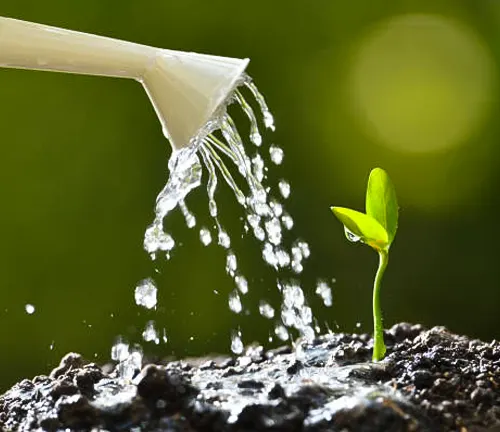
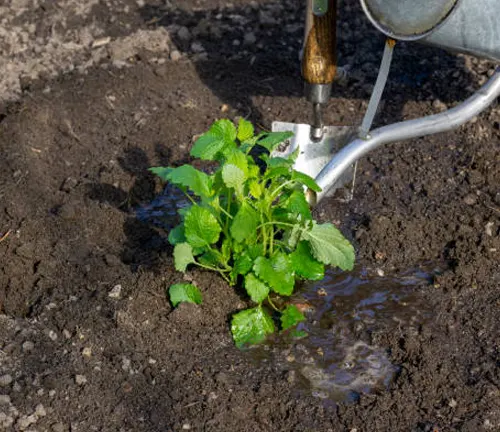
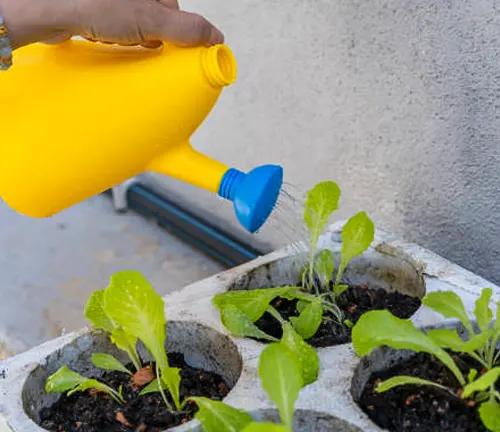
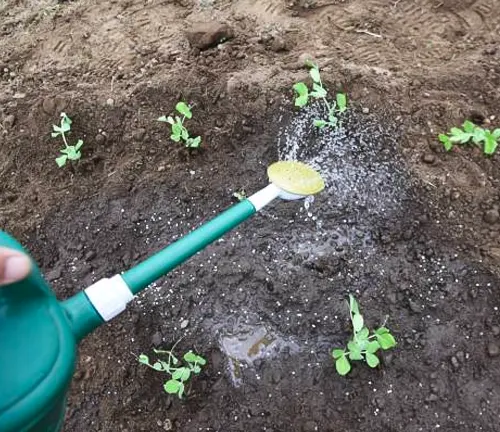
Watering Techniques for New Seedlings
Proper watering is vital for seedlings. Use a gentle spray to avoid disturbing the soil or damaging young plants. Keep the soil consistently moist but not waterlogged. Consider using a drip irrigation system or soaker hoses for even, deep watering that encourages strong root growth. Here’s a list of guides on Watering Techniques for New Seedlings:
1. Gentle Watering: New seedlings are delicate and require gentle watering. Use a watering can with a fine rose or a gentle spray setting on a hose to avoid dislodging or damaging the young plants.
Pro Tips:
- Water early in the morning to reduce evaporation and allow leaves to dry out during the day.
- Aim the water at the base of the seedlings, not the foliage, to prevent disease.
- Regularly check soil moisture; it should feel damp but not waterlogged.
2. Consistent Moisture Levels: Maintaining consistent moisture levels in the soil is crucial for seedling development. Fluctuations in water levels can stress plants and affect root growth.
Pro Tips:
- Use a moisture meter to monitor soil moisture accurately.
- Mulch around the seedlings to help retain soil moisture.
- Create a watering schedule and adjust based on weather conditions.
3. Bottom Watering: For seedlings in trays or small pots, bottom watering encourages deep root growth and prevents overwatering. Place the containers in a tray of water and allow the soil to absorb water from the bottom.
Pro Tips:
- Ensure the water level does not go above the pot’s base to avoid soggy soil.
- Let the soil surface dry slightly between waterings to encourage roots to grow downwards.
- Remove the pots from the water once the top soil feels moist to the touch.
4. Avoiding Overhead Watering: Overhead watering can spread diseases and disturb delicate seedlings. Instead, use a soaker hose or drip irrigation for a more controlled and gentle watering method.
Pro Tips:
- Install drip lines close to the base of the seedlings for direct watering.
- Adjust the flow to avoid excessive water pressure.
- Regularly check and clean emitters to ensure even watering.
Implementing Companion Planting
Companion planting involves placing plants together that benefit each other in terms of growth, pest control, or pollination. For example, planting marigolds near tomatoes can deter pests, while planting basil alongside can improve growth and flavor. Research companion plants for your chosen vegetables to enhance your garden’s health and yield.
Pest and Disease Monitoring

Regularly inspect your plants for signs of pests or diseases. Early detection is key to managing these issues effectively. Implement organic pest control methods and remove any diseased plants promptly to prevent spread. Encourage beneficial insects that prey on common garden pests.
- Regular Plant Inspection: Consistently checking your plants, especially the undersides of leaves and stems, helps in early detection of pest infestations or disease symptoms. Look for signs like unusual leaf spots, wilting, or insect activity.
- Identifying Common Pests and Diseases: Familiarize yourself with common pests and diseases that affect your specific plants. Knowledge of their appearance and behavior can aid in early diagnosis and treatment, preventing widespread damage.
- Use of Traps and Barriers: Implementing physical barriers or traps, such as sticky traps or row covers, can effectively monitor and control the presence of pests, reducing the need for chemical interventions.
- Encouraging Beneficial Insects: Beneficial insects, like ladybugs and predatory wasps, play a crucial role in controlling pest populations naturally. Cultivating a diverse garden ecosystem can attract these natural allies.
- Monitoring Soil Health: Healthy soil contributes to robust plants more capable of resisting pests and diseases. Regular soil testing and amendments based on its needs can enhance plant immunity and resilience.
- Keeping Records: Maintaining a garden journal documenting pest and disease occurrences helps in identifying patterns or recurring issues, enabling more effective, targeted management in future seasons.
Season Extension Techniques
To extend your growing season, use techniques like cold frames, row covers, or greenhouses. These tools can protect your plants from early or late frosts, allowing you to start your garden earlier in the spring and extend harvesting into the fall.
- Using Cold Frames: Cold frames are enclosed structures with transparent tops, providing a microclimate for plants. They are ideal for extending the growing season in both spring and fall.
Tip: Place cold frames in a south-facing location to maximize sun exposure. Ventilate on warm days to prevent overheating.
- Floating Row Covers: Lightweight, permeable row covers can protect plants from frost while still allowing light and water to reach them.
Tip: Secure the edges with rocks or soil to prevent wind from lifting the covers. Use hoops to support the fabric and prevent it from touching the plants.
- Utilizing Greenhouses: Greenhouses offer a controlled environment for growing plants, protecting them from extreme weather and extending the growing season significantly.
Tip: Monitor temperature and humidity levels regularly. Use shade cloths in summer to prevent overheating and ensure adequate ventilation.
- Implementing Mulching: Mulch insulates the soil, keeping it warmer in winter and cooler in summer. It also helps retain soil moisture.
Tip: Use organic mulches like straw or leaves for winter protection. Remove or thin out the mulch as temperatures rise in spring.
- Growing in Hoop Houses: Hoop houses are tunnel-like structures covered with plastic, offering more durability and protection than row covers.
Tip: Use UV-resistant plastic for longevity and create roll-up sides for ventilation in warmer weather.
- Using Cloches for Individual Plants: Cloches, or bell-shaped covers, can be placed over individual plants to protect them from cold.
Tip: Use cloches made of transparent materials for light access. Remove or ventilate during the day to prevent overheating.
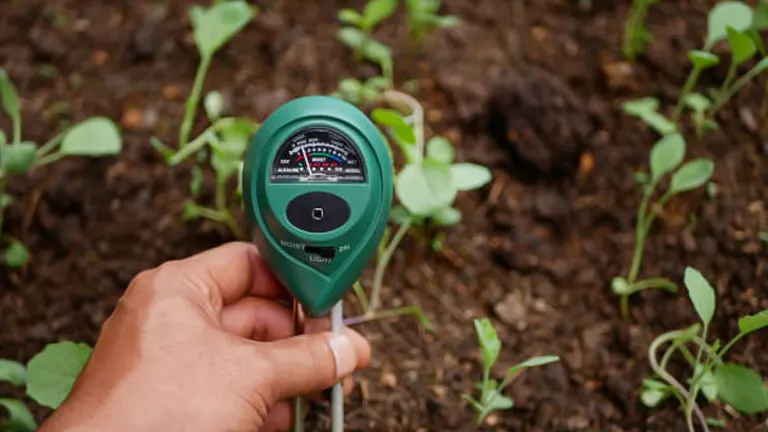
Tools and Resources for Timing
Several tools and resources can help you with timing your garden. Planting calendars, specific to your region, can guide you on when to plant different vegetables. Gardening apps can also provide personalized advice and reminders, making it easier to stay on track with your garden’s timeline. Here’s a list of tools and resources for timing your vegetable garden:
- Planting Calendars: A planting calendar is an essential tool for gardeners. It provides specific dates for sowing seeds based on your local climate and frost dates. These calendars take the guesswork out of planting times, ensuring that vegetables are sown at the optimal time for growth. Many online gardening sites and local agricultural extensions offer customized planting calendars.
- Gardening Apps: In the digital age, gardening apps have become invaluable for timing your garden activities. These apps can offer personalized advice, track your garden’s progress, and remind you of key gardening tasks. Features often include weather alerts, planting guides, and tips for caring for your specific plants.
- Soil Thermometers: Soil temperature is a critical factor in determining planting dates, especially for warm-season crops. A soil thermometer helps you measure the ground temperature to decide the best time to plant. This tool is particularly useful in early spring when air temperatures can be misleading.
- Frost Date Charts: Understanding your local frost dates is crucial for garden planning. Frost date charts indicate the average dates of the last spring frost and first fall frost in your area. These charts help you avoid planting sensitive crops too early or too late in the season.
- Garden Journals: Keeping a garden journal can be a great resource for timing your plantings. Record your gardening activities, including planting dates, weather conditions, and crop performance. Over time, this personalized record becomes a valuable tool for planning future gardens based on past experiences.
- Online Gardening Communities: Engaging with online gardening communities and forums can provide insights and advice on timing from experienced gardeners. These platforms are excellent for sharing experiences, asking questions, and getting region-specific advice that can help in making informed decisions about planting times.
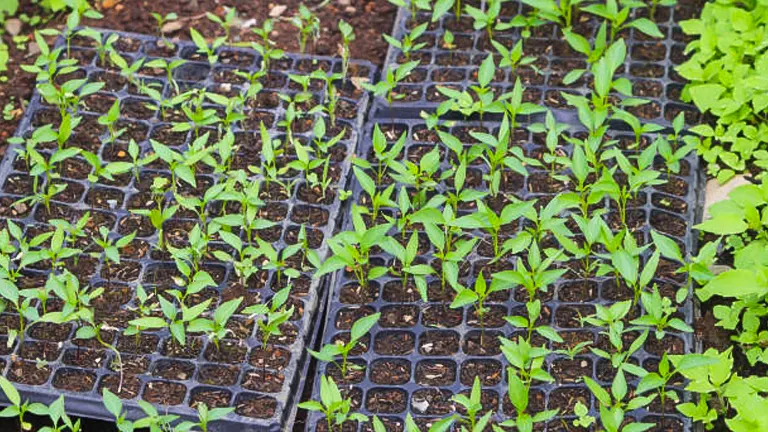
Practical Tips for Early Planting
Getting a head start on your gardening season can be advantageous, especially in regions with shorter growing periods. Starting seeds indoors is a popular method. It allows you to control the environment, protecting delicate seedlings from harsh weather. Greenhouses also offer a similar benefit, extending the growing season by shielding plants from cold snaps. However, it’s important to balance eagerness with caution. Planting too early can expose your garden to frost risks, so always consider your local frost dates.
Here’s a list of practical tips for early planting:
- Start Seeds Indoors: Begin seeds indoors to get a jump on the season, especially in cooler climates.
- Select Cold-Tolerant Varieties: Choose plant varieties known for their resilience to cooler temperatures.
- Harden Off Seedlings: Gradually acclimate indoor seedlings to outdoor conditions to reduce shock.
- Warm the Soil: Use covers like plastic mulch to heat the soil before planting.
- Utilize Raised Beds: Raised beds and containers can warm up faster than ground soil.
- Monitor Weather Forecasts: Keep an eye on weather changes to protect plants from late frosts.
- Employ Frost Protection: Have materials like cloches or row covers ready for unexpected cold snaps.
- Amend Soil Early: Prepare and enrich soil before the planting season begins.
Monitoring and Adjusting Your Garden Schedule
A successful gardener is always observant and adaptable. Regularly monitoring your garden’s progress is key. Look out for signs of growth, health issues, or soil deficiencies. Be prepared to adjust your planting schedule based on what you observe. For instance, if a cold snap is forecasted unexpectedly, you might need to protect or relocate your plants. Similarly, a particularly warm season might mean you can plant certain crops earlier. Responding effectively to these changes can make a significant difference in your garden’s productivity.
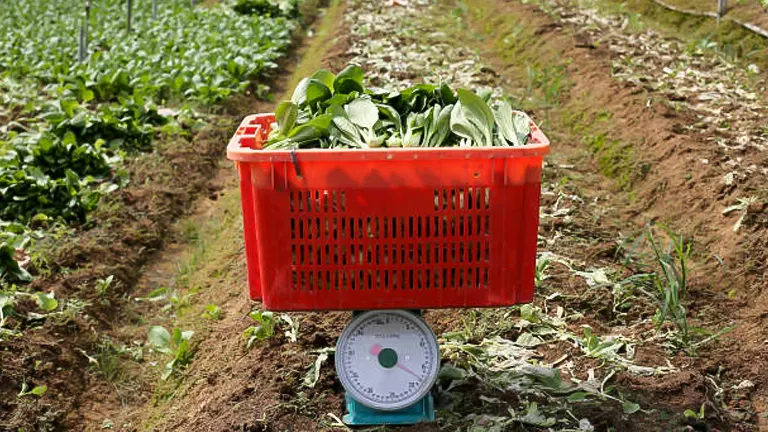
Harvesting: Reaping the Rewards at the Right Time

Harvesting is the most rewarding part of vegetable gardening, but timing is everything. Each vegetable has its own signs of readiness. For example, lettuce leaves should be harvested when they’re tender and before they start to bolt, while tomatoes are best picked when they’ve reached their full color and are slightly soft to the touch. To extend your harvest, pick vegetables regularly and at the right stage of growth. This not only ensures a continuous yield but also encourages plants to produce more.
Additional Tips:
- Harvest in the Morning: Vegetables are usually crispest in the early morning after the cool night air has refreshed them.
- Use Sharp Tools: Employ sharp scissors or pruning shears for harvesting to avoid damaging the plant or the fruit.
- Regular Picking: Regularly harvest ripe produce to encourage plants to produce more.
- Know the Signs: Learn the signs of ripeness for each type of vegetable, such as color, size, and firmness.
- Handle Gently: Handle vegetables gently to avoid bruising them, which can lead to quicker spoilage.
- Leave Some Roots: For root vegetables, leave a few in the ground to harvest later, as many will continue to grow.
- Check Plants Daily: During peak season, check your plants every day as some vegetables can quickly become overripe.
- Don’t Overload Plants: Be careful not to harvest too much at once, which can stress the plant.
- Use Vegetables Quickly: Freshly harvested vegetables have the best flavor and nutritional value, so plan to use them soon after picking.
- Clean Gently: Clean your vegetables gently but thoroughly to remove any dirt or insects before storage or consumption.
Conclusion
In conclusion, the timing of your vegetable garden is a delicate balance influenced by many factors, including climate, soil, plant variety, and weather changes. By understanding these elements and adapting your strategies accordingly, you can maximize your garden’s potential. Whether you are a novice or an experienced gardener, remember that gardening is a journey of learning and growth. With patience and observation, your garden can become a source of great joy and abundant harvests.
Related Post
- Best Soil for a Vegetable Garden in a Raised Bed
- Backyard Vegetable Garden Layout Plans
- Cold Frame Winter Vegetable Gardening
- Best Manures for Vegetable Gardens
- Raised Bed Vegetable Gardening: A Beginner’s Guide
- Free Vegetable Garden Layout Plans and Ideas
- Best Gardening Tools
FAQs
- What’s the best way to determine when to start planting my vegetable garden?
The best way to determine planting time is by referencing your local frost dates and understanding the climate zone of your area. Additionally, soil temperature plays a crucial role, so consider using a soil thermometer. - Can I plant all my vegetables at the same time?
No, vegetables have different temperature and light requirements. Cool-season vegetables like lettuce can be planted earlier, while warm-season crops like tomatoes should be planted after the risk of frost has passed. - How does soil type affect planting time?
Different soil types warm up at different rates in the spring. Sandy soil warms up faster than clay, which might allow for earlier planting in some cases. - Is it possible to start planting before the last frost date?
Yes, with protection methods like cold frames or row covers, you can start some hardy vegetables before the last frost. However, frost-sensitive plants should wait until after the frost date. - How do I know if my soil is ready for planting?
Your soil is ready when it’s no longer saturated with water (not too wet to form a ball) and has reached the ideal temperature range for your specific crops. - Are there any tools that can help me determine the best planting times?
Yes, gardening apps and local planting calendars can be very helpful. They often take into account your specific location and provide tailored planting dates. - What should I do if an unexpected frost is forecasted after I’ve planted?
Protect your plants with frost cloths, burlap, or plastic covers. If possible, bring container plants indoors or into a garage to shield them from the frost. - Can I use the same planting schedule every year?
It’s a good starting point, but be flexible. Weather patterns can change, and adapting to current conditions is key. Keeping a garden journal can help track yearly variations.
As we wrap up our exploration of the best times to start your vegetable garden, remember that patience and observation are as important as any tool in your gardening kit. Every season brings its lessons, and each year’s harvest is a testament to the care and attention you give to understanding and working with nature’s rhythms. Happy gardening, and here’s to a bountiful harvest that’s well-timed and well-loved!

Benjamin Brooks
Forestry AuthorGreetings! I'm Benjamin Brooks, and my journey over the past 15 years has revolved around the fascinating realms of content creation, expertise in snow clearing, and the intricate world of lumberjacking and landscaping. What began as a simple curiosity about the natural world and heavy machinery has evolved into a passionate profession where my love for crafting words intertwines seamlessly with my lumberjacking and garden skills.


Leave your comment