Turning a Shed Into a Chicken Coop
- January 22, 2024
- 2 comment
As a self-proclaimed backyard farming enthusiast, I recently embarked on a project that seemed both exciting and daunting: transforming an old garden shed into a functional chicken coop. My goal was to create a safe, comfortable home for my feathered friends, while also ensuring the project was cost-effective and sustainable. In this blog, I’ll share my journey, evaluate the process, and provide insights for those considering a similar endeavor.
Embarking on the journey of beginner chicken keeping, one quickly realizes the need for a chicken coop, and sooner than expected. It’s fascinating how rapidly baby chicks grow and the urgency to provide them with a secure habitat becomes apparent. This article will guide you on how to adeptly transform a shed into a chicken coop, offering your birds a safe and comfortable home.
We often envision ourselves as perfectly organized, preparing everything in advance for our chicken-keeping adventures. However, reality tends to differ. Drawing from my own experiences, our first flock was an unexpected gift from the Easter Bunny. This led to a hectic period of nurturing baby chicks, hastily constructing a grow-out coop, and eventually building a permanent home for them.
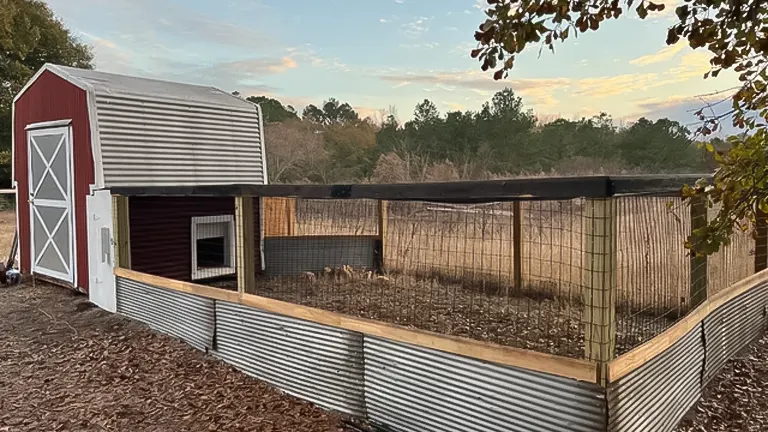
After numerous changes in our flock and having constructed two coops, the time arrived for us to build a new one. We opted to buy an 8′ x 8′ garden shed kit from a home improvement store, intending to transform it into a chicken coop. Our previous experiences had taught us that my husband and I were not particularly skilled carpenters. Moreover, the limited access to our yard made it impractical to bring in a pre-built coop. Choosing a garden shed kit seemed like a practical solution, removing the complexities of construction from scratch. This choice also allowed us to apply the valuable lessons we had learned from our past coop-building experiences to this new project.
List of Turning a Shed Into a Chicken Coop:
- Planning and Preparing
- The Transformation Process
- The Grand Opening
- Enhancing Coop Security
- Tips for Aspiring Coop Builders
Why I Decided to Convert My Shed
The genesis of my shed-to-coop transformation journey began on a quiet, introspective afternoon in my garden. As I sat there, my gaze landed on the old shed, a structure that had been a silent, overlooked part of my backyard for years. Its weathered walls and faded paint spoke of an era gone by, yet it stood there with a sturdy promise of potential.
As someone deeply passionate about sustainability and self-sufficiency, the idea of repurposing this neglected space struck a chord with me. I envisioned a bustling coop, alive with the sounds of clucking chickens and the promise of fresh, organic eggs each morning. This vision wasn’t just about having a constant supply of eggs; it was about connecting more deeply with the natural food cycle, reducing waste, and giving new life to an old structure.
The shed, once a forgotten storage space, now held the potential to become a cornerstone of my journey towards a more sustainable, fulfilling lifestyle. This was an opportunity to not only revitalize a part of my property but also to enrich my daily life with the joys and responsibilities of raising chickens. The thought of transforming this underused space into a thriving, eco-friendly chicken coop ignited a sense of excitement and purpose, setting the stage for what would become a profoundly rewarding project.
1. Planning and Preparing
The initial phase of my chicken coop project was dominated by meticulous planning, a process that became both an educational journey and a creative endeavor. Night after night, I found myself immersed in a sea of resources, from detailed articles and online forums dedicated to backyard poultry care to books brimming with coop design ideas. My goal was to absorb as much knowledge as possible about what makes a coop not just functional, but also a safe and pleasant environment for the chickens.
I pored over various coop layouts and styles, understanding the importance of each element – from the placement of perches and nesting boxes to the type of flooring most conducive to cleanliness and health. The safety and comfort of my future flock were at the forefront of every decision. I meticulously considered factors like insulation for weather protection, the ideal size for the coop relative to the number of chickens, and the types of materials that would be durable yet non-toxic.
In the second phase of my preparation, I turned these gleanings into tangible plans. My evenings were filled with sketching and revising designs, each iteration bringing me closer to the ideal balance of form and function. The coop needed to be secure, not just against the weather, but also against potential predators. I researched the most common threats in my area and incorporated features such as reinforced wire mesh and secure locking mechanisms.

Ventilation was another critical aspect; I knew that proper air circulation was essential for maintaining a healthy environment, so I planned for strategically placed vents and windows that could offer ample airflow without creating drafts. Lighting too was an important consideration, both for the health of the chickens and for extending their laying period during shorter days. I explored options for natural light through windows and skylights, and looked into safe, energy-efficient artificial lighting solutions.
Additionally, I aimed to design the coop in a way that would make maintenance routines as straightforward as possible, knowing that ease of cleaning and accessibility were key to ensuring a well-kept, hygienic home for the chickens. This extensive planning phase laid a solid foundation for what would become a fulfilling and successful project.
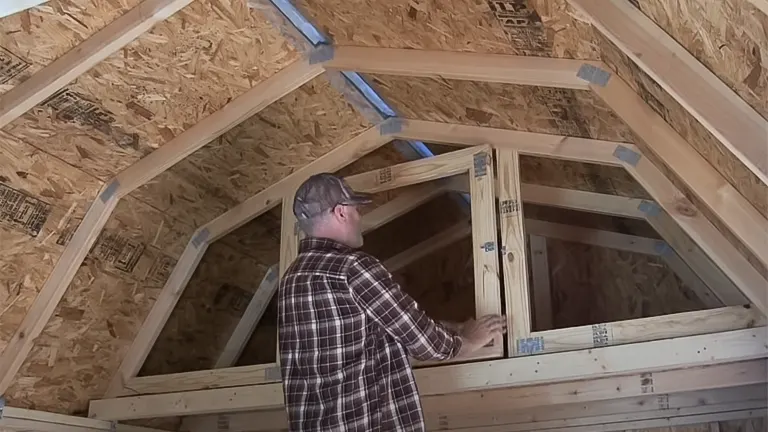
2. The Transformation Process
Cleaning and Repairs
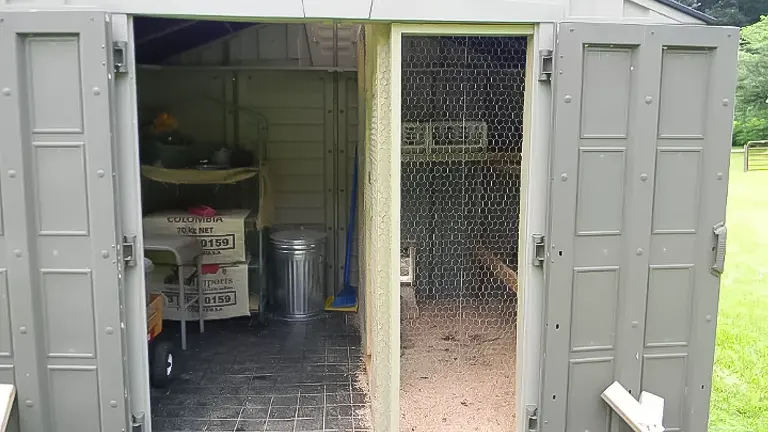
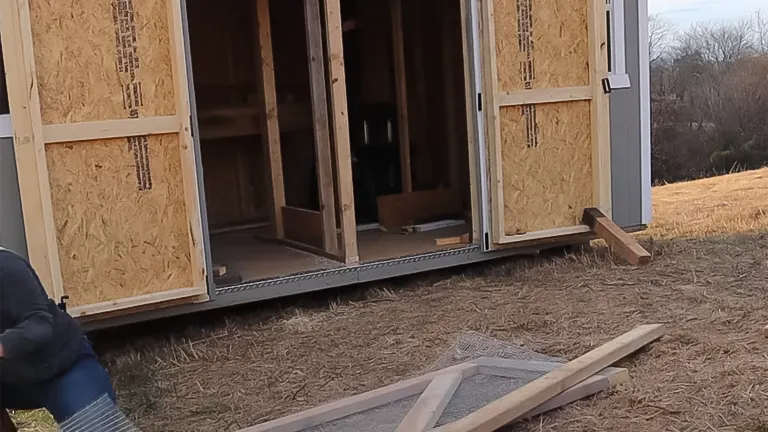
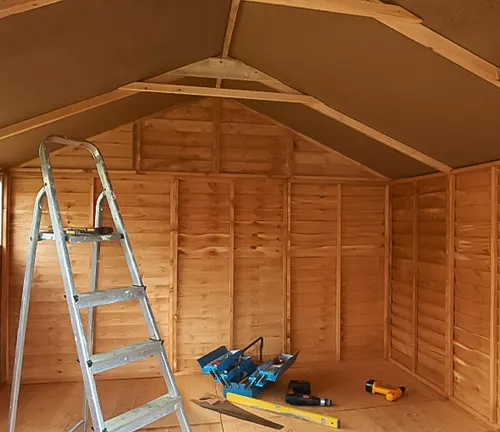
The transformation began with a thorough cleaning of the old shed, which was cluttered with gardening tools and covered in dust. After a dedicated weekend of clearing out and inspecting the structure, I found it to be in reasonably good condition. However, I took no chances and reinforced several weak spots to enhance its stability. Additionally, I addressed a minor but crucial repair by fixing a small leak in the roof, ensuring the interior would remain dry and protected from the elements.
Ventilation and Insulation
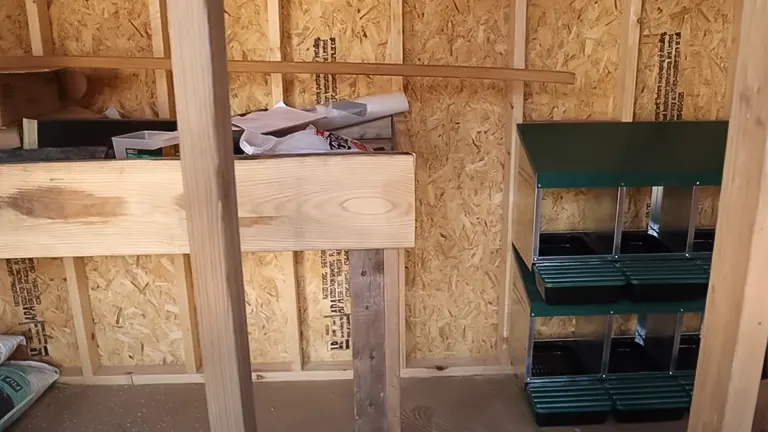
Understanding the importance of a well-ventilated and climate-controlled environment for chickens, I focused next on ventilation and insulation. To facilitate adequate air circulation, I installed several vents and windows, strategically placed to provide fresh air without creating uncomfortable drafts. The walls were then insulated, a step that would keep the coop warm during the chilly winter months and pleasantly cool throughout the summer, creating a comfortable year-round habitat for the chickens.

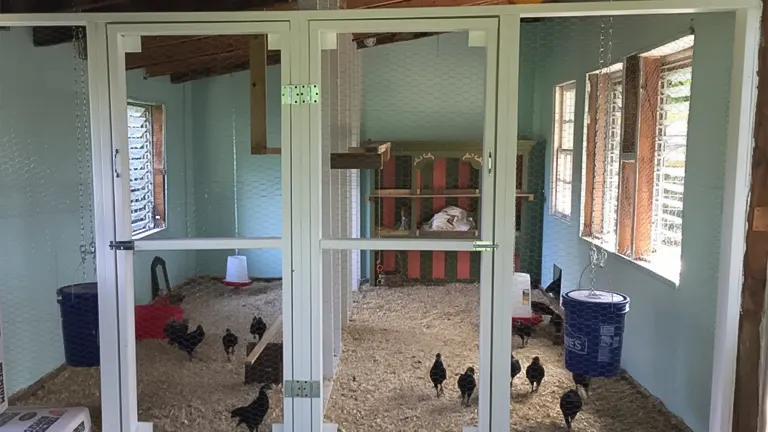
Nesting Boxes and Roosting Bars
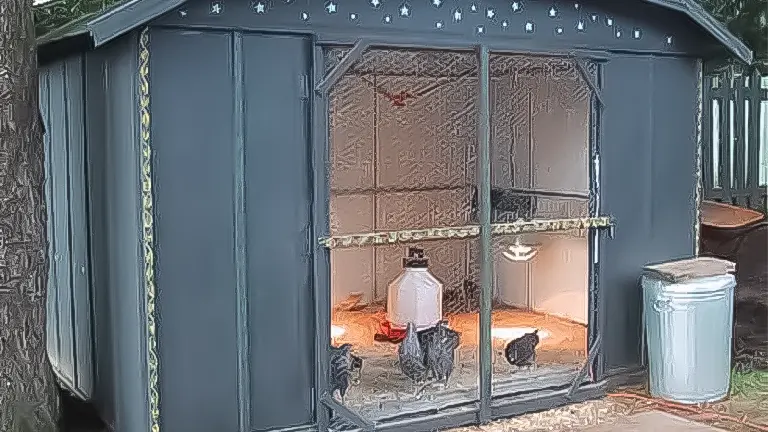
For the chickens’ comfort and egg-laying needs, I constructed nesting boxes along one side of the shed and fitted roosting bars. I ensured the nesting boxes were lined with straw, making them soft, warm, and inviting. This setup was designed not just for the chickens’ comfort but also to encourage regular and stress-free egg laying.
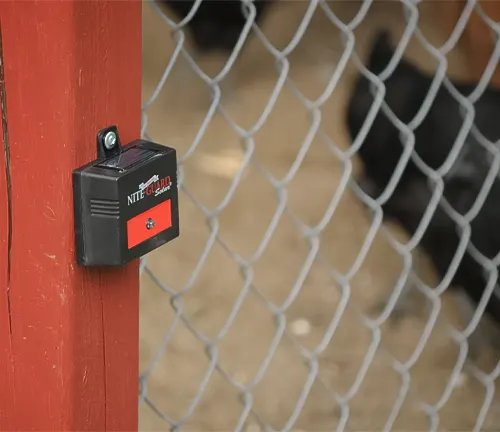
Predator-Proofing
Lastly, ensuring the safety of the chickens was paramount. I rigorously predator-proofed the coop by installing hardware cloth around the perimeter, including all potential entry points. I meticulously secured windows and doors and checked for any gaps or vulnerabilities that might allow predators to enter, thus creating a secure and safe environment for the chickens to thrive.
3. Grand Opening
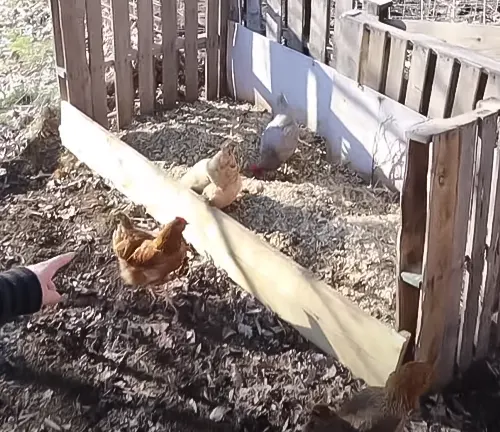
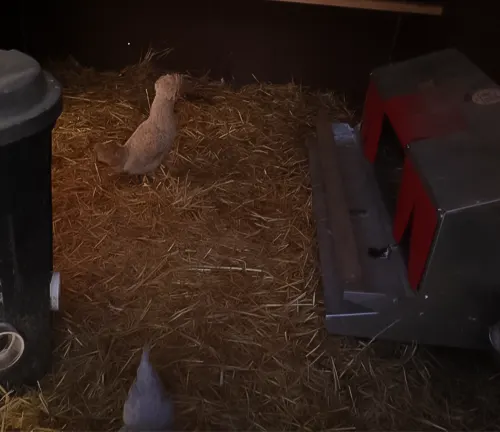
Finally, the much-anticipated day dawned when it was time to welcome my chickens into their newly transformed abode. As I gently ushered them into the coop, their reactions were nothing short of delightful. The air was filled with their lively clucks and curious chirps, a chorus that seemed to express their excitement and approval.
They eagerly explored every corner, their beaks busily pecking at the straw-lined floor and the smooth wooden surfaces of their new roosting bars and nesting boxes. Watching them adapt so quickly and comfortably to their surroundings filled me with a profound sense of achievement and joy. They seemed to instinctively understand that this was their new safe haven, a place meticulously crafted for their comfort and well-being.
Each curious glance and contented cluck from the chickens was a validation of the effort and love I had poured into every detail of the coop. This moment wasn’t just about completing a project; it was the beginning of a new chapter in my journey with these fascinating creatures, and the fulfillment of a vision brought to life through hard work and dedication.
4. Life with the Coop
- Daily Routines: My daily routine includes feeding the chickens, collecting eggs, and ensuring the coop is clean and comfortable. It’s surprisingly therapeutic, and I’ve grown quite fond of my feathery friends.
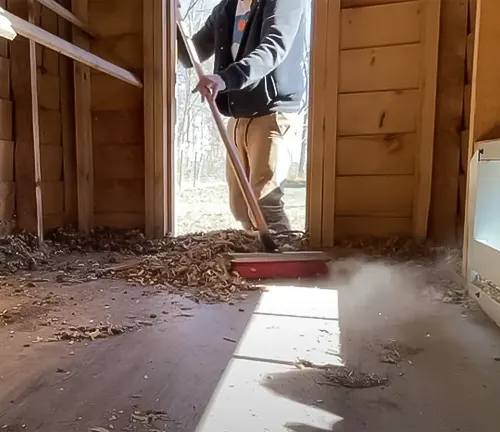
- Challenges and Solutions: One challenge was managing the smell and cleanliness. I learned that regular cleaning and proper ventilation were key. I also implemented a deep litter method, which has worked wonders.
- The Joy of Fresh Eggs: There’s nothing like the taste of fresh eggs. They’re a staple in my kitchen now, and I often share them with neighbors, strengthening our community bond.
5. Enhancing Coop Security
Transforming your shed into a chicken coop run invites the challenge of safeguarding your flock from wildlife, essentially turning your backyard into a potential feast for predators. It’s crucial to fortify the coop effectively. Here are several key measures:
- Opt for a half-inch hardware cloth for securing openings such as windows and ventilation areas.
- Around the coop’s run, dig a trench about 12 inches deep and line it with hardware cloth to deter digging predators.
- Fully enclose the run with a sturdy cover to ensure complete protection.
- Implement raccoon-proof latches. Raccoons are notably clever and agile, so using a padlock, despite its slight inconvenience, is often the best solution.
- Avoid relying on chicken wire for security; it’s more decorative than protective.
- Always bring food and water containers inside during the night to avoid attracting unwanted visitors.
After establishing these security basics in your converted chicken coop, you have the liberty to enhance its aesthetic appeal. Decorative elements like lighting, landscaping, and personalized signs can add charm but always prioritize cleanliness, functionality, and, above all, the safety of your chickens to create a space that both you and your birds will cherish.
Tips for Aspiring Coop Builders
- Do Your Research: Understand the needs of your chickens and the best practices for building a coop.
- Plan Thoroughly: Good planning prevents future problems.
- Prioritize Safety: Protect your chickens from predators.
- Be Ready for Maintenance: A coop requires regular cleaning and care.
- Enjoy the Process: Embrace the learning curve and enjoy the journey!
Final Conclusion
Embarking on this endeavor has transcended the mere construction of a chicken coop; it has unfolded as an enriching journey of discovery and connection. Through this project, I’ve not only gained practical skills but have also deepened my bond with nature and joined a vibrant community of like-minded backyard chicken keepers. The experience has been incredibly rewarding, offering not just the tangible benefits of fresh eggs but also an immense sense of fulfillment and joy. For anyone contemplating a similar venture, my advice is to wholeheartedly embrace the opportunity. It’s more than just a project; it’s a pathway to learning, growth, and the pleasures of a self-sustained lifestyle.
Frequently Asked Questions
- What is the ideal size for a shed to be converted into a chicken coop?
The ideal size depends on the number of chickens you plan to keep. Generally, each chicken requires about 3-4 square feet of space inside the coop. - Do I need any special permissions or permits to convert my shed into a chicken coop?
This varies depending on local zoning laws. It’s essential to check with your local government or zoning office for any permits or regulations. - How do I ensure proper ventilation in the chicken coop?
Install vents or windows that can be opened or closed depending on the weather. Ensure there’s enough airflow to reduce humidity and ammonia levels but not too much to cause drafts. - What materials are safe and recommended for insulating the coop?
Materials like fiberglass, foam boards, or natural options like wool can be used. Ensure they are covered so the chickens don’t peck at them. - How many nesting boxes do I need for my flock?
Typically, one nesting box for every 3-4 hens is sufficient as they often share boxes. - What’s the best way to predator-proof my chicken coop?
Use hardware cloth instead of chicken wire for better protection, secure all doors and windows, and ensure there are no gaps or weak points around the coop. - How often should I clean the chicken coop?
Perform spot cleaning daily and a thorough clean every few weeks or as needed. The frequency depends on the size of your flock and coop. - What type of flooring is best for a chicken coop?
Concrete, dirt, or wooden floors are common. Concrete is easy to clean but needs bedding for comfort, while wood is warmer but can rot over time. - Can I use artificial lighting in the coop, and how does it affect chickens?
Yes, artificial lighting can be used to extend daylight hours, especially in winter, to maintain egg production. However, it should mimic natural light patterns to avoid stressing the chickens. - How do I manage temperature extremes in the coop, especially during winter and summer?
Insulation helps regulate temperature. In winter, use extra bedding and possibly a safe heat source if extremely cold. In summer, ensure adequate ventilation and shade to prevent overheating.
We’d love to hear from you! If you’ve embarked on the journey of transforming a shed into a chicken coop, please share your personal experiences and insights in the comments section below. Your stories, tips, and lessons learned could be invaluable to others considering this rewarding project. Your input could help fellow enthusiasts navigate the challenges and joys of creating a cozy, functional home for their feathered friends. Let’s build a community of knowledge and support together!

Edward Smith
Forestry AuthorWoodworking is about more than crafting; it's a harmonious connection with nature, mastering tools, and preserving our environment. I'm here to share my knowledge and experiences with you, forging a future where we can embrace wood's beauty and utility while safeguarding our forests' health and diversity.
2 comments
I have just bought myself eight chickens and want to start Poultry.farming. I have an old Wendy house and want to transform.it. would love learn woodwork.


I want to start Poultry farming in my backyard. I have a wooden Wendy house to use it for keeping my eight chickens. 3 Rooster and 5 hens.
Christine Mthimkhulu
February 3, 2024 9:00 pm