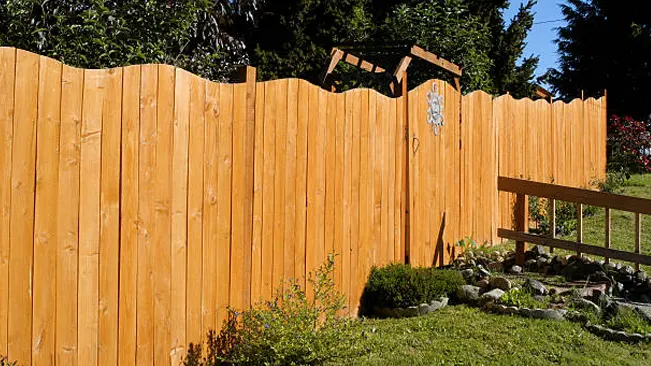
How to Build a 6 Foot Privacy Fence: Step-by-Step Guide
- September 26, 2024
- 0 comment
Do you want to enjoy your backyard in privacy, free from prying eyes or nosy neighbors? A 6-foot privacy fence can offer both security and peace of mind, providing a clear boundary between you and the outside world. But how do you go about building one, especially if you’ve never tackled such a project before?
While constructing a fence may seem daunting, following a clear, step-by-step process can simplify the task. In this guide, we’ll break down everything you need to know to build a sturdy and attractive 6-foot privacy fence.
Tools and Materials You’ll Need
To build a 6-foot privacy fence, you’ll need a variety of tools and materials. Here’s a list of the essentials:
Tools:
- Post hole digger or power auger
- Level
- Measuring tape
- Hammer or nail gun
- Saw (circular or handsaw)
- Cordless drill
- String line
Materials:
- Fence posts (4×4 pressure-treated lumber or metal posts)
- Fence panels or individual boards (cedar or treated pine)
- Concrete mix
- Nails or screws (galvanized to prevent rust)
- Gravel for post drainage
- Stain or sealant (for wood fences)
Types of Privacy Fences
There are several types of privacy fences, and the one you choose will affect both the appearance and function of your fence. Understanding the differences between them can help you make the right decision for your yard.
1. Stockade Fences
Stockade fences consist of tightly placed vertical boards that are attached to horizontal rails, creating a solid barrier. These are popular for full privacy because the boards leave no gaps.
2. Board-on-Board Fences
Board-on-board fences have overlapping vertical boards, offering complete privacy while allowing airflow. This design reduces wind pressure on the fence, making it more durable in windy areas.
3. Lattice-Top Fences
Lattice-top fences combine solid privacy fencing with an open lattice section at the top. This design offers both privacy and aesthetic appeal, allowing some light and airflow through the upper portion.
Step-by-Step Guide to Building a 6-Foot Privacy Fence
Now that you’ve considered the preliminary factors and chosen your materials, it’s time to start building. Here’s a step-by-step process to guide you.
1. Mark the Fence Line
Use string and stakes to mark where your fence will go. Measure carefully to ensure the fence follows your property line. Ensure the lines are straight and mark where each post will be placed, typically every 6 to 8 feet.
2. Dig Post Holes
Using a post hole digger or power auger, dig holes for your fence posts. The general rule of thumb is that one-third of the post should be underground. For a 6-foot fence, the holes should be at least 2 feet deep. Adding a few inches of gravel to the bottom of the hole helps with drainage and prevents wood rot.
3. Set Fence Posts in Concrete
Place each post into the hole and check that it’s level. Pour the concrete mix around the post, ensuring that it holds the post steady. Allow the concrete to cure for 24 hours before proceeding to the next step.
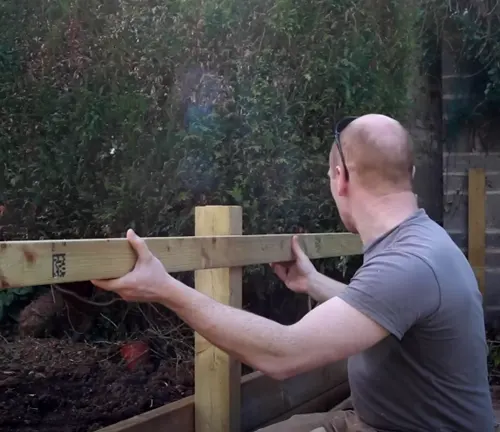
4. Attach Rails
Once the posts are set, attach horizontal rails between the posts. For a 6-foot fence, you’ll typically need three rails: one near the top, one in the middle, and one at the bottom. Secure the rails to the posts with galvanized nails or screws.
5. Install Fence Panels or Boards
If you’re using pre-made fence panels, you can now attach them to the rails. For individual boards, start at one end and attach each board vertically, ensuring they are level. Boards can be placed tightly together for full privacy or spaced slightly apart for airflow.
6. Trim and Seal the Fence
Once all the boards are attached, trim the tops of the boards to a uniform height if necessary. For wood fences, apply a protective stain or sealant to prevent water damage and extend the life of the fence.
Conclusion
Building a 6-foot privacy fence is a great way to enhance your home’s security and create a secluded space for relaxation. By understanding the materials, tools, and steps involved, you can successfully construct a fence that meets your needs and stands the test of time. Follow local regulations, use quality materials, and take your time during the installation process.
With careful planning and execution, your new privacy fence will be both functional and aesthetically pleasing, adding value to your property for years to come.
Frequently Asked Questions (FAQ’s)
- Do I need a permit to build a 6-foot privacy fence?
Yes, most areas require a permit for fences taller than 4 feet, so check with your local authorities. - How deep should fence posts be for a 6-foot privacy fence?
Fence posts should be buried at least 2 feet deep or one-third the height of the fence for stability. - What type of wood is best for building a 6-foot privacy fence?
Cedar and pressure-treated pine are great options because they resist rot and pests. - Can I install a 6-foot fence myself, or should I hire a professional?
You can install it yourself, but hiring a professional may ensure faster and more accurate installation. - How far apart should fence posts be placed?
Posts are usually placed 6 to 8 feet apart for adequate support. - Should I use nails or screws for attaching fence boards?
Screws are better because they hold stronger and are easier to replace if needed. - How long does it take to build a 6-foot privacy fence?
It typically takes 2 to 3 days for a DIY project, depending on the size. - Can I install a privacy fence on uneven ground?
Yes, but it may require special techniques like stepping or racking the panels. - What maintenance is required for a wood privacy fence?
Seal or stain the wood every 1-2 years and inspect for loose boards or damage. - What is the most cost-effective material for a privacy fence?
Pressure-treated wood is usually the most affordable and durable option.

Edward Smith
Forestry AuthorWoodworking is about more than crafting; it's a harmonious connection with nature, mastering tools, and preserving our environment. I'm here to share my knowledge and experiences with you, forging a future where we can embrace wood's beauty and utility while safeguarding our forests' health and diversity.


Leave your comment