How to Grow and Care for Potatoes: Essential Tips for Bountiful Harvests
- May 8, 2024
- 3 comment
If you’re dreaming of a garden filled with robust and healthy potato plants, you’ve come to the right place. In this comprehensive guide, we’ll walk you through every step of the potato growing process. From choosing the right soil and seed potatoes to mastering the art of planting, caring, and finally harvesting, we provide all the information you need to ensure your potato patch is the envy of neighbors and the pride of your garden.
Whether you’re a beginner or an experienced gardener, our expert tips and practical advice will help you achieve the bountiful harvest you’re aiming for. Let’s get started and turn those potato dreams into reality!
Table of Contents
- Understanding Potatoes
- Preparing for Planting
- Planting Your Potatoes
- Growth and Maintenance
- The Hilling Process in Potato Cultivation
- Harvesting and Storing Potatoes
- Final Thoughts
- FAQs
Understanding Potatoes
The potato, scientifically known as Solanum tuberosum, is a tuberous crop from the nightshade family, originating from the Andean mountain regions of South America. Through centuries of domestication and breeding, the potato has evolved into a diverse array of varieties each adapted to various climates and soil conditions across the globe. Potatoes are not only a staple food but also serve as a significant source of vitamin C, potassium, and dietary fiber.
Potato Varieties and Their Unique Characteristics
When planning a potato garden, the variety selection is crucial as each type has distinct cooking properties and nutritional profiles. Here’s a deeper look at the three main categories:
- Starchy Potatoes (Russets, Idaho): These potatoes are high in starch and low in moisture, making them ideal for baking and frying. They turn fluffy and light when cooked, which is perfect for dishes like baked potatoes and french fries. Starchy potatoes have a glycemic index of approximately 85-111, which can vary based on preparation methods.
- Waxy Potatoes (Red Potatoes, Fingerling): Waxy varieties have less starch and more moisture, maintaining their shape well during cooking. They are excellent for boiling, roasting, and slicing in salads. Their lower starch content generally translates to a glycemic index around 56-69.
- All-Purpose Potatoes (Yukon Gold, White Potatoes): These potatoes have a moderate amount of starch and are versatile enough to perform well in most recipes, whether they are roasted, mashed, or used in soups. The glycemic index for all-purpose varieties typically ranges from 70-90.
Characteristics of Potato Varieties
| Variety Type | Example Varieties | Ideal Cooking Method | Glycemic Index Range | Typical Climate |
|---|---|---|---|---|
| Starchy | Russets, Idaho | Baking, frying | 85-111 | Cooler, well-drained soil |
| Waxy | Red Potatoes, Fingerling | Boiling, salads | 56-69 | Versatile, moist environments |
| All-Purpose | Yukon Gold, White | Roasting, mashing | 70-90 | Adaptable to various climates |
Climate and Soil Considerations
Selecting the right potato variety also involves understanding the specific climate and soil preferences of each type:
- Russets: Thrive in cooler climates with a well-drained, slightly acidic soil (pH 5.0-6.0).
- Red Potatoes: Perform well in various environments but prefer moist conditions and can tolerate slightly more acidic soils.
- Yukon Gold: Known for their adaptability, these potatoes can thrive in a wide range of climatic conditions and soil types.
In-Depth Nutritional Insights
Potatoes are an excellent source of several micronutrients, including vitamin B6, vitamin C, and various antioxidants which vary slightly between varieties. For instance, pigmented potatoes like purple varieties contain anthocyanins, which have been shown to have antioxidant properties.
Preparing for Planting
Soil Preparation
Successful potato cultivation begins with optimal soil conditions. Potatoes require well-drained, loose soil to avoid issues like waterlogging and rot. The ideal soil for potatoes has a pH between 5.0 and 7.0, which supports optimal nutrient uptake and minimizes the risk of soil-borne diseases.
- Soil Amendments: Integrate generous amounts of organic matter into your soil at least three to four weeks before planting. Materials like well-rotted manure, compost, or leaf mold not only improve soil structure and drainage but also boost fertility. For soils that are particularly dense or clayey, consider adding sand to enhance permeability.
- Testing and Adjusting pH: Conduct a soil test to determine the pH level. If the pH is too high (alkaline), incorporate sulfur to lower it. If it’s too low (acidic), adding garden lime can help raise the pH to the desired level. Adjusting the soil pH to the ideal range ensures that potatoes can absorb the maximum amount of nutrients.
Climate Considerations
The timing of planting is pivotal and varies by climate:
- Cooler Climates: Plant potatoes as soon as the soil is thawed and workable, typically around two weeks before the last expected frost. This early start avoids the soil becoming too wet and cold, which can delay growth.
- Warmer Regions: In areas with hot summers, planting in late winter allows the crop to establish itself before the high temperatures of summer, which can stress the plants and inhibit tuber development.
Optimal Planting Times and Soil Preparation Techniques
| Climate Type | Planting Time | Soil Amendment | pH Adjustment Needed |
|---|---|---|---|
| Cooler | Early spring, before last frost | Compost, manure, sand (if clayey) | Sulfur (if too alkaline) |
| Warmer | Late winter, before summer heat peaks | Compost, manure | Lime (if too acidic) |
Planting Your Potatoes
Choosing Seed Potatoes
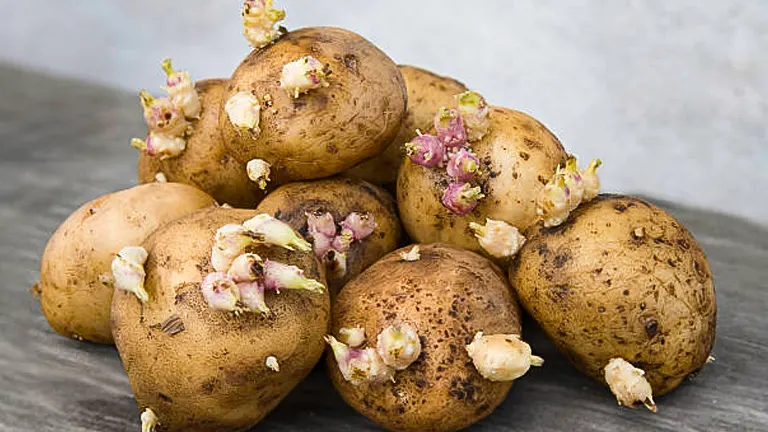
Selecting the right seed potatoes is critical for ensuring a healthy and productive crop. Use certified seed potatoes, which are guaranteed to be free from pathogens such as viruses and bacterial infections. These seeds have been inspected and certified by agricultural authorities to ensure they meet high standards of quality.
- Selection Criteria: Look for firm potatoes with a robust skin. Each ‘eye’ on a potato has the potential to sprout into a new plant. The eyes should be well-defined and numerous, indicating a healthy seed potato.
Cutting and Curing
Larger seed potatoes should be cut into pieces to maximize the number of plants you can grow from each tuber. Each piece should have at least one or two eyes.
- Cutting Technique: Use a clean, sharp knife to make clean cuts. This reduces the risk of disease transmission and promotes faster healing.
- Curing Process: After cutting, the potato pieces need to be cured. Place them in a dry, well-ventilated area for 2-3 days. Curing allows the cut surfaces to dry and form a callus, a process scientifically known as suberization, where suberin—a protective waxy substance—seals the cut areas to prevent infection and moisture loss.
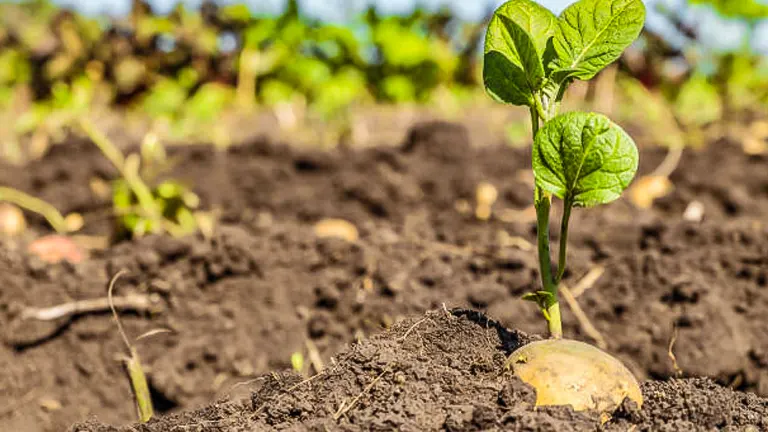
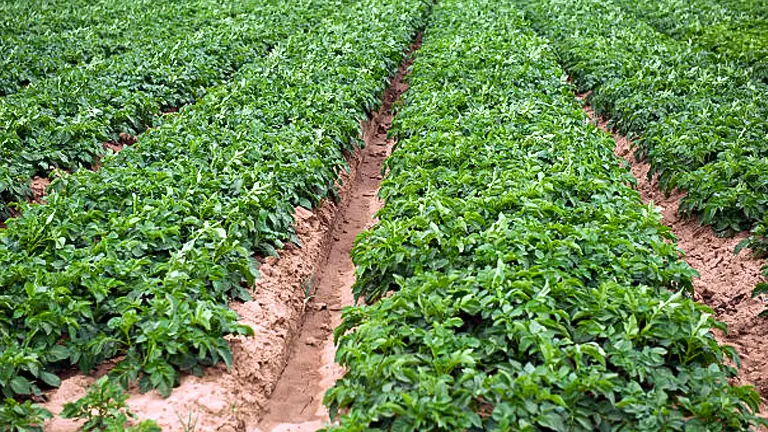
Planting Techniques
The proper planting of potatoes can significantly affect both the yield and the quality of your crop.
- Depth and Spacing: Plant the cured potato pieces with the eye side facing up, about three to four inches deep. This depth allows the sprouts to emerge easily. Space the seed pieces about 12 inches apart to ensure that each plant has enough room to develop a healthy root system and adequate foliage.
- Row Spacing: Standard row spacing is 30 to 36 inches. This spacing allows for sufficient airflow and sunlight penetration, which are crucial for healthy growth. For higher density planting, such as in commercial farming or limited space gardens, reduce the row spacing to about 24 inches. This closer spacing can increase yield per unit area but requires careful management of nutrients and water to prevent competition stress among plants.
Planting Parameters and Effects
| Parameter | Specification | Purpose | Scientific Benefit |
|---|---|---|---|
| Cutting Size | 1-2 eyes per piece | Maximize use of seed potatoes | Promotes efficient use of resources |
| Curing Time | 2-3 days | Allows formation of protective callus | Enhances disease resistance |
| Planting Depth | 3-4 inches | Optimal for sprout emergence | Ensures adequate cover, reduces greening |
| Plant Spacing | 12 inches | Room for growth | Optimizes nutrient uptake and growth |
| Row Spacing | 30-36 inches, 24 inches for high density | Access for cultivation, affects air and light exposure | Balances yield with plant health |
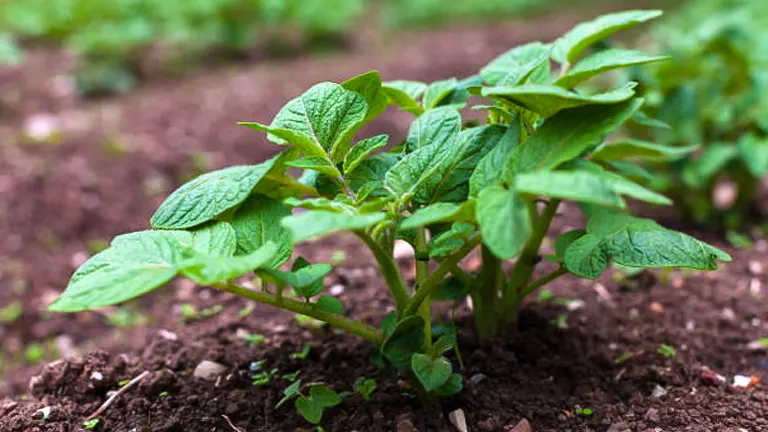
Growth and Maintenance
Successful cultivation of potato plants requires meticulous attention to their growing conditions. Here’s a detailed breakdown of the key care practices:
Watering Requirements
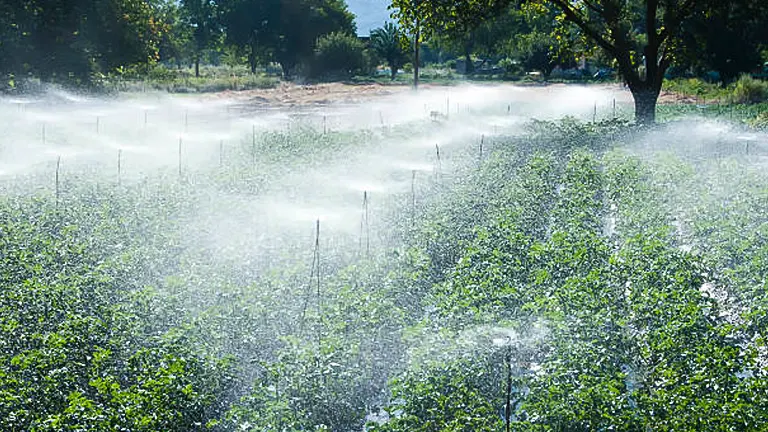
Potatoes thrive on consistent moisture, particularly during the critical tuber-forming phase. It’s essential to provide approximately 25 to 50 mm (1 to 2 inches) of water per week. This hydration supports the plants during the rapid growth phase and ensures the development of well-formed tubers. The timing and distribution of water are crucial; irregular watering can cause tubers to develop cracks or become misshapen. Use a drip irrigation system for uniform application and to avoid wetting foliage, which can lead to fungal diseases.
Fertilization and Soil Care
Optimal soil management and fertilization are vital for healthy potato growth. After planting, apply a balanced fertilizer with a lower nitrogen content (e.g., N-P-K ratio of 5-10-10) to encourage strong root and tuber development without excessive foliage. A second application should be made halfway through the growing season to maintain nutrient availability. Regularly aerate the soil to prevent compaction, and keep the soil weed-free to reduce competition for nutrients.
Pest and Disease Management
Potato crops are susceptible to pests like the Colorado potato beetle and aphids, as well as diseases such as blight and scab. Effective management includes regular inspections and prompt treatment using suitable organic or conventional methods. Implementing a crop rotation strategy, ideally on a three-year cycle, significantly mitigates soil-borne diseases and disrupts pest life cycles.
Pruning Techniques
While potatoes generally require minimal pruning, strategic foliage management can benefit overall plant health. Trimming lower leaves can enhance air circulation, reducing the risk of moisture-related fungal diseases. Thinning dense foliage occasionally helps redirect the plant’s energy towards tuber formation rather than leaf growth.
Scientific Analysis Table
To further assist in understanding the precise requirements for optimal potato growth, the following table provides detailed parameters:
| Growth Factor | Optimal Range or Value | Description |
|---|---|---|
| Watering Depth | 25-50 mm per week | Ensures sufficient moisture reaches roots, crucial for tuber formation. |
| Fertilizer Type | Low nitrogen (N-P-K 5-10-10) | Promotes tuber growth over foliage; applied post-planting and mid-season. |
| Soil pH | 5.0-6.5 | Slightly acidic soil favors growth and reduces the occurrence of soil pathogens. |
| Pest Monitoring | Weekly | Early detection is critical to managing infestations before they become severe. |
| Crop Rotation | Every 3 years | Prevents pathogen buildup in soil and disrupts pest life cycles. |
| Pruning Techniques | Trim lower leaves, thin dense foliage | Improves airflow, reduces disease risk, and helps redirect energy to tuber growth. |
The Hilling Process in Potato Cultivation
Hilling is an essential agricultural technique used in potato farming to ensure optimal tuber development and to protect the tubers from environmental factors that can compromise their quality and yield.
Purpose of Hilling
- Tuber Development: Hilling increases the volume of soil around the potato stems, providing more space for tubers to expand and develop. This additional soil space is crucial as it directly correlates with the potential yield of the plant.
- Protection from Sunlight: Exposing potatoes to direct sunlight can trigger the production of solanine, a natural toxin that makes potatoes green and bitter. Hilling ensures tubers remain covered and protected from light.
- Improved Drainage: By mounding soil around the plants, hilling helps improve drainage around the potato roots, reducing the risk of waterlogging and subsequent root and tuber rot.
Hilling Procedure
- First Hilling:
- Timing: Begin when potato plants are about 6-8 inches tall.
- Method: Using a hoe, shovel, or mechanical tiller, gently mound soil around the base of each plant, covering the lower stems but leaving the upper leaves exposed to ensure continued photosynthesis.
- Second Hilling:
- Timing: Perform a second hilling once the plants have grown an additional 6 inches, usually a few weeks after the first.
- Method: Increase the height of the mound to 10-12 inches using additional soil drawn from between the rows. This not only supports growing tubers but also stabilizes the plant.
- Maintenance:
- Regular Inspection: Check and maintain the hills throughout the growing season, especially after heavy rainfalls, to ensure that tubers remain well-covered and protected.
Scientific Insights and Table of Hilling Metrics
To provide a more quantitative understanding, here is a detailed table describing the scientific metrics associated with the hilling process:
| Aspect | Description | Impact on Potato Growth |
|---|---|---|
| Initial Hilling | Plants reach 6-8 inches in height | Encourages early tuber formation by providing more soil space and stabilizing the stems. |
| Second Hilling | Plants grow another 6 inches | Further enhances tuber expansion, improves drainage, and stabilizes taller plants. |
| Soil Mound Height | Target: 10-12 inches | Provides ample room for tubers to grow and shields them from sunlight to prevent greening. |
| Regular Maintenance | Monitor hills post-rainfall | Ensures tubers remain protected, reducing the risk of green and bitter potatoes. |
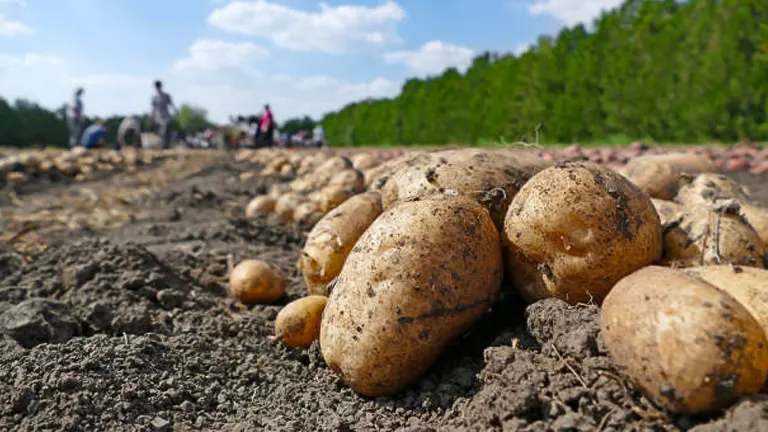
Harvesting and Storing Potatoes
Effective harvesting and proper storage techniques are crucial for maximizing the yield and quality of your potato crop.
Signs of Maturity
Understanding when potatoes are ready for harvest is essential for obtaining the best quality:
- New Potatoes: These are harvested early, usually about two weeks after the plants flower, when the tubers are still small and tender. They are not suitable for long-term storage but are prized for their flavor and texture.
- Mature Potatoes: For potatoes intended for storage, wait until the foliage has completely died back and then allow an additional two to three weeks before harvesting. This waiting period is critical as it allows the skins to thicken and cure naturally on the plant, which is vital for enhancing their storage capacity.
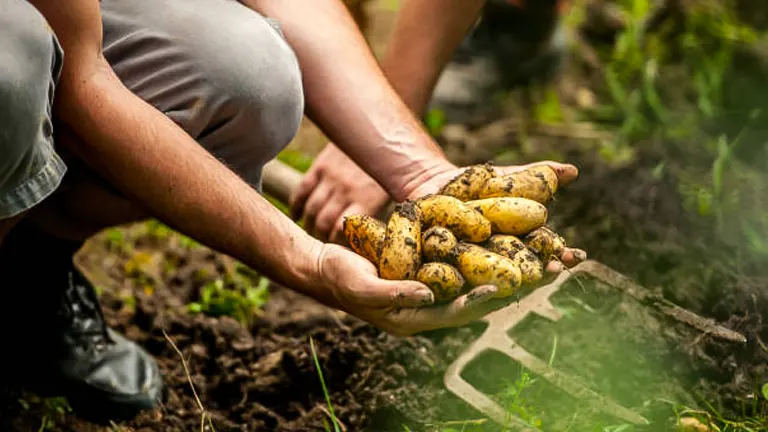
Harvesting Techniques
The method of harvesting can significantly affect the integrity and subsequent storability of the tubers:
- Manual Digging: Ideal for small-scale gardens, use a garden fork or spade to gently loosen the soil around the plants. Carefully lift the plant and remove the tubers by hand, shaking off any excess soil. This method minimizes damage to the potatoes, preserving their skins from mechanical injuries.
- Mechanical Harvesting: Suitable for large plots, mechanical diggers lift the potatoes from the soil and convey them via a series of belts or rollers, which can be adjusted to handle the tubers as gently as possible. Regular maintenance and correct adjustment of the harvester are essential to avoid bruising and skinning the potatoes, which can lead to spoilage.
Storing Potatoes
Proper storage conditions can significantly extend the shelf life of potatoes:
- Curing: After harvesting, cure potatoes in a cool (approximately 60°F), dark, and well-ventilated area for about 10 days. Curing heals cuts and reduces the moisture content of the skin, toughening it up to withstand the rigors of storage.
- Storage Conditions: Transfer the cured potatoes to a storage area with temperatures between 45 to 50°F and high humidity (around 85-90%) to prevent shriveling. Darkness is vital to prevent greening and the development of solanine, a toxic compound.
- Regular Inspection: Periodically check stored potatoes for signs of spoilage such as soft spots, mold, or sprouting. Remove compromised tubers to prevent the spread of decay.
Summary Table
| Aspect | Detail | Importance |
|---|---|---|
| Signs of Maturity | 2 weeks after flowering (new); 2-3 weeks after foliage dies (mature) | Ensures optimal flavor and storability |
| Manual Harvesting | Use garden fork or spade | Minimizes damage to tubers |
| Mechanical Harvesting | Adjust equipment for gentle handling | Prevents bruising and ensures quality |
| Curing Process | 10 days in cool, dark, ventilated space | Heals cuts, toughens skin |
| Storage Conditions | 45-50°F, 85-90% humidity, dark environment | Prevents sprouting and spoilage, extends shelf life |
| Regular Inspection | Check for spoilage | Maintains quality and reduces waste |
Related Post
- How to Fertilize Bougainvillea: A Complete Guide for Stunning Blooms
- How to Fertilize Apple Trees: Essential Tips for a Bountiful Harvest
- How to Fertilize Lemon Trees: Secrets for Thriving Citrus
- How to Fertilize Avocado Tree: A Step-by-Step Guide for Lush Growth
Final Thoughts
Whether you are a novice gardener or an experienced cultivator, growing potatoes offers a rewarding experience with delicious outcomes. With patience and care, your potato plants will thrive, providing you with a plentiful supply of this versatile and nutritious vegetable. We encourage you to use this guide as a resource as you nurture your crops, explore different potato varieties, and perfect your techniques for year-round success.
FAQs
- What is the best time of year to plant potatoes?
The best time to plant potatoes depends on your climate. In cooler regions, plant potatoes as early as two weeks before the last expected frost in spring. In warmer climates, it’s better to plant in late winter to avoid the heat of mid-summer. - How do I select the right potato variety for my garden?
Choose a variety based on your local climate, soil type, and culinary preferences. Starchy varieties like Russets are great for baking and frying, while waxy types like Red Potatoes are ideal for boiling and salads. Consider disease resistance and maturity time when selecting varieties. - Can I use supermarket potatoes as seed potatoes?
It’s not recommended to use supermarket potatoes as they may have been treated to prevent sprouting and could carry diseases. Instead, purchase certified seed potatoes from a reputable nursery or seed supplier. - How deep and far apart should I plant potato seeds?
Plant seed potato pieces about three to four inches deep and about 12 inches apart. Rows should be spaced about 30 to 36 inches apart to allow for growth and hilling. In denser planting setups, rows can be about 24 inches apart. - What are the signs that potatoes are ready to harvest?
Potatoes are ready for harvest when the foliage begins to yellow and die back. For new potatoes, harvest them about two weeks after the plants have flowered. For mature potatoes, wait until the foliage has completely died back to allow the skins to thicken, which is better for storage. - How should I water my potato plants?
Potatoes require consistent moisture, especially during tuber formation. Provide about 1 to 2 inches of water per week, adjusting based on rainfall, soil type, and weather conditions. Avoid overwatering to prevent tuber rot. - What common pests and diseases should I watch out for when growing potatoes?
Watch for Colorado potato beetles, aphids, and potato blight. Implement preventative measures such as crop rotation, proper spacing, and using disease-resistant varieties. Regularly inspect plants and treat with appropriate organic or chemical methods if pests or diseases appear. - How do I store potatoes after harvesting?
Cure potatoes in a cool, dark, and well-ventilated place for about 10 days to allow any cuts to heal and the skin to harden. Store cured potatoes in a dark, cool (around 45 to 50°F), and humid environment. Avoid storing potatoes in the refrigerator, as cold temperatures can turn starches into sugars and alter the taste.
With these essential tips for planting, growing, and storing, you’re now well-equipped to cultivate your own bountiful harvests of potatoes. Embrace the journey from soil preparation to harvest, and enjoy the satisfying crunch of freshly dug potatoes from your garden. Happy gardening!

Kristine Moore
Forestry AuthorI'm Kristine Moore, a seasoned garden landscaping professional with over 30 years of experience. My extensive career has been dedicated to transforming outdoor spaces into stunning, sustainable landscapes. With a deep understanding of horticulture, design principles, and environmental stewardship, I have become a respected figure in the field, known for creating harmonious, visually appealing, and eco-friendly gardens. My commitment to excellence and continuous learning in landscaping trends and techniques has solidified my reputation as an expert in garden design and implementation.
3 comments
So educative, you have motivated to plant potato this year, thank you admin
Anierobi nonso
May 16, 2024 2:02 pmThank you for your insight. I had my potato plants turning grey and I just harvest them all with lower yield what could be the reason.


Nice Post!
David Rugaaju
May 16, 2024 5:40 pm