Cold Frame Winter Vegetable Gardening
- January 22, 2024
- 0 comment
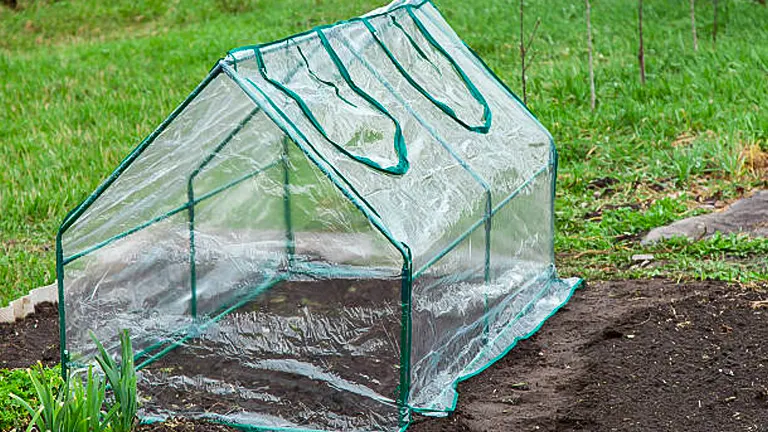
Master winter gardening with cold frames! Discover tips for growing vegetables even in the coldest months. Welcome to the world of Cold Frame Winter Vegetable Gardening, a haven for those who love to nurture plants all year round! Imagine savoring your home-grown vegetables even during the chilly winter months. Cold frames, simple structures with transparent tops, make this possible. They create a snug and warm environment for your plants, protecting them from frost and cold winds.
Whether you’re a seasoned gardener or a curious beginner, cold frame gardening is an accessible way to extend your growing season and enjoy fresh, home-grown produce when most gardens are asleep. Let’s embark on this journey to turn winter’s chill into a season of growth!
Table of Contents
- What is a Cold Frame?
- Defining The Structure and Essential Components of Cold Frame
- How a Cold Frame Works to Protect Plants?
- Benefits of Using a Cold Frame
- Planning for Cold Frame Gardening
- Choosing a Cold Frame
- How To Build a Simple DIY Cold Frames
- Selecting the Right Crops for Cold Frame Gardening
- Advantages and Disadvantages of Cold Frame Gardening
- The Persephone Period
- Maintenance and Care for Cold Frame Gardening
- Harvesting Your Winter Vegetables in Cold Frame
- Conclusion
- FAQs
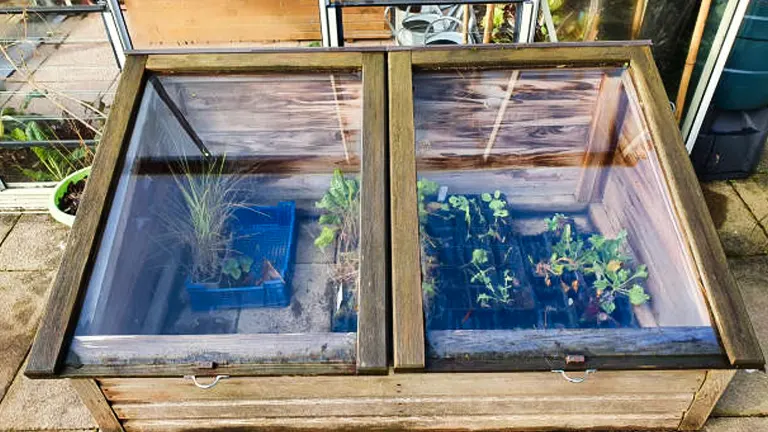
What is a Cold Frame?
A cold frame is a practical gardening structure designed to extend the growing season by protecting plants from the cold. It typically consists of a transparent top made of glass or clear plastic, supported by a sturdy frame, usually crafted from wood or metal. This transparent cover is key to its function, as it allows sunlight to enter while retaining heat, fostering a warmer, controlled environment inside.
The primary purpose of a cold frame is to shield young seedlings and delicate plants from harsh winter conditions. By trapping solar heat and insulating plants against frost, it creates a favorable microclimate that can significantly jumpstart the growing season. Gardeners often use cold frames to start seed germination earlier in the spring and keep vegetables growing longer into the fall and early winter.
Beyond extending the growing season, cold frames also offer a protective haven for plants against damaging winter elements. They reduce the impact of cold winds and prevent frost damage, which is particularly crucial for tender plants that are susceptible to sudden temperature drops. This protection makes cold frames an invaluable tool for gardeners looking to maximize their yield year-round.
Moreover, cold frames provide an excellent environment for hardening off plants. This process involves gradually introducing indoor-grown plants to outdoor conditions, preparing them for eventual transplanting into the garden. The controlled environment of the cold frame makes it an ideal intermediary step, offering a buffer against the elements while plants adjust to the temperature and light variations they will encounter in an outdoor setting.
Cold frames are a versatile and essential component of gardening, especially in regions with longer winters or cooler climates. They allow gardeners to extend their cultivation capabilities, offering a cost-effective and efficient way to grow a variety of plants outside of the traditional growing season.
Defining The Structure and Essential Components of Cold Frame
1. Transparent Top
- Function: The transparent top of a cold frame, typically made of glass or clear, sturdy plastic, serves a dual purpose. It allows sunlight to enter, which is crucial for plant growth and warmth. During the day, the transparent top captures solar energy, creating a greenhouse effect inside the cold frame.
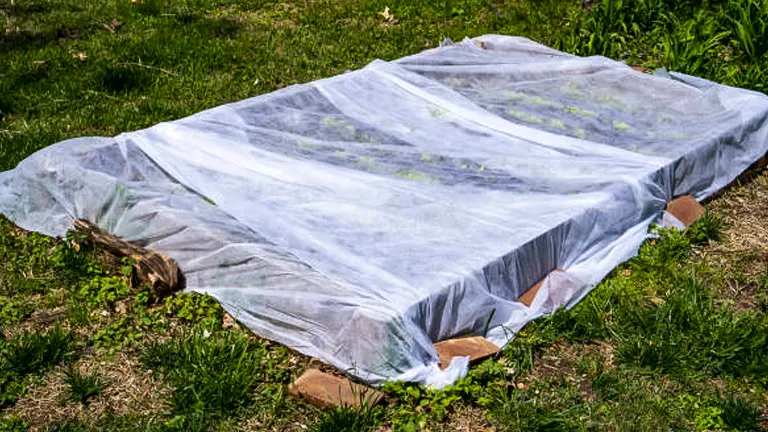
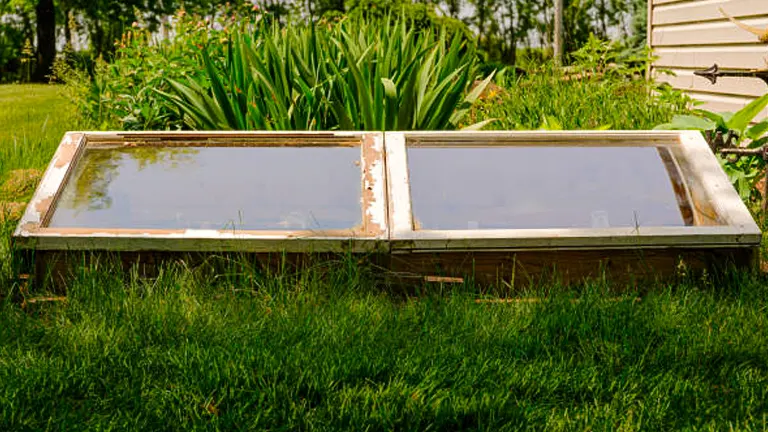
- Materials: Choices range from old windows to purpose-built, UV-resistant polycarbonate panels. Each material has its benefits, with glass being durable and clear, while plastics are lighter and less fragile.
2. Insulated Sides
- Role: The sides of a cold frame provide essential insulation. They are designed to keep the heat captured by the transparent top from escaping, especially during the night when temperatures drop.
- Construction: Common materials include wood, bricks, or even hay bales. Wood is a popular choice due to its availability, ease of working, and natural insulation properties. Bricks add more permanence and better insulation but at a higher cost and labor intensity.
3. Ventilation System
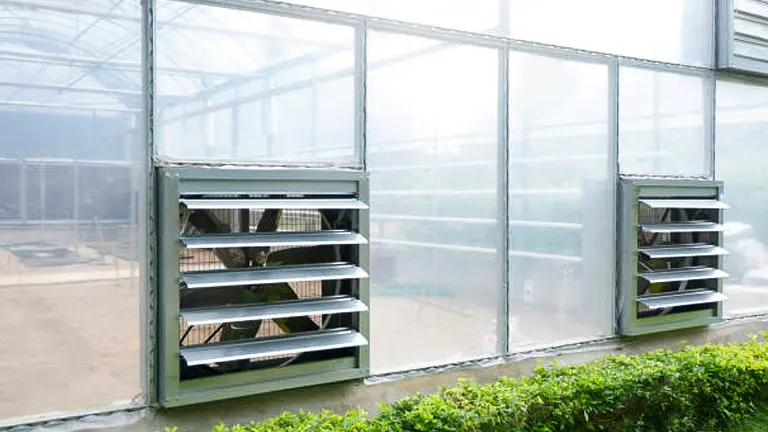
- Importance: Ventilation is crucial in a cold frame to prevent overheating and to provide air circulation. On sunny days, even in winter, temperatures inside a cold frame can rise significantly, potentially harming the plants.
- Design: This can be as simple as a hinged top that can be propped open or more complex with automatic opening arms that respond to temperature changes. The key is to allow gardeners to control the internal environment, balancing between warmth and necessary air flow.
4. Bottomless Design
- Concept: Most cold frames are bottomless, placed directly over a patch of ground. This design allows plants to grow in natural soil, which maintains the health of the root systems and eases nutrient uptake.
- Advantages: The bottomless structure also aids in drainage, preventing water accumulation that could lead to root rot or fungal diseases. It simplifies the setup process, as gardeners can place the frame over an existing garden bed.
5. Size and Shape
- Variability: Cold frames come in various sizes and shapes, but they are generally low to the ground to maximize heat retention and ease of access.
- Customization: The size can be tailored to the gardener’s needs and available space. A standard cold frame is typically large enough to accommodate several plants but small enough to be easily managed.
How a Cold Frame Works to Protect Plants?
Cold frames work by creating a microclimate that guards against frost and promotes a warmer environment. The transparent top allows sunlight to warm the soil and air during the day, while the insulated sides keep the heat in during cooler nights. Here’s a breakdown of its key functions:
- Traps Solar Heat: The transparent top of a cold frame, made of glass or clear plastic, captures sunlight. This sunlight warms the air and soil inside the frame, creating a snug, greenhouse-like environment. This warmth is crucial for seed germination and growth during colder months.
- Insulates Against Cold: The frame’s sides, typically constructed from materials like wood or bricks, provide insulation. They help retain the heat gathered during the day, preventing it from escaping at night. This insulation is vital in maintaining a stable, warmer temperature inside the frame, protecting plants from frost and freezing conditions.
- Shields from Wind and Snow: Cold frames act as a physical barrier against harsh winter winds and snow. By blocking these elements, the frame minimizes the risk of physical damage to plants and reduces the chilling effect of cold winds, which can be detrimental to plant growth.
- Regulates Moisture: While protecting plants from excess moisture like heavy rain or snow, cold frames also help in maintaining adequate soil moisture levels. This controlled environment prevents the soil from becoming too wet or too dry, promoting healthier plant growth.
In essence, a cold frame is a simple yet effective tool in extending the gardening season, allowing plants to thrive even during the colder parts of the year.
Benefits of Using a Cold Frame
Using a cold frame in gardening brings several advantages, each contributing to a more fruitful and extended growing season. Here’s a look at some key benefits:
- Extended Growing Season: One of the primary benefits of using a cold frame is the extension of the growing season. By providing a warmer and controlled environment, cold frames allow gardeners to start their spring planting earlier and extend the harvest period into the colder months. This is particularly beneficial for regions with short growing seasons, enabling gardeners to maximize their yield throughout the year.
- Protection from Frost: Cold frames offer crucial protection against frost, which can be detrimental to young seedlings and sensitive plants. By maintaining a stable temperature that’s warmer than the external environment, these structures ensure that sudden drops in temperature don’t damage or kill off plants. This protection is especially important in early spring and late fall when frost can be unpredictable.
- Enhanced Plant Growth: The microclimate created within a cold frame promotes more robust plant growth. The consistent and warmer environment, along with protection from harsh elements, results in healthier plants and often leads to better yields. This is especially noticeable in vegetables and herbs, which can flourish in the conditions a cold frame provides.
- Pest and Wildlife Control: Cold frames act as a physical barrier against pests and wildlife that might otherwise damage or consume the plants. This protection is vital for ensuring that young seedlings can grow without the threat of being eaten or harmed by garden pests and animals.
- Economical and Eco-friendly: For those looking to garden more sustainably and economically, cold frames are an excellent option. They require no external power source, relying solely on natural sunlight for heat. This not only saves on energy costs but also reduces the carbon footprint associated with traditional greenhouse gardening.
In summary, cold frames are an invaluable asset in the garden, enhancing plant growth, extending the growing season, and providing a sustainable way to protect and nurture plants year-round.
Planning for Cold Frame Gardening
Successful cold frame gardening begins with strategic planning, essential for maximizing the potential of your winter garden. The process should ideally start before the arrival of cold weather. Selecting an optimal location is crucial; a spot that is south-facing and receives ample sunlight throughout the day is ideal. This maximizes natural light and heat, vital for maintaining a warm environment inside the cold frame. Consider the type of plants you wish to grow. Hardy vegetables like kale, spinach, and carrots are excellent for winter gardening. Timing is key, and in most regions, planting in late summer or early fall allows plants to establish before the cold sets in.

Deciding whether to build your own cold frame or buy a pre-made one is another important aspect of planning. A DIY cold frame can be a rewarding project, allowing for customization to fit your specific needs and space. Use materials that are durable, provide good insulation, and are transparent for maximum sunlight. Understanding your local climate, including first frost dates and the duration of the growing season, helps determine the best planting times and the most suitable crops for your cold frame. An internal thermometer is a useful tool for monitoring the temperature and ensuring optimal growing conditions.
Additional Tips for Cold Frame Gardening:
- Ventilation: Plan for adequate ventilation to prevent overheating on sunny days.
- Watering Schedule: Adjust your watering routine as plants in cold frames may require less water.
- Pest Control: Regularly inspect for pests, as a warmer environment can attract them.
- Insulation: Consider extra insulation for the frame during extreme cold spells.
- Crop Rotation: Rotate crops in the cold frame to maintain soil health and prevent disease.
When it comes to selecting a cold frame for your garden, the decision largely hinges on whether to build one yourself (DIY) or purchase a pre-made unit. Both options have their unique advantages, depending on your gardening needs, skills, and preferences.
Choosing a Cold Frame
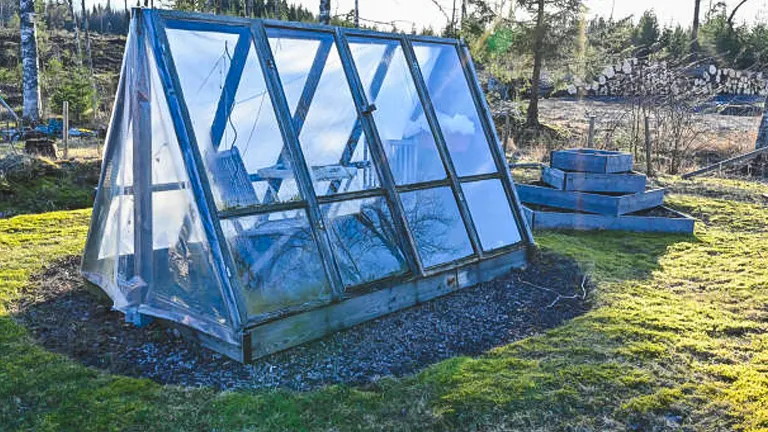
1. DIY Cold Frames
Building your own cold frame can be a fulfilling project for those who enjoy DIY activities. The main advantage of constructing a cold frame yourself is the ability to customize its size and design to suit your specific gardening space and needs. Materials such as old windows, lumber, and polycarbonate sheets can be used, offering flexibility and often a more cost-effective solution. A DIY approach also allows you to choose materials that blend well with your garden’s aesthetic. However, building a cold frame requires some basic carpentry skills, tools, and an understanding of how to create a structure that will effectively capture and retain heat while providing durability and ease of access.
Additional Tips for making a DIY Cold Frames:
- Choose the Right Wood: Selecting the appropriate wood is crucial. While cedar is popular due to its durability and rot resistance, other options like pine can be more affordable. If using a less durable wood, consider treating it with a non-toxic sealant to prolong its life.
- Optimize for Sun Exposure: When designing your cold frame, consider the angle of the sun during different seasons. A sloping top, higher at the back than the front, allows for maximum sun exposure and facilitates rain and snow runoff.
- Consider the Top’s Weight: If you are using a heavy material like an old window for the top, ensure the frame is sturdy enough to support it. The lid should be easy to lift for ventilation without straining the structure.
- Waterproofing: Protect your cold frame from moisture damage by waterproofing the wood. Use a non-toxic waterproof sealant, especially if you are using a wood type that is not naturally weather-resistant.
- Easy Access and Security: Ensure the lid can be securely opened and closed. In windy areas, a locking mechanism or heavy-duty latches can prevent the lid from blowing open.
- Internal Heat Sources: In extremely cold climates, consider adding an internal heat source like a heat mat or a bulb. Just be cautious with electrical items and ensure they are suitable for outdoor use.
- Drainage and Soil Health: Good drainage is vital. If placing the cold frame directly on the ground, remove grass underneath and consider adding a layer of gravel for improved drainage. This also aids in soil health by preventing waterlogging.
- Reflective Surfaces to Enhance Light: To increase light inside the cold frame, consider placing reflective materials such as aluminum foil or white paint on the interior walls. This can help distribute light more evenly, especially beneficial for growing seedlings.
- Regular Maintenance Checks: Periodically inspect your cold frame for any damage, especially after severe weather conditions. Regular maintenance can extend its life and ensure it remains a safe and effective environment for your plants.
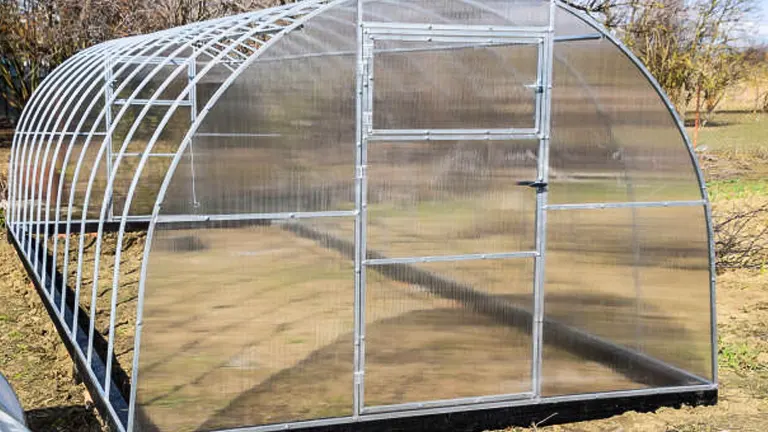
2. Pre-Made Cold Frames
For gardeners who prefer a ready-to-use solution, pre-made cold frames are available in various sizes and materials. These cold frames offer convenience and are ideal for those who may not have the time or inclination to build one. Pre-made frames are typically well-designed for optimal light and heat retention and come with features like adjustable lids for ventilation. While this option can be more expensive than a DIY project, it saves time and effort and ensures a professionally crafted product that is ready to be used immediately after purchase.
Additional Tips to Consider when Choosing Pre-made Cold Frames:
- Material Quality: When selecting a pre-made cold frame, assess the quality of the materials used. Look for durable frames made from weather-resistant wood or metal and high-quality transparent materials like UV-stabilized polycarbonate. A good quality material ensures longevity and better insulation.
- Size and Shape: Consider the size and shape of the cold frame in relation to your available garden space and the type of plants you intend to grow. Ensure it’s large enough to accommodate your needs but not so large that it becomes cumbersome to manage or doesn’t fit in your designated space.
- Ventilation Options: Proper ventilation is crucial for regulating temperature and humidity inside a cold frame. Look for models with adjustable lids or side panels that can be easily opened or closed. Some advanced models come with automatic vent openers that adjust according to the temperature.
- Ease of Assembly and Use: Check how easy it is to assemble the cold frame. Many pre-made options are designed for easy setup, but some might require additional tools or complex assembly. Also, consider how easy it is to access the plants for maintenance or harvesting.
- Insulation Features: Good insulation is key for a cold frame, especially in very cold climates. Check if the cold frame has features like double-glazed panels or weather stripping to improve heat retention.
- Brand Reputation and Reviews: Research the brand and read customer reviews. This can provide insights into the product’s durability, effectiveness, and any potential issues. A reputable brand often guarantees better customer service and product quality.
- Warranty and Customer Support: Look for products with a warranty. This provides assurance against manufacturing defects. Also, consider the level of customer support offered by the company in case you encounter issues with the product.
Regardless of the choice between DIY and pre-made, the key considerations for a cold frame remain its ability to provide adequate light, retain heat, ensure ventilation, and offer ease of access for planting, maintaining, and harvesting your plants.
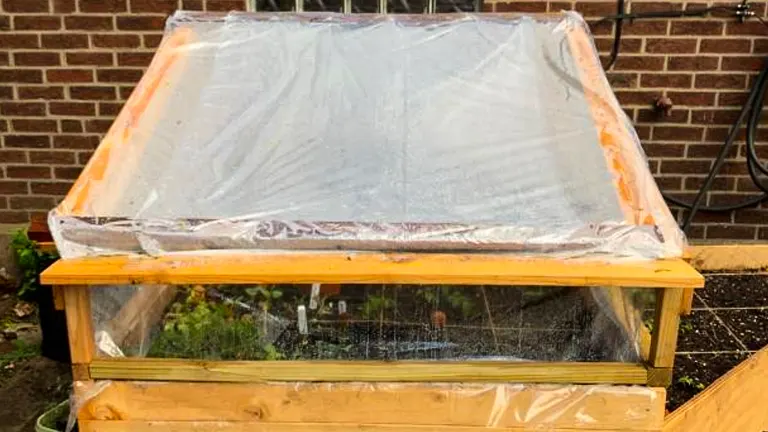
How To Build a Simple DIY Cold Frames
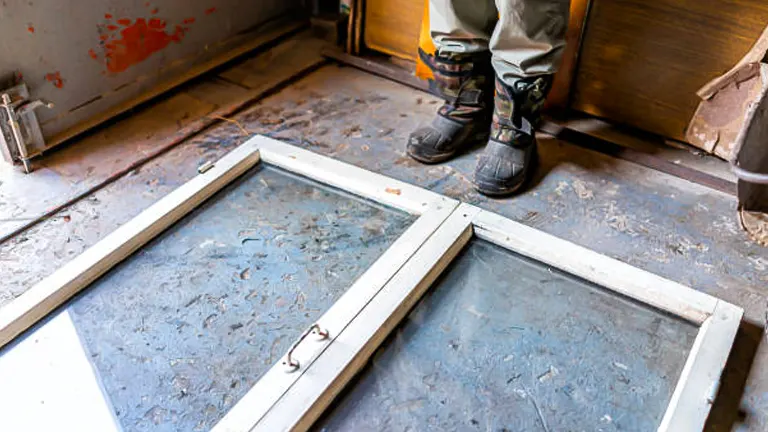
1. Gather Materials

Start by collecting all necessary materials. You will need some type of transparent material for the top, such as an old window or a clear, sturdy plastic sheet. For the frame, durable wood like cedar is a good choice due to its resistance to rot, but any sturdy lumber will do. Additionally, gather tools like a saw, screws, hinges, a drill, and a measuring tape.
2. Design Your Frame
Decide on the dimensions of your cold frame. A standard size is about 3 feet wide by 6 feet long, but you can adjust based on available space and materials. Plan for the back of the frame to be slightly taller than the front to create a sloped roof for rain runoff and maximum sun exposure.
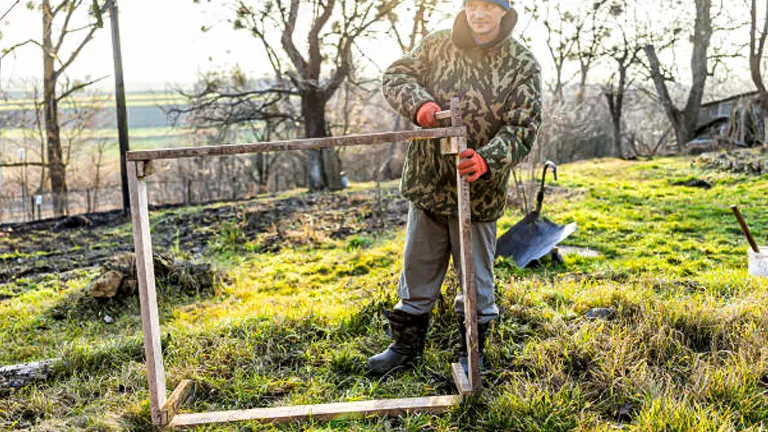
3. Construct the Frame

Cut the wood to your desired dimensions and assemble a simple rectangular box. Use screws to join the corners securely. If you’re using an old window, design the frame to match its size. For a more durable structure, consider reinforcing the corners with metal brackets.
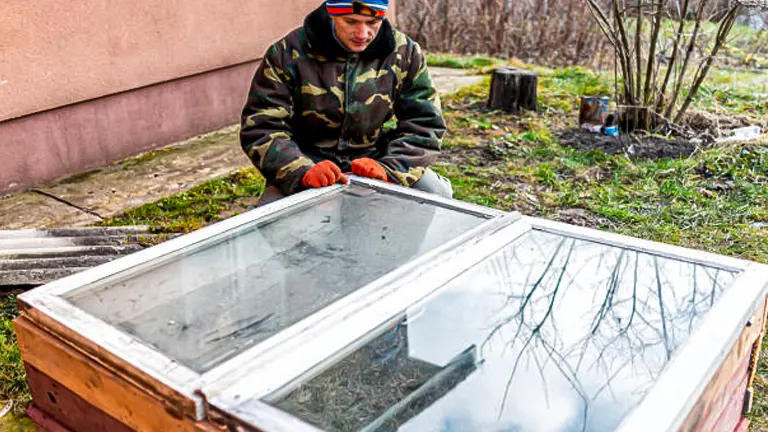
4. Attach the Transparent Top
If using an old window, attach it to the frame using sturdy hinges. This allows the top to be opened for ventilation. If using plastic sheeting, create a wooden frame that fits over the top of the box and staple the plastic to it. Attach this lid to the frame with hinges.
5. Ensure Proper Ventilation

Proper ventilation is crucial to prevent overheating and to regulate humidity. Install a prop stick or automatic vent opener to keep the lid open when temperatures rise. You can also drill several holes near the top of the sides for additional air flow.
6. Position the Cold Frame
Place your cold frame in a south-facing location that gets maximum sunlight. Ensure it’s in a spot with good drainage. If necessary, you can elevate the frame slightly off the ground with bricks or blocks to improve drainage and deter pests.
7. Add Insulation if Needed
In colder climates, adding insulation can improve the cold frame’s effectiveness. Line the inside walls with bubble wrap or foam insulation to help retain heat. Remember, the key is to balance insulation with adequate sunlight penetration.
8. Final Touches
Seal any gaps or cracks with caulk to prevent drafts. Test the lid to ensure it opens and closes smoothly. Optionally, you can paint or treat the wood for additional weather protection and aesthetic appeal.
By following these steps, you can build a functional DIY cold frame that enhances your gardening capabilities, especially during the cooler months.
Selecting the Right Crops for Cold Frame Gardening
1. Leafy Greens (Kale, Spinach, and Swiss Chard):
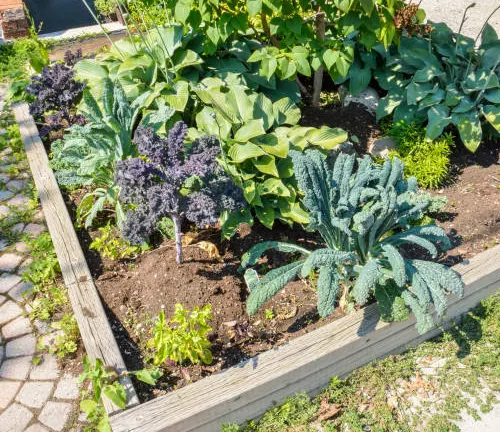
Leafy greens like kale, spinach, and Swiss chard are ideal for cold frame gardening. They can tolerate cold temperatures and even improve in flavor after a light frost. Planting these greens in late summer or early fall can yield a productive harvest throughout the winter months. They require minimal maintenance and provide a continuous supply of fresh leaves for salads and cooking.
2. Root Vegetables (Carrots, Beets, and Radishes):
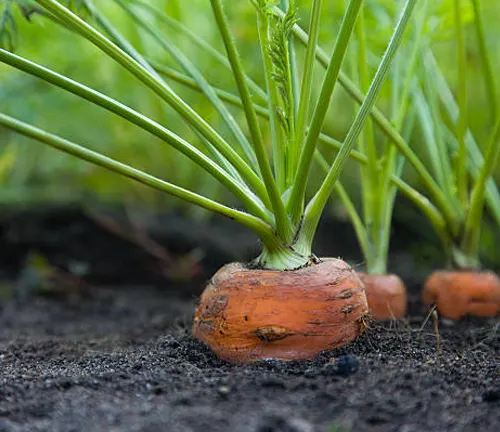
Root vegetables are well-suited to the conditions within a cold frame. Carrots, beets, and radishes can be sown in late summer for a late fall or early winter harvest. They benefit from the cold frame’s protection, which keeps the soil from freezing, allowing these root crops to continue developing slowly and become sweeter in the colder weather.
3. Herbs (Parsley, Cilantro, and Chives):
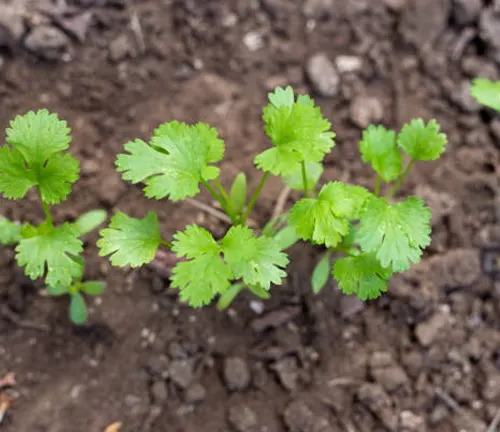
Certain herbs thrive in the cooler temperatures and controlled environment of a cold frame. Parsley, cilantro, and chives can be grown throughout the winter, providing fresh flavors for culinary use. These herbs are generally hardy and can withstand the lower light conditions of winter, making them excellent choices for cold frame gardening.
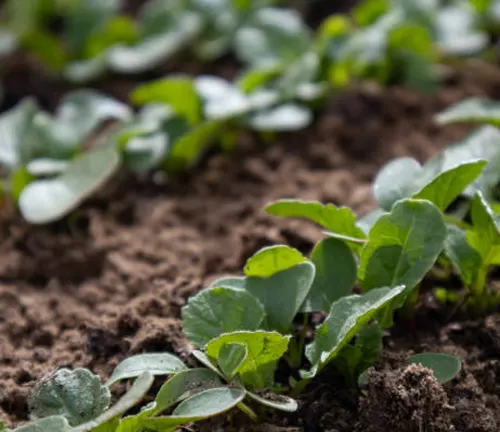
4. Salad Greens (Lettuce, Arugula, and Mâche):
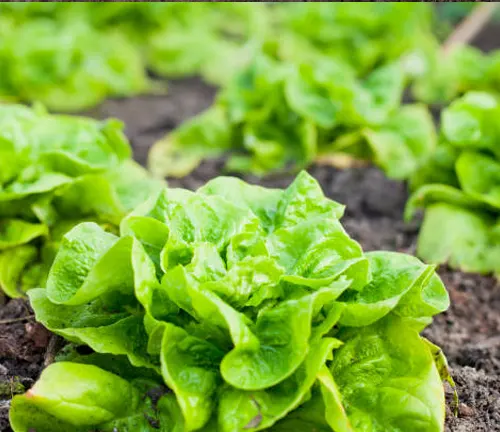
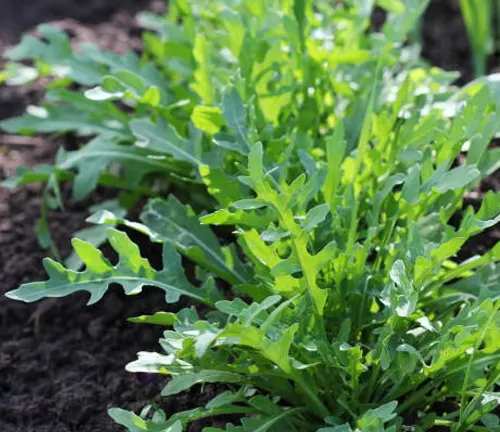
Salad greens such as lettuce, arugula, and mâche (lamb’s lettuce) are perfect for cold frames due to their quick growing times and cold tolerance. Planting these greens in succession every few weeks can provide a steady harvest. The cold frame environment protects them from harsh weather, and the cooler temperatures often result in crisper, tastier leaves.
5. Cruciferous Vegetables (Broccoli and Cauliflower):
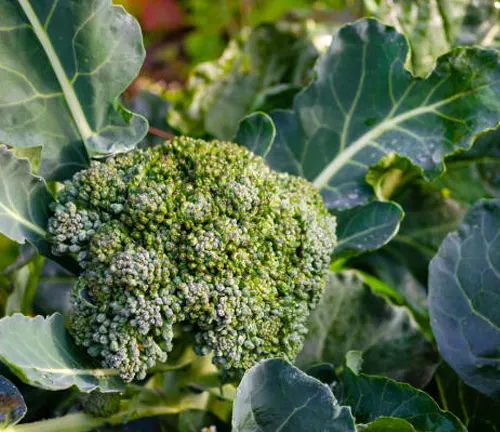
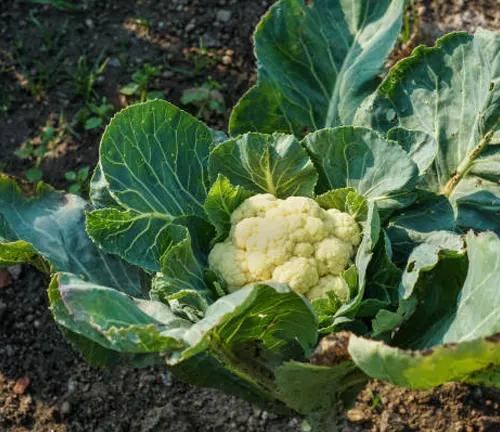
While they require more space, broccoli and cauliflower can be successful in larger cold frames. These crops need to be started earlier in the season to ensure they have enough time to mature. The cold frame can protect these plants from early frost, allowing for a late fall or early winter harvest.
6. Peas and Broad Beans:
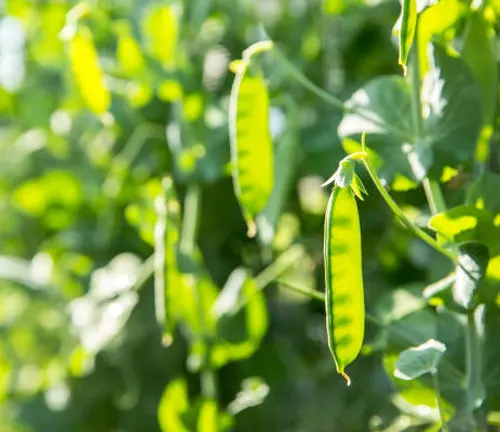
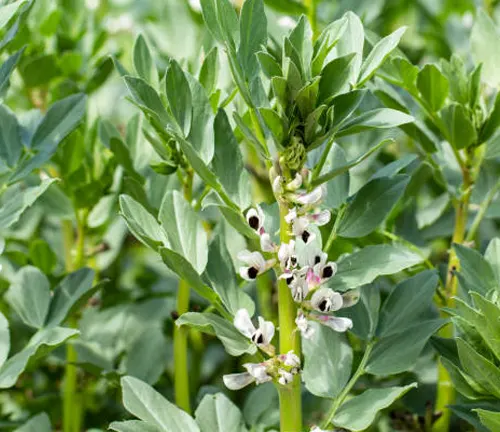
Early varieties of peas and broad beans can be planted in a cold frame towards the end of winter, ready for an early spring harvest. These legumes benefit from the protection and slightly warmer environment provided by the cold frame, giving them a head start before being transplanted outside or harvested directly from the frame.
Choosing the right crops for your cold frame involves considering the space available, the light conditions, and the temperature range inside the frame. With careful selection, cold frame gardening can be a rewarding way to extend your growing season and enjoy fresh produce even in the colder months.
Advantages and Disadvantages of Cold Frame Gardening
Advantages:
- Extended Growing Season: One of the most significant advantages of using a cold frame is the ability to extend the growing season. By protecting plants from the cold and creating a warmer microclimate, a cold frame allows for the cultivation of vegetables and herbs well into the colder months and even through winter in some climates.
- Protection from Harsh Weather: Cold frames provide a shield against frost, snow, and harsh winds, which can damage or kill plants. This protection is crucial for tender seedlings or plants that are sensitive to extreme weather fluctuations, ensuring healthier growth and higher survival rates.
- Pest and Disease Control: The enclosed environment of a cold frame can help reduce the incidence of pests and diseases. By creating a barrier, cold frames limit the access that pests have to the plants, potentially reducing the need for chemical pesticides.
- Energy Efficiency: Compared to traditional greenhouses, cold frames are more energy-efficient as they do not usually require additional heating. They rely on natural sunlight to warm the plants, making them an eco-friendly option for gardeners looking to reduce their carbon footprint.
Disadvantages:
- Limited Space: Cold frames offer limited space, which can be a constraint for gardeners used to more extensive gardening areas. This limitation requires careful planning regarding what and how much to plant, as overcrowding can lead to poor plant growth.
- Temperature and Humidity Management: Managing the internal temperature and humidity levels within a cold frame can be challenging, especially during unseasonably warm or sunny days. Overheating can damage plants, so regular monitoring and ventilation adjustments are necessary to maintain a conducive growing environment.
- Maintenance Requirements: While not excessively demanding, cold frames do require regular maintenance. This includes cleaning the transparent top to ensure maximum light penetration, checking for damages, and adjusting ventilation as needed. Neglecting these tasks can lead to suboptimal growing conditions.
- Watering Considerations: Unlike open-air gardening, cold frames can alter the natural watering needs of plants. Gardeners need to pay close attention to soil moisture levels, as the enclosed space can either retain too much moisture, leading to mold and rot, or dry out quickly.
Understanding these advantages and disadvantages can help gardeners effectively use cold frames and mitigate any challenges that may arise. With proper management, the benefits of cold frame gardening can significantly outweigh the drawbacks.
The Persephone Period
The Persephone Period is a crucial concept in the realm of cold frame gardening and winter agriculture. Named after the Greek goddess Persephone, who was associated with the growth of vegetation and the cycle of the seasons, this period refers to the time of year when there are fewer than 10 hours of daylight each day. During these shorter days, typically from late fall to early spring, plant growth significantly slows down or even halts, due to the insufficient daylight. This natural phenomenon is vital for gardeners to understand and consider, especially when planning and managing a cold frame garden.

The onset and duration of the Persephone Period can vary depending on geographical location. It is essential for gardeners to determine the specific dates for their local area, as this will influence when to plant certain crops and what to expect in terms of growth rates. For instance, vegetables planted too close to the start of the Persephone Period might not have enough time to establish themselves fully before the reduced light limits their growth. Conversely, understanding this period can help gardeners maximize their use of cold frames, as some hardy plants can survive and even continue to grow slowly throughout this time, providing fresh produce during the winter months.
Here’s an example of how the Persephone Period affects cold frame gardening, presented in a column format:
| Crop | Ideal Planting Time Before Persephone Period | Harvest Time During/After Persephone Period |
|---|---|---|
| Spinach | 8-10 weeks before last 10-hour day | Mid-Winter to Early Spring |
| Kale | 10-12 weeks before last 10-hour day | Throughout Winter |
| Carrots | 12-14 weeks before last 10-hour day | Late Winter |
| Lettuce | 6-8 weeks before last 10-hour day | Early to Mid-Winter |
| Broad Beans | 10-12 weeks before last 10-hour day | Early Spring |
This table shows various crops commonly grown in cold frames, their ideal planting times relative to the onset of the Persephone Period, and their expected harvest times. The “Ideal Planting Time Before Persephone Period” is calculated based on the average length of time each crop needs to establish itself before growth slows down due to reduced daylight hours. The “Harvest Time During/After Persephone Period” indicates when these crops are typically ready to be harvested, which can be during or after the Persephone Period, depending on the crop.
Maintenance and Care for Cold Frame Gardening
Proper maintenance and care are key to ensuring a successful cold frame garden. Here’s a list of tips to maintain the right environment inside a cold frame, along with addressing common challenges like moisture control and temperature regulation:
- Regular Ventilation: Proper ventilation is crucial for preventing overheating and providing adequate air circulation within the cold frame. On sunny days, even in winter, the temperature inside can rise quickly. It’s important to open the lid or vents during the day to allow excess heat and moisture to escape and close them in the evening to retain warmth. Automatic vent openers can be a useful investment, as they open and close the lid based on temperature changes.
- Temperature Monitoring: Keeping an eye on the temperature inside your cold frame is essential for the health of your plants. Use a maximum-minimum thermometer to track the temperature fluctuations. The ideal temperature range should be between 45°F and 75°F (7°C to 24°C). On very cold nights, consider insulating the cold frame with burlap sacks or old blankets to protect plants from freezing.
- Moisture Management: Balancing moisture levels is key to preventing mold growth and root rot. Over-watering can be as detrimental as under-watering. Check the soil moisture regularly; it should be damp, not wet. During periods of rain or heavy snow, ensure that water is not seeping into the cold frame and stagnating.
- Pest and Disease Checks: Regularly inspect your plants for signs of pests or disease. The enclosed space of a cold frame can sometimes create an ideal environment for pests to thrive. Remove any affected plants to prevent the spread of disease and consider natural pest control methods to maintain a healthy growing environment.
- Clean the Transparent Top: Keeping the transparent top clean ensures maximum light penetration, which is vital for plant growth. Regularly wipe down the glass or plastic top to remove dirt, algae, or snow. This is especially important during the shorter days of winter when sunlight is limited.
- Soil Health: Over time, the soil in a cold frame can become depleted of nutrients. Refresh or replace the soil as needed, ideally at the start of each growing season. Adding compost or organic matter can help maintain soil fertility and structure, promoting healthy plant growth.
By following these maintenance and care tips, gardeners can create an optimal environment for their cold frame, addressing common challenges and ensuring a productive growing season.
Harvesting Your Winter Vegetables in Cold Frame
- Understanding Harvest Timings: Vegetables grown in a cold frame often have a slower growth rate due to the lower temperatures and reduced sunlight during winter. It’s important to adjust your expectations regarding the size and harvest time. For instance, leafy greens like spinach and kale can be harvested when they have enough leaves to sustain continued growth, typically when leaves are 3-4 inches long. Root vegetables like carrots and beets may take longer to reach full size and are generally ready when they are firm and their tops are poking out of the soil.
- Gentle Harvesting Techniques: The process of harvesting in a cold frame should be gentle to avoid disturbing the roots and compacting the soil, which can be detrimental to the remaining plants. Use your hands or a light tool to carefully pick or cut the vegetables. For root vegetables, loosen the soil around the plant before gently pulling it out.
- Regular Harvest to Encourage Growth: Regular harvesting, especially of leafy greens, encourages further growth. By consistently picking mature leaves, you signal the plant to produce new growth, extending the harvest period. Always leave enough leaves for photosynthesis to ensure the plant continues to thrive.
- Monitoring Plant Health: Keep an eye on the overall health of your plants. If you notice any signs of disease or pest damage, harvest the affected plants promptly to avoid spreading issues to healthy plants. This is also a good opportunity to inspect and maintain the remaining plants.
- Harvesting Before Extreme Weather: If extreme cold or a heavy snowstorm is forecast, consider harvesting your crops beforehand, especially if they are mature enough. Extreme conditions, even within a cold frame, can stress plants and impact the quality of your produce.
- Maximizing Winter Light Exposure: After harvesting, take a moment to remove any dead leaves or debris and adjust the position of plants if necessary to ensure they receive maximum light exposure during the shorter winter days.
By following these harvesting guidelines, you can ensure a productive and sustained yield from your cold frame garden throughout the winter months.
Related Post
- How to Build a Barn: A Step-by-Step Guide for Beginners
- How to Build a Sustainable Compost Bin: Easy and Eco-Friendly DIY
- How to Fertilize Bougainvillea: A Complete Guide for Stunning Blooms
- How to Fertilize Apple Trees: Essential Tips for a Bountiful Harvest
- How to Fertilize Lemon Trees: Secrets for Thriving Citrus
- How to Fertilize Avocado Tree: A Step-by-Step Guide for Lush Growth
- 10 Best Bow Saws to Buy in 2024: Top Picks for the Money
- Best Miter Saw For Beginners
- Top 10 Pruning Saws to Buy in 2024: Best for the Money
- 7 Best Pocket Chainsaw
Conclusion
In summary, cold frame winter vegetable gardening is a testament to resilience and ingenuity in the gardening world. It allows us to defy traditional gro
wing seasons, offering fresh, home-grown produce even during the colder months. These simple structures not only extend our gardening capabilities but also deepen our connection with nature year-round. Whether for experienced gardeners or beginners, cold frame gardening is a rewarding, sustainable way to enjoy fresh vegetables and greens, regardless of the weather outside.
FAQs
- What vegetables are best suited for a cold frame in winter?
Hardy greens like kale and spinach, root vegetables such as carrots and beets, and some herbs including parsley and cilantro thrive in cold frames during winter. These plants can withstand cooler temperatures and benefit from the microclimate a cold frame provides. - How does a cold frame protect plants in winter?
A cold frame works by trapping solar heat and insulating plants against the cold. The transparent top allows sunlight in while retaining warmth, creating a more favorable environment for plant growth during the colder months. - Can I use a cold frame in a region with heavy snowfall?
Yes, cold frames can be used in snowy regions, but it’s important to ensure they are structurally sound to withstand the weight of snow. Regularly clearing snow from the top of the cold frame is also necessary to allow light in. - How often should I water plants in a cold frame?
Plants in cold frames generally require less frequent watering since the enclosed space reduces water evaporation. It’s important to check the soil moisture regularly and water only when necessary to avoid over-watering. - Do I need to ventilate my cold frame?
Yes, ventilation is crucial to prevent overheating and to regulate humidity inside a cold frame. On warmer days, propping open the lid or using automatic vent openers can help maintain an optimal growing environment. - Can I build a DIY cold frame or should I buy one?
Both options are viable. A DIY cold frame allows for customization and can be a cost-effective solution, while a pre-made one offers convenience and professional design. The choice depends on your skills, budget, and specific gardening needs. - How do I determine when to plant in my cold frame for winter gardening?
Planting times vary based on your location and the Persephone Period – when daylight hours drop below 10 hours. Generally, planting in late summer to early fall allows plants to establish before this period. - What maintenance does a cold frame require?
Regular maintenance includes monitoring and adjusting ventilation, maintaining the right moisture level in the soil, checking for pests and diseases, and ensuring the transparent top is clean for optimal light penetration.
As we wrap up our journey through the world of Cold Frame Winter Vegetable Gardening, let’s embrace this eco-friendly, rewarding method that defies the traditional gardening calendar. Whether you’re a seasoned gardener or a beginner, cold frames offer an exciting opportunity to continue your green endeavors all year round. Happy gardening!

Benjamin Brooks
Forestry AuthorGreetings! I'm Benjamin Brooks, and my journey over the past 15 years has revolved around the fascinating realms of content creation, expertise in snow clearing, and the intricate world of lumberjacking and landscaping. What began as a simple curiosity about the natural world and heavy machinery has evolved into a passionate profession where my love for crafting words intertwines seamlessly with my lumberjacking and garden skills.


Leave your comment