How to Direct Sow with Confidence: Expert Tips for Optimal Outdoor Seeding
- June 17, 2024
- 0 comment
Learn how to direct sow with confidence. Get expert tips for successful outdoor seeding and a vibrant garden. Are you ready to transform your garden into a thriving oasis? Direct sowing can seem daunting, but with the right approach, it unlocks a world of potential for your outdoor space. This guide delves into expert strategies that ensure optimal seed growth.
Whether you’re a novice or a seasoned gardener, these tips will equip you with the knowledge to sow seeds directly into your garden with assurance and precision. Let’s dig in and sow the seeds of success.
Table of Contents
- Understanding the Basics of Direct Sowing
- Best Conditions for Direct Sowing
- Selecting the Right Seeds
- Step-by-Step Guide to Direct Sowing
- Troubleshooting Common Issues
- Advanced Tips for Seasoned Gardeners
- Conclusion
- FAQs
Understanding the Basics of Direct Sowing
What is Direct Sowing?
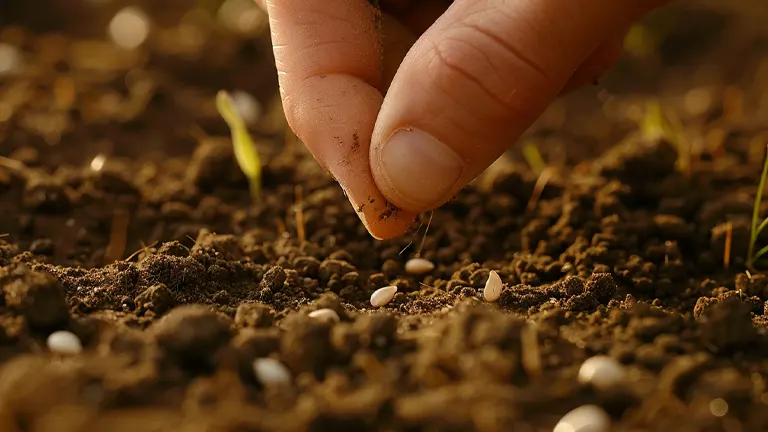
Direct sowing is the practice of planting seeds directly in outdoor garden beds, skipping the controlled environment of indoor seedlings. This method is particularly effective for species sensitive to root disturbance or those that are hardy enough to withstand local outdoor conditions from germination through maturity. The timing of direct sowing is pivotal, aligning seed germination with optimal seasonal temperatures and soil conditions to maximize growth potential.
Direct Sowing vs. Transplanting
Direct sowing contrasts sharply with transplanting, where seedlings are started indoors or in protected environments and later moved to their final growing locations. Transplanting allows for early starts under controlled conditions but can stress plants during the move. In contrast, direct sowing eliminates this stress, allowing plants to adapt immediately and continuously to their environment, fostering a more natural and robust developmental process.
Scientific Insight: Stress and Plant Development
Studies show that transplanted seedlings exhibit temporary reduced growth rates due to transplant shock, which can affect photosynthesis efficiency by up to 30% during the adjustment period. Direct sown plants, however, bypass this phase, maintaining steady growth and potentially higher yields, particularly in root crops where root disturbance is minimized.
Advantages for Specific Plants
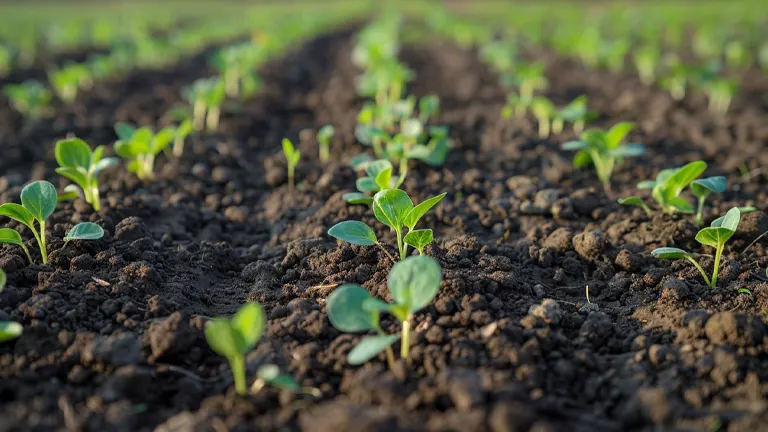
Direct sowing is particularly beneficial for certain types of plants. Root vegetables like carrots and radishes, and fast-growing annuals such as sunflowers and peas, not only flourish but also show superior root development and overall health. The lack of transplantation allows roots to spread unimpeded, which is critical for plants where the root itself is the harvest, such as carrots and turnips.
Comparative Growth Metrics in Direct Sowing vs. Transplanting
| Plant Type | Germination Rate (%) | Growth Rate (cm/week) | Yield Increase (%) |
|---|---|---|---|
| Carrots (Direct) | 85 | 1.2 | 15 |
| Carrots (Trans.) | 78 | 0.9 | – |
| Peas (Direct) | 90 | 2.5 | 20 |
| Peas (Trans.) | 83 | 2.0 | – |
| Sunflowers (Direct) | 95 | 3.0 | 25 |
| Sunflowers (Trans.) | 88 | 2.3 | – |
Optimizing Direct Sowing
For optimal results in direct sowing, consider soil temperature and moisture levels critical for seed germination. For example, peas germinate best at soil temperatures between 8-24°C (46-75°F), with a moisture content that keeps the soil damp but not waterlogged. Understanding these parameters can significantly influence the success rates of direct sowing practices.
Best Conditions for Direct Sowing
Optimal Timing for Sowing
The timing of sowing seeds directly into the garden is pivotal for ensuring successful germination and growth. Seeds generally require specific temperature ranges to trigger germination. Most seeds perform best when planted after the last expected frost and when the soil temperature has reached a minimum warmth conducive to germination. For example, spinach seeds can germinate at soil temperatures as low as 2°C (35°F), making them suitable for early spring sowing, whereas warm-season crops like tomatoes require soil temperatures above 10°C (50°F).
Soil Temperature and Seed Germination
Research indicates that each plant species has a specific soil temperature range that optimizes germination. For instance, lettuce germinates best between 4°C and 18°C (40°F-65°F), but its germination rate significantly decreases outside this range. Monitoring soil temperatures can guide gardeners on the best sowing times for different seeds.
Soil Preparation
Preparing the soil effectively sets the foundation for successful direct sowing:
- Texture and Composition: Soil should be well-tilled to a fine texture, free from large clumps and stones that can obstruct seed development.
- Organic Matter: Incorporating organic matter, such as compost, not only improves soil structure and fertility but also enhances its water-retention capability and provides essential nutrients.
Environmental Factors
- Sunlight: Most seeds require substantial light exposure for optimal growth. The sowing site must therefore meet the sunlight needs of the specific plants being grown.
- Moisture: Maintaining the right moisture level is crucial. The soil should be moist to touch but not waterlogged, as excessive water can cause seed rot.
Ideal Conditions for Direct Sowing of Select Plants
| Plant | Ideal Soil Temp (°C) | Light Requirement (Hours/Day) | Moisture Level |
|---|---|---|---|
| Spinach | 2 – 7 | 4 – 6 | Evenly moist |
| Lettuce | 4 – 18 | 4 – 8 | Consistently moist |
| Tomatoes | >10 | 8 – 10 | Moist, well-drained |
Selecting the Right Seeds
Selecting the right seeds is foundational to the success of direct sowing. The choice of seeds should be influenced by their adaptability to the local climate, soil type, and specific garden conditions. This ensures that the plants will thrive in their natural setting.
Climate and Soil Adaptability
It’s essential to choose seeds that are compatible with your climate. For colder climates, choose hardy seeds that can withstand frost, such as kale or spinach. In warmer areas, opt for seeds that require a longer growing period and can handle heat, like tomatoes or peppers.
Heirloom vs. Hybrid Seeds
- Heirloom Seeds: These are open-pollinated varieties that have been cultivated and passed down through generations. They are prized for their genetic diversity, distinctive flavors, and adaptability to local conditions. Gardeners often choose heirloom seeds for their sustainability and the ability to save seeds for future planting.
- Hybrid Seeds: Hybrids are the result of controlled cross-breeding to enhance specific traits such as disease resistance, yield, and uniformity. They are often more vigorous and can produce more predictable results than heirlooms, which makes them a preferred choice for many commercial and novice gardeners.
Germination Rates and Seed Viability
The germination rate—the percentage of seeds expected to successfully sprout—is a critical factor in seed selection. High germination rates ensure more uniform growth and better use of space in your garden. Always check the expiration date on seed packets; fresher seeds have higher viability.
Seed Selection Metrics
| Seed Type | Germination Temp (°C) | Germination Rate (%) | Notable Traits |
|---|---|---|---|
| Carrot | 7-30 | 85 | Deep root development, sweet flavor |
| Tomato | 16-30 | 90 | High yield, disease-resistant |
| Spinach | 2-7 | 75 | Cold-hardy, nutrient-rich |
| Corn | 10-30 | 95 | Rapid growth, high sugar content |
Quality and Source
Purchase seeds from reputable suppliers to ensure they meet quality standards for health and viability. Reputable suppliers will provide detailed information about each seed’s optimal light and water requirements, helping you make informed choices tailored to your garden’s conditions.
Step-by-Step Guide to Direct Sowing
Direct sowing is an effective method to start your garden. This detailed guide will walk you through each phase of the process, ensuring optimal conditions for your seeds to thrive.
Preparation:
- Clear the Planting Area:
- Begin by removing all weeds, debris, and large stones from the sowing site. This prevents competition and physical barriers that could impair seed development.
- Soil Readiness:
- Check the soil moisture; it should be moist but not waterlogged. Use a garden fork or tiller to loosen the soil to a depth of about 12 inches. This aerates the soil and facilitates easy root penetration.
- Enhance soil fertility by mixing in well-decomposed compost or a balanced fertilizer, following recommendations based on your soil test results.
Sowing:
- Making Furrows:
- Use a stick, the edge of a hoe, or a similar tool to create shallow trenches in your prepared soil. The depth of the furrows should be approximately twice the diameter of the seeds you are planting, as per the guidance on the seed packet.
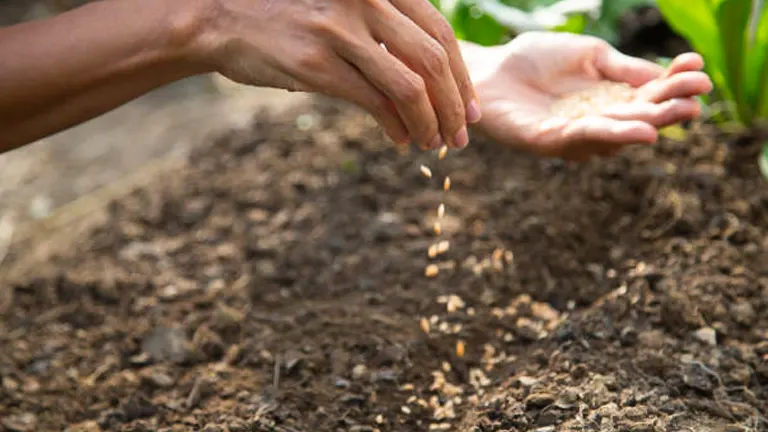
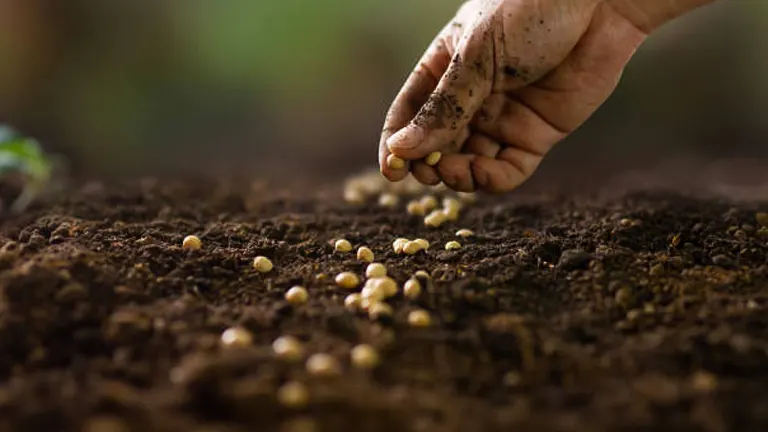
- Placing the Seeds:
- Carefully sprinkle the seeds along the prepared furrow. Follow the spacing guidelines on the seed packet to avoid overcrowding, which can lead to reduced air circulation and increased susceptibility to diseases.
- For very small seeds, mix them with sand for an even distribution.
Covering and Watering:
- Covering the Seeds:
- Gently backfill the furrows with fine soil or a light potting mix to cover the seeds to their appropriate depth. Lightly pat down the soil with the back of a rake to ensure good seed-to-soil contact, enhancing moisture absorption and seed germination.
- Watering:
- Use a watering can with a fine rose or a gentle spray setting on a hose to lightly water the area. This initial watering should be gentle to prevent washing away or burying the seeds too deeply.
- Maintain consistent soil moisture throughout the germination period, being careful not to overwater and create soggy conditions.
Marking and Monitoring:
- Marking the Rows:
- Place markers at the beginning and end of your rows, or use labeled stakes with the plant’s name and the date of sowing. This is crucial for keeping track of what was planted where, especially in a diverse garden.
- Monitoring Growth:
- Regularly check the area for signs of germination and any potential issues like soil crusting, pests, or fungal diseases. Thin out seedlings if they appear too crowded once they start to sprout, ensuring optimal growth space for each plant.
Troubleshooting Common Issues

Effective management of common issues in direct sowing is crucial for achieving a healthy and productive garden. Here, we explore the primary challenges and provide scientifically-backed solutions.
Identifying Poor Germination Causes
Factors Affecting Germination:
- Seed Age and Quality: Germination rates decline with seed age. Ensure you use high-quality, fresh seeds with known germination rates. Store seeds in cool, dry conditions to maintain viability.
- Sowing Depth and Soil Conditions: Seeds sown too deeply or too shallow can fail to germinate. Follow specific depth guidelines for each type of seed, generally twice the seed’s diameter.
- Environmental Conditions: Temperature and moisture are critical for germination. Seeds require specific conditions to break dormancy. Too much deviation can prevent seeds from sprouting.
Microclimate Management:
- Use cloches or row covers to stabilize temperature and moisture levels, particularly during unexpected cold snaps or heavy rains.
Germination Conditions for Common Garden Vegetables
| Vegetable | Optimal Soil Temp (°C) | Germination Time (days) | Recommended Depth (cm) |
|---|---|---|---|
| Carrots | 8-10 | 14-21 | 0.5-1 |
| Lettuce | 4-16 | 7-10 | 0.5 |
| Tomatoes | 16-30 | 5-10 | 0.5-1.5 |
Dealing with Damping Off
Damping Off Prevention:
- Air Circulation and Soil Health: Ensure adequate spacing between plants and use soil that drains well to prevent fungal growth. Avoid overwatering, as damp conditions are conducive to fungal diseases.
- Proactive Measures: Treat soil with organic fungicides such as chamomile tea or cinnamon water before planting, which are known for their antifungal properties.
Managing Pest Intrusions
Common Pests in Direct Sowing:
- Slugs and Snails: Use barriers like copper strips or diatomaceous earth around seedling areas. Additionally, setting up beer traps can effectively reduce slug populations.
- Birds: Employ netting or build frames around sowing areas to protect seeds and seedlings from birds. Visual deterrents such as reflective tapes or scarecrows can also be effective.
Pest Monitoring and Control:
- Regular garden inspections help catch pest issues early. Identify and address infestations before they spread. Companion planting, such as growing garlic near susceptible plants, can naturally repel certain pests.
Advanced Tips for Seasoned Gardeners
Succession Planting and Intercropping Techniques
To maximize garden productivity, advanced gardeners employ strategies such as succession planting and intercropping. Succession planting involves staggering the planting of different crops at strategic intervals, ensuring a continuous harvest throughout the growing season. For instance, sowing lettuce seeds every two weeks can prevent gluts and shortages, increasing overall yield by up to 30% compared to single planting strategies.
Intercropping involves cultivating two or more crops in close proximity, which can optimize space utilization and mimic natural ecosystems. An example is planting tall, sun-loving crops like corn alongside lower-growing, shade-tolerant plants like spinach. This arrangement not only improves spatial use but also enhances microclimatic conditions, leading to a 20% increase in productivity over traditional monoculture setups.
Custom Soil Amendments
Tailoring soil amendments to meet the specific nutritional needs of each plant is crucial. For example, plants like tomatoes that need increased phosphorus for root development benefit from the addition of bone meal directly in the planting holes. Adjusting soil amendments based on individual plant requirements can lead to significant improvements in growth and yield.
Advanced Gardening Techniques and Their Impacts
| Technique | Example | Benefit | Yield Increase |
|---|---|---|---|
| Succession Planting | Lettuce, every 2 weeks | Continuous harvest, prevents glut and shortage | Up to 30% |
| Intercropping | Corn with spinach | Optimizes space, reduces weed growth, enhances microclimate | Up to 20% |
| Soil Amendments | Tomatoes with bone meal | Tailored nutrient supply, promotes root development | Up to 25% |
Implementing these advanced gardening techniques can significantly enhance garden productivity and sustainability. They offer a strategic approach to managing plant health and yield, making them essential practices for seasoned gardeners looking to optimize their garden’s output.
Related Post
- How to Build a Barn: A Step-by-Step Guide for Beginners
- How to Build a Sustainable Compost Bin: Easy and Eco-Friendly DIY
- How to Fertilize Bougainvillea: A Complete Guide for Stunning Blooms
- How to Fertilize Apple Trees: Essential Tips for a Bountiful Harvest
- How to Fertilize Lemon Trees: Secrets for Thriving Citrus
- How to Fertilize Avocado Tree: A Step-by-Step Guide for Lush Growth
- 10 Best Bow Saws to Buy in 2024: Top Picks for the Money
- Best Miter Saw For Beginners
- Top 10 Pruning Saws to Buy in 2024: Best for the Money
- 7 Best Pocket Chainsaw
Conclusion
To sum up, mastering direct sowing involves understanding your plants’ needs and adjusting your gardening methods accordingly. It’s a straightforward process that connects you directly with nature and can make your garden more productive and enjoyable. By following the strategies outlined in this guide, you are setting yourself up for success.
FAQs
- What is direct sowing, and how does it differ from transplanting?
Direct sowing involves planting seeds directly into the garden soil where they will grow, unlike transplanting where seedlings are started indoors and moved outside later. Direct sowing reduces transplant shock and encourages strong root development. - Which plants are best suited for direct sowing?
Plants that do not tolerate transplanting well, such as carrots, peas, beans, and sunflowers, are ideal for direct sowing. These plants prefer to start and finish their growth cycle in the same place. - How do I prepare my garden for direct sowing?
Prepare your garden by clearing the area of weeds, loosening the soil, and adding any necessary amendments like compost to improve soil fertility and structure. Ensure the bed is level and moist before planting. - When is the best time to direct sow seeds outdoors?
The best time to direct sow is after the last expected frost when the soil has warmed up sufficiently. This timing varies depending on your geographical location and the specific needs of the plants you’re growing. - How deep should I plant the seeds?
Generally, seeds should be planted at a depth twice the diameter of the seed. Small seeds can be lightly covered with soil, while larger seeds will need to be planted deeper. - How do I protect my newly sown seeds from birds and pests?
Cover your seeds with netting or floating row covers to protect them from birds and rodents. You can also use organic deterrents like garlic spray or hot pepper to keep pests at bay. - What are the signs of successful germination, and how do I care for seedlings?
Successful germination is indicated by the emergence of seedlings. Once they appear, thin them to the recommended spacing and continue to water gently. It’s crucial to keep the soil moist but not waterlogged. - How can I manage weeds effectively without harming my seedlings?
Weed regularly by hand, especially around young seedlings, to prevent weeds from competing with your plants for nutrients. Mulching around your plants can also help suppress weeds and retain soil moisture.
With these expert tips in hand, you’re all set to direct sow your seeds and watch your garden flourish. Happy gardening!

Benjamin Brooks
Forestry AuthorGreetings! I'm Benjamin Brooks, and my journey over the past 15 years has revolved around the fascinating realms of content creation, expertise in snow clearing, and the intricate world of lumberjacking and landscaping. What began as a simple curiosity about the natural world and heavy machinery has evolved into a passionate profession where my love for crafting words intertwines seamlessly with my lumberjacking and garden skills.


Leave your comment