How to Grow and Care for Your Bay Leaf Plant: Easy Success Strategies
- April 30, 2024
- 0 comment
Discover easy success strategies on how to grow and care for your bay leaf plant. Achieve lush, healthy growth with our expert tips. If you’re looking to add a touch of greenery to your home with a plant that also offers culinary benefits, the bay leaf plant is an excellent choice. Known for its aromatic leaves widely used in cooking, growing a bay leaf plant can be both rewarding and decorative.
In this guide, we’ll unveil easy success strategies that ensure your bay laurel not only survives but thrives. Whether you’re a seasoned gardener or a novice, these tips will help you cultivate a lush, healthy bay leaf plant effortlessly. Let’s get started!
Table of Contents
- Understanding Bay Leaf Plant
- Choosing the Right Plant
- Essential Supplies
- Planting Your Bay Leaf Plant
- Optimal Growing Conditions
- Watering and Nutrition
- Pruning and Maintenance
- Pest and Disease Management
- Harvesting Bay Leaves
- Troubleshooting Common Problems
- Conclusion
- FAQs
Understanding Bay Leaf Plant
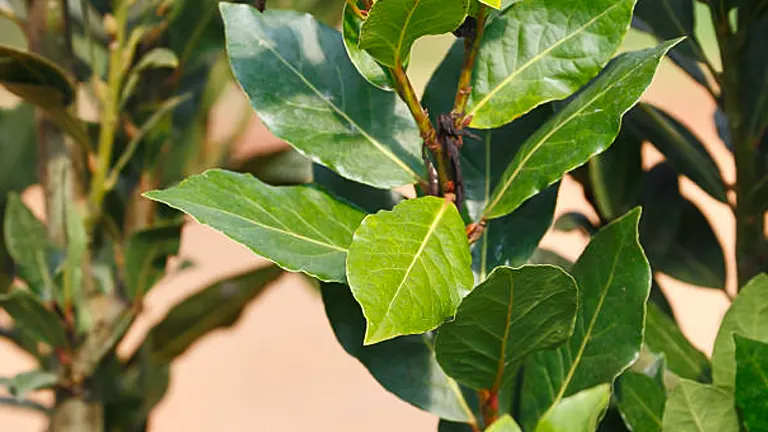
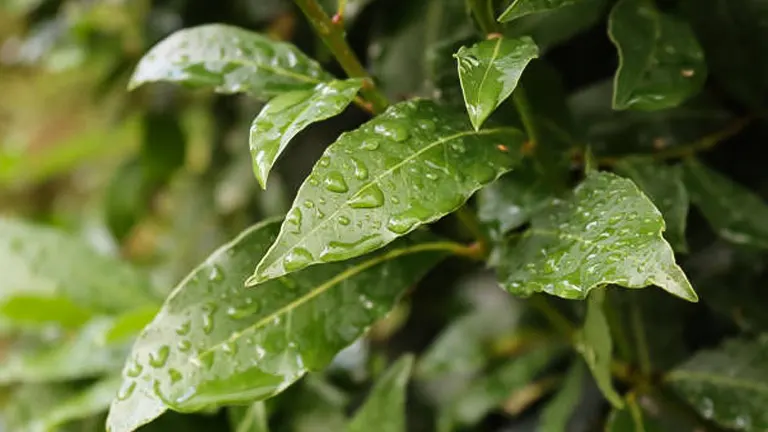
The bay leaf plant (Laurus nobilis), commonly referred to as bay laurel, is an evergreen shrub or tree native to the Mediterranean region. It is prized for its aromatic leaves, which are commonly used dried in cooking to add flavor to dishes such as soups, stews, and meat preparations. The leaves themselves are dark green, glossy, and leathery, growing up to 4 inches long on branches that can make the plant reach heights of 10 to 30 feet if left unpruned in the wild.
Beyond its culinary uses, bay laurel is historically significant, often woven into wreaths to crown the victors of ancient Greek and Roman games, symbolizing wisdom and glory. The plant is not only functional but also ornamental, with its deep green foliage offering year-round visual interest whether planted in the ground or contained within pots for patio or indoor use.
Key features:
- Growth Habit: Upright, dense foliage that can be shaped through pruning.
- Climate: Prefers warm climates but is relatively cold-hardy once established.
- Soil Preference: Thrives in well-drained soils; it is susceptible to root rot in overly wet conditions.
Choosing the Right Plant

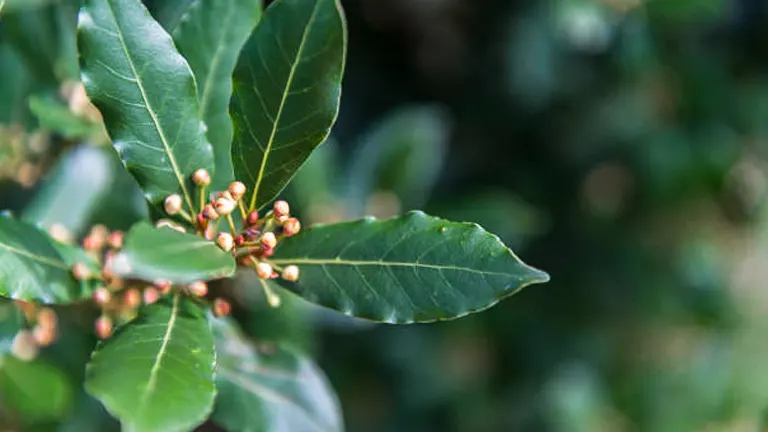
The first and perhaps most crucial step in cultivating a bay leaf plant is selecting a healthy specimen. When you visit a nursery or garden center, take your time to carefully examine the plants on offer. You want to look for bay leaf plants with vibrant, robust green leaves that show no signs of yellowing, spotting, or damage. These visual cues are indicators of a plant’s overall health and vitality.
It’s equally important to ensure that you’re purchasing a true bay laurel (Laurus nobilis), as it’s the only type suitable for culinary purposes. Be wary of similar-looking plants like the California bay or mountain laurel, which are not only unsuitable for cooking but can also be toxic if consumed.
When examining potential plants to bring home, pay special attention to:
- Leaf Appearance: Healthy leaves should be lush and glossy, which signifies a well-nourished plant.
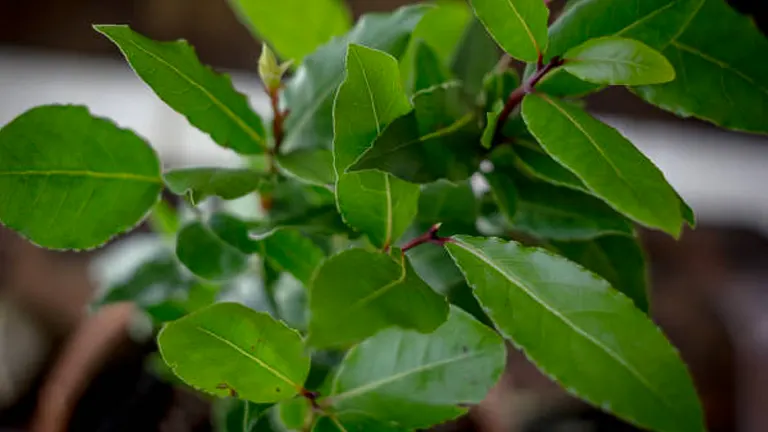
- Plant Structure: Opt for plants that have a strong, upright growth habit. Plants that appear leggy or spindly might have not received adequate light or nutrition during their early growth stages.
Essential Supplies
Proper preparation is crucial when setting up for successful bay laurel cultivation. The right tools and materials not only streamline the planting process but also boost the plant’s health and productivity over its lifetime. Below is a detailed breakdown of the essential supplies needed, along with scientific insights and a table summarizing key information.
Soil and Potting Mix
Choosing the right soil mix is foundational for the health of your bay laurel. A high-quality, well-draining soil mix optimizes the balance of moisture, essential for preventing root diseases such as root rot.
Ideal Soil Composition:
- Organic Matter: 30-40% by volume to enhance soil structure and nutrient retention.
- pH Level: Bay laurel prefers slightly acidic to neutral soil, with an optimal pH range of 6.0 to 7.5.
- Drainage Capability: The soil should have good aeration properties, which can be enhanced by incorporating perlite or coarse sand.
Container
The choice of container is critical, especially if space is limited or if you are growing the plant indoors.
Container Specifications:
- Size: A 12 to 16-inch diameter pot is typically adequate for young plants, allowing enough room for root growth without being overly spacious.
- Material: Opt for clay or breathable fabric pots to enhance moisture management and prevent waterlogging.
- Drainage: Ensure multiple drainage holes at the bottom to facilitate proper water flow.
Fertilizer
Nutrition plays a significant role in the health and growth rate of your bay laurel.
Fertilizer Requirements:
- NPK Ratio: A balanced slow-release fertilizer with an NPK ratio of 10-10-10 is ideal for maintaining steady growth.
- Application Frequency: Apply at the beginning of the growing season and mid-season after pruning, typically not exceeding twice per year to avoid nutrient burn.
Gardening Tools
Effective tools enhance plant care and maintenance, making it easier to manage the bay laurel.
- Pruning Shears: Opt for ergonomically designed shears that provide clean cuts without straining your hand. Regularly disinfect blades to prevent disease spread.
- Watering Can: A can with a long, narrow spout provides precision watering, reducing moisture on foliage which can lead to fungal infections.
Bay Laurel Cultivation Insights
| Parameter | Ideal Values | Scientific Importance |
|---|---|---|
| Soil Particle Size | 0.05mm to 2mm | Promotes drainage and prevents compaction, essential in potted plants. |
| Soil Porosity | 50% | Ensures adequate air and water space, crucial for root health and nutrient uptake. |
| Field Capacity | 20-30% water by volume | Indicates the optimal water content soil can retain post-drainage for healthy moisture levels. |
| pH Range | 6.0 to 7.5 | Supports nutrient availability and absorption, crucial for plant health. |
| NPK Ratio | 10-10-10 | Balances nitrogen, phosphorus, and potassium for growth, root development, and leaf production. |
| Leaf Area Index (LAI) | 3 to 5 | Optimizes photosynthesis while preventing excessive self-shading. |
| Cytokinin Response | Enhanced by pruning | Pruning stimulates growth hormones that promote denser foliage and healthier growth. |
| Soil Moisture Tension | 10 to 30 centibars | Optimal range for watering, ensuring moisture is adequate without waterlogging, measurable with a tensiometer. |
Planting Your Bay Leaf Plant
Planting a bay leaf plant involves more than just placing it in soil; it requires careful consideration of timing and technique to ensure your plant has the best start possible.
Timing: The best time to plant bay laurel is in the early spring or late fall. These seasons offer moderate temperatures that help young plants acclimate without the stress of extreme heat or cold.
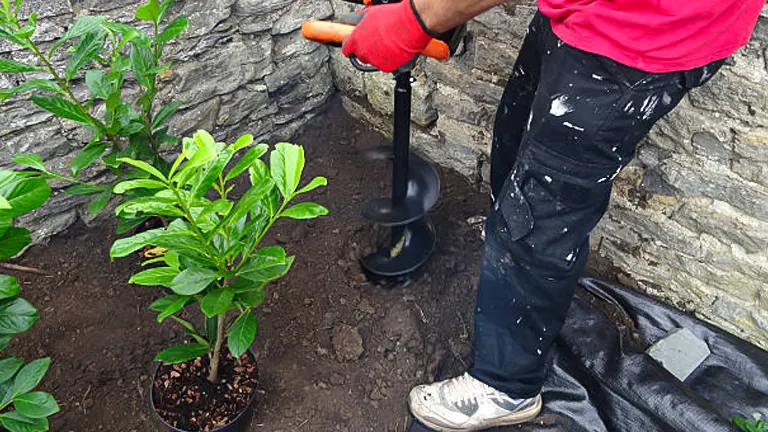
Planting Process:
- Preparation: Begin by preparing your pot or garden spot. Fill your container or a designated garden area with the chosen well-draining soil, leaving enough room to accommodate the root ball of your plant.
- Positioning the Plant: Gently remove the bay leaf plant from its nursery container, taking care not to disturb the root system more than necessary. Inspect the roots and trim any that are broken or excessively long.
- Planting: Place the plant in the hole or pot so that the top of the root ball is level with the soil surface. Backfill with soil, gently firming it around the roots to eliminate air pockets.
- Watering: Water the plant thoroughly after planting to settle the soil around the roots and help reduce transplant shock.
By following these steps, you can provide a stable foundation for your bay leaf plant, encouraging successful establishment and robust growth.
Optimal Growing Conditions
To thrive, bay laurel requires specific environmental conditions that mimic its native Mediterranean habitat.
Sunlight: Bay leaf plants perform best in full sun to partial shade. Ideally, they should receive at least 6 hours of direct sunlight per day, which promotes healthy leaf development and optimal growth.
Temperature: Bay laurel is hardy in USDA zones 8 through 10 and can tolerate temperatures down to about 20°F (-6°C). However, if you live in a cooler climate, it’s advisable to plant in a pot that can be moved indoors during harsh winter months.
Air Circulation: Good air circulation is critical for preventing fungal diseases. Whether planted in a pot or in the ground, ensure your bay leaf plant is not overcrowded by other plants or structures that could impede airflow.
Soil: The ideal soil for bay laurel should be fertile, rich, and loamy, with a pH between 6.0 and 7.0. It’s important to maintain moderate soil moisture, as the plant does not tolerate drought well, nor does it like “wet feet” from standing water.
By creating an environment that meets these criteria, you can maximize your bay leaf plant’s health and productivity, enjoying not only its aesthetic presence but also its culinary bounty.
Watering and Nutrition
Proper watering and nutrition are paramount for the health of your bay leaf plant. Striking the right balance can mean the difference between a thriving plant and one that struggles.
Watering: Bay laurel plants require consistent moisture, but it is crucial to avoid overwatering. The goal is to maintain a moist, but not soggy, soil environment. During the growing season (spring and summer), water the plant once the top inch of soil feels dry to the touch. Reduce watering frequency in the winter when the plant’s growth slows down.
- Method: Use a watering can with a long spout to direct water to the base of the plant, avoiding foliage to minimize the risk of leaf diseases.
- Monitoring: Regularly check the soil moisture using a simple finger test or a soil moisture meter to ensure optimal hydration levels.
Nutrition: Fertilization is essential to support the robust growth of your bay leaf plant.
- Fertilizer Type: Use a balanced, slow-release fertilizer that provides nutrients over time rather than all at once. This type of fertilizer reduces the risk of nutrient burn, which can damage the plant.
- Application Schedule: Apply fertilizer in early spring to kickstart growth and again in mid-summer to support continued development. Avoid fertilizing in late fall or winter when the plant is not actively growing.
Properly watered and nourished, your bay leaf plant will develop strong roots and lush foliage, essential for both ornamental and culinary uses.
Pruning and Maintenance
Regular pruning and maintenance are crucial not only to maintain the shape and size of your bay leaf plant but also to encourage healthy growth and productivity.
Pruning:
- When to Prune: The best time to prune your bay leaf plant is in late winter or early spring before new growth begins. This timing allows you to shape the plant without stunting new shoots.
- How to Prune: Use clean, sharp pruning shears to remove any dead or dying branches. Shape the plant to your desired form, keeping in mind that bay leaf plants can be trained into various shapes, including topiaries.
- Maintenance Pruning: Throughout the growing season, lightly prune to encourage bushier growth. This practice helps maintain the plant’s density and prevents it from becoming leggy.
General Maintenance:
- Pest Control: Keep an eye out for common pests such as scale insects and bay sucker aphids. Treat infestations early with insecticidal soap or neem oil to prevent them from spreading.
- Disease Prevention: Ensure good air circulation around your plant and avoid overhead watering to prevent fungal diseases. Regularly clean up fallen leaves and debris to keep the area around your plant tidy and disease-free.
With diligent care, your bay leaf plant will not only survive but thrive, providing you with fresh bay leaves for your culinary experiments and a beautiful, green addition to your garden or home.
Pest and Disease Management
Keeping your bay leaf plant healthy involves proactive pest and disease management. By understanding the common issues and how to address them, you can protect your plant and ensure its vigor.
Common Pests:
- Scale Insects: These pests can be identified by their small, shell-like appearance on stems and leaves. They suck sap from the plant, weakening it over time. To control scale, apply horticultural oil or insecticidal soap, ensuring thorough coverage of affected areas.
- Bay Sucker Aphids: These aphids are particularly drawn to bay leaf plants and can cause leaf curling and discoloration. Treat infestations with neem oil or by releasing natural predators like ladybugs into your garden.
Diseases:
- Fungal Diseases: Bay leaf plants are susceptible to root rot and powdery mildew, especially in humid conditions or if overwatered. Ensure proper drainage and air circulation and use fungicides as a preventive measure during the damp months of the year.
- Leaf Spot: Caused by fungi or bacteria, leaf spots appear as discolored patches on leaves. Improve air circulation, avoid overhead watering, and remove infected leaves to manage this issue.
Regular monitoring and early intervention are key to managing pests and diseases effectively. By maintaining clean growing conditions and addressing problems swiftly, you can keep your bay leaf plant healthy and productive.
Harvesting Bay Leaves
Harvesting bay leaves at the right time and in the correct manner enhances their flavor and extends the productivity of your plant.
When to Harvest:
- Maturity: Bay leaves are best harvested when the plant is mature enough to withstand pruning. Leaves should be large enough and have a deep green color, typically achieved after the plant is at least two years old.
- Seasonal Timing: The best time to harvest is in the morning when the plant’s aromatic oils are at their peak.
How to Harvest:
- Selective Pruning: Use sharp scissors or pruning shears to cut leaves or branches. This not only yields leaves for use but also helps shape the plant and encourage new growth.
- Amount: Do not harvest more than one-third of the plant at a time to avoid stressing it.
Post-Harvest:
- Drying: Bay leaves develop their fullest flavor when dried. Spread the leaves out in a warm, dry place away from direct sunlight. Once dried, store them in an airtight container to preserve their aroma and flavor for cooking.
- Using Fresh: Although less common, fresh bay leaves can be used in cooking for a milder flavor. They can be stored in the refrigerator for a few weeks if needed.
Harvesting your bay leaves properly not only ensures a continuous supply for your kitchen but also keeps your plant healthy and encourages productive growth in subsequent seasons.
Troubleshooting Common Problems
Even with the best care, bay leaf plants can encounter issues. Being equipped to identify and address common problems quickly can help keep your plant thriving.
Yellowing Leaves: One of the most common signs of distress in bay leaf plants is yellowing leaves. This can be caused by a variety of factors:
- Overwatering: Bay laurel does not like soggy soil. Reduce watering and ensure your pot or garden has good drainage.
- Underwatering: If leaves look dry and crispy along with yellowing, increase watering frequency slightly.
- Nutrient Deficiency: A lack of nutrients, especially nitrogen, can lead to yellow leaves. Apply a balanced fertilizer according to the recommended schedule.
Stunted Growth: If your bay leaf plant is not growing as expected, consider these factors:
- Poor Lighting: Insufficient light can hinder growth. Make sure your plant gets at least 6 hours of direct sunlight daily.
- Root Bound: In pots, plants can become root-bound. Check the root system and repot into a larger container if necessary.
By addressing these issues promptly, you can prevent further stress and damage to your plant, ensuring it remains a vibrant part of your garden or home.
Related Post
- How to Fertilize a Mango Tree Effectively: Tips and Tricks for Healthy Growth
- How to Fertilize Apple Trees: Essential Tips for a Bountiful Harvest
- How to Fertilize Lemon Trees: Secrets for Thriving Citrus
- How to Fertilize Avocado Tree: A Step-by-Step Guide for Lush Growth
- How to Fertilize Bougainvillea: A Complete Guide for Stunning Blooms
Conclusion
Growing a bay leaf plant is a rewarding endeavor that beautifies your space and enhances your cooking with fresh, aromatic leaves. By following the easy success strategies outlined in this guide—from selecting the right plant and providing the essential supplies to managing pests and diseases and proper harvesting techniques—you can cultivate a healthy and productive bay laurel.
Remember, the key to successful bay leaf plant care is consistency and attentiveness. Regularly monitor your plant’s environment and condition, adjusting care routines as needed to address any signs of distress. With patience and perseverance, you will enjoy the lush, flavorful rewards of your bay leaf plant for many years.
FAQs
- Can bay leaf plants survive in indoor environments?
Yes, bay leaf plants can thrive indoors provided they have sufficient light. They need at least 6 hours of sunlight per day, so placing them near a south-facing window or supplementing with grow lights is ideal. Regular pruning will help manage their size and maintain their health indoors. - What is the best way to propagate a bay leaf plant?
Bay leaf plants are best propagated by taking semi-hardwood cuttings in late summer. Cut a 6-8 inch segment of stem, remove the lower leaves, dip the cut end in rooting hormone, and plant in a pot with moist potting mix. Keep it under partial shade until roots develop. - How often should I repot my bay leaf plant?
Repotting should be done every 2-3 years or when the plant becomes root-bound. Spring is the best time to repot, using fresh potting mix and a slightly larger pot to encourage continued growth. - Are coffee grounds good for bay leaf plants?
Coffee grounds can be beneficial for bay leaf plants as they add organic material to the soil, improving drainage and aeration. However, they should be used sparingly and mixed into the soil to avoid increasing acidity too much. - How do I treat brown spots on bay leaf leaves?
Brown spots are often a sign of a fungal infection due to too much moisture. Improve air circulation around the plant, reduce watering, and apply a fungicide specifically suited for fungal leaf spots. - What should I do if the leaves of my bay leaf plant start curling?
Leaf curling is typically a sign of water stress or pest infestation. Check the moisture level of the soil to ensure it’s not too dry or too wet. Inspect the leaves for pests like aphids or scale and treat with neem oil or insecticidal soap if needed. - Can I use mulch around my outdoor bay leaf plants?
Mulching can help maintain soil moisture and regulate temperature. Use organic mulch like bark or wood chips around the base of the plant, keeping it away from the stem to prevent rot. - Is it necessary to use fertilizer for my bay leaf plant during winter?
It’s best to avoid fertilizing bay leaf plants in winter when their growth slows down. Resume fertilizing in early spring to coincide with the start of the growing season.
Thank you for joining us on this journey to master the art of growing and caring for bay leaf plants. We hope these strategies empower you to cultivate a thriving plant. For more gardening insights and tips, stay tuned!

Benjamin Brooks
Forestry AuthorGreetings! I'm Benjamin Brooks, and my journey over the past 15 years has revolved around the fascinating realms of content creation, expertise in snow clearing, and the intricate world of lumberjacking and landscaping. What began as a simple curiosity about the natural world and heavy machinery has evolved into a passionate profession where my love for crafting words intertwines seamlessly with my lumberjacking and garden skills.


Leave your comment