How to Grow and Care for Dill: Expert Secrets for a Bountiful Harvest
- May 13, 2024
- 0 comment
Learn how to grow and care for dill with our expert secrets and achieve a bountiful harvest with practical tips and techniques. Unlock the secrets of growing and caring for dill to ensure a bountiful harvest. This guide is tailored for both novice gardeners and seasoned green thumbs, providing essential knowledge for successful cultivation.

Learn how to select the right soil, apply the best watering practices, and nurture your dill plants effectively. With these expert tips, you’ll enhance the vibrant flavors and aromas of your dill, transforming your garden into a thriving herb haven. Let’s dive into the techniques that will elevate your gardening skills.
Table of Contents
- Understanding Dill
- Optimal Growing Conditions
- Planting Dill
- Growing Dill in Containers
- Daily and Seasonal Care for Dill
- Pests and Disease Management
- Harvesting and Storage
- Troubleshooting Common Issues
- Conclusion
- FAQs
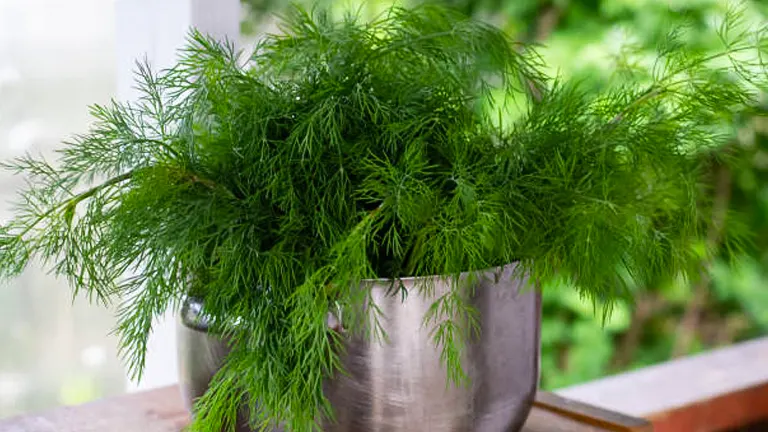
Understanding Dill
Botanical Profile
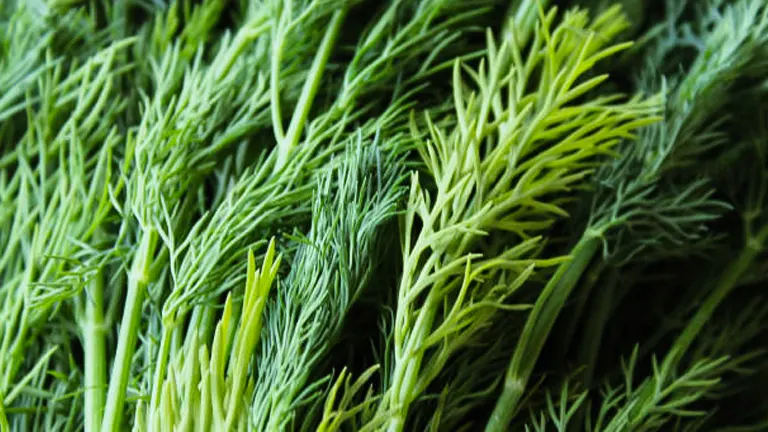
Dill (Anethum graveolens) is an annual herb belonging to the Apiaceae family, which includes plants like celery and parsley. It reaches a typical height of 24 to 36 inches (60 to 90 cm) under optimal conditions. Dill prefers a soil pH between 5.5 and 6.5, thriving in light, loamy, well-drained soils but is quite adaptable to slightly poorer conditions provided there is good drainage.
The plant’s growth rate is influenced by environmental factors, with optimal temperatures ranging from 60°F to 75°F (15°C to 24°C). Its linear leaves, around 4 to 8 inches long, branch off into thin, delicate segments. The yellow flower heads, forming umbrella-shaped clusters called umbels, appear in summer and are composed of numerous tiny flowers that attract beneficial insects.
Photosynthetic Efficiency
Dill has a high photosynthetic efficiency, with a photosynthesis rate approximately 18 µmol m^-2 s^-1 under full sunlight, which contributes to its rapid growth cycle. The plant’s ability to efficiently convert light into energy is key to its quick maturation, typically flowering within 8 weeks of sowing.
Varieties of Dill
| Variety | Height | Leaf Size | Suitable for Container | Flavor Profile | Special Features |
|---|---|---|---|---|---|
| Bouquet | 24-30″ | Medium | No | Mild with aromatic seeds | Most common, excellent for pickling |
| Fernleaf | 12-18″ | Small, compact | Yes | Delicately mild | Dwarf variety, ideal for containers |
| Mammoth | 24-36″ | Large | No | Robust, slightly sweet | Large heads, great for seed production |
Choosing the Right Variety
Selecting the right variety of dill is crucial for gardening success. For those with limited space, ‘Fernleaf’ offers a compact growth ideal for pots and small gardens. ‘Bouquet’ is preferred for its dual-purpose nature, providing both aromatic leaves and seeds ideal for pickling. ‘Mammoth’, known for its large size and potent flavor, is excellent for chefs and home cooks looking for impactful flavor and a bountiful seed harvest. Each variety has adapted to specific climatic and spatial conditions, so understanding your gardening environment and culinary needs is essential for making the best choice.
Optimal Growing Conditions
Soil and pH
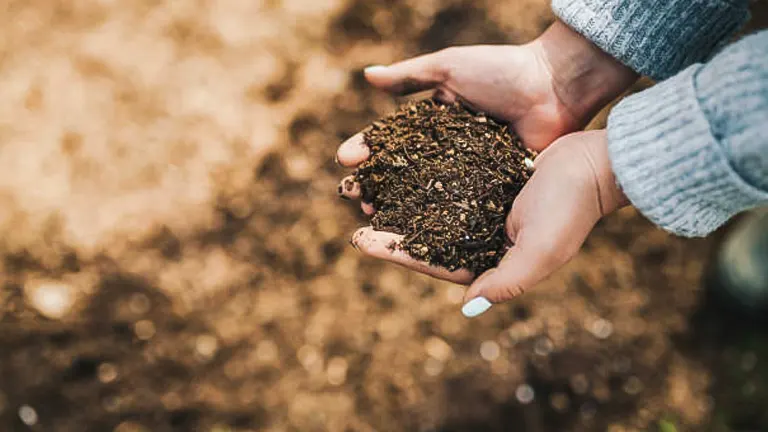
Dill thrives in slightly acidic to neutral soil, with an ideal pH range of 5.8 to 6.5. The soil’s texture should be loamy and well-aerated to ensure adequate drainage and prevent root rot. Incorporating organic matter such as compost not only enhances the soil structure but also improves its water-holding capacity and fertility. Regular soil testing can help maintain the optimal pH level and nutrient balance, crucial for the healthy growth of dill.
Sunlight and Temperature
Dill requires significant sunlight, benefiting from at least 6 to 8 hours of direct exposure daily. This herb utilizes sunlight not only for photosynthesis but also to develop its essential oils, which are responsible for its distinctive flavor. Optimal temperature ranges are crucial: seed germination is most effective at 60°F to 70°F (15°C to 21°C), while growth is best supported at temperatures between 60°F to 75°F (15°C to 24°C). Below or above this range, the plant may experience stress, affecting flavor and growth.
Climate Considerations
Dill’s adaptability allows it to grow in various climatic conditions, though it prefers moderate environments. Extreme temperature swings can stress the plant, leading to bolting (premature flowering), especially in heat. Strategic planting to capitalize on morning sunlight and afternoon shade can mitigate the impact of high temperatures. In cooler climates, utilizing row covers or planting in spots that maximize winter sun exposure can extend the growing season.
Water Requirements
Proper watering is essential for dill, which prefers consistently moist soil. Over-watering or under-watering can both stress the plant and affect its development. Dill typically requires about 1 inch of water per week, but this may need to be adjusted based on temperature and soil conditions.
Detailed Environmental Impact Table
| Factor | Ideal Range | Impact on Dill |
|---|---|---|
| Soil pH | 5.8 to 6.5 | Ensures nutrient availability and optimal root health |
| Sunlight | 6-8 hours daily | Maximizes photosynthesis and essential oil production |
| Temperature (Day) | 60°F to 75°F (15°C to 24°C) | Supports robust growth and prevents bolting |
| Temperature (Night) | Not lower than 50°F (10°C) | Prevents stress and damage to young plants |
| Watering | Approximately 1 inch per week | Maintains soil moisture without waterlogging |
By understanding these conditions and monitoring your garden environment, you can optimize your dill plants’ health and productivity. This enhanced approach, complete with scientific details and practical tips, ensures that both novice and experienced gardeners can achieve success in growing dill.
Planting Dill
Timing is Everything
The optimal timing for sowing dill seeds in your garden is crucial and varies by climate. In temperate zones, plant dill immediately after the last spring frost when soil temperatures consistently exceed 60°F (15.5°C). This cooler weather aids in effective seed germination, which typically ranges between 15°C to 21°C, and allows the plant to establish itself robustly before the onset of intense summer heat. For gardeners in warmer climates, a late summer to early autumn sowing can avoid the heat stress of midsummer and extend the growing season into the cooler months, ensuring a continuous supply.
Soil Preparation and Sowing Seeds
Prepare your planting bed by loosening the soil to approximately 12 inches deep. Enhance the nutrient profile and structure of the soil by incorporating a balanced, organic compost. This amendment improves drainage, aeration, and moisture retention, creating an ideal environment for dill seeds, which require well-drained yet consistently moist soil.
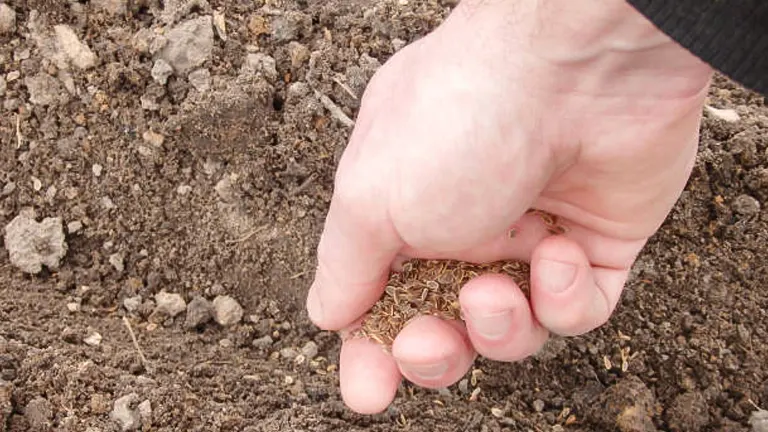
Sow the dill seeds by lightly scattering them over the prepared bed and covering them with a thin layer of soil, about a quarter-inch deep. Water the area gently to settle the soil around the seeds without causing erosion. The initial moisture level of the soil is critical as dill seeds require a moist environment for the first 7-14 days post-sowing to enhance germination rates.
Spacing for Success
Proper spacing between dill plants is essential for healthy growth and optimal yield. For home gardens, a spacing of about 18 inches between plants is recommended to provide ample room for development and easy access for harvesting. In commercial or intensive gardening setups, reducing the spacing to about 12 inches between plants with rows spaced 18 inches apart can increase yield per area. However, it’s crucial to maintain sufficient airflow around the plants to prevent the onset of fungal diseases.
Optimal Planting Parameters for Dill
| Parameter | Value | Description |
|---|---|---|
| Soil Temperature | 60°F – 70°F (15.5°C – 21°C) | Ideal range for germination. |
| Seed Depth | 0.25 inches | Depth to which seeds should be sown. |
| Germination Time | 7-14 days | Typical range for dill seeds to emerge. |
| Plant Spacing | 18 inches | Recommended spacing in home gardens. |
| Row Spacing | 18 inches | Optimal row distance to maximize air circulation. |
| Watering | Consistent moisture | Soil should remain moist, especially during germination phase. |
This enhanced section now provides detailed, clear, and specific information that will aid gardeners in understanding the optimal conditions and methods for planting dill. By following these guidelines, both novice and experienced gardeners can achieve a bountiful and healthy dill harvest.
Growing Dill in Containers
Container Selection
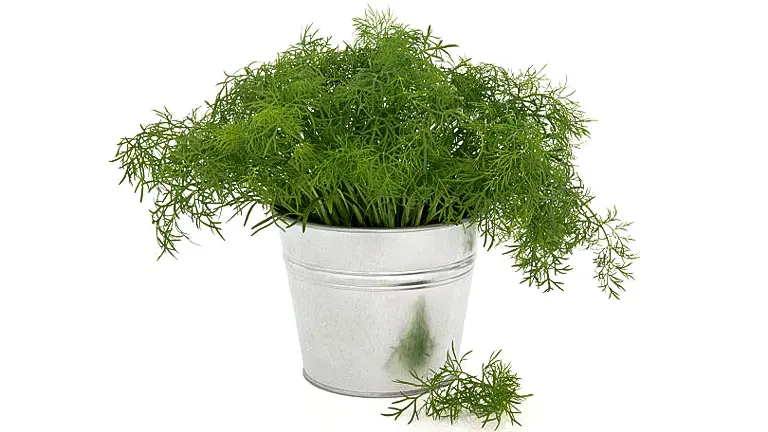
Selecting the right container is crucial for the successful cultivation of dill. Opt for a container that is at least 12 inches deep to accommodate the plant’s lengthy taproot. The container should feature multiple drainage holes to prevent waterlogging, which can be detrimental to the plant’s health. Materials like terra cotta are ideal as they allow for better air movement through the soil, enhancing root health by preventing moisture accumulation.
Soil and Planting
Use a high-quality potting mix specifically designed for vegetable gardening to ensure optimal growth. Such mixes are formulated to provide proper drainage and a balanced nutrient profile, which is crucial for container gardening. Avoid using regular garden soil as it can compact in pots, restricting root growth and water drainage. Plant dill seeds by sprinkling them lightly over the soil and covering them with about a quarter-inch of soil. Water gently to settle the soil around the seeds without displacing them.
Sunlight Requirements
Dill requires abundant sunlight to develop fully, ideally needing between 6 to 8 hours of direct sunlight daily. Position the container in a spot that maximizes sun exposure. In regions with very high temperatures, it’s advisable to provide afternoon shade to prevent the plant from overheating, which could lead to bolting or reduced vigor.
Watering
Containers tend to dry out more quickly than in-ground beds, necessitating frequent watering. Check the soil daily, especially during hot or windy days, and water thoroughly once the top inch of the soil feels dry. Ensure water drains freely out of the container’s bottom to prevent salt and mineral buildup, which could negatively affect plant growth.
Nutrition
Fertilize your dill plants every four to six weeks with a water-soluble fertilizer appropriate for herbs and vegetables. This replenishment is crucial as frequent watering can leach nutrients from the soil. Follow the fertilizer’s recommended dilution rates to avoid nutrient burn, which can damage the plant.
Temperature Management
Due to their reduced volume of soil, containers can cause plants to experience more extreme temperature fluctuations. During hot weather, move containers to a shaded area to protect plants from excessive heat. Conversely, in colder weather, protect the plants by moving containers indoors or covering them during frost events.
Harvesting
Harvest dill leaves once the plant is well-established and has grown several segments of leaves. Regular harvesting encourages further growth. To extend the foliage production period and delay seeding, pinch off any emerging flower heads.
Key Considerations for Growing Dill in Containers
| Factor | Recommendations |
|---|---|
| Container Depth | Minimum of 12 inches |
| Soil Type | Premium vegetable potting mix |
| Sunlight | 6-8 hours daily, provide shade in extreme heat |
| Watering | Daily monitoring, adjust based on weather |
| Nutrition | Fertilize every 4-6 weeks, use herb-specific fertilizer |
| Temperature | Manage placement for protection against extremes |
| Harvest Timing | Harvest when mature, manage flower heads |
Daily and Seasonal Care for Dill
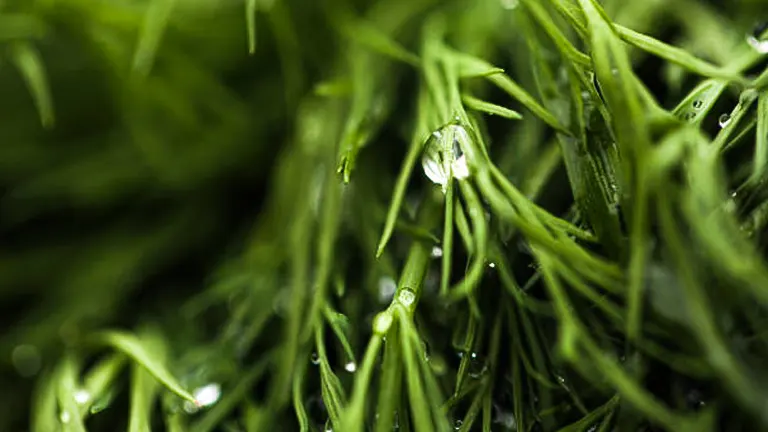
Watering Wisely

Dill requires consistent moisture in the soil, particularly critical during the seedling phase and the hot summer months. Water your dill plants deeply once or twice a week, adapting to the local weather conditions to encourage deep root development. The goal is to ensure the soil is moist to a depth of at least 4-6 inches, which can be checked using a soil moisture meter or by simple finger test. Avoid overhead watering to minimize the risk of fungal diseases like powdery mildew, which thrives in damp conditions on leaves.
Fertilization Fundamentals
Dill benefits from a light application of a nitrogen-rich fertilizer, which supports the development of lush, vibrant leaves. Apply a balanced 10-10-10 fertilizer at a rate of about 1/2 pound per 100 square feet every four to six weeks during the growing season. It is crucial to avoid over-fertilization, which can lead to rapid yet frail growth, making the plants more susceptible to diseases and affecting the aromatic quality of the leaves.
Weed Management
Maintaining a weed-free zone around dill plants is essential as weeds compete for nutrients, light, and water, significantly impacting the growth and health of your dill. Use mulching around the base of your plants to suppress weed growth and retain soil moisture. Regular, gentle hoeing can be effective, but care must be taken not to disturb the shallow roots of the dill plants.
Pruning Practices
While dill generally requires little pruning, managing the flower heads can significantly impact leaf production and seed development. For leaf production, regularly pinch off the flower heads to prolong the vegetative state of the plant, enhancing leaf growth. If seeds are desired, allow the plant to bloom and set seeds, which typically occurs later in the growing season.
Care Guidelines for Optimal Growth of Dill
| Care Aspect | Details | Recommended Practices |
|---|---|---|
| Watering | Soil should be consistently moist, not waterlogged | Water 1-2 times a week, deep soaking |
| Fertilization | Nitrogen-rich for foliage, balanced for general health | Apply 10-10-10 fertilizer every 4-6 weeks |
| Weed Control | Weeds compete for resources | Mulch and hoe gently around plants |
| Pruning | Depends on desired product (leaves vs seeds) | Pinch off flowers for leaves, let bloom for seeds |
Pests and Disease Management
Identifying and Preventing Pests
Dill, though generally robust, attracts several common garden pests which can compromise its health and productivity.
- Aphids: These small, sap-sucking insects tend to cluster on the undersides of leaves, sapping the plant’s strength and excreting a sticky substance known as honeydew, which can lead to sooty mold. Regular inspections and washing the plants with a strong stream of water can effectively reduce aphid populations. In cases of severe infestations, applying organic insecticidal soaps or neem oil, which are safe for use on edible plants, can provide control.
- Spider Mites: Thriving in hot, dry conditions, spider mites cause the leaves to appear speckled and may lead to premature leaf drop. Increasing humidity around the plants can deter these pests, and miticidal sprays can be used when necessary.
Fighting Fungal Diseases
Dill is susceptible to several fungal diseases that thrive in cool, moist environments.
- Powdery Mildew: Appears as a white or grayish powder-like coating on leaves. It inhibits photosynthesis, stressing the plant. Proper spacing to ensure good air circulation and avoiding overhead watering are crucial preventive measures. For existing infections, apply sulfur-based or biological fungicides approved for use in organic gardening.
- Downy Mildew: This disease presents as yellow spots on the upper surfaces of leaves and a fluffy white growth on the underside. It’s particularly problematic in wet conditions. As with powdery mildew, ensuring plants are not too densely spaced and using fungicides early can help manage outbreaks.
Integrated Pest and Disease Management Table
| Pest/Disease | Symptoms | Prevention Strategies | Treatment Options |
|---|---|---|---|
| Aphids | Sticky residue, distorted leaves | Regular monitoring, strong water spray | Insecticidal soap, neem oil |
| Spider Mites | Speckled leaves, leaf drop | Increase humidity, avoid dry dust settings | Miticidal sprays, neem oil |
| Powdery Mildew | White/grayish powder on leaves | Ensure air circulation, avoid wet leaves | Sulfur-based fungicides, biological agents |
| Downy Mildew | Yellow spots, white undergrowth | Reduce leaf wetness, good plant spacing | Approved organic fungicides |
Harvesting and Storage
Optimal Harvesting Practices
Harvesting dill at the correct time is essential for maximizing both its flavor and medicinal properties. The prime time for harvesting dill leaves is just before the onset of flowering. This stage is ideal because the concentration of essential oils in the leaves is at its highest, typically occurring in the late morning after the dew has evaporated. Utilize sharp, clean scissors to harvest the leaves, which helps prevent damage to the plant’s structure. For seed collection, observe the maturation of the flower heads; seeds are ready when they shift in color from green to a brownish-tan, indicating optimal oil content and maturity.
Biochemical Analysis of Harvest Timing
The essential oil content in dill, primarily comprising carvone and limonene, varies significantly throughout the day. Research indicates that these oils peak in concentration late in the morning, making this the best time for harvesting to ensure maximum flavor and therapeutic benefits. The oil’s composition not only contributes to the distinct aroma and taste of dill but also offers antioxidant and antimicrobial properties.
Effective Storage Solutions
- Short-term Storage: After rinsing the dill under cold water to remove any soil or pests, shake off excess moisture and pat the leaves dry. Wrap the dill in a damp paper towel and place it in a plastic bag within the refrigerator’s crisper. This method preserves the dill’s freshness for about a week.
- Freezing for Longevity: For longer storage, chop the cleaned dill and distribute it into ice cube trays, filling them with water or olive oil. This method encapsulates the flavor and facilitates easy use in cooking, preserving the dill for up to six months.
- Drying for Preservation: Drying is an excellent method for long-term storage, particularly when preserving dill for use as a seasoning. Tie bunches of dill stems together and hang them upside down in a warm, well-ventilated area away from direct sunlight, which helps maintain the integrity of essential oils. Once dry, crumble the leaves and seeds and store them in an airtight container in a cool, dark place, where they retain flavor for up to six months.
Summary of Harvesting and Storage Techniques for Dill
| Technique | Best Time to Harvest | Storage Method | Shelf Life | Key Benefits |
|---|---|---|---|---|
| Leaf Harvest | Late morning before flowering | Refrigerate in damp towel | 1 week | Maximizes essential oil content |
| Seed Harvest | When seeds turn brownish-tan | Dry and store airtight | 6 months | Preserves seeds for planting or culinary use |
| Freezing | Post-washing, chop leaves | Freeze in ice cube trays | Up to 6 months | Seals in flavor, easy to use |
| Drying | Post-flowering | Hang in ventilated area | Up to 6 months | Ideal for long-term storage, enhances flavor |
Troubleshooting Common Issues
Addressing Growth Challenges
Dill may experience several growth issues, such as stunted growth, yellowing leaves, or sparse foliage, typically indicating a nutrient deficiency.
- Nitrogen Deficiency: Often shown by yellowing of older leaves first, as nitrogen is mobile within the plant and moves to new growth.
- Iron Deficiency: Exhibits as yellowing between the veins of young leaves while veins stay green, often due to high pH levels that lock iron in the soil, making it unavailable to plants.
To address these deficiencies, apply a balanced, water-soluble fertilizer rich in nitrogen and iron. It’s crucial to follow the recommended dosage to prevent nutrient burn, characterized by leaf tip burn and reduced growth rate.
Dealing with Bolting Bolting, the premature production of flowering stalks, commonly occurs in dill due to stress from high temperatures or dry soil conditions. Bolting leads to a reduction in leaf flavor quality.
- Prevention Strategies: Ensure consistent soil moisture through regular watering and use mulch to maintain cooler soil temperatures. Implementing succession planting, where new seeds are planted at intervals throughout the growing season, can help maintain a continuous crop before older plants bolt.
Reviving Wilting Plants
Wilting may result from overwatering, underwatering, or poor drainage.
- Soil Moisture Management: Use a soil moisture meter to check the moisture level at root depth. If the soil is too wet, improve drainage by mixing in sand or organic material to increase soil structure. Reduce watering to let the soil dry slightly. For dry conditions, increase watering frequency, ensuring that water penetrates deeply to encourage deeper root growth.
Troubleshooting Common Dill Issues
| Issue | Symptoms | Likely Cause | Solution |
|---|---|---|---|
| Stunted Growth | Short, weak plants | Nitrogen deficiency, over/under watering | Apply balanced fertilizer, adjust watering |
| Yellowing Leaves | Yellow leaves, green veins | Iron deficiency due to high soil pH | Apply chelated iron, adjust soil pH |
| Bolting | Early flower stalk development | High temperatures, dry soil | Mulch, consistent watering, succession planting |
| Wilting | Drooping or limp leaves | Over/underwatering, poor drainage | Adjust watering, improve soil structure |
Related Post
- How to Fertilize Bougainvillea: A Complete Guide for Stunning Blooms
- How to Fertilize Apple Trees: Essential Tips for a Bountiful Harvest
- How to Fertilize Lemon Trees: Secrets for Thriving Citrus
- How to Fertilize Avocado Tree: A Step-by-Step Guide for Lush Growth
Conclusion
Growing dill is a rewarding endeavor that enriches your garden and enhances your culinary creations. By following this comprehensive guide—from selecting the right conditions and implementing effective planting strategies to managing care and addressing common challenges—you’ll be well-equipped to cultivate a thriving dill garden. Embrace these expert tips to unlock the full potential of this aromatic herb and enjoy a bountiful harvest that brings flavor and vitality to your dishes.
FAQs
- Can dill be grown indoors, and if so, what are the best practices?
Yes, dill can be grown indoors. Use a deep pot with ample drainage to accommodate its taproot. Place the pot in a sunny spot where the plant can receive at least 6-8 hours of sunlight daily. Keep the soil moist but not waterlogged, and use a high-quality potting mix to ensure healthy growth. - How does companion planting benefit dill, and what are some ideal companion plants?
Companion planting can help deter pests and enhance growth. Dill works well with cabbage, onions, and cucumbers by repelling pests that typically attack these plants. However, avoid planting dill near carrots and tomatoes, as it can inhibit their growth. - What is the ideal pH level for growing dill, and how can it be adjusted?
Dill prefers a slightly acidic to neutral soil, with an ideal pH level of 5.8 to 6.5. If your soil is too alkaline, you can lower the pH by adding sulfur or peat moss. For overly acidic soil, incorporate lime to raise the pH. - How often should dill be watered, and what are the signs of overwatering?
Water dill deeply once or twice a week, allowing the soil to dry slightly between waterings. Signs of overwatering include yellowing leaves and a general limp appearance. Ensure good drainage in the soil to prevent waterlogging. - Can dill recover from a frost, and what are the immediate steps to take if it gets frosted?
Dill is somewhat frost-resistant but can be damaged by a severe frost. If frosted, cover the plants with a frost cloth or move pots indoors if possible. Trim any damaged foliage to help the plant focus on producing new, healthy growth. - What natural methods can be used to enhance the flavor of dill leaves?
To enhance the flavor, ensure the plant receives enough sunlight and water, and harvest the leaves early in the morning when their aromatic oils are most potent. Additionally, a light application of a fish emulsion fertilizer can promote richer flavors. - How can one use dill flowers apart from seed harvesting?
Dill flowers are edible and have a milder flavor compared to the leaves. They can be used in salads, as a garnish for soups and seafood dishes, or pickled along with cucumbers to add flavor. - What are the signs that dill seeds are ready to be harvested, and how should they be stored?
Dill seeds are ready when the flowers turn brown, and the seeds darken to a tan or brown color. Cut the seed heads and hang them upside down in a paper bag to capture seeds as they dry and fall off. Store the dried seeds in an airtight container in a cool, dark place to maintain their viability for planting or use them in cooking.
Thank you for joining us on this journey to mastering the art of growing dill. With the secrets and tips shared, you’re now ready to cultivate your own lush dill plants. May your garden flourish and your harvests be plentiful!
Emma Hudson
Forestry AuthorEmma's experience in farming shapes her detailed guides on gardening and farming tools, providing practical, actionable advice grounded in real-world experience. Her work targets both newcomers and experienced farmers, aiming to enhance their practices with a mix of traditional wisdom and modern techniques. By making complex agricultural concepts accessible, Emma's guides serve as valuable tools for those navigating the challenges of contemporary farming, offering strategies for sustainable success.


Leave your comment