How to Grow and Care for Jicama: Expert Techniques for Optimal Growth
- May 28, 2024
- 0 comment
Learn how to grow and care for jicama with expert techniques for optimal growth. Master every step from planting to harvest. Jicama, a versatile and sweet-tasting root vegetable, thrives under the right conditions. This guide will walk you through the essential techniques from soil preparation to harvest, ensuring your jicama grows healthy and productive.
Whether you’re a novice gardener or looking to refine your skills, these expert tips will help you achieve optimal growth.
Table of Contents
- Understanding Jicama: The Basics
- Preparing the Garden
- Planting Techniques
- Watering and Nutritional Needs
- Managing Pests and Diseases
- Supporting Jicama Plants
- Pruning Techniques
- Harvesting and Post-Harvest Care
- Culinary Uses and Recipes
- Conclusion
- FAQs
Understanding Jicama: The Basics
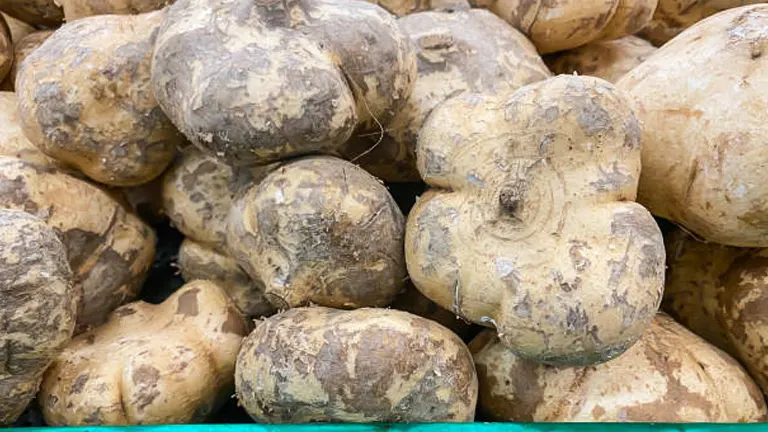
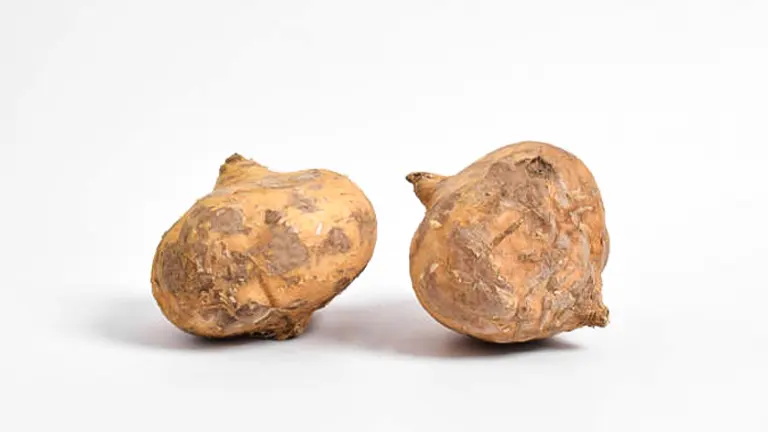
Jicama (Pachyrhizus erosus) is a member of the legume family, Fabaceae, notable for its large, edible tuberous roots. It is a perennial vine that, in optimal conditions, can reach lengths of up to 4 to 5 meters. The plant has heart-shaped, trifoliate leaves and produces clusters of blue or white flowers. The most valued part of the plant is its root, which can weigh between 1 to 5 pounds. Jicama roots are characterized by their brown, fibrous skin and white, crisp flesh, which has a mild, sweet flavor similar to that of an apple or pear. Each plant typically produces one to several tubers.
Climate and Soil Preferences:
Jicama thrives in warm climates and requires a lengthy frost-free period of at least 9 months for optimal tuber development. The ideal temperature range for growing jicama is between 70°F and 90°F (21°C to 32°C). It prefers full sunlight and well-drained soils, with a pH range of 6.0 to 7.0. While jicama is tolerant of a variety of soil conditions, it performs best in sandy or loamy soils that are rich in organic matter. Proper soil preparation, including the addition of compost or well-rotted manure, can significantly enhance tuber size and quality.
Additional Information and Scientific Analysis
Nutritional Profile: Jicama is not only a versatile vegetable but also a nutritious one. It is rich in dietary fiber, vitamin C, and potassium, while being low in calories. A 100-gram serving of jicama provides approximately:
- Calories: 38
- Dietary Fiber: 4.9 grams (20% of daily value)
- Vitamin C: 20.2 mg (34% of daily value)
- Potassium: 150 mg (4% of daily value)
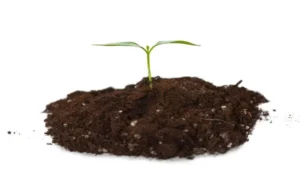
Growth and Development: Jicama’s growth cycle can be broken down into distinct phases:
- Germination and Early Growth: Takes about 7-14 days post-planting. The seeds require warm, moist soil for optimal germination.
- Vegetative Growth: The vine rapidly grows and develops leaves and flowers. This stage lasts for approximately 4-6 months.
- Tuber Formation: Begins as the vegetative growth slows down, typically around the 4th to 6th month, and continues until harvest.
Scientific Insights:
- Photosynthesis Efficiency: Jicama plants have a high photosynthetic efficiency, which allows them to convert sunlight into chemical energy effectively. This efficiency is particularly important in regions with high sunlight intensity.
- Water Use Efficiency (WUE): Jicama has a WUE of approximately 2.5 g/L, meaning it produces 2.5 grams of biomass per liter of water consumed. This makes it a relatively water-efficient crop, especially in semi-arid regions.
Key Growth Parameters and Nutritional Information
| Parameter | Value |
|---|---|
| Botanical Name | Pachyrhizus erosus |
| Family | Fabaceae (Legume family) |
| Plant Type | Perennial Vine |
| Vine Length | Up to 4-5 meters |
| Flower Color | Blue or White |
| Tuber Weight | 1 to 5 pounds |
| Ideal Temperature Range | 70°F to 90°F (21°C to 32°C) |
| Soil pH | 6.0 to 7.0 |
| Preferred Soil Type | Sandy or loamy, rich in organic matter |
| Nutritional Value (per 100g) | Calories: 38, Fiber: 4.9g, Vitamin C: 20.2mg, Potassium: 150mg |
| Water Use Efficiency (WUE) | 2.5 g/L |
Unique Insights:
- Symbiotic Nitrogen Fixation: Jicama, like other legumes, engages in symbiotic nitrogen fixation with Rhizobium bacteria. This relationship allows the plant to convert atmospheric nitrogen into a form usable by plants, reducing the need for nitrogen-based fertilizers.
- Allelopathic Properties: Jicama has been observed to possess allelopathic properties, which means it can suppress the growth of certain weed species through chemical compounds released into the soil. This characteristic can be beneficial in integrated weed management strategies.
Preparing the Garden
Soil Preparation:
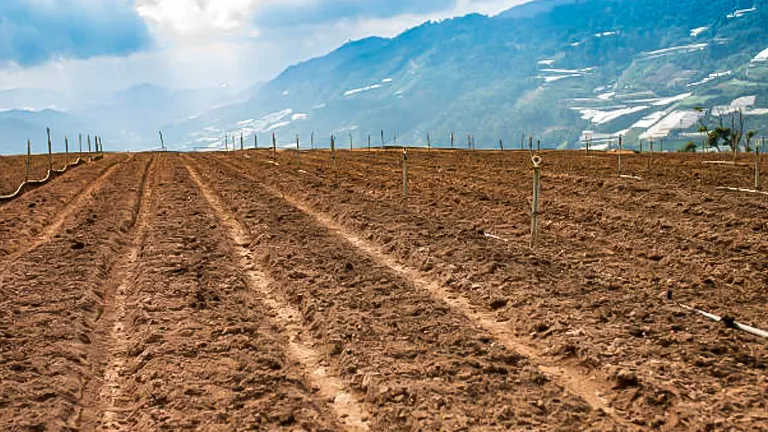
Proper soil preparation is essential for healthy jicama growth. Begin by testing your soil’s pH level to ensure it falls within the ideal range of 6.0 to 7.0. If necessary, amend the soil to adjust the pH. Incorporate ample amounts of compost or well-rotted manure to enhance soil fertility and improve its structure. This is crucial, as jicama roots are prone to rot in overly wet conditions. For heavy clay soils, consider creating raised beds to enhance drainage and root development. Raised beds not only improve drainage but also warm up more quickly in the spring, providing a better environment for root growth.
Choosing the Right Location:
Jicama plants thrive in full sun, so select a location in your garden that receives at least 6 to 8 hours of direct sunlight daily. Adequate sunlight is vital for photosynthesis and tuber development. Ensure the site has good air circulation to prevent fungal diseases. Planning for a trellising system is also beneficial, as it supports the sprawling vines and helps keep the foliage off the ground, reducing the risk of soil-borne diseases and making it easier to manage the plants.
Plant-to-Plant and Row-to-Row Spacing:
In medium or high-density jicama farming, spacing is crucial for plant health and ease of management. Each plant should be spaced 8 to 12 inches apart, while rows should be 18 to 24 inches apart. This spacing allows each plant enough room to grow without competing for nutrients, water, or sunlight. Proper spacing also facilitates air circulation around the plants, which helps prevent fungal diseases and supports healthy growth. Additionally, this spacing makes it easier to weed, water, and harvest the plants.
Additional Information and Scientific Analysis
Soil Nutrient Requirements: Jicama plants benefit from a balanced supply of nutrients. A soil test can help determine specific nutrient deficiencies. Generally, jicama requires:
- Nitrogen (N): Essential for vegetative growth. Recommended rate is about 50-75 kg/ha.
- Phosphorus (P): Important for root development. Recommended rate is about 20-40 kg/ha.
- Potassium (K): Crucial for overall plant health and disease resistance. Recommended rate is about 50-75 kg/ha.
Water Management: Jicama requires consistent moisture for optimal growth. Drip irrigation is ideal as it provides water directly to the roots while keeping foliage dry, which helps prevent fungal diseases. The critical periods for water are during germination, flowering, and tuber formation. Over-watering or waterlogging should be avoided to prevent root rot.
Key Soil and Plant Parameters
| Parameter | Value |
|---|---|
| Ideal Soil pH | 6.0 – 7.0 |
| Recommended Nitrogen (N) | 50-75 kg/ha |
| Recommended Phosphorus (P) | 20-40 kg/ha |
| Recommended Potassium (K) | 50-75 kg/ha |
| Plant Spacing | 8-12 inches apart |
| Row Spacing | 18-24 inches apart |
| Sunlight Requirement | 6-8 hours of direct sunlight daily |
| Water Requirement | Consistent moisture, avoid waterlogging |
Unique Insights:
- Soil Microbiome: The health of the soil microbiome plays a significant role in nutrient uptake for jicama. Beneficial microbes, such as mycorrhizal fungi, can enhance phosphorus uptake and overall plant health.
- Allelopathy: Jicama exhibits mild allelopathic properties, which can suppress the growth of certain weed species. This characteristic can be beneficial in reducing weed competition in the garden.
Scientific Analysis
Photosynthetic Efficiency: Jicama plants have a high photosynthetic efficiency, which is crucial for converting sunlight into energy. This efficiency allows jicama to thrive in areas with high sunlight intensity, contributing to robust vegetative growth and tuber development.
Water Use Efficiency (WUE): Jicama demonstrates a water use efficiency (WUE) of approximately 2.5 grams of biomass per liter of water consumed. This metric indicates that jicama is relatively water-efficient, making it suitable for regions with semi-arid climates.
Symbiotic Relationships: Jicama, like other legumes, engages in symbiotic nitrogen fixation with Rhizobium bacteria. This relationship allows the plant to convert atmospheric nitrogen into a usable form, reducing the need for nitrogen fertilizers and promoting sustainable farming practices.
Planting Techniques
When to Plant:
The optimal time for planting jicama is crucial for successful growth. In temperate climates, sow jicama seeds after the last frost when the soil temperature consistently reaches at least 65°F (18°C). This ensures that the soil is warm enough for seed germination, which is vital as jicama seeds are sensitive to cold soil. In tropical or consistently warm climates, planting can be done at any time, provided there is a sufficient growing period (about 5 to 9 months) before any potential cool season.
How to Plant:
For seeds:
- Plant jicama seeds 1 to 2 inches deep in well-prepared, fertile soil. Space the seeds about 4 to 6 inches apart to allow for initial growth without overcrowding.
- Water the soil immediately after planting to moisten the seeds, promoting germination. Keep the soil consistently moist but not waterlogged during the germination period.
For seedlings:
- If starting with seedlings, inspect them carefully to ensure they are robust and free from pests or diseases.
- Loosen the root ball gently to encourage root expansion after transplanting. Plant seedlings at the same depth they were growing in their containers to avoid burying the stem too deeply, which can lead to stem rot.
- Space the seedlings about 12 inches apart with rows 24 inches apart to allow for mature growth and easy access for maintenance and harvesting.
Additional Information and Scientific Analysis
Germination Rate and Time: Jicama seeds have a germination rate of approximately 80% under optimal conditions. The germination time can range from 14 to 21 days, depending on soil temperature and moisture levels.
Root Development: The root system of jicama is pivotal for its growth. The initial root structure is fibrous, developing into a large tuber as the plant matures. Effective root development is enhanced by loose, well-draining soil and proper planting depth.
Key Planting Parameters and Growth Metrics
| Parameter | Value |
|---|---|
| Optimal Soil Temperature for Planting | ≥65°F (18°C) |
| Seed Planting Depth | 1-2 inches |
| Seedling Plant Spacing | 12 inches |
| Row Spacing | 24 inches |
| Germination Rate | Approx. 80% |
| Germination Time | 14-21 days |
| Recommended Watering Post-Planting | Immediately, then as needed to keep soil moist |
Unique Insights:
- Thermal Germination Threshold: Jicama seeds have a thermal germination threshold, with an optimal temperature range of 70°F to 85°F (21°C to 29°C). Below or above this range, germination rates significantly decrease.
- Root Tuberization: Jicama’s tuber formation is highly sensitive to daylight length, with shorter days promoting more significant tuber development. This is why jicama is often planted in late spring to coincide with decreasing day lengths after the summer solstice, enhancing tuber growth.
Scientific Note on Daylight Sensitivity:
- Jicama plants exhibit a photoperiodic response, which means they begin to form tubers when daylight decreases to about 12 hours or less. This response triggers biochemical pathways that prioritize energy storage in the tubers rather than vegetative growth.
Watering and Nutritional Needs
Watering Schedules:
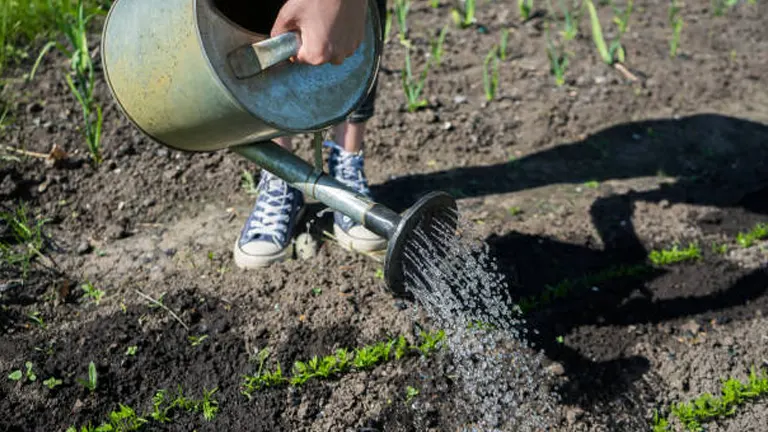
Proper hydration is crucial for jicama, particularly during its active growth phases. Jicama plants require consistent moisture, especially during the peak growing season when the plant is developing foliage and beginning tuber formation. It’s recommended to water the plants deeply once a week, which helps penetrate the soil deeply enough to reach the roots. Allow the soil to dry out slightly between waterings to prevent waterlogging, which can lead to root rot. For the most effective watering, utilize a soaker hose or drip irrigation system. These methods reduce moisture on foliage and decrease the risk of fungal diseases by delivering water directly to the soil surface near the plant roots.
Fertilization Strategies:
While jicama is not excessively demanding regarding nutrients, proper fertilization is essential to promote healthy growth and robust tuber development. Use a balanced, slow-release fertilizer with an NPK ratio close to 10-10-10 at planting to provide a steady supply of nutrients. A mid-season application of fertilizer can further support the critical phases of flowering and tuber formation. It is vital to adhere to the manufacturer’s recommendations for dosage and frequency to prevent over-fertilization, which can lead to excessive foliage growth at the expense of the root.
Additional Information and Scientific Analysis
Soil Moisture Retention:
- Jicama benefits from soil that maintains moisture yet drains well. Adding organic matter such as compost can improve moisture retention and aeration in the soil. The ideal soil moisture content for jicama should be maintained around 20-30% volumetric water content, which supports optimal plant growth without risk of waterlogging.
Nutrient Uptake and Efficiency:
- Jicama’s nutrient uptake efficiency can be optimized through soil pH adjustments. The ideal pH range for jicama is between 6.0 and 7.0, which maximizes nutrient availability, particularly phosphorus, potassium, and micronutrients. Regular soil tests can help monitor nutrient levels and pH to adjust your fertilization strategy accordingly.
Watering and Fertilization Parameters
| Parameter | Value |
|---|---|
| Recommended Watering Frequency | Once per week |
| Soil Moisture Content | 20-30% volumetric water content |
| Ideal Soil pH | 6.0 – 7.0 |
| Fertilizer Type | Balanced, slow-release |
| NPK Ratio | 10-10-10 |
| Fertilization Frequency | At planting and mid-season |
Unique Insights:
- Water Use Efficiency (WUE): Jicama has a moderate WUE, indicating how efficiently the plant uses water for biomass production. Studies suggest a WUE of about 3-4 grams of dry weight per liter of water consumed, which is comparatively efficient for a tuberous crop.
- Impact of Micronutrients: Micronutrients such as zinc and boron play a crucial role in the growth and development of jicama. Zinc is essential for protein synthesis and growth regulation, while boron is critical for cell wall formation and helps regulate nutrient transport.
Managing Pests and Diseases
Common Pests:
Jicama is vulnerable to several pests, which can significantly impact plant health and yield. Key pests include aphids, spider mites, and whiteflies, which suck sap from the plants, weakening them and potentially transmitting diseases. Effective pest management involves:
- Regular Monitoring: Check plants frequently for signs of pests. Early detection is crucial for preventing large infestations.
- Integrated Pest Management (IPM): Utilize a combination of cultural, biological, and chemical control methods to manage pest populations sustainably. For instance, maintaining garden hygiene can reduce pest incidence.
- Biological Control: Introduce beneficial insects like ladybugs, lacewings, and predatory mites, which prey on harmful pests like aphids and spider mites.
- Organic Pesticides: For severe infestations, use insecticidal soaps or neem oil sprays. These treatments are less harmful to beneficial insects and the environment than synthetic pesticides.
Common Diseases:
Jicama plants are susceptible to root rot and fungal diseases, particularly in conditions of high moisture. Managing these diseases involves:
- Proper Irrigation: Implement drip irrigation to minimize water contact with foliage and provide only as much water as the plant needs, reducing the risk of waterlogging.
- Soil Management: Ensure that the soil has good drainage. Amend heavy soils with organic matter or sand to improve soil structure.
- Crop Rotation: Rotate jicama with non-leguminous crops to prevent the buildup of soil-borne pathogens and reduce the risk of disease carryover from one season to the next.
- Fungicide Application: If infections are spotted, apply fungicides that are safe for use on edible crops. Be sure to follow the application guidelines provided on the label for safe and effective use.
Supporting Jicama Plants
Staking and Trellising:
Jicama, being a vining plant, greatly benefits from support structures such as stakes and trellises. Installing these supports at the time of planting is crucial to avoid disturbing the roots later in the growth cycle. A well-constructed trellis provides robust support for the heavy vines, ensuring they receive adequate sunlight and air circulation, which are vital for healthy growth. Here are some detailed steps and additional insights for effective staking and trellising:
- Choosing Materials: Use sturdy materials such as bamboo stakes, metal rods, or wooden stakes that can withstand the weight of mature vines. For trellises, options include lattice panels, wire mesh, or specialized garden trellises.
- Installation: Place stakes or trellises 6-12 inches away from the plant base to avoid damaging the roots. Drive the stakes deep enough into the ground to provide stability. If using a trellis, ensure it is securely anchored.
- Guiding the Vines: As the jicama vines grow, gently guide them onto the trellis or stakes. Use soft plant ties or garden twine to loosely secure the vines, allowing for natural movement and growth.
Advantages of Physical Support:
Supporting jicama plants with stakes and trellises offers several significant benefits:
- Improved Air Circulation: Elevating the vines promotes better air flow around the plant, reducing humidity levels and the risk of fungal diseases such as powdery mildew and downy mildew.
- Maximized Sunlight Exposure: By lifting the vines off the ground, the leaves and stems can access more sunlight, enhancing photosynthesis and overall plant vigor.
- Pest Prevention: Physical support helps keep the foliage off the soil, making it less accessible to ground-dwelling pests like slugs and snails.
- Space Efficiency: Vertical growth saves garden space, allowing for more efficient use of available area and enabling intercropping with other plants.
Growth Dynamics and Trellising:
- Vertical Growth Rates: Jicama vines can grow rapidly under optimal conditions, sometimes extending up to 5 meters (16 feet) in length. This vertical growth necessitates robust support to prevent breakage and maximize health.
- Photosynthetic Efficiency: Elevated vines with better sun exposure exhibit higher photosynthetic rates, translating into more energy for root development. Studies indicate that jicama vines on trellises can achieve a 15-20% increase in photosynthetic efficiency compared to those growing on the ground.
Impact on Yield and Quality:
- Disease Reduction Metrics: Research shows that trellising can reduce the incidence of fungal diseases by up to 30%, primarily due to improved air circulation and reduced leaf wetness.
- Yield Improvement: Proper support structures have been linked to a yield increase of up to 25%, as healthier plants produce larger and more numerous tubers.
Pruning Techniques
Importance of Pruning
Pruning is a crucial practice in cultivating jicama, especially given its vigorous vining habit. While lush foliage can indicate a healthy plant, not all growth is beneficial for tuber development. By strategically pruning jicama plants, gardeners can direct the plant’s energy towards producing larger and healthier tubers, rather than excessive leaf and stem growth. This process not only enhances tuber size and quality but also improves overall plant health by promoting better air circulation and light penetration.
Step-by-Step Guide:
- Initial Pruning: When the plant reaches about a foot tall, start by removing any lateral shoots that emerge from the base. This encourages the plant to focus on upward growth, supporting stronger main stems.
- Selective Pruning: As the plant continues to grow, monitor for overcrowded areas. Prune selectively to thin out dense foliage, allowing sunlight to reach all parts of the plant and enhancing air flow. This helps prevent fungal diseases and ensures that energy is directed towards tuber development.
- Regular Maintenance: Throughout the growing season, regularly inspect the plant and remove any dead or diseased leaves and stems. This not only maintains plant health but also reduces the risk of pest infestations.
- Final Pruning: Towards the end of the growing season, consider a final round of pruning to remove any remaining unnecessary growth, maximizing the plant’s energy reserves for tuber maturation.
Tools and Techniques:
- Tools: Use clean, sharp pruning shears to make precise cuts. Disinfect the shears with rubbing alcohol before and after use to prevent the spread of diseases.
- Technique: Make cuts close to the main stem but avoid cutting into it. Angled cuts are preferable as they reduce the risk of water accumulation and subsequent disease.
Additional Information and Scientific Analysis
Impact on Photosynthesis: Pruning enhances photosynthetic efficiency by ensuring that all leaves receive adequate sunlight. Studies have shown that well-pruned plants can have a 10-15% increase in photosynthetic rates, directly influencing growth and tuber size.
Energy Allocation: Pruning redirects the plant’s energy from non-essential growth (excessive leaves and lateral shoots) towards tuber development. Scientific analysis indicates that this can improve tuber weight by up to 20%, as the plant efficiently utilizes its resources.
Disease and Pest Control: Regular pruning helps prevent the spread of diseases by improving air circulation and reducing the habitat for pests. By keeping the plant open and airy, the microclimate around the plant becomes less conducive to fungal growth and pest infestations.
Pruning Schedule and Benefits
| Pruning Stage | Action | Benefits | Scientific Insight |
|---|---|---|---|
| Initial Pruning | Remove lateral shoots at 1 foot tall | Directs growth upwards, strengthens main stems | Promotes robust stem development |
| Selective Pruning | Thin out dense foliage | Enhances light penetration, air circulation | Increases photosynthetic efficiency by 10-15% |
| Regular Maintenance | Remove dead/diseased parts | Maintains plant health, reduces pest risk | Prevents disease spread, improves plant vitality |
| Final Pruning | Remove non-essential growth | Maximizes energy for tuber maturation | Can increase tuber weight by up to 20% |
Harvesting and Post-Harvest Care
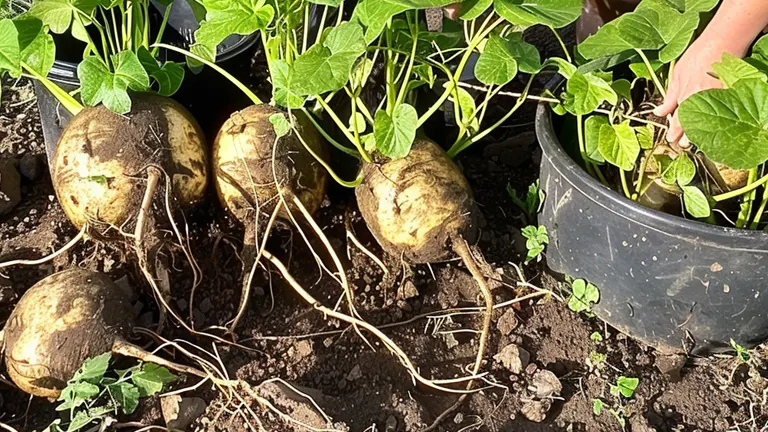
Signs of Readiness for Harvest:
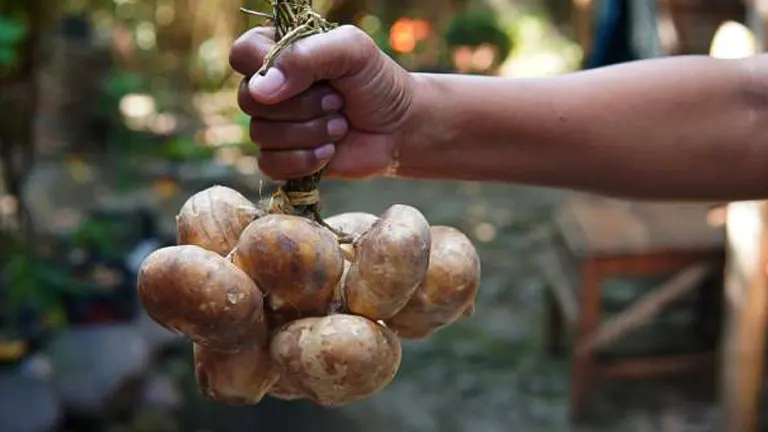
Jicama is typically ready for harvest between 5 to 9 months after planting, depending on the growing conditions. Recognizing the right time to harvest is crucial for ensuring optimal flavor and texture. The most reliable indicator of readiness is when the leaves begin to yellow and wither, signaling that the plant is diverting energy from foliage to root development. To confirm, gently unearth a small portion of the root; a mature jicama root should feel firm and range in size from a tennis ball to a soccer ball. The skin should be smooth and free from significant blemishes.
How to Harvest:
- Preparation: Before harvesting, ensure the soil is slightly moist but not wet. This makes it easier to unearth the roots without damaging them.
- Loosening the Soil: Use a gardening fork or spade to gently loosen the soil around the base of the plant, taking care not to pierce the roots.
- Lifting the Root: Carefully lift the root from the soil by its base, avoiding any sudden movements that could bruise or damage it. Handle the roots gently, as any damage can lead to spoilage during storage.
- Cleaning: Shake off excess soil and cut the vine close to the root. Rinse the roots with cool water to remove any remaining dirt.
Storage and Handling:
Proper storage is essential to maintain the quality and freshness of harvested jicama roots:
- Initial Drying: After cleaning, allow the jicama roots to dry in a shaded, well-ventilated area for a few hours. This drying period helps to toughen the skin and reduces the risk of mold.
- Short-Term Storage: Jicama can be stored at room temperature in a cool, dry place for several weeks. Avoid exposing the roots to direct sunlight or extreme temperatures.
- Long-Term Storage: For extended storage, keep the roots in a cool, dark place such as a root cellar or a refrigerator. Optimal storage conditions are temperatures between 50°F and 60°F (10°C and 15°C) with high humidity (85-90%). Under these conditions, jicama can be stored for several months.
- Handling Tips: Do not wash the roots before long-term storage to minimize the risk of mold growth. Instead, clean them just before use.
Nutrient Retention:
- Vitamin C Stability: Jicama is rich in vitamin C, which is sensitive to light and air. Proper storage conditions help preserve this nutrient. Studies show that vitamin C content can decrease by up to 25% if jicama is stored improperly.
- Water Content: Jicama roots have a high water content (approximately 86-90%), which is crucial for their crisp texture. Proper storage helps maintain this water content, ensuring the roots remain crunchy.
Post-Harvest Physiology:
- Respiration Rate: Jicama roots have a low respiration rate compared to other root vegetables. This means they can be stored for longer periods without significant quality loss if kept under optimal conditions.
- Ethylene Sensitivity: Jicama is not sensitive to ethylene gas, which allows it to be stored alongside other ethylene-producing fruits and vegetables without risk of accelerated spoilage.
Culinary Uses and Recipes
Versatility in the Kitchen: Jicama is celebrated for its crisp texture and mildly sweet, nutty flavor, making it a versatile ingredient in the kitchen. It can be eaten raw, julienned for salads, or cut into sticks for dips. Cooked jicama retains its crunchy texture, making it a fantastic addition to stir-fries, soups, and stews.
Simple Recipes to Get Started:
- Jicama Slaw: Combine julienned jicama with cabbage, carrots, and a light vinaigrette for a refreshing side dish.
- Spicy Jicama Sticks: Toss jicama sticks with lime juice, chili powder, and salt for a zesty, healthy snack.
Related Post
- How to Build a Barn: A Step-by-Step Guide for Beginners
- How to Build a Sustainable Compost Bin: Easy and Eco-Friendly DIY
- How to Fertilize Bougainvillea: A Complete Guide for Stunning Blooms
- How to Fertilize Apple Trees: Essential Tips for a Bountiful Harvest
- How to Fertilize Lemon Trees: Secrets for Thriving Citrus
- How to Fertilize Avocado Tree: A Step-by-Step Guide for Lush Growth
- 10 Best Bow Saws to Buy in 2024: Top Picks for the Money
- Best Miter Saw For Beginners
- Top 10 Pruning Saws to Buy in 2024: Best for the Money
- 7 Best Pocket Chainsaw
Conclusion
Growing jicama can be a rewarding addition to your garden. With patience and care, you can enjoy a plentiful harvest of this unique root vegetable. The techniques discussed—from soil preparation to pruning and harvesting—will help ensure your jicama plants thrive and produce to their fullest potential. Remember, the key to successful gardening is not just the actions you take but the attention to detail along the way.
FAQs
- What is the best time of year to plant jicama?
Jicama should be planted after the last frost in spring when the soil has sufficiently warmed up. This timing helps ensure that the plants have a long, frost-free growing period, essential for developing mature tubers. - How deep should I plant jicama seeds?
Jicama seeds should be planted about 1 to 2 inches deep in the soil. This depth helps protect them from the elements and ensures that they have enough soil coverage to support the initial stages of growth. - Can jicama be grown in containers?
Yes, jicama can be grown in containers, provided they are large enough to accommodate the plant’s root system. A container that is at least 20-30 inches deep and wide is ideal. Ensure that the container has good drainage. - How often should I water jicama plants?
Water jicama plants deeply once a week, allowing the soil to dry out slightly between waterings. This schedule may need to be adjusted depending on your climate and the weather conditions. - What type of fertilizer works best for jicama?
A balanced, slow-release fertilizer is ideal for jicama. It should be applied at planting and possibly again mid-season, depending on the plant’s response and soil fertility. - When is jicama ready to harvest?
Jicama is usually ready to harvest when the leaves begin to yellow and die back, typically about 5 to 9 months after planting. The tubers should feel firm and can be checked by uncovering a small portion of the root. - How can I prevent pests from damaging my jicama plants?
Regularly inspect your plants for signs of pests and manage infestations early with organic methods such as introducing beneficial insects, using insecticidal soap, or applying neem oil. Proper plant spacing and hygiene also help minimize pest issues. - What are some common uses for jicama in cooking?
Jicama is commonly used raw in salads and slaws for its crisp texture and mild flavor. It can also be cooked in stir-fries or baked like a potato for a nutritious side dish. Additionally, jicama makes a great low-calorie snack when sliced and sprinkled with lime juice and chili powder.
With these expert tips and techniques, you’re well-equipped to grow and care for jicama successfully. Start planting today and look forward to enjoying the crisp, sweet rewards of your garden.

Benjamin Brooks
Forestry AuthorGreetings! I'm Benjamin Brooks, and my journey over the past 15 years has revolved around the fascinating realms of content creation, expertise in snow clearing, and the intricate world of lumberjacking and landscaping. What began as a simple curiosity about the natural world and heavy machinery has evolved into a passionate profession where my love for crafting words intertwines seamlessly with my lumberjacking and garden skills.


Leave your comment