How to Sharpen Lawn Mower Blades: A Step-by-Step Guide
- March 1, 2024
- 0 comment
Maintaining Sharp blades on a lawn mower is crucial for the health and appearance of your lawn. Dull blades can tear and bruise the grass, leading to an uneven cut and potential lawn diseases. Sharp blades, on the other hand, make clean cuts, promoting healthier grass growth and giving your lawn a manicured look. Regular blade maintenance not only ensures the efficiency of your mower but also extends its lifespan by reducing the wear and tear on its motor.
Safety First
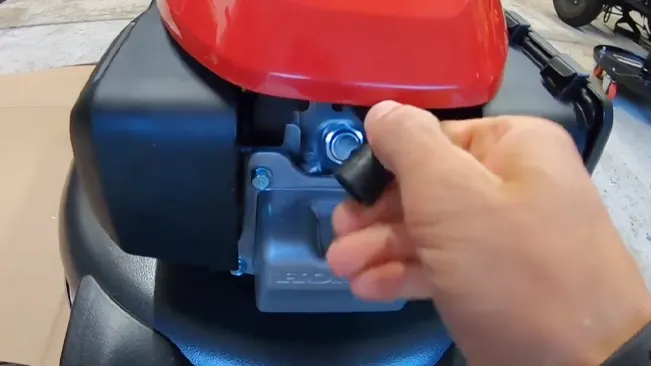
Before embarking on the task of sharpening your lawn mower blades, prioritizing safety is paramount. A critical first step is to unplug the spark plug, which serves as a fail-safe against any unintended startups while you’re working on the mower. This simple action can prevent potential injuries and ensure a safe working environment.
Additionally, during the sharpening process, it’s essential to protect your eyes from any flying sparks or debris. Wearing protective eyewear is not just a precaution; it’s a necessity. The grinding and filing of metal blades can produce small, high-velocity particles that pose a serious risk to your eyesight. By wearing safety glasses or goggles, you shield your eyes from these hazards, ensuring that your maintenance routine is not only effective but also safe.
Preparation for Removal
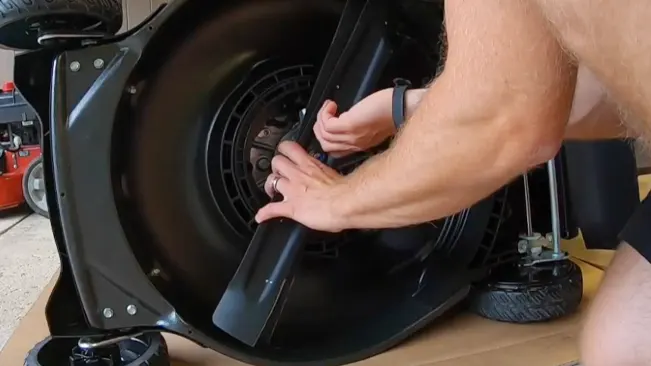
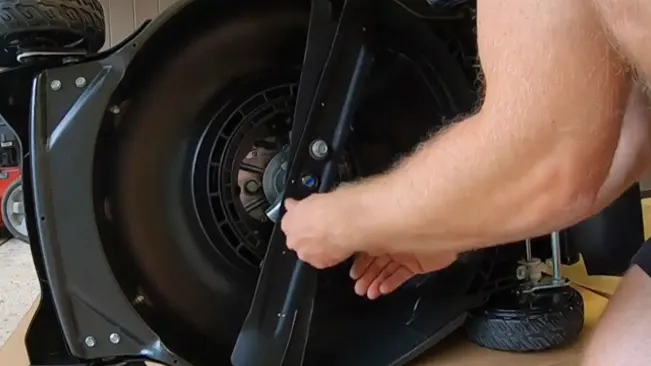
The initial step in sharpening your lawn mower blades involves their careful removal. To start, position a sturdy block of wood within the mowing deck to immobilize the blade. This block acts as a brace, preventing the blade from spinning as you apply torque to the bolts. With the blade securely in place, you’re ready to tackle the bolts.
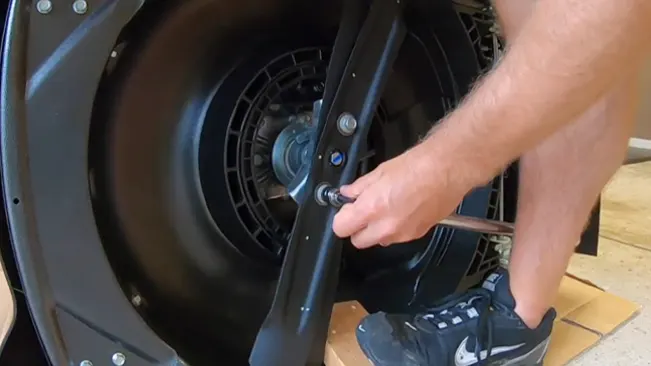
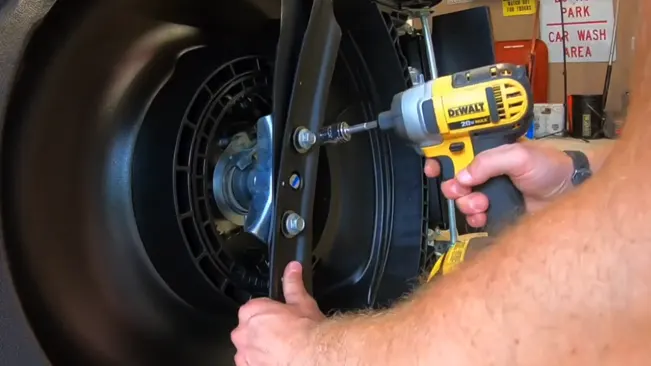
For this task, arm yourself with a 14mm socket attached to either a breaker bar or a ratchet. The choice between these tools depends on your preference and the tools available at your disposal. The breaker bar offers more leverage for loosening tight bolts, while the ratchet allows for quicker, more efficient movement once the bolts are loosened. Once the initial resistance is overcome and the bolts are loosened, switching to an impact driver can significantly expedite the process. The impact driver simplifies the task of completely removing the bolts, making the process smoother and less labor-intensive. This tool is especially useful for those who prefer a more efficient method to manually unscrewing the bolts the entire way. With the bolts removed, you can then proceed to take the blades off the mower for sharpening.
Cleaning the Blades
Before you begin the actual sharpening process, it’s imperative to clean the lawn mower blades thoroughly. Over time, blades accumulate a layer of gunk, comprising dried grass clippings, dirt, and other debris. This buildup can significantly affect the quality of the cut, leading to an uneven and unsatisfactory mowing experience. Moreover, excessive debris on the blades can also throw off their balance, causing additional strain on the mower’s engine and potentially reducing its lifespan.
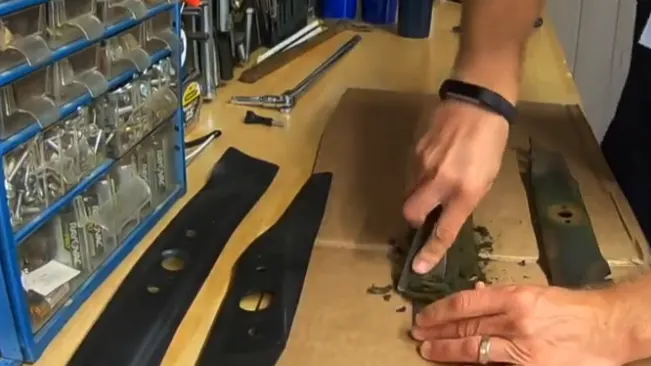
To effectively clean the blades, utilize a scraper tool. This simple yet effective tool can efficiently remove the hardened layer of debris clinging to the blades. Start by gently scraping the flat surfaces of the blades, being careful not to apply excessive force that might damage the blade’s surface. Pay particular attention to the edges and corners where clippings tend to accumulate the most. Work your way along both sides of each blade, ensuring all visible debris is removed. This not only prepares the blades for a more effective sharpening but also allows you to inspect the blades for any damage or wear that might have been hidden under the buildup. A clean blade ensures that your sharpening efforts are precise and effective, leading to a better cut and a healthier lawn.
Inspecting the Blades
Inspecting your lawn mower blades before sharpening is a critical step in the maintenance process. This inspection allows you to assess the condition of the blades and determine the extent of sharpening needed. Two key aspects to focus on during this inspection are the blade angle and the level of dullness. Lawn mower blades are typically designed with a cutting edge angled at approximately 30 degrees. This angle is crucial for efficient cutting and should be maintained during sharpening. Use a protractor or an angle gauge to measure the existing angle of the blade’s edge. If the angle is significantly off, it will need to be corrected during the sharpening process to ensure optimal cutting performance.
The dullness of the blade is another important factor to assess. A blade that is too dull will fail to make clean cuts, instead tearing or bruising the grass, which can lead to an unhealthy lawn. To check for dullness, carefully examine the blade’s edge. A sharp blade should have a clean, defined edge, while a dull blade will have a rounded or flattened edge. Running your finger gently and carefully along the edge (parallel to the edge, not across it) can also help you feel for dullness. If the edge feels smooth or blunt to the touch, it indicates that the blade is too dull and needs sharpening. Identifying these issues before you start sharpening ensures that you can address them effectively during the sharpening process, resulting in a well-maintained mower and a healthier, better-looking lawn.
Sharpening Process
Using a Grinder
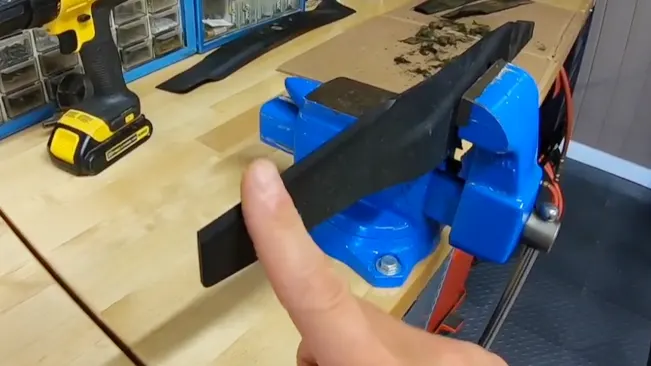
- Secure the Blade: Secure the lawn mower blade in a vise or with clamps on a stable work surface to prevent movement during sharpening.
- Safety Gear: Always wear protective eyewear and gloves to safeguard against sparks and sharp edges.
- Check the Angle: Confirm the blade’s existing angle (usually around 30 degrees) and plan to maintain this angle throughout the sharpening process.
- Grinding: Turn on the grinder and approach the blade with the tool. Hold the grinder at the same angle as the blade’s existing edge. Begin making consistent, gentle passes along the length of the blade’s cutting edge. Avoid pressing too hard or staying in one spot to prevent overheating and warping the metal.
- Maintain Consistency: Work to maintain the angle and apply even pressure during each pass to ensure the blade is evenly sharpened along its length.
- Cooling: Periodically cool the blade with water if it becomes too hot to touch. Overheating can weaken the blade’s structure.
Fine-Tuning with a File
After using the grinder, a metal file can be used for fine-tuning the sharpness and cleaning up any burrs left by the grinding process.
- Secure the Blade: Re-secure the blade if it was removed for cooling or inspection.
- Correct Angle: Hold the file at the same angle as the blade’s edge. Begin with the side that was ground, making smooth, consistent strokes along the cutting edge.
- Light Touch: Use a light touch to avoid removing too much material. The goal is to refine the edge, not to reshape it.
- Check for Burrs: After filing one side, feel for burrs on the opposite side. These are small pieces of metal pushed out by the filing process.
- Remove Burrs: Lightly file the backside of the blade to remove any burrs. This ensures a clean, sharp edge.
- Inspect: After filing, inspect the blade for uniform sharpness and correct any uneven areas.
Reattaching the Blades
Position the Blades
When reattaching the blades to your lawn mower, start by carefully aligning them with the spindle or the designated mounting area on the mower’s underside. It’s essential to pay attention to the orientation of the blades; typically, the cutting edge, which is the sharpened side, should be facing away from the mower deck to ensure effective cutting. This means when the mower is in operation, the sharp edge will contact the grass first. Incorrectly positioned blades can result in ineffective cutting and can cause damage to both the lawn and the mower. Take a moment to visually inspect the blade orientation, ensuring the sharp edges are positioned to slice through the grass cleanly.
Secure with Bolts
Once the blades are correctly positioned, proceed to secure them with the bolts. Insert the bolts through the central holes of the blades and start hand-tightening them to ensure they catch the threads properly. It’s important to use the mower’s original bolts or bolts specifically recommended by the mower’s manufacturer to maintain the assembly’s integrity. Using the wrong bolts could lead to a poor fit, causing the blades to become loose over time or even detach during operation, posing a significant safety risk.
Tighten the Bolts
After hand-tightening, further secure the bolts using a torque wrench, applying the manufacturer’s recommended torque setting. This precision tool ensures that the bolts are tightened adequately without exceeding the limit, which could damage the blades or the mower’s assembly. If a torque wrench is not accessible, use a standard wrench to tighten the bolts firmly, but exercise caution to avoid over-tightening and potentially stripping the threads, which would compromise the blade’s security and the mower’s safety.
Double-Check Tightness

With all the blades attached and initially tightened, it’s wise to revisit each bolt for a final check. This ensures that the process of tightening one bolt hasn’t inadvertently loosened another. This step is vital for ensuring the mower’s safety and functionality, as loose blades can lead to uneven cutting and pose a significant safety hazard during operation.
Ensuring Blade Balance
Checking Blade Balance
Using a Blade Balancer
- Clean the Blade: Ensure the blade is clean from any debris or clippings for an accurate balance check.
- Place on Balancer: Position the center hole of the blade onto the cone or spindle of the blade balancer. A balanced blade will remain horizontal without tilting to either side.
- Adjusting Balance: If one side tilts down, it’s heavier and needs material removed. Mark the heavier side for reference.
Using a Nail in the Wall
- Secure a Nail: Drive a nail into a wall or a beam in your workspace, ensuring it’s firmly in place.
- Hang the Blade: Place the blade’s center hole over the nail. The blade should hang horizontally if balanced.
- Identify Heavy Side: If the blade tilts, the lower side is the heavier one. Mark this side for material removal.
Final Steps
Re-Plugging the Spark Plug
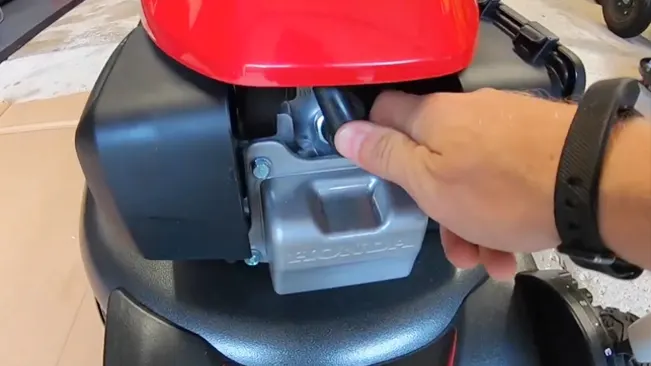
After the blades are securely reattached and inspected, the next crucial step is to reconnect the spark plug. This action reactivates the mower’s engine, making it ready for use. Reconnecting the spark plug should be done with care, ensuring it’s properly seated and the connection is secure. This step is vital for the safe operation of the mower, as it prevents accidental startups during maintenance and ensures that the mower will start smoothly when you’re ready to use it.
Conducting a Final Check
Before starting your mower, conduct a comprehensive final check. Ensure all tools and maintenance materials are cleared away from the work area. Check the mower’s oil and fuel levels to ensure it’s ready for operation. Briefly inspect the mower for any loose screws or parts that may have been overlooked during the maintenance process. This final check is crucial for ensuring the mower is in optimal condition for use, reducing the risk of breakdowns and ensuring a smooth mowing experience.
Conclusion
In conclusion, the maintenance of lawn mower blades, encompassing cleaning, sharpening, balancing, and proper reattachment, is fundamental for both the health of your lawn and the longevity of your mower. Taking the time to perform these steps ensures that your mower operates efficiently, providing a clean and even cut that promotes the growth of a healthy, lush lawn. The process, which can be completed in approximately 10 minutes, is a small investment when considering the extended lifespan of your mower and the improved appearance of your lawn. By adhering to these maintenance practices, you not only safeguard your investment in your lawn mower but also contribute to the overall well-being of your outdoor space, ensuring it remains a vibrant and welcoming environment.
FAQs
1. How often should I sharpen my lawn mower blades?
It’s generally recommended to sharpen your lawn mower blades at least once per mowing season, or every 20-25 hours of mowing time. However, if you notice the blades are tearing the grass instead of cutting cleanly, it might be time for a sharpening.
2. Can I sharpen my lawn mower blades without removing them?
While it’s possible to sharpen blades without removing them, it’s not recommended. Removing the blades allows for a more thorough cleaning, inspection for damage, and ensures a more accurate sharpening and balancing process.
3. How do I know if my lawn mower blades are balanced?
After sharpening, you can use a blade balancer or hang the blade on a nail to check if it stays horizontal. If one side dips, it’s heavier, and you’ll need to remove a bit more material from that side.
4. What angle should I sharpen my lawn mower blades to?
Most lawn mower blades should be sharpened to an angle of about 30 degrees. It’s important to maintain this angle to ensure the blade cuts effectively.
5. Can I use a file to sharpen my lawn mower blades?
Yes, a file can be used for sharpening lawn mower blades, especially for fine-tuning after using a grinder. However, it might take longer and require more effort compared to using a bench grinder or a hand-held grinder.
6. What safety precautions should I take when sharpening lawn mower blades?
Always disconnect the spark plug before removing blades to prevent accidental starts. Wear protective gloves and eyewear during the sharpening process to protect against sparks and metal filings.
7. What do I do if my lawn mower blade is bent?
If a blade is bent, it’s generally safer and more effective to replace it rather than try to straighten it. A bent blade can cause vibration issues and may not cut effectively even after straightening.
8. How tight should the bolts be when reattaching the blades?
Bolts should be tightened to the manufacturer’s recommended torque specification. If unsure, tighten them firmly but be cautious not to strip the threads by over-tightening.
9. How do I dispose of or recycle old lawn mower blades?
Old lawn mower blades can often be recycled at local metal recycling facilities. Check with your local waste management services for specific guidance.
10. Can dull blades affect the health of my lawn?
Yes, dull blades tear the grass rather than cutting it cleanly, which can lead to a greater susceptibility to disease and an overall unhealthy appearance. Sharp blades ensure a clean cut, promoting healthier grass.

Joel Cunningham
Forestry AuthorI'm Joel Cunningham, an expert in pruning and weed management with over a decade of experience. My skills are rooted in formal training and extensive practice, focusing on advanced pruning techniques and efficient weed control. I'm known for my quality work, precision, and deep understanding of plant health and soil dynamics. My contributions extend to educational initiatives where I share sustainable practices and advice, establishing myself as a reliable and authoritative figure in the gardening community.


Leave your comment