How to Grow and Care for Squash: Ensure Success with Expert Gardening Tips
- May 15, 2024
- 0 comment
Discover how to grow and care for squash. Ensure success with expert gardening tips that guide you from planting to harvest. This comprehensive guide is designed to assist you in mastering the art of growing and caring for squash. Our expert tips will equip you with the knowledge needed to navigate the entire process, from the initial planting to reaping a fruitful harvest.
Delve into the essential practices that will guarantee a healthy, productive squash garden. With strategic advice and practical steps, prepare to elevate your gardening skills and enjoy spectacular results.
Table of Contents
- Understanding Squash Varieties
- Preparing the Soil
- Planting Squash: Seeds vs. Transplants
- Watering and Fertilizing for Optimal Growth
- Pruning and Training Squash Plants
- Pest and Disease Management
- Harvesting Squash
- Troubleshooting Common Issues
- Tips for Maximizing Yield
- Regular Maintenance and Care for Squash
- Conclusion
- FAQs
Understanding Squash Varieties
Summer Squash
Summer squash varieties like zucchini, yellow squash, and pattypan are known for their rapid growth and tender texture. They require a growing season of approximately 50-70 days from seed to harvest. These squashes are non-climacteric, meaning they do not continue to ripen once picked, which is why they are best consumed shortly after harvesting. Rich in vitamin C and relatively low in calories, summer squash is ideal for a variety of culinary uses—from grilling and sautéing to being incorporated fresh into salads.
Key Varieties and Their Characteristics:
- Zucchini: Rapid growth, high yield, and versatility in cooking.
- Yellow Squash: Mild flavor, slightly larger seeds, excellent for frying.
- Pattypan Squash: Distinctive shape, buttery flavor, perfect for stuffing.
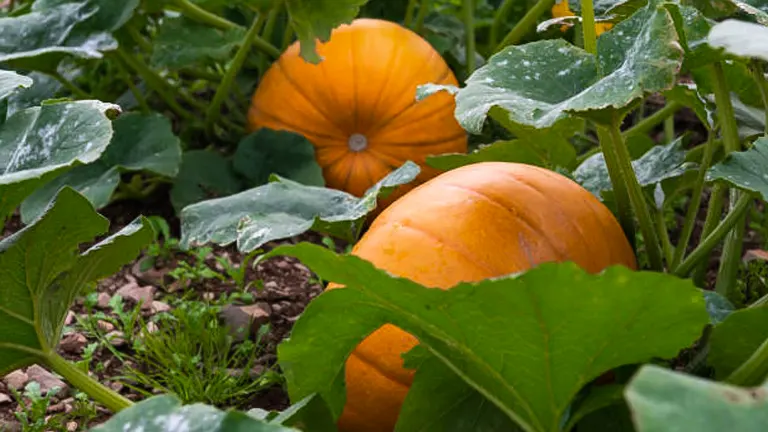
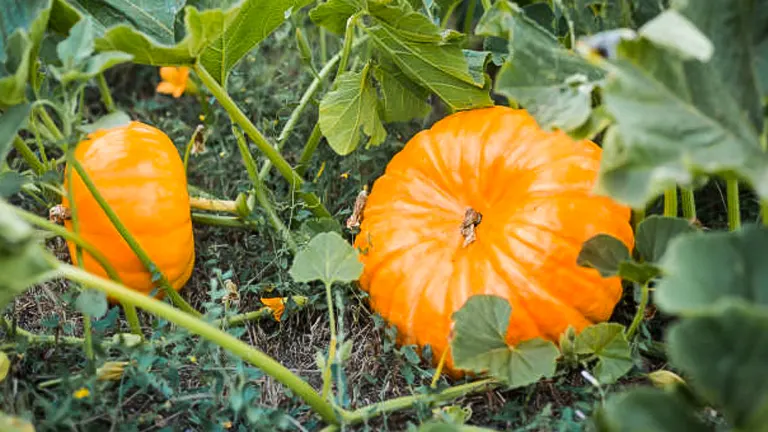
Winter Squash
Winter squash, including butternut, acorn, and spaghetti squash, require a longer maturation period of about 80-120 days. They are climacteric, which means they can ripen after being harvested, contributing to their longer shelf life. The hard rind of these squashes facilitates storage extending through winter, making them staples for hearty meals. Winter squash is a great source of vitamins A and E, potassium, and dietary fibers, making them not only tasty but also beneficial for health.
Key Varieties and Their Characteristics:
- Butternut Squash: Sweet and nutty flavor, smooth texture, versatile in both savory and sweet dishes.
- Acorn Squash: Distinctive ribbed rind, slightly nutty flavor, ideal for baking.
- Spaghetti Squash: Unique flesh that separates into spaghetti-like strands when cooked, excellent as a pasta substitute.
Comparative Analysis
Here’s a table comparing key characteristics of selected summer and winter squash varieties, providing a scientific breakdown suitable for gardeners and cooking enthusiasts who appreciate deeper insights:
| Variety | Type | Days to Maturity | Vitamin Content | Preferred Culinary Use |
|---|---|---|---|---|
| Zucchini | Summer | 50-60 | High in Vitamin C | Sautéing, grilling, salads |
| Yellow Squash | Summer | 50-70 | High in Vitamin C | Frying, steaming |
| Pattypan | Summer | 45-65 | Moderate in Vitamin C | Stuffing, baking |
| Butternut | Winter | 100-120 | High in Vitamins A & E | Soups, roasts |
| Acorn | Winter | 80-100 | High in Vitamin A | Baking, stuffing |
| Spaghetti | Winter | 90-100 | Moderate in Vitamin A | Used as a pasta substitute |
Choosing the Right Variety
Selecting the right squash variety for your garden hinges on several factors. Consider your local climate and the length of the growing season—summer squash thrive in warm climates, whereas winter squash do well even in cooler conditions due to their longer maturation period. Space availability is also critical; sprawling vine varieties like butternut require more room, whereas bush varieties of summer squash can fit into smaller spaces.
By choosing a combination of summer and winter squash, you can maximize your garden’s productivity and enjoy a diverse and extended harvest period. This approach not only enhances your culinary repertoire but also contributes to a well-balanced diet.
Preparing the Soil
Healthy soil is crucial for the success of any garden, particularly when cultivating squash, which thrives in nutrient-rich environments. Here’s how to meticulously prepare your soil to ensure the best possible conditions for growing squash:
Soil Testing and Amendment
- Soil Testing: Begin by conducting a comprehensive soil test to determine the pH and nutrient levels. This analysis will reveal deficiencies in minerals crucial for squash growth such as nitrogen, phosphorus, and potassium. Soil testing kits can be purchased at garden centers or requested through local agricultural extensions.
- Amending Soil pH:
- If the pH is below 6.0, indicating acidity, incorporate lime to raise the pH.
- If the pH is above 6.8, suggesting alkalinity, apply sulfur to lower the pH.
- Aim for a pH range of 6.0 to 6.8, which is ideal for squash plants to absorb maximum nutrients.
- Nutrient Enrichment: Based on the soil test results, enhance the soil by adding appropriate fertilizers. Use a balanced 10-10-10 fertilizer to provide equal parts nitrogen, phosphorus, and potassium, or adjust the ratios based on specific soil needs.
Enhancing Soil Quality
To optimize the growing conditions for squash, improving the soil structure and fertility is key:
- Organic Matter Addition: Integrate a 2-3 inch layer of compost or well-rotted manure into the top 6-8 inches of soil. This not only boosts soil fertility but also enhances moisture retention and aeration, promoting healthy root growth.
- Green Manure: Consider planting cover crops such as clover or vetch before the growing season. These plants can be tilled into the soil, adding organic matter and nutrients.
Selecting the Planting Site
The choice of planting site significantly impacts the health and productivity of squash plants:
- Sunlight: Ensure the site receives a minimum of 6-8 hours of direct sunlight daily. Squash plants require ample sunlight to develop strong stems and vibrant fruits.
- Wind Protection: Select a location sheltered from strong winds, which can damage plants and disrupt pollination. Consider using a windbreak such as a fence or planting taller plants upwind to shield squash plants.
- Drainage: Good drainage is crucial to prevent root rot. If drainage is poor, consider raising the planting beds to improve water flow away from the roots.
Soil Preparation Table
Here’s a scientific breakdown of soil preparation for squash, including pH values, organic content percentages, and ideal nutrient levels:
| Parameter | Ideal Range | Notes |
|---|---|---|
| pH | 6.0 – 6.8 | Adjust with lime or sulfur based on soil test |
| Organic Matter | 5% – 10% | Increase with compost or manure |
| Nitrogen (N) | 150 – 200 ppm | Essential for leaf and stem growth |
| Phosphorus (P) | 30 – 50 ppm | Important for root and fruit development |
| Potassium (K) | 200 – 300 ppm | Crucial for disease resistance and water regulation |
| Sunlight Exposure | 6-8 hours/day | Critical for photosynthesis |
| Wind Protection | Moderate | Prevents physical damage and aids pollination |
By following these detailed steps and aiming for the ideal soil parameters, you will create an optimal environment that enhances the growth and fruiting of your squash plants, ensuring a bountiful and healthy harvest.
Planting Squash: Seeds vs. Transplants
Whether starting from seeds or using transplants, understanding the optimal conditions and techniques for planting squash is essential for healthy growth and a fruitful harvest.
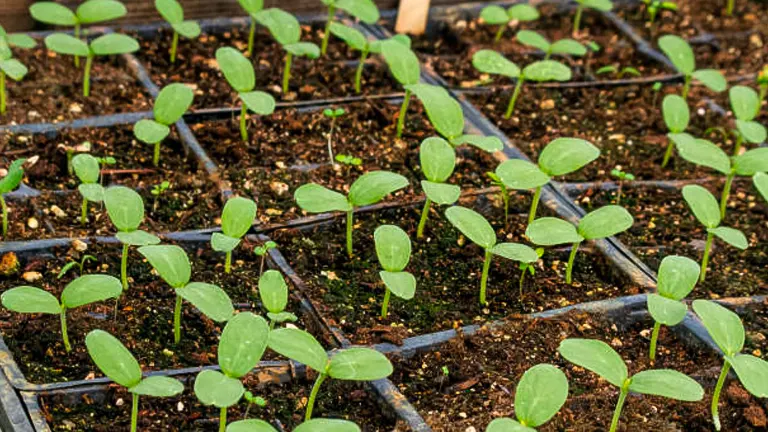
Starting from Seeds
Planting seeds directly into your garden is both cost-effective and beneficial for developing robust root systems. Here’s an optimized approach:
- Soil Preparation: Till the soil to a depth of 12 inches to ensure it is loose and aerated. Mix in well-aged compost to enrich the soil with nutrients, aiming for a compost-to-soil ratio of about 30%, which facilitates optimal seedling growth.
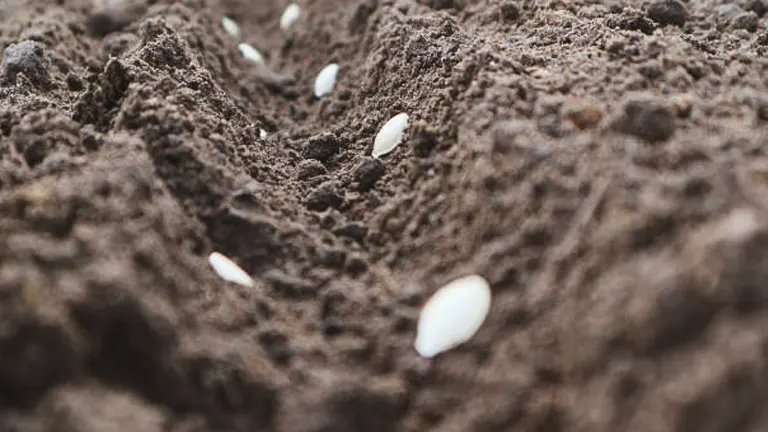
- Planting Depth and Technique: Plant squash seeds approximately 1 inch deep in the soil. Sow two to three seeds per hole to enhance the chances of germination. Space these clusters about 24-36 inches apart to allow ample growth space.
- Thinning Seedlings: When seedlings develop at least two sets of true leaves, thin them to keep only the healthiest seedling in each cluster. This reduces competition for nutrients and sunlight, crucial for early growth stages.
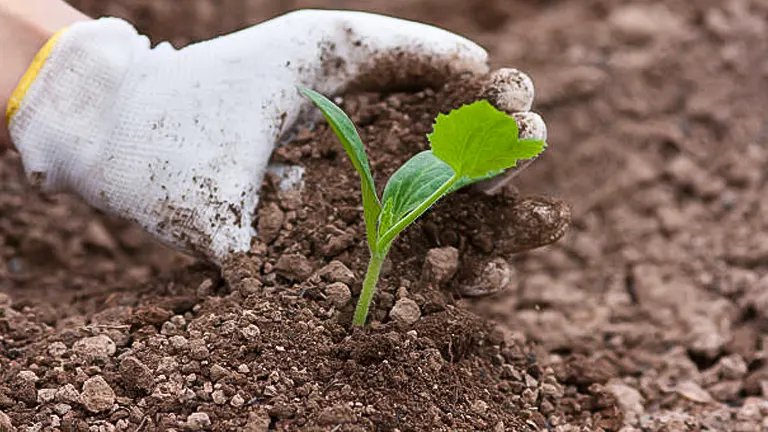
Using Transplants
Transplants are ideal for extending the growing season, especially in regions with shorter warm periods. Here’s how to maximize the success of squash transplants:
- Starting Indoors: Begin by planting seeds in biodegradable pots indoors about 3-4 weeks before the last expected frost. This protects the seedlings from extreme weather and provides a controlled growth environment.
- Hardening Off: To prepare for outdoor transplanting, expose seedlings to the outside environment gradually. Start with a few hours daily and progressively increase exposure over a week to toughen the plants against outdoor conditions.
- Transplanting Techniques: Transfer the seedlings to your garden once they display at least two true leaves and after all danger of frost has passed. Ensure the soil temperature is consistently above 60°F. Plant the biodegradable pots directly into the garden to avoid disturbing the roots, spacing the transplants according to the specified density guidelines.
Optimal Spacing for Squash
Proper spacing is crucial for maximizing air circulation and minimizing disease risk. Here are detailed spacing guidelines:
- Plant-to-Plant Distance:
- Medium Density: 18-24 inches apart.
- High Density: 12-18 inches apart.
- Row-to-Row Distance:
- Medium Density: 3-4 feet apart.
- High Density: 2-3 feet apart.
Succession Planting
To ensure a continuous harvest, practice succession planting:
- Frequency: Plant new seeds every 2-3 weeks up until midsummer.
- Benefits: This technique not only extends your harvest period but also mitigates the risk of losing all plants to pests or diseases at once.
Scientific Analysis Table
For a clearer understanding, here’s a table detailing the germination rates, growth phases, and spacing requirements:
| Stage | Description | Details |
|---|---|---|
| Germination | Seed to sprout | 7-14 days at soil temperatures above 60°F |
| Seedling Development | Sprout to true leaves | 10-21 days, requires high humidity and stable temperatures |
| Plant Spacing | Optimizing growth | Medium Density: 18-24 in, High Density: 12-18 in |
| Row Spacing | Preventing disease by air circulation | Medium Density: 3-4 ft, High Density: 2-3 ft |
| Succession Planting | Continuous harvest | Plant every 2-3 weeks until midsummer |
By following these scientifically-informed practices, you can significantly enhance the health and yield of your squash plants, ensuring robust growth and a successful gardening season.
Watering and Fertilizing for Optimal Growth
Watering Techniques
Proper hydration is crucial for the health and productivity of squash plants. Below are refined watering techniques designed to optimize moisture delivery and promote strong plant growth:
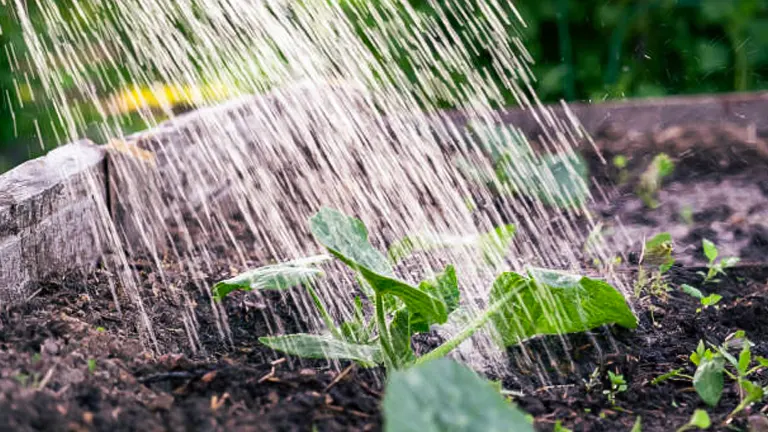
- Deep Watering: It’s essential to water squash plants deeply and directly at the base to ensure that the moisture reaches the root zone, which is typically 6-8 inches below the surface. This method helps prevent superficial root development and reduces water wastage.
- Mulching: Apply a 2-3 inch layer of organic mulch around the base of each plant. Mulch helps maintain soil moisture by reducing evaporation, moderates soil temperature, and suppresses weed growth. Organic mulches like straw or shredded leaves also add nutrients to the soil as they decompose.
- Water Frequency: Squash plants generally require about 1-2 inches of water per week, but this can vary based on climate conditions. Use a rain gauge to monitor water input and adjust accordingly. During peak summer temperatures, increase the frequency as needed to prevent stress and blossom end rot.
Fertilizing Strategies
Squash plants are vigorous growers and have substantial nutrient needs throughout the growing season. Here’s a detailed approach to fertilizing:
- Initial Soil Preparation: Before planting, integrate a balanced 10-10-10 (N-P-K) fertilizer into the soil to provide an initial nutrient boost. For organic gardens, enrich the soil with well-decomposed compost which releases nutrients slowly and improves soil structure.
- Side-Dressing During Growth: As squash vines begin to develop and spread, apply a nitrogen-rich fertilizer to support rapid growth and foliage development. This is crucial as squash plants are heavy nitrogen consumers. Apply side dressings every 3-4 weeks until the end of the growing season.
- Adjusting Nutrients Based on Plant Needs: If your squash plants show signs of nutrient deficiencies (e.g., yellowing leaves may indicate a nitrogen deficiency), consider adjusting your fertilizer types or application rates. Using a foliar spray can provide quick relief for nutrient-starved plants.
Scientific Analysis and Guidelines Table
To assist with precise management of watering and fertilizing, the following table offers scientific data and recommendations:
| Aspect | Detail | Recommendation |
|---|---|---|
| Soil Moisture Depth | Root Zone Moisture Level | Maintain 6-8 inches depth of moist soil |
| Mulch Thickness | Optimal Layer | 2-3 inches of organic mulch |
| Watering Amount | Weekly Requirement | 1-2 inches per week, adjust based on weather |
| Fertilizer Ratio | Balanced Mix | 10-10-10 N-P-K before planting |
| Nitrogen Application | During Growth | High-nitrogen side-dress every 3-4 weeks |
| Foliar Spray | Nutrient Absorption Boost | Apply as needed for visible deficiency signs |
This enhanced approach to watering and fertilizing squash plants is designed to optimize growth conditions, ensuring that your squash garden is not only productive but also resilient against environmental stresses and nutrient deficiencies.
Pruning and Training Squash Plants
Effective pruning and training are critical to managing squash plant growth, optimizing fruit production, and preventing disease. Here are advanced techniques and strategies for maximizing the health and yield of your squash plants:
Pruning Techniques
Pruning is vital for maintaining plant health and encouraging productive growth. It enhances air circulation and light penetration, both crucial for reducing disease risk and promoting robust development.
- Removing Dead or Diseased Leaves: Consistently monitor your plants and remove any foliage that appears yellowed, dead, or diseased. This not only helps prevent the spread of pathogens but also improves the aesthetic appeal of your plant. Use sterilized, sharp scissors or pruners to make clean cuts, which help the plant heal faster and prevent further infection.
- Thinning Foliage: Overly dense foliage can trap moisture and reduce airflow around the plant, creating ideal conditions for fungal infections. Thin out the inner leaves and less productive branches to ensure light and air can penetrate to the lower parts of the plant, which is especially crucial for reducing the incidence of powdery mildew and other leaf-spot diseases.
- Pinching Back: This technique is particularly useful for bush varieties of squash. Pinching back the growing tips when plants reach 2-3 feet encourages lateral growth rather than vertical, leading to a bushier plant structure and potentially more fruit sites. This method can also be used to control the size of the plant, ensuring it doesn’t overtake other plants in your garden.
Training Squash Plants
Training methods can greatly improve plant health and fruit quality by providing support, enhancing sunlight exposure, and facilitating care.
- Using Trellises: For vining squash varieties, trellises offer a way to elevate the vines off the ground, promoting better air circulation and reducing contact with soil-borne diseases. Trellised plants often produce cleaner, more uniformly shaped fruits, which are less prone to rot. Secure the vines with garden ties or soft twine to prevent damage to the stems.
- Staking: Ideal for smaller garden spaces or container gardening, staking involves using a single stake to support the main stem. This method helps manage plant growth vertically, making it easier to perform maintenance tasks like watering, fertilizing, and harvesting.
- Horizontal Training: Spread out the vines of ground-sprawling varieties in designated directions to manage space efficiently and reduce the risk of plant overlap, which can lead to competition for light and nutrients. This technique is particularly useful in densely planted gardens.
Pest and Disease Management
Common Pests and Control Methods
Squash plants are susceptible to several pests. Early detection and control are crucial to preventing severe damage:
- Squash Bugs: These pests suck sap from the leaves, causing them to wilt and die. Control methods include handpicking, using row covers, and applying neem oil or insecticidal soap.
- Cucumber Beetles: These beetles can transmit bacterial wilt disease. Control methods include using yellow sticky traps, row covers, and organic insecticides.
- Vine Borers: These pests bore into the stems, causing the plant to wilt and die. Control methods include placing collars around the base of the plants, injecting Bt (Bacillus thuringiensis) into the stems, and rotating crops yearly.
Common Diseases and Prevention
Diseases can quickly spread and devastate squash plants. Here are common diseases and how to prevent them:
- Powdery Mildew: This fungal disease appears as white, powdery spots on leaves. Prevention includes ensuring proper spacing for air circulation, using resistant varieties, and applying fungicides when necessary.
- Downy Mildew: This disease causes yellow and brown spots on leaves. Prevent it by improving air circulation, avoiding overhead watering, and applying fungicides.
- Bacterial Wilt: Spread by cucumber beetles, this disease causes plants to wilt and die. Control cucumber beetles to prevent this disease. There is no cure for infected plants, so remove and destroy affected plants promptly.
Harvesting Squash
Signs of Maturity

Identifying the right time to harvest squash is crucial for ensuring the best flavor and texture. Here are detailed signs of maturity for both summer and winter squash:
- Summer Squash: These should be harvested when they are still young and tender, typically when they reach about 6-8 inches in length for zucchini, and 4-7 inches for other varieties like crookneck and pattypan. The skin should be bright, glossy, and thin enough to be easily punctured with a fingernail, indicating peak freshness.
- Winter Squash: These varieties are ready for harvest when their rind becomes hard and resistant to pressure from a fingernail. The color should be rich and uniform across the surface, and the connecting stem should start to wither and turn brown, signaling that the squash has reached its full maturity and is ready for long-term storage.
Harvesting Techniques
Employing the right techniques during harvesting can significantly enhance the longevity and quality of your squash:
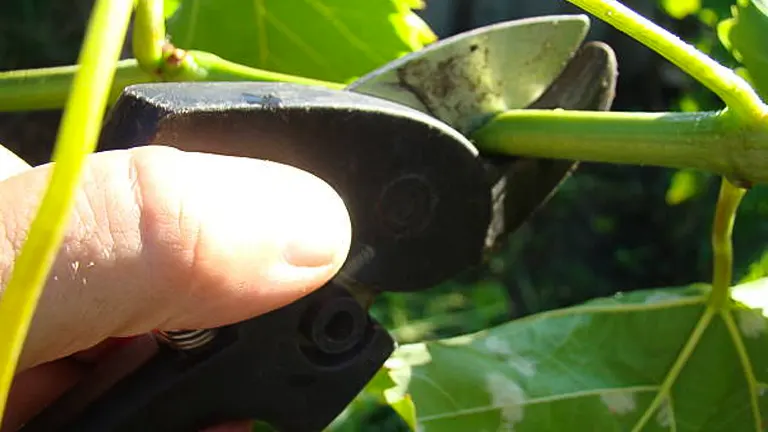
- Using Tools: Always use a sharp knife or a pair of pruning shears to cut the squash from the vine. It is important to leave about 1-2 inches of stem attached, as a shorter stem can hasten moisture loss and decay.
- Handling with Care: Squash, especially summer varieties, should be handled gently. Avoid dropping or squeezing the fruits, as bruises can quickly turn into rot, significantly shortening their shelf life.
Post-Harvest Handling
Proper post-harvest handling is crucial for maximizing the storage life and maintaining the quality of your squash:
- Summer Squash: These should be stored in the refrigerator where they can maintain their quality for about a week. Wrap them loosely in a plastic bag to retain moisture yet allow for some air circulation.
- Winter Squash: After harvesting, winter squash varieties benefit from a curing process. Place them in a warm, dry location for about 10-14 days to harden the skin. This curing process enhances their storage potential, after which they should be stored in a cool, dark place. Properly cured winter squash can last for several months, depending on the variety.
Troubleshooting Common Issues
Poor Fruit Set
Poor fruit set can be frustrating, but understanding the causes and solutions can help you achieve a bountiful harvest.
- Causes: Poor pollination is a common cause, often due to a lack of pollinators or unfavorable weather conditions. Extreme temperatures can also affect fruit set.
- Solutions:
- Hand Pollination: Use a small paintbrush to transfer pollen from male flowers to female flowers. This can be particularly effective in areas with few pollinators.
- Attract Pollinators: Plant flowers nearby that attract bees and other pollinators.
- Improve Conditions: Ensure plants receive adequate water and nutrients, and provide shade during extreme heat to protect blossoms.
Blossom End Rot
Blossom end rot is a common issue that manifests as a dark, sunken spot at the blossom end of the fruit.
- Causes: This condition is typically caused by a calcium deficiency in the fruit, often exacerbated by inconsistent watering.
- Solutions:
- Consistent Watering: Maintain even soil moisture to ensure calcium uptake. Mulching can help regulate soil moisture levels.
- Calcium Supplementation: Add calcium to the soil using products like lime or gypsum, or apply a calcium foliar spray directly to the plants.
Yellowing Leaves
Yellowing leaves can indicate several issues, from nutrient deficiencies to pests and diseases.
- Nutrient Deficiencies: A lack of nitrogen is often the cause of yellowing leaves.
- Solution: Fertilize with a balanced or nitrogen-rich fertilizer to correct deficiencies.
- Water Stress: Both overwatering and underwatering can cause leaves to yellow.
- Solution: Adjust your watering practices to ensure consistent moisture without waterlogging the soil.
- Pests and Diseases: Inspect for signs of pests like aphids or diseases like downy mildew.
- Solution: Treat pests with insecticidal soap or neem oil and manage diseases with appropriate fungicides and cultural practices.
Tips for Maximizing Yield
Companion Planting
Companion planting can enhance the growth and yield of your squash plants by repelling pests, improving soil health, and attracting beneficial insects.
- Beneficial Companions:
- Beans: Fix nitrogen in the soil, benefiting squash plants.
- Corn: Provides a natural trellis for climbing squash varieties.
- Marigolds: Repel pests like aphids and nematodes.
Season Extension
Extend your squash growing season to maximize yield with these techniques:
- Row Covers: Use row covers to protect young plants from frost in the spring and fall.
- Cold Frames: Build or purchase cold frames to shield plants from cold weather, allowing for an earlier start in the spring and an extended harvest in the fall.
- Mulching: Apply organic mulch to help regulate soil temperature, keeping roots warmer in the early spring and late fall.
Regular Maintenance and Care for Squash
Consistent garden maintenance is key to maximizing yield and ensuring healthy plants.
- Weed Control: Keep the area around your squash plants weed-free to reduce competition for nutrients and water. Mulching can help suppress weed growth.
- Pest Monitoring: Regularly inspect plants for signs of pests and take action promptly to prevent infestations.
- Health Monitoring: Check plants frequently for signs of disease or nutrient deficiencies and address issues as they arise.
Related Post
- How to Fertilize Bougainvillea: A Complete Guide for Stunning Blooms
- How to Fertilize Apple Trees: Essential Tips for a Bountiful Harvest
- How to Fertilize Lemon Trees: Secrets for Thriving Citrus
- How to Fertilize Avocado Tree: A Step-by-Step Guide for Lush Growth
Conclusion
Growing and caring for squash can be a rewarding experience, providing you with an abundant harvest of versatile and nutritious vegetables. By understanding the different squash varieties, preparing the soil properly, planting with the correct techniques, maintaining consistent watering and fertilizing practices, and managing pests and diseases, you can ensure a successful squash garden. Remember to practice pruning and training, troubleshoot common issues, and implement tips for maximizing yield. With these expert gardening tips, you’ll be well on your way to enjoying a bountiful and healthy squash harvest.
FAQs
- How often should I water my squash plants?
Squash plants need consistent moisture. Water deeply once a week, providing about 1-2 inches of water. Increase watering during hot, dry spells. Avoid wetting the foliage to prevent disease. - What are the signs that squash is ready to be harvested?
For summer squash, harvest when the fruits are young and tender, usually 6-8 inches long for zucchini and 4-7 inches for other varieties. The skin should be glossy. Winter squash is ready when the rind is hard and cannot be punctured with a fingernail, and the stem is dry and brown. - How can I prevent pests from damaging my squash plants?
Use row covers to protect young plants, handpick pests like squash bugs and cucumber beetles, and apply organic insecticides such as neem oil. Planting companion plants like marigolds can also help repel pests. - Why are the leaves on my squash plants turning yellow?
Yellowing leaves can be caused by nutrient deficiencies, overwatering, underwatering, or pests. Check soil moisture levels, ensure adequate fertilization, and inspect for pests. Adjust watering practices as needed. - Can I grow squash in containers, and if so, how?
Yes, you can grow squash in containers. Choose a large container (at least 5 gallons) with good drainage. Use a high-quality potting mix and ensure the container receives plenty of sunlight. Water regularly and provide support for vining varieties. - What is the best way to store harvested squash?
Summer squash should be stored in the refrigerator and used within a week for the best flavor and texture. Winter squash should be cured by placing it in a warm, dry place for 10-14 days, then stored in a cool, dark place where it can last for several months. - How can I improve pollination in my squash plants?
Improve pollination by attracting bees and other pollinators with flowers planted nearby. If pollinators are scarce, you can hand-pollinate by using a small paintbrush to transfer pollen from male flowers to female flowers. - What should I do if my squash plants are affected by powdery mildew?
Remove affected leaves and ensure proper spacing for air circulation. Apply fungicides if necessary, and water the plants at the base to avoid wetting the foliage. Using resistant varieties can also help prevent powdery mildew.
Thank you for reading our expert gardening tips on growing and caring for squash. With these practical guidelines, you’re well-equipped to achieve a thriving squash garden. Happy gardening and enjoy your bountiful harvest!

Benjamin Brooks
Forestry AuthorGreetings! I'm Benjamin Brooks, and my journey over the past 15 years has revolved around the fascinating realms of content creation, expertise in snow clearing, and the intricate world of lumberjacking and landscaping. What began as a simple curiosity about the natural world and heavy machinery has evolved into a passionate profession where my love for crafting words intertwines seamlessly with my lumberjacking and garden skills.


Leave your comment