How to Propagate Succulents: Simple Techniques for Thriving Plants
- March 5, 2024
- 0 comment
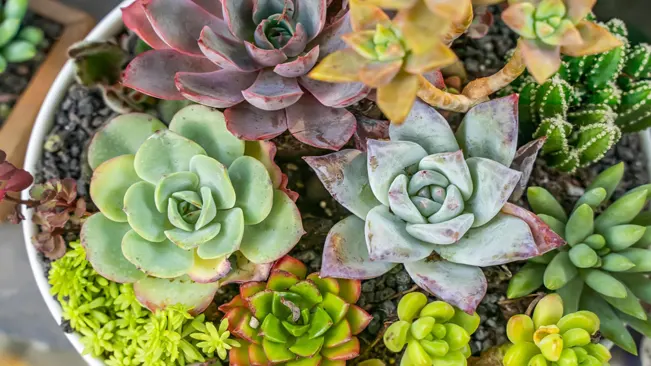
Succulents, with their diverse shapes and easy-care reputation, have become increasingly popular in homes and gardens worldwide. Propagating succulents is a rewarding and cost-effective way to expand your collection or create personalized gifts for friends and family. This comprehensive guide will take you through the process of succulent propagation, from selecting the right plant to aftercare and troubleshooting.
Getting Ready for Propagation
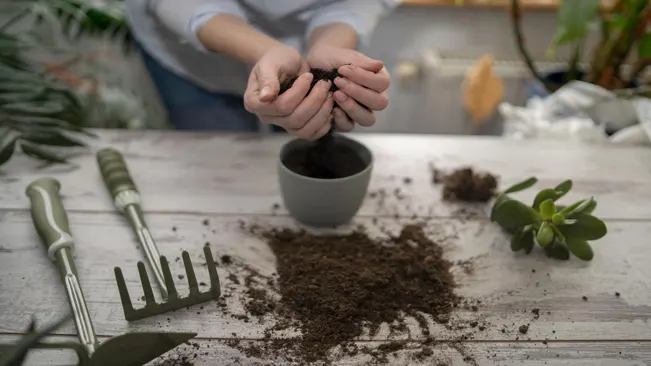
- Before you begin, gather your tools: sharp scissors or a knife, a clean surface, and small pots with well-draining soil. Select a healthy succulent, looking for one with ample leaves or stem segments to cut.
Propagation Methods
Succulents can be propagated in several ways: leaf propagation, stem cuttings, offsets (or pups), and seeds. Each method has its specifics, but the general principles of patience and gentle care apply to all.
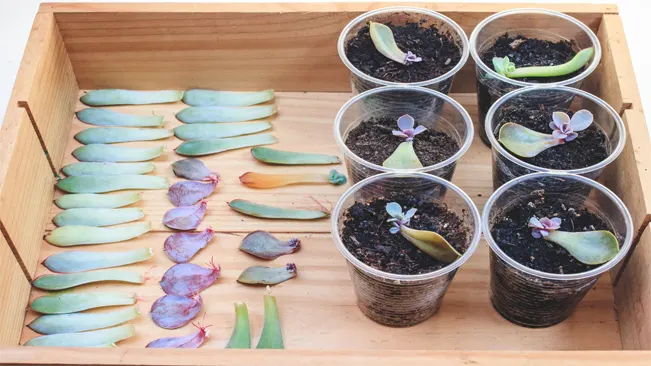
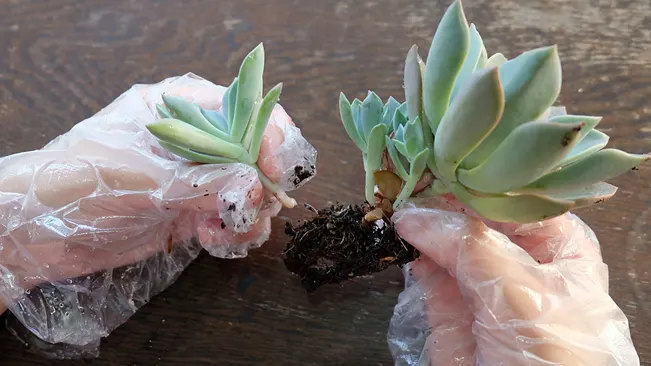
Leaf Propagation
Gently twist a leaf from the succulent, ensuring you get the entire leaf without tearing. Place the leaf on a dry surface and allow it to callous over for a few days. Once calloused, lay it on top of soil in a pot, misting lightly every few days. Roots and a tiny new plant will eventually emerge.
Selecting the Leaf
- When choosing a leaf for propagation, look for a healthy, full one that’s not too young or too old. A mature leaf, but not one that’s starting to wither, is ideal. The leaf should come from a healthy part of the plant, avoiding any part that shows signs of disease or stress.
Removing the Leaf
- The technique of removing the leaf is crucial. Gently twist the leaf from the stem in a smooth motion. It’s important to get the whole leaf, including the base that attaches to the stem, as this is where the new roots will sprout. If the leaf tears or breaks, it may not be viable for propagation.
Letting the Leaf Callous
- After removing the leaf, place it in a dry, warm area away from direct sunlight. The end of the leaf needs time to form a callous, which usually takes a few days. This process is essential as it prevents the leaf from absorbing too much moisture and rotting when planted.
Laying on Soil
- Once the leaf has calloused, place it on top of a pot filled with well-draining soil. Succulent or cactus mix is ideal for this. The calloused end should not be buried in the soil but simply resting on top.
Misting the Leaf
- The leaf requires moisture to grow, but not too much. The best way to achieve this is by misting the leaf lightly every few days. The soil should be barely moist, not wet. Overwatering can lead to rot and hinder the propagation process.
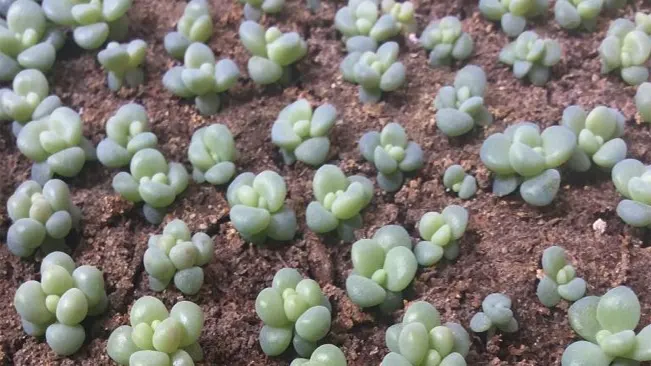
Waiting for Growth
- This stage requires patience. In a few weeks to a month, you’ll begin to notice small roots emerging from the base of the leaf. Eventually, a tiny new succulent plant will start to grow from the base as well.
Transplanting the New Plant:
- Once the new plant has grown sufficiently and has a good root system, it can be gently transplanted into its own pot. Continue to care for it as you would any other succulent, with plenty of light and minimal watering.
Continued Care:
- As the new plant grows, gradually increase watering. However, always let the soil dry out between waterings to prevent root rot.
Stem Cuttings
Choose a healthy stem and cut a segment, allowing it to callous for a few days. Plant the calloused end in soil, watering sparingly until roots develop. This method often yields quicker results than leaf propagation.
Selecting the Right Stem
- The key to successful stem propagation is to start with a healthy parent plant. Look for stems that are robust, free of damage or disease, and have a good number of leaves. Avoid stems that are too young or overly mature.
Cutting the Stem
- Using a sharp, clean knife or scissors, make a clean cut on the stem. The ideal cutting length is usually between 2 to 5 inches. Ensure the cut is straight and smooth to increase the surface area for rooting and reduce the risk of disease.
Letting the Cutting Callous
- After cutting, it’s crucial to let the end of the stem callous over. This process involves leaving the cutting in a dry, well-ventilated area away from direct sunlight for a few days (typically 2-5 days). The callousing helps to prevent rot when the cutting is planted.
Preparing the Pot and Soil
- While the cutting is callousing, prepare a pot with well-draining soil. A mixture specifically designed for cacti and succulents works best. Ensure the pot has drainage holes to prevent waterlogging.
Planting the Stem Cutting
- Once the cut end has calloused, it’s time to plant it. Insert the calloused end into the soil. You can plant multiple cuttings in a single large pot, but make sure to leave enough space between them for growth.
Initial Watering
- Right after planting, water the soil lightly to help settle it around the cutting. Be cautious not to overwater as the cutting has not yet developed roots to absorb moisture effectively.
Root Development
- Place the pot in a warm, well-lit area, but out of direct sunlight to prevent scorching. The rooting process can vary in time, typically taking a few weeks. During this period, keep the soil slightly moist but not soggy.
Monitoring Growth
- Watch for signs of growth, such as new leaves. Once you observe growth, it’s an indication that roots have developed, and the plant can be treated like a regular succulent.
Care After Rooting
- Once the cutting has established roots, gradually introduce it to more sunlight. Continue with regular succulent care, which includes infrequent watering, ensuring the soil is dry between watering, and providing adequate light.
Transplanting (if Necessary)
- If the new plant outgrows its pot, you can transplant it to a larger pot. The best time to do this is during the succulent’s active growing season.
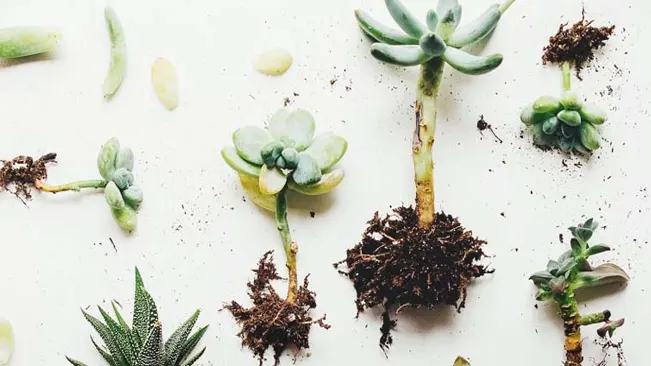
Offsets Propagation
Some succulents produce small offsets or pups around their base. Gently separate these from the parent plant and plant them in their own pot.
Identifying Offsets
- Offsets typically appear at the base of the parent plant. They are miniature replicas of the parent and will grow from the root system or stem. In some species, offsets can also develop on the flower stalks.
When to Separate Offsets
- It’s best to wait until the offsets are a reasonable size and have developed their own roots. This makes them more likely to survive when removed from the parent plant. A good rule of thumb is to wait until the offset is about one-quarter to one-third the size of the parent plant.
Separating Offsets
- To separate an offset, gently pull it away from the parent plant. If it doesn’t come away easily, you can use a clean, sharp knife or scissors to cut it off, ensuring you include some roots. Be careful not to damage the parent plant or the offset in the process.
Letting Offsets Callous
- After removing the offset, it’s important to let it callous over before planting. Place it in a dry, shaded area for a few days to a week. This process allows the cut area to dry and heal, reducing the risk of rot when planted.
Planting Offsets
- Once the offset has calloused, plant it in a pot with well-draining succulent soil. The pot should have drainage holes to prevent water accumulation. Plant the offset at the same depth it was growing at while attached to the parent plant.
Aftercare for Offsets
- Water the newly planted offset sparingly until it establishes itself and starts to grow. Provide it with bright, indirect light, and gradually move it to more sunlight as it matures.
Growth and Maturation
- Offsets will gradually grow and develop into a mature succulent over time. With proper care, they can become as large and vibrant as the parent plant.
Seed Propagation
Growing succulents from seeds is the most challenging and time-consuming method, but it can be incredibly rewarding. Plant the seeds in a well-draining soil mix and keep them in a warm, humid environment.
- Selecting the Right Seeds: Choosing high-quality succulent seeds is crucial. You can purchase these from reputable nurseries or online stores specializing in succulent plants. Look for seeds of species known to be more successful when grown from seed, as some succulents are more challenging to propagate this way.
- Preparing the Soil: Use a well-draining soil mix specifically designed for cacti and succulents. This mix usually contains a combination of potting soil, coarse sand, and perlite or pumice. The key is to provide a medium that retains enough moisture for germination but drains quickly to prevent rot.
- Sowing the Seeds: Spread the seeds evenly over the surface of the soil. Do not bury them deeply as succulent seeds are typically fine and need light to germinate. You can gently press them into the topsoil without covering them.
- Creating a Humid Environment: After sowing the seeds, cover the pot or tray with a clear plastic lid or wrap. This helps maintain humidity and warmth, creating a greenhouse effect. Ensure there are some holes or gaps for air circulation to prevent mold growth.
- Providing the Right Temperature and Light: Succulent seeds generally need warm conditions to germinate. A consistent temperature of about 70-80°F (21-27°C) is ideal. Place the tray in a bright area with indirect sunlight. Avoid direct sun exposure as it can cause the soil to dry out too quickly or overheat the seeds.
- Watering Carefully: The soil should be kept slightly moist but not soggy. Use a spray bottle to mist the soil gently. Overwatering can lead to fungal infections or cause the seeds to rot.
- Waiting for Germination: Patience is key. Germination times vary widely among succulent species, ranging from a few weeks to several months. Keep the environment stable and resist the temptation to disturb the seeds.
- Transplanting Seedlings: Once the seedlings have developed a few sets of true leaves and are large enough to handle, they can be carefully transplanted into individual pots. Continue with gentle care, gradually acclimatizing them to less humid conditions and more direct sunlight.
- Ongoing Care: As your succulents grow, adjust watering and lighting to meet their changing needs. Succulents grown from seeds may take a few years to reach maturity and display their full characteristics.
Aftercare for Propagated Succulents
Once your succulents have successfully rooted and begun to grow, they will require consistent and appropriate care to thrive. Here are some key aspects of aftercare:
- Light Requirements: Succulents need plenty of light, but direct sunlight can sometimes be too harsh, especially for young plants. Place them in a location where they’ll receive bright but indirect sunlight. If you notice any discoloration or stretching (etiolation), this could be a sign they need more light.
- Watering Practices: Overwatering is one of the most common issues with succulent care. Once the succulents have rooted, allow the soil to dry out completely between waterings. When you do water, do so thoroughly, ensuring excess water drains out of the pot. This mimics the natural dry-wet cycle they experience in their native habitats.
- Soil and Drainage: Use a well-draining soil mix, specifically designed for succulents or cacti. This helps prevent water from pooling around the roots, which can lead to rot.
- Temperature and Humidity: Most succulents prefer a dry, warm climate. They can tolerate a range of temperatures, but it’s best to keep them in an environment between 60-80°F (15-27°C). Avoid drastic temperature changes and protect them from frost.
- Fertilizing: During the growing season (usually spring and summer), feed your succulents with a diluted, balanced fertilizer. Over-fertilizing can be harmful, so it’s better to err on the side of caution and fertilize sparingly.
Benefits of Propagating Succulents
Propagating succulents not only provides a sense of accomplishment but also offers several benefits:
- Cost-Effective: Growing your succulent collection through propagation is significantly more economical than purchasing new plants. A single succulent can potentially give rise to many new plants.
- Environmental Impact: By propagating your own succulents, you reduce the demand for commercially grown plants. This contributes to a smaller carbon footprint, as commercial growing often involves extensive resource use, including water, fertilizers, and transport.
- Therapeutic Benefits: The process of caring for and propagating plants can be incredibly therapeutic. It provides a sense of connection to nature and can be a relaxing, mindful activity that helps reduce stress.
- Educational Value: Propagating succulents can be a valuable educational experience. It offers hands-on learning about plant biology, the importance of environmental conditions, and the lifecycle of plants.
- Personalization and Creativity: Propagating your own plants allows you to create custom arrangements and displays that reflect your personal style. It also gives you the opportunity to experiment with different species and hybrids.
- Gift-Giving: Propagated succulents make thoughtful, personalized gifts. Sharing them with friends and family can spread the joy of gardening and introduce others to the world of succulents.
Conclusion
Succulent propagation is not just a hobby, but a journey of discovery and patience. It allows gardeners to delve into the world of these resilient plants, fostering a deeper appreciation for their diverse beauty and unique growth patterns. By mastering the art of propagation, whether through seeds, cuttings, or offsets, you unlock the potential to cultivate a vibrant and varied collection of succulents. This rewarding experience not only enhances your gardening skills but also brings a touch of nature’s wonder into your home or garden.
FAQs (Frequently Asked Questions)
- What is the best time of year to propagate succulents?
- The ideal time is during the warmer months, typically in spring or early summer, when succulents are in their active growth phase.
- The ideal time is during the warmer months, typically in spring or early summer, when succulents are in their active growth phase.
- Can all types of succulents be propagated?
- Most succulents can be propagated, but some varieties are easier to propagate than others. It’s important to research the specific needs of your succulent species.
- Most succulents can be propagated, but some varieties are easier to propagate than others. It’s important to research the specific needs of your succulent species.
- Do I need special tools for propagating succulents?
- Basic tools include sharp scissors or a knife for clean cuts, a tray or pot for planting, and well-draining soil. Sterilizing your tools before use helps prevent infection.
- Basic tools include sharp scissors or a knife for clean cuts, a tray or pot for planting, and well-draining soil. Sterilizing your tools before use helps prevent infection.
- How long does it take for succulent cuttings to root?
- It varies depending on the method and the plant, but generally, it can take anywhere from a few weeks to several months for roots to develop.
- It varies depending on the method and the plant, but generally, it can take anywhere from a few weeks to several months for roots to develop.
- Can I propagate succulents from a leaf or does it have to be a stem cutting?
- Many succulents can be propagated from leaves as well as stem cuttings. The leaf should be gently twisted off the plant ensuring the whole leaf is intact.
- Many succulents can be propagated from leaves as well as stem cuttings. The leaf should be gently twisted off the plant ensuring the whole leaf is intact.
- How often should I water my propagated succulents?
- Water sparingly. The soil should be allowed to dry out completely between waterings. Overwatering can lead to rot, especially in young plants.
- Water sparingly. The soil should be allowed to dry out completely between waterings. Overwatering can lead to rot, especially in young plants.
- Do propagated succulents need sunlight?
- Yes, but indirect sunlight is best initially. Too much direct sunlight can scorch young plants. Gradually acclimate them to more sunlight as they mature.
- Yes, but indirect sunlight is best initially. Too much direct sunlight can scorch young plants. Gradually acclimate them to more sunlight as they mature.
- How do I know if my succulent propagation is successful?
- Signs of successful propagation include new growth such as roots or small leaves. If the cutting or leaf has not shriveled or rotted, it’s likely on the right track.
- Signs of successful propagation include new growth such as roots or small leaves. If the cutting or leaf has not shriveled or rotted, it’s likely on the right track.
- Can I use regular potting soil for propagating succulents?
- It’s best to use a well-draining soil mix, such as a cactus or succulent mix. Regular potting soil retains too much moisture for succulents.
- It’s best to use a well-draining soil mix, such as a cactus or succulent mix. Regular potting soil retains too much moisture for succulents.
- What should I do if my succulent cutting starts to rot?
- If a cutting starts to rot, it’s important to remove the rotted part immediately. Allow the healthy part to callous over before attempting to replant.

Kristine Moore
Forestry AuthorI'm Kristine Moore, a seasoned garden landscaping professional with over 30 years of experience. My extensive career has been dedicated to transforming outdoor spaces into stunning, sustainable landscapes. With a deep understanding of horticulture, design principles, and environmental stewardship, I have become a respected figure in the field, known for creating harmonious, visually appealing, and eco-friendly gardens. My commitment to excellence and continuous learning in landscaping trends and techniques has solidified my reputation as an expert in garden design and implementation.


Leave your comment