How to Fertilize Orchids for Maximum Bloom: Expert Tips for Stunning Results
- April 12, 2024
- 0 comment
Discover expert tips on how to fertilize orchids for maximum bloom. Learn the best techniques for stunning results and vibrant, healthy flowers. Fertilizing orchids can seem like a complex science, but with the right knowledge and techniques, you can encourage your plants to produce spectacular blooms. Orchids require a specific balance of nutrients to flourish, and understanding the nuances of orchid fertilization can significantly impact their health and flowering potential.
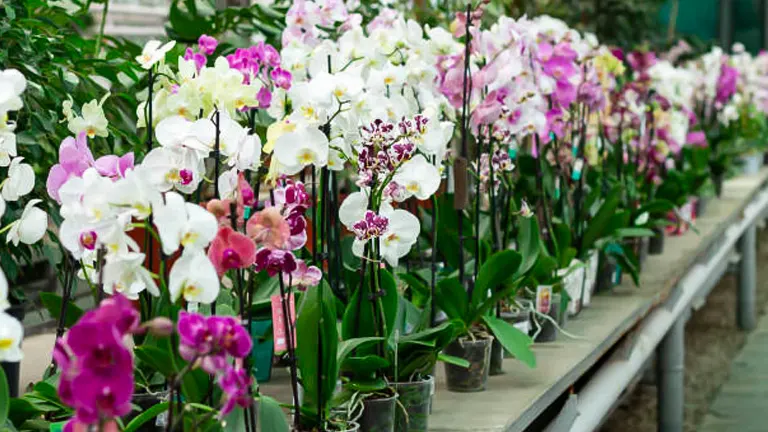
This guide provides expert tips and clear, practical advice on how to fertilize your orchids effectively, ensuring stunning results that will transform your indoor garden into a vibrant floral showcase. Whether you’re a beginner or an experienced grower, these insights will help you optimize your orchid care routine for maximum bloom.
Table of Contents
- Understanding Orchid Nutrition
- Choosing the Right Fertilizer
- Best Time to Fertilize Orchids
- Step-by-Step Guides on How to Fertilize Orchids
- Fertilization Techniques for Potted Orchids
- Advanced Fertilizing Techniques
- Common Fertilization Issues and Fixes
- Seasonal Fertilization Strategies
- Conclusion
- FAQs
Understanding Orchid Nutrition
Orchids demand a variety of macro and micronutrients to thrive, each contributing uniquely to the plant’s physiological processes:
- Nitrogen (N): Primarily promotes the growth of leaves and stems by synthesizing amino acids, the building blocks of proteins. It is a vital component of chlorophyll, which plants use to convert sunlight into energy (photosynthesis).
- Phosphorus (P): Essential for the formation of roots and flowers, phosphorus plays a pivotal role in cell energy transfer; it helps convert nutrients into usable building blocks for the plant (ATP and ADP molecules).
- Potassium (K): Potassium regulates the opening and closing of stomata, which controls the exchange of water vapor, oxygen, and carbon dioxide. It is crucial for enzyme activation within the plant, aiding in photosynthesis and overall health.
- Calcium (Ca): Integral for maintaining cell integrity, calcium stabilizes cell walls and facilitates the growth of new cells within the root and shoot tips.
- Magnesium (Mg): Central to chlorophyll production, magnesium also plays a significant role in phosphorus utilization and energy transfer.
- Trace Elements: Elements like Iron (Fe), Manganese (Mn), Zinc (Zn), and Copper (Cu) are vital for their roles in plant metabolism and development. They act as co-factors for many enzymes, supporting photosynthesis, hormone regulation, and other physiological functions.
Below is a table that details the typical concentration ranges of these essential nutrients in a standard orchid fertilizer blend, designed to optimize health and maximize blooming potential:
| Nutrient | Symbol | Concentration (ppm) | Function |
|---|---|---|---|
| Nitrogen | N | 150-250 | Leaf and stem growth, chlorophyll production |
| Phosphorus | P | 30-50 | Root and flower development, energy transfer |
| Potassium | K | 150-250 | Stomatal function, enzyme activation |
| Calcium | Ca | 50-150 | Cell wall stability, growth of new cells |
| Magnesium | Mg | 25-50 | Chlorophyll production, phosphorus utilization |
| Iron | Fe | 2-5 | Chlorophyll synthesis, electron transport |
| Manganese | Mn | 0.5-2 | Enzyme co-factor, chloroplast construction |
| Zinc | Zn | 0.5-2 | Enzyme co-factor, growth hormone production |
| Copper | Cu | 0.05-0.5 | Enzyme co-factor, lignin synthesis |
Recognizing Nutritional Deficiencies
Deficiencies in any of these essential nutrients can manifest in several visual cues, which if identified early, can be corrected to prevent serious health issues in the orchid:
- Nitrogen deficiency: Older leaves lose their lush green color and turn yellow prematurely, and overall plant growth is stunted.
- Phosphorus deficiency: Leaves may show a dark green hue, then turn reddish-purple. Root growth slows, and flower production diminishes.
- Potassium deficiency: Leaf edges and tips may appear scorched, curling with a yellowish tint, and the plant’s resistance to diseases drops.
- Calcium deficiency: New leaves are misshapen or stunted, and root tips may die back.
- Magnesium deficiency: Leaves develop interveinal chlorosis, where the space between veins turns yellow while veins remain green.
- Trace element deficiencies: Symptoms include distorted leaf growth, pale or yellow spots on leaves, and inhibited flowering.
Monitoring your orchids regularly and responding to these signs with the appropriate nutritional adjustments helps maintain their health and enhances their blooming potential. By understanding the precise roles and requirements of these essential nutrients, orchid enthusiasts can more effectively cultivate their plants, ensuring maximum growth and spectacular blooms.
Choosing the Right Fertilizer
Orchid Fertilizer Options
Choosing the correct fertilizer type is paramount:
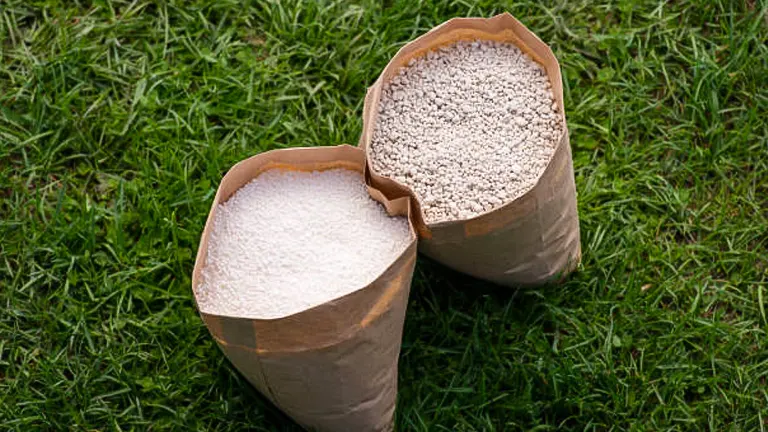
- Organic fertilizers: These are derived from natural sources such as fish emulsion, bone meal, or composted materials. They release nutrients slowly, which can be beneficial for maintaining long-term soil health but may be less precise in nutrient balance.
- Synthetic fertilizers: These offer immediate nutrient availability and specific ratios which can be tailored to the orchid’s growth stage, though they risk salt accumulation if not used correctly.
For most household orchids, a balanced 20-20-20 fertilizer, diluted to quarter strength, is effective for promoting growth and blooms.
Specialty Orchid Fertilizers
Many brands offer fertilizers specifically blended for orchids, featuring adjusted N-P-K ratios or added micronutrients. These can simplify the fertilization process, ensuring that your orchids receive nutrients in the optimal form and proportion.
Fertilizer Application Basics
Proper application is crucial:
- Label Reading: Always check the N-P-K ratio and follow the mixing instructions to avoid nutrient burn.
- Dilution: Orchids are particularly sensitive to strong concentrations, so dilute liquid fertilizers more than you would for other plants.
- Frequency: Regular, light applications are preferable to occasional heavy feedings. During the growing season, fertilizing bi-weekly is ideal.
Best Time to Fertilize Orchids
Understanding the right timing for fertilizing orchids is as important as knowing what nutrients they need. Orchids have unique growth cycles, and their nutritional requirements can change depending on the phase they’re in. Here’s a closer look at when and how often you should fertilize your orchids for the best results.
Seasonal Timing
Orchids typically go through a growth phase in spring and summer, during which they require more frequent fertilization to support new growth. Here’s how you should approach fertilization throughout the year:
- Spring to Summer: This is the active growth period for most orchids. Fertilize them lightly but frequently, about once every two weeks, using a balanced fertilizer. This supports the development of new leaves, roots, and, eventually, flower spikes.
- Fall: As daylight decreases and temperatures drop, orchids start preparing for their rest period. Reduce fertilization to once a month and consider switching to a high-phosphorus fertilizer to encourage blooming in the coming months.
- Winter: Many orchids enter a dormant or rest phase during winter. During this time, reduce fertilization further or pause it altogether, especially if the orchid is not showing signs of new growth. Over-fertilizing during dormancy can harm the plant.
Orchid Types and Fertilization Timing
Different types of orchids may have slightly different fertilization needs:
- Phalaenopsis Orchids (Moth Orchids): Since they can often bloom multiple times a year, they may benefit from continuous, light fertilization year-round.
- Cymbidium Orchids: These orchids have a distinct growing and blooming cycle, with growth in spring and summer and blooming in winter. They require regular fertilization during their growth period and less during their dormant period.
Signs It’s Time to Fertilize
- New Growth: The appearance of new leaves or roots is a clear sign your orchid is ready to be fertilized.
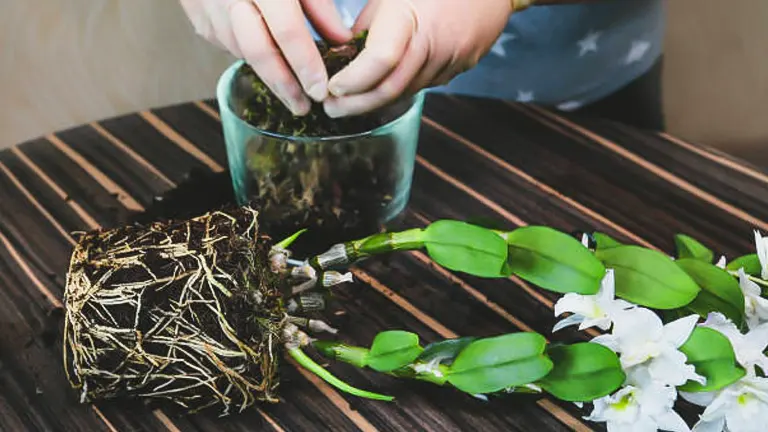
- After Repotting: Wait about a month after repotting to start fertilizing, allowing your orchid to adjust to its new environment.
Daytime Fertilization
For best absorption, fertilize your orchids in the morning. This allows the fertilizer to be taken up effectively throughout the day and reduces the risk of root burn, which can occur if the orchid is fertilized in the heat of the day.
Optimal Fertilization Schedule for Orchids
| Orchid Type | Growth Phase | Fertilizer Type (N-P-K) | Frequency | Concentration | Scientific Notes |
|---|---|---|---|---|---|
| Phalaenopsis | Active Growth | 20-20-20 | Every 2 weeks | 1/4 strength | Promotes leaf & root development; supports continuous blooming. |
| Pre-Bloom | 10-30-20 | Once a month | 1/4 strength | High phosphorus content encourages flower development. | |
| Cymbidium | Active Growth | 20-10-20 | Every 2 weeks | 1/2 strength | Supports robust growth in preparation for winter blooms. |
| Dormant | No fertilization | Pause | N/A | Rest period; excessive nutrients can disturb natural dormancy. | |
| Dendrobium | Active Growth | 20-20-20 | Every 2 weeks | 1/4 strength | Frequent, diluted feedings support sustained growth phases. |
| Post-Bloom | 6-25-25 | Once a month | 1/4 strength | Enhances nutrient storage for off-season health. | |
| Oncidium | Active Growth | 30-10-10 | Every 2 weeks | Full strength | High nitrogen needed for extensive leaf development. |
| Pre-Bloom | 10-30-20 | Once every 3 weeks | 1/2 strength | Prepares plant for vigorous blooming cycle. | |
| Vanda | Year-Round | 20-20-20 | Every week | 1/8 strength | Consistent, light feedings cater to Vanda’s continuous growth needs. |
Scientific Insight and Analysis:
This table integrates specific N-P-K ratios that align with the orchids’ growth stages, which are crucial for tailoring nutrient application precisely:
- N (Nitrogen): Vital during the active growth phase for promoting foliage and root development.
- P (Phosphorus): Increases in the pre-bloom phase to support the development of flower buds.
- K (Potassium): Constant need to aid in overall plant health and disease resistance.
Step-by-Step Guides on How to Fertilize Orchids
Equipment and Supplies Needed:
- Orchid fertilizer (preferably a balanced 20-20-20 liquid formula for growth phases and a 10-30-20 formula for blooming phases)
- Measuring spoons
- Watering can or jug
- Non-chlorinated water (distilled or rainwater is ideal)
- pH meter (optional, for testing water pH)
- Calendar for schedule tracking
Step 1: Determine Fertilizer Needs Based on Orchid Type and State
- Different species, such as Phalaenopsis, Cymbidium, or Dendrobium, might have slight variations in nutrient requirements and schedules.
- Check whether your orchid is in its active growth phase, pre-bloom phase, or dormant. This will dictate the type of fertilizer and the frequency of application.
Step 2: Prepare the Fertilizer Solution
- Use a balanced 20-20-20 NPK ratio fertilizer during the growth phase and switch to a 10-30-20 formula pre-bloom to encourage flowering.
- Dilution Instructions:
- Dilute the fertilizer to one-quarter strength for typical applications, which equates to mixing approximately 1/4 teaspoon of liquid fertilizer per gallon of water (check the specific brand’s instructions as concentrations can vary).
- Tip: Orchids are sensitive to salt buildup, so it’s safer to under-fertilize than over-fertilize.
Step 3: Application Timing and Technique
- Frequency of Fertilization:
- Active Growth: Fertilize every other week.
- Pre-Bloom: Fertilize once a month with a high-phosphorus formula to encourage blooms.
- Dormancy: Reduce fertilization to once a month with a balanced formula, or pause if the orchid shows no signs of new growth.
- Always fertilize in the morning to allow the orchid to absorb nutrients throughout the day and avoid potential root burn at night.
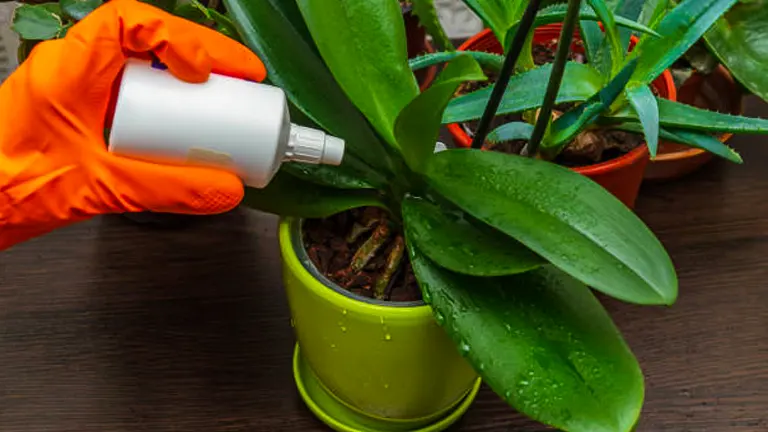
- Application Process:
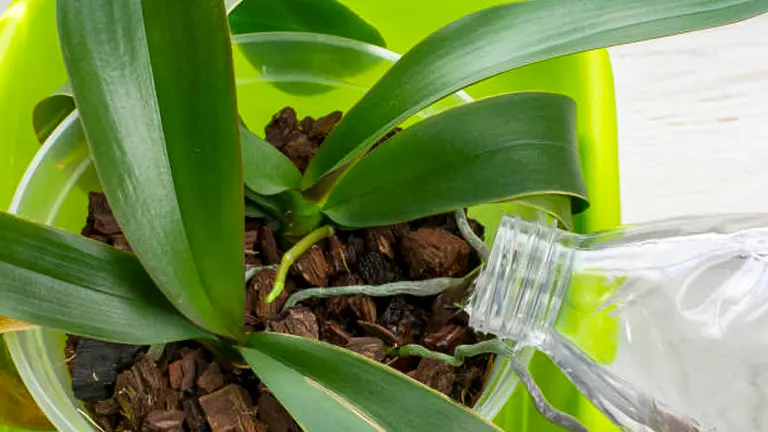
- Water the orchid lightly before applying the fertilizer to pre-moisten the soil. This helps prevent root burn.
- Pour the diluted fertilizer solution slowly around the base of the plant, avoiding direct contact with the orchid’s leaves and roots.
- Ensure the solution is evenly distributed in the potting medium.
Step 4: Post-Fertilization Care
- Immediately after applying the fertilizer, water the plant thoroughly to help distribute the nutrients and prevent any potential salt buildup from the fertilizer.
- Over the next days to weeks, watch for signs of over-fertilization (such as salt buildup on the pot’s surface or burnt leaf tips) and adjust the dilution or frequency accordingly.
Step 5: Regular Maintenance and Adjustments
- Use a calendar to keep track of fertilization dates and adjust as necessary based on the orchid’s health and external conditions (like changes in temperature and humidity which might affect growth and nutrient uptake).
- Every few months, especially just before the start of a new growth phase, flush the potting medium with clean water to remove any accumulated salts from the fertilizer, which could potentially harm the plant.
Step 6: Advanced Tips for Precision Care
- Occasionally test the water’s pH you’re using to mix with the fertilizer. Orchids generally prefer a slightly acidic environment (pH 5.5-6.5). Adjusting the water pH can help improve nutrient uptake.
- For orchids that are particularly large or have extensive root systems, consider a slight increase in fertilizer strength during peak growth periods, but always monitor the plant’s response closely to avoid nutrient burn.
Fertilization Techniques for Potted Orchids
Special Considerations for Potted Orchids
Potted orchids require tailored care that differs significantly from ground-planted ones due to their confined environment, which impacts moisture retention, air flow, and nutrient dynamics.
- Potting Medium:
- Components: A specialized orchid mix typically contains pine bark, coarse perlite, and charcoal. These components are chosen for their ability to hold moisture while also providing fast drainage and good aeration — key factors in preventing root diseases.
- Function: Bark chunks create air pockets, allowing roots to breathe; perlite improves drainage; and charcoal absorbs impurities and odors, keeping the root environment fresh.
- Pot Size and Material:
- Size Considerations: Orchids are typically under-potted to ensure the medium dries out quickly enough to prevent root rot. Small pots also encourage blooming; a pot that is too large can lead to excessive moisture retention and may delay flowering.
- Material Effects: Plastic pots help retain moisture and are lightweight, making them ideal for indoor environments where humidity control is necessary. Clay or terracotta pots are porous, promoting increased evaporation and suitable for hotter climates.
Impact of Pot Size and Material on Orchid Health
| Pot Size/Type | Drainage | Moisture Retention | Root Health | Blooming Cycle Impact |
|---|---|---|---|---|
| Small/Plastic | Moderate | High | Healthy, risk of over-watering if not monitored | Encourages blooming |
| Large/Clay | High | Low | Prone to dry out, good in humid conditions | Can delay blooming |
Best Practices for Watering and Fertilizing Potted Orchids
The relationship between watering and fertilizing is pivotal to the health of potted orchids. Below are refined best practices incorporating scientific principles to optimize growth:
- Watering Before Fertilizing:
- Purpose: Pre-watering helps temper the soil, allowing for better nutrient absorption and reducing the risk of osmotic shock to the roots from concentrated fertilizers.
- Technique: Use tepid water to moisten the potting medium thoroughly until it is just damp. This preparation prevents fertilizer burn and ensures the roots are adequately hydrated to absorb nutrients effectively.
- Application Technique:
- Method: Apply diluted fertilizer solution along the pot’s edges to promote outward root growth. This method encourages the roots to strengthen as they stretch toward the nutrient source.
- Avoidance of Direct Application: Do not apply fertilizer directly to the center or on the foliage, as this can cause root tip burn and foliar damage, respectively.
- Frequency and Strength:
- Growth Period (Spring-Summer): Fertilize every other week with a half-strength balanced fertilizer solution (e.g., 20-20-20).
- Dormant Period (Fall-Winter): Reduce to once a month with a quarter-strength of the same fertilizer or switch to a bloom-boosting formulation (e.g., 10-30-20) to prepare for the blooming season.
- Scientific Insight:
- Nutrient Absorption Efficiency: Research indicates that orchid roots absorb nutrients most efficiently when the potting medium’s pH is slightly acidic (pH 5.5 to 6.5). Adjusting the pH of the water used for mixing fertilizer can significantly enhance nutrient uptake.
- Fertilizer Decomposition: Nutrients in organic fertilizers are released slowly as they decompose naturally, which can be beneficial during the active growth phase as it provides a steady supply of nutrients. Synthetic fertilizers provide immediate nutrient availability but should be used carefully to avoid salt buildup.
Advanced Fertilizing Techniques
Tailoring Fertilization Plans
Each orchid species may have slightly different nutritional needs based on its natural habitat and growth conditions:
- Custom Nutrient Mixes: Some orchids will benefit from higher nitrogen levels while actively growing leaves, whereas they might need more phosphorus and potassium during the bloom phase.
- Microclimates: Consider the microclimate your orchid is growing in. Variations in light, humidity, and temperature can affect how orchids use nutrients. Adjust your fertilization strategy to accommodate these conditions for optimal health and bloom.
The Importance of pH in Fertilization
pH levels play a crucial role in how well orchids can absorb nutrients:
- Testing Soil pH: Use a pH meter to test the potting mix’s pH regularly. The ideal pH for most orchids is between 5.5 and 6.5.
- Adjusting pH: If the pH is not optimal, use sulfur to lower it or lime to raise it. Be cautious with adjustments—make small changes and wait to see the effect before adding more.
Understanding and adjusting pH as needed ensures that your orchids can access the nutrients in their fertilizer, which is essential for their growth and bloom capabilities.
Common Fertilization Issues and Fixes
Even with the best care, issues can arise. Here are solutions to some common problems:
- Over-fertilization: Symptoms include salt buildup on the pot’s surface and leaf burn. If this occurs, flush the pot with clean water and reduce fertilizer concentration and frequency.
- Under-fertilization: Weak growth or lack of blooms may indicate nutrient deficiency. Increase the strength of your fertilizer slightly, or adjust your application frequency.
Seasonal Fertilization Strategies
Orchids respond differently to fertilization depending on the season due to their growth cycles and environmental changes.
Spring and Summer Care
- Spring: This is a growth period for orchids, where higher nitrogen levels can support leaf and stem development. Increase fertilization frequency to every other week.
- Summer: As temperatures rise, orchids may benefit from slightly increased phosphorus for bloom support and additional potassium to aid in heat stress resistance.
Fall and Winter Care
- Fall: Begin to reduce fertilization as orchids enter a preparatory phase for dormancy. Shift to a phosphorus-rich fertilizer to support root development and upcoming blooms.
- Winter: Most orchids require less fertilizer in the winter when their growth slows. Monthly application of a balanced formula, or even suspending fertilization if growth ceases, is typical.
Tailoring your approach to the time of year not only supports your orchid’s natural life cycle but also optimizes nutrient availability and plant health.
Related Post
- How to Fertilize a Mango Tree Effectively: Tips and Tricks for Healthy Growth
- How to Fertilize Apple Trees: Essential Tips for a Bountiful Harvest
- How to Fertilize Lemon Trees: Secrets for Thriving Citrus
- How to Fertilize Avocado Tree: A Step-by-Step Guide for Lush Growth
Conclusion
Mastering the art of fertilizing orchids is a balance of science and intuition. By understanding the needs of your specific orchid, adjusting your approach with the seasons, and responding to the plant’s feedback, you can foster robust growth and spectacular blooms. Remember, each orchid is unique, and their requirements can vary greatly, even within the same species. Regular observation, coupled with an adaptable fertilization plan, is key to your success.
FAQs
- What is the best time of day to fertilize orchids?
The best time of day to fertilize orchids is in the morning. This allows the fertilizer to be absorbed throughout the day and prevents the potential for root burn, which can occur if fertilizers are applied during the hotter parts of the day when evaporation rates are higher. - Can I use tap water to mix with orchid fertilizer?
It is preferable to use rainwater or distilled water to mix with orchid fertilizer, as tap water can contain salts, chlorine, and fluoride that can accumulate in the potting medium and potentially harm the roots over time. If tap water is your only option, let it sit out overnight to allow chlorine to dissipate. - How do I adjust fertilizer concentration based on my orchid’s health?
If your orchid is looking lush and producing healthy leaves but not flowering, it may benefit from a fertilizer with a higher phosphorus content to promote blooming. Conversely, if your orchid has weak, leggy growth, increase nitrogen to boost foliage development. Always start with a diluted solution to prevent nutrient burn, gradually increasing strength as needed. - Should I fertilize my orchid while it’s blooming?
Yes, you should continue to fertilize your orchid during its blooming phase but switch to a fertilizer lower in nitrogen and higher in phosphorus, which helps prolong bloom life and enhances flower color. Reduce the frequency of fertilization to once a month during this stage. - Is it necessary to flush the potting mix periodically if I fertilize regularly?
Yes, it is advisable to flush the potting mix with clean water every few months to prevent salt and mineral buildup, which can be harmful to orchid roots. This is particularly important if you are using synthetic fertilizers, as these can leave more residue than organic options. - What should I do if I over-fertilize my orchid?
If you suspect over-fertilization (indicated by burnt leaf tips and a white crust on the potting medium), flush the pot thoroughly with water to rinse out excess fertilizer. Moving forward, reduce both the concentration and frequency of fertilizer applications. - How does the potting medium affect how I should fertilize my orchid?
The type of potting medium significantly influences watering and fertilization practices. Mediums like sphagnum moss retain moisture longer and may require less frequent watering and fertilization, whereas bark-based mediums drain quickly and might need more frequent watering and nutrient application. - Can I make my own orchid fertilizer at home?
Yes, you can make a homemade orchid fertilizer using common household ingredients like eggshells, milk, and Epsom salts, which provide calcium, magnesium, and other micronutrients. However, ensure to research and use the correct ratios to avoid damaging your plants.
Proper fertilization is crucial for vibrant and healthy orchids. Follow these steps to encourage stunning blooms and robust growth. Happy gardening!

Emma Hudson
Forestry AuthorEmma's experience in farming shapes her detailed guides on gardening and farming tools, providing practical, actionable advice grounded in real-world experience. Her work targets both newcomers and experienced farmers, aiming to enhance their practices with a mix of traditional wisdom and modern techniques. By making complex agricultural concepts accessible, Emma's guides serve as valuable tools for those navigating the challenges of contemporary farming, offering strategies for sustainable success.


Leave your comment