How to Sharpen a Drill Bit: Master Flawless Edges with Pro Tips
- March 19, 2024
- 0 comment
Discover How to Sharpen a Drill Bit with our comprehensive guide, ensuring your DIY and professional projects are efficient, precise, and safe. Learn vital skills to maintain tool sharpness, improve work quality, and extend tool life, saving you time and money.
List on How to Sharpen a Drill Bit
- Preparing Your Drill Bit
- Setting Up the Drill Bit
- Sharpening the First Edge
- Refining the Opposite Side
- Testing the Sharpness
Before You Start
A typical drill bit features two primary cutting edges set at an approximate 60-degree angle, positioned symmetrically on either side of its central axis. For effective sharpening, one should aim to replicate this angle, refining the cutting edges to restore their sharpness while preserving their original geometry.
Key Components of a Drill Bit
- Flutes: Spiral channels running along the drill bit’s length, essential for chip removal, cutting fluid delivery, and formation of the cutting edges.
- Land: The solid sections between flutes that support the bit’s structure.
- Web: The central spine that connects the lands, forming the chisel edge at the bit’s tip in a standard two-flute design.
- Cutting Edge: The sharp boundary extending from the chisel edge to the bit’s outer diameter, responsible for material removal.
- Tip: The tapered end comprising the web, cutting edges, and land terminations, designed for penetrating material.
- Secondary Cutting Edge: The additional sharp boundary formed where the point’s relief surface meets the land’s notch face, enhancing the cutting process.
Safety Precautions
When sharpening a drill bit, proximity to the grinding wheel poses a heightened risk of contact injuries. It’s advisable to wear protective gloves for added safety. Equip yourself with safety glasses to shield your eyes from particles and sparks. Ensure a secure grip on the drill bit during sharpening to prevent any sudden movements or slipping, maintaining control over the tool at all times.
Signs Your Drill Bit Needs Sharpening
- Decreased Efficiency: If drilling becomes slower or requires more effort, even in materials that used to be easy to penetrate, your drill bit might have dulled.
- Poor Finish: A sharp drill bit leaves a clean, smooth hole. If you notice rough edges, fraying, or splintering, it could indicate the bit is no longer sharp.
- Excessive Heat: Dull bits generate more friction and heat. If the bit or the material gets unusually hot during drilling, it’s likely due to a dull edge.
- Slippage: A sharp bit should bite into the material immediately. If the bit “walks” or slips on the surface before drilling, the tip may have lost its sharpness.
- Visible Wear: Inspect the bit closely. If the cutting edges appear rounded or there are visible signs of wear and tear, it’s time for a sharpening.
- Increased Noise: A change in the sound, such as increased noise or a high-pitched screeching during drilling, can signal a dull bit.
- Difficulty in Starting Holes: A sharp drill bit should easily start a hole at the desired point. Difficulty in initiating the drilling process suggests the bit may be dull.
- Burn Marks: Discoloration or burn marks on the bit or the material being drilled are indicators of excessive friction due to a dull bit.
Tools Required for Sharpening Drill Bit
Bench Grinder or Drill Bit Sharpener
Bench Grinder A versatile tool that can accommodate various sizes and types of drill bits. It’s equipped with a grinding wheel that, when used skillfully, can reshape and sharpen drill bits. However, achieving the correct angle requires a steady hand and experience. Drill Bit Sharpener A specialized device designed specifically for sharpening drill bits. It often comes with guides and adjustments to help you maintain the correct angle effortlessly, making it ideal for those seeking precision and ease of use.
Safety Glasses
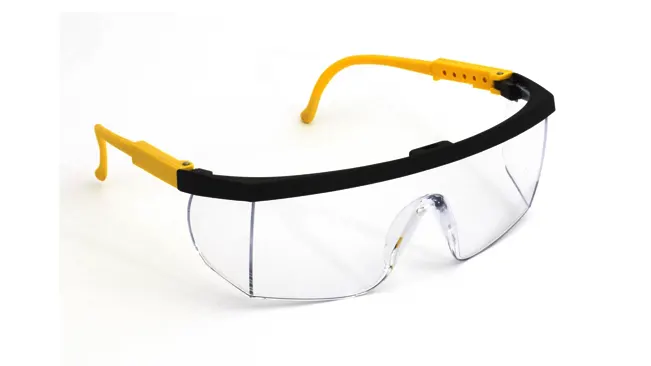
These are crucial for shielding your eyes from potentially harmful particles like metal filings, sparks, and other debris. During the grinding process, tiny fragments can be projected at high speeds, posing a significant risk to eye safety.
Protective Gloves
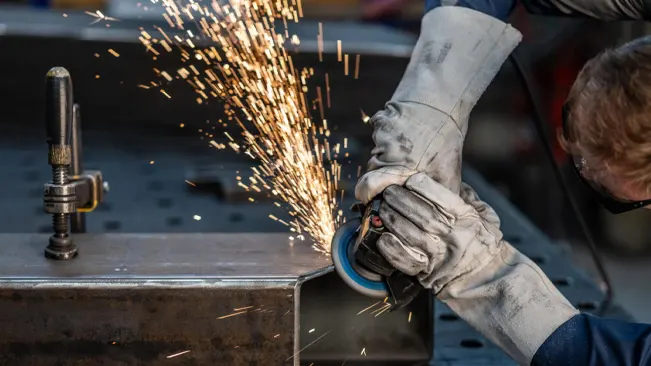
Gloves can offer additional grip and protect your hands from the heat generated by friction and from any sharp edges on the drill bit. However, caution is advised since gloves can get caught in rotating parts of machinery, presenting a safety hazard. Use them judically, especially when working near spinning components.
Inspection Tools
After sharpening, it’s important to inspect the drill bit to ensure that the edges are even and properly formed. A magnifying glass or an inspection mirror can help identify any irregularities or remaining dull spots that may affect the bit’s performance.
Dressing Tool
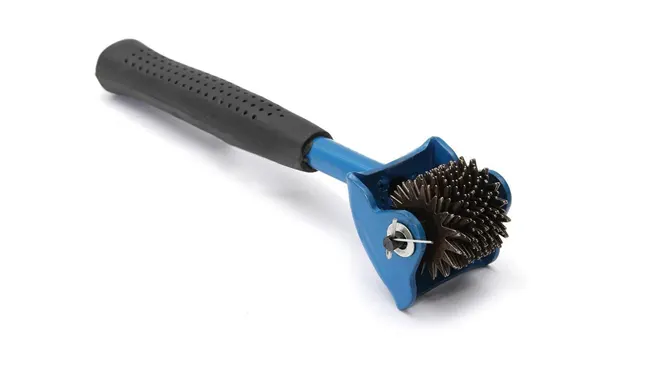
Over time, the grinding wheel of a bench grinder can become clogged with metal particles and lose its shape. A dressing tool is used to remove these particles and restore the wheel’s flat surface, ensuring that the grinding process is efficient and effective. A well-maintained wheel contributes to the accuracy and quality of the sharpening.
Step-by-Step Guide to Sharpening Drill Bit
Preparing Your Drill Bit
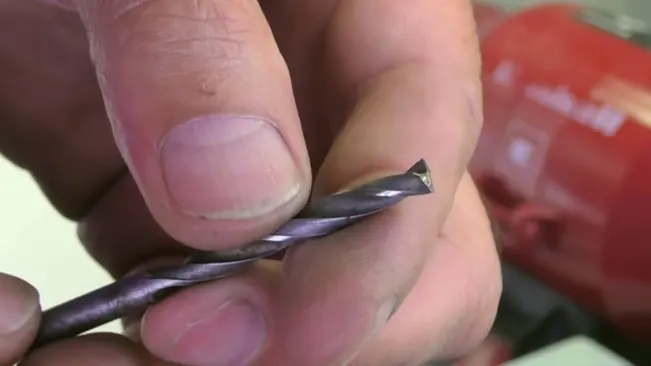
Begin by thoroughly assessing your collection of drill bits to identify those that have become dull or are showing signs of wear. If you encounter any rough edges or burrs along the bit’s shank, gently file them down to prevent potential injuries during the sharpening process. Depending on the condition of the drill bit, opt for either a coarse or fine grinding wheel; the former for significantly worn bits and the latter for bits that require minor touch-ups.
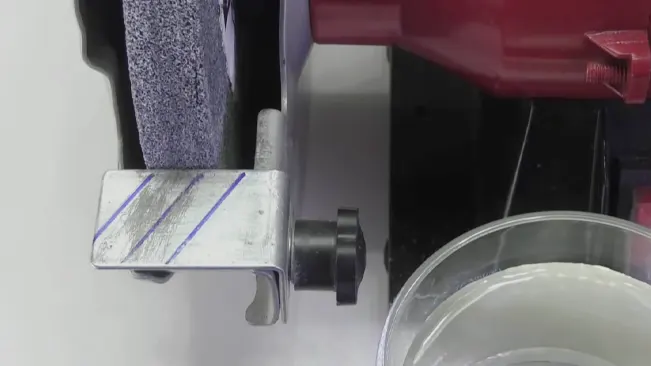
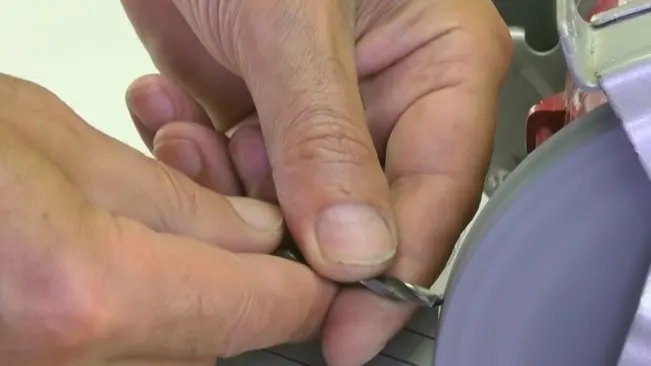
Setting Up the Drill Bit
Ensure your safety by donning protective eyewear. Securely hold the drill bit, aligning its cutting edge parallel to the grinding wheel’s surface. Aim for a 60-degree angle between the bit and the wheel. It’s crucial to find a comfortable and stable position before proceeding to the next step.
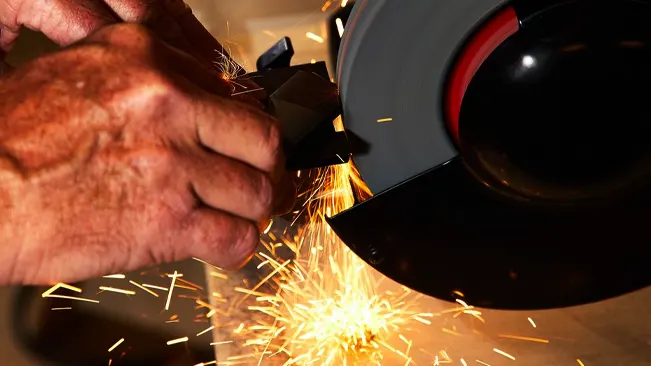
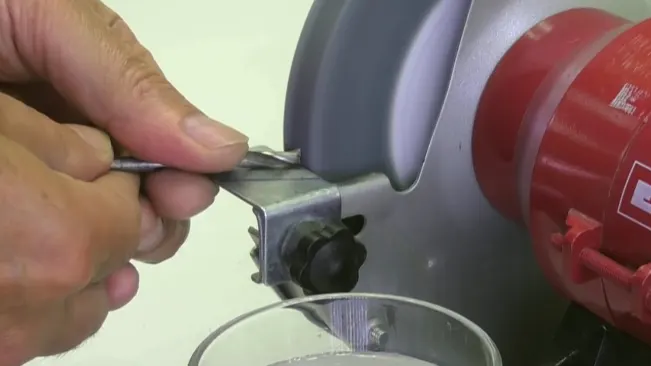
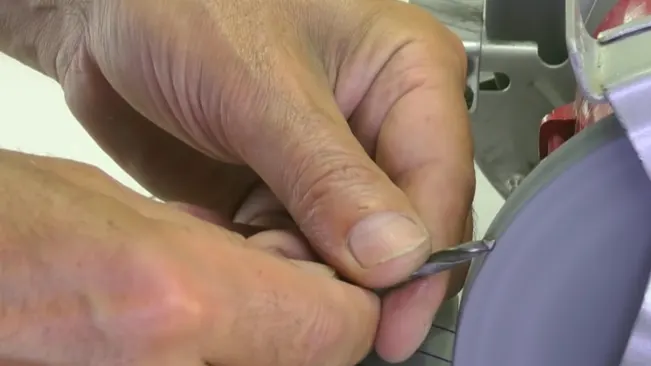
Sharpening the First Edge
To begin sharpening the first edge, turn on the bench grinder and firmly hold the drill bit, guiding it towards the grinding wheel. Use a precise technique to ensure effective sharpening: Position the drill bit at a 60-degree angle with the end of the land directly touching the wheel. Slightly raise your hand that’s at the back, applying a gentle but firm pressure towards the grinder. Then, subtly move your rear hand sideways to form the desired chisel angle on the bit. Finally, carefully rotate the drill bit in a counter-clockwise direction, allowing for a smooth and rounded shaping of the land’s surface. This methodical approach will help create a sharp and effective cutting edge on the drill bit.
Refining the Opposite Side
Once you’re content with the first side, flip the bit to its opposite side, mirroring the sharpening steps to ensure both edges are symmetrically sharp. After another short grinding period, quench the bit in water again, then inspect to confirm both sides are evenly sharpened.
Testing the Sharpness
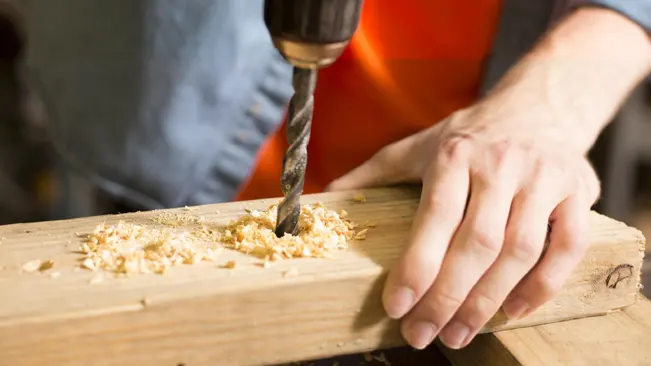
Mount the freshly sharpened drill bit into your drill and conduct a test run on a scrap piece of wood. A properly sharpened bit should penetrate the wood smoothly, leaving behind a clean, even hole. This indicates a successful sharpening job, with both sides sharpened to equal sharpness.
Advanced Techniques
Drill Doctor or Professional Drill Bit Sharpeners

Drill Doctors and professional drill bit sharpeners are designed with precision in mind, catering to both novice and experienced users. They come equipped with features such as adjustable chucks and alignment systems, making it easier to handle bits of different diameters and designs, including split-point bits. These devices often feature multiple sharpening angles, allowing users to tailor the edge for specific drilling tasks. The automatic indexing ensures that both edges of the bit are sharpened equally, preserving the bit’s geometry and ensuring optimal performance.
Diamond Sharpening Wheels
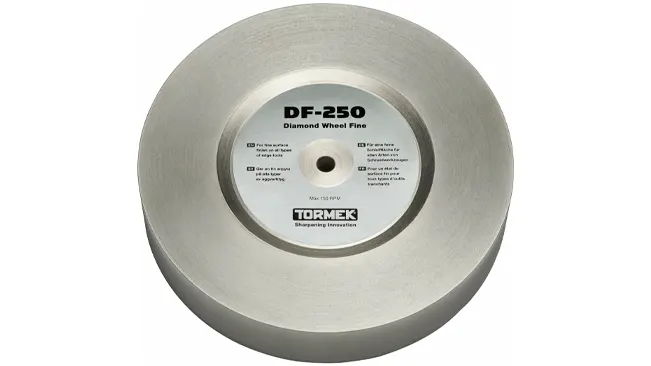
Diamond sharpening wheels are a significant upgrade from standard abrasive wheels. The diamond coating provides a harder, more durable surface that remains consistent over time, ensuring a uniform sharpening process. These wheels produce less heat and wear down the bit less, reducing the risk of altering the bit’s geometry. The fine grit of diamond wheels also allows for a polished, razor-sharp finish, enhancing the drill bit’s cutting efficiency and longevity.
Troubleshooting Common Issues
- Uneven Cutting Edges: If the cutting edges are not sharpened to the same length and angle, the drill bit may drill off-center, creating uneven or inaccurate holes. This usually results from inconsistent hand movements or incorrect positioning of the bit against the grinding wheel.
- Overheating: Applying too much pressure or sharpening for too long without cooling can cause the drill bit to overheat. This not only risks burning your fingers but can also lead to the loss of temper in the steel, making the bit softer and less durable.
- Incorrect Angles: Sharpening the drill bit at the wrong angle can significantly impact its drilling performance. An angle that’s too steep or too shallow will affect the bit’s ability to penetrate the material effectively and can also increase wear on the bit.
- Loss of Symmetry: Failing to maintain symmetry between the two cutting edges can result in a drill bit that wobbles or doesn’t produce clean, straight holes. This is often a consequence of not turning the bit correctly or not using a guide when sharpening.
- Dulling Instead of Sharpening: Using a grinding wheel that’s too coarse or applying too much pressure can sometimes remove too much material or create rough edges, effectively dulling the bit rather than sharpening it.
- Wear on the Grinding Wheel: Over time, the grinding wheel itself can wear down, becoming uneven or clogged with metal filings. This can result in less effective sharpening and can even damage the drill bit if not addressed.
- Insufficient Inspection: Neglecting to closely inspect the drill bit before and after sharpening can lead to missed imperfections or uneven sharpening. It’s important to examine the bit closely, ideally with magnification, to ensure a quality sharpening job.
Maintenance and Care
- Clean After Use:Immediately after use, clean your drill bits to eliminate any residues like wood shavings, metal scraps, or drywall dust. A soft brush or cloth can effectively clear away these particles. For tougher grime, apply a solvent or degreaser, followed by a comprehensive wipe.
- Lubrication:Some drill bits, particularly those used for metal drilling, benefit from a light application of lubricant to fend off rust and corrosion. Light machine oil works well, but ensure excess oil is wiped away to prevent dirt accumulation.
- Proper Storage:Keep your drill bits in a dry place and organize them well. Utilizing the original cases or holders that come with the bits helps in maintaining their sharpness and avoiding damage from contact with other bits. In the absence of a case, magnetic strips, drill indexes, or custom holders are good alternatives for organization and protection.
- Avoid Moisture:To prevent rust, ensure your storage area is devoid of moisture. Incorporating silica gel packets or using a dehumidifier within the tool storage space can assist in keeping a dry environment.
- Regular Inspection:Conduct periodic checks on your drill bits for any signs of wear, dullness, or damage, such as blunted edges, chips, or bending. Early detection of these issues can often save a drill bit from being discarded prematurely.
- Resharpening:Stay vigilant about the sharpness of your drill bits. At the first hint of dullness, sharpen them according to the correct techniques and angles specific to the bit type. Consistent sharpening can significantly prolong the life of a drill bit.
- Use Correctly:Ensure you’re using the appropriate bit for the material you’re working with. Misapplication, such as using a wood bit on metal, can rapidly degrade or break the bit. Also, adhere to the recommended speed and pressure for both the material and bit type to avoid overheating and unnecessary wear.
- Cooling During Use:In extended drilling sessions, particularly with hard materials, employ cooling fluid or intermittently cool the bit in water to avert overheating, which can quickly dull the bit.
Conclusion
In conclusion, mastering the skill of sharpening drill bits significantly improves their efficiency and extends their lifespan. The process entails thorough inspection, cleaning, and precise sharpening using the right tools while maintaining correct angles. Safety measures and advanced techniques enhance the process, leading to superior results. Regular care and maintenance further sustain the bits’ performance. Sharpening drill bits is not only cost-effective but also ensures precise and efficient drilling, making it a valuable skill for both DIY enthusiasts and professionals.
FAQs
1. Can all drill bits be sharpened?
Most high-speed steel (HSS), cobalt, and carbide-tipped drill bits can be sharpened. However, some specialty bits with complex geometries may require professional sharpening services.
2. How often should I sharpen my drill bits?
Sharpen your drill bits as soon as you notice a decrease in drilling efficiency or quality. This varies based on usage frequency and the materials you’re drilling into.
3. What angle should I sharpen my drill bits to?
The most common angle for a standard twist drill bit is 118 degrees, but some bits, especially those for harder materials, may require a 135-degree angle.
4. Can I sharpen drill bits without specialized equipment?
While specialized sharpeners offer precision, you can use a bench grinder with careful technique. For best results, consider using a drill sharpening guide or jig.
5. How can I tell if a drill bit is sharp enough?
A sharp drill bit will have clean, crisp edges without any rounding or dull spots. It should also be able to easily cut into a piece of scrap material without excessive pressure.
6. Is it worth sharpening cheap drill bits?
Yes, sharpening even inexpensive bits can extend their life and improve performance, making it a cost-effective practice.
7. Can damaged drill bits be repaired by sharpening?
Minor damage, such as small nicks or dull edges, can often be repaired through sharpening. However, severely damaged or broken bits may not be salvageable.
8. How do I prevent overheating while sharpening a drill bit?
Use light pressure and short intervals when grinding, and frequently dip the bit in water or a cooling fluid to dissipate heat.
9. What’s the difference between a split point and a standard point drill bit, and can both be sharpened the same way?
A split point has an additional grinding at the tip, reducing the need for a center punch and minimizing bit “walking.” Both types can be sharpened, but a split point requires an additional step to recreate the split feature.
10. How do I maintain the symmetry of the drill bit while sharpening?
Use consistent pressure and angles on both sides of the bit. Visual aids on sharpeners or markings on the bit can help maintain symmetry. Practice and experience also play significant roles in achieving consistent results.

Joel Cunningham
Forestry AuthorI'm Joel Cunningham, an expert in pruning and weed management with over a decade of experience. My skills are rooted in formal training and extensive practice, focusing on advanced pruning techniques and efficient weed control. I'm known for my quality work, precision, and deep understanding of plant health and soil dynamics. My contributions extend to educational initiatives where I share sustainable practices and advice, establishing myself as a reliable and authoritative figure in the gardening community.


Leave your comment