How to Clean a Stihl Chainsaw Carburetor
- February 1, 2024
- 0 comment
Are you ready to dive into the world of chainsaw maintenance? Today, we’re focusing on the heart of your Stihl chainsaw – the carburetor. Specifically, we’re zooming in on models MS 292, MS 310, MS 390, 029, and 039. These models share a similar design, making the cleaning process conveniently uniform. Here’s a step-by-step guide to ensure your chainsaw’s carburetor is spotless and functioning at its best.
Pre-Cleaning Preparations
When preparing to clean the carburetor of your Stihl chainsaw, setting the stage correctly is just as crucial as the cleaning itself. A thoughtful approach to pre-cleaning preparations not only ensures a smooth process but also enhances your safety. Here’s a deeper dive into the initial steps:
1. Empty the Gas Tank
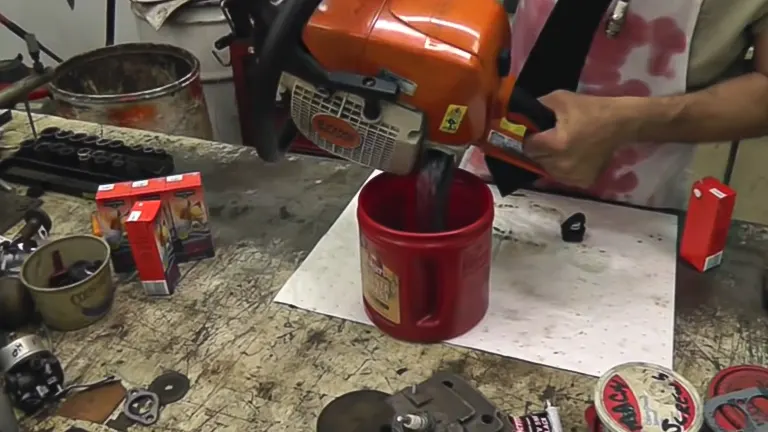
The first step in your preparation should be to drain all the gasoline from your chainsaw’s tank. This step is more than a mere formality; it’s a critical safety measure. Gasoline, being highly flammable, poses a significant risk, especially when you’re about to dismantle parts of your chainsaw that have been in close contact with it. Furthermore, the fuel system is often under pressure, and opening a pressurized system without first relieving the pressure can lead to gasoline spraying out forcefully. This not only creates a messy situation but also a hazardous one if the gasoline comes into contact with your skin or eyes, or if it ignites. Therefore, ensure the tank is completely emptied into an appropriate fuel container, preferably while working in a well-ventilated area to minimize the inhalation of fumes.
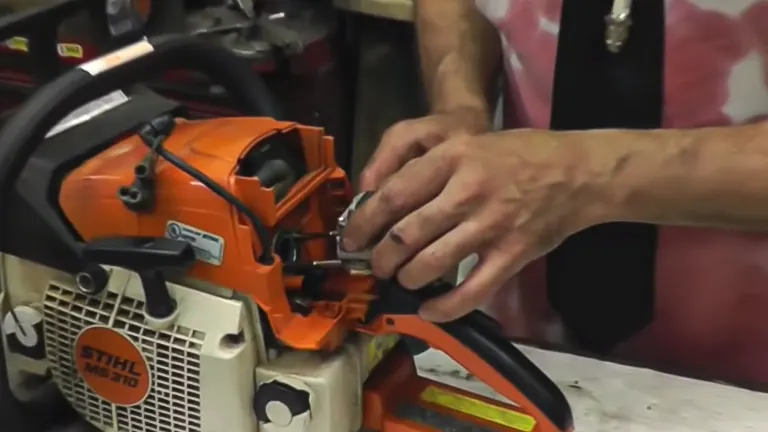
2. Remove the Cover
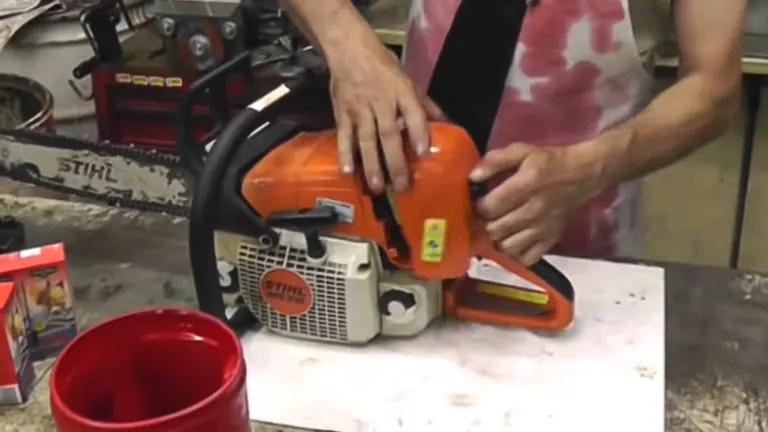
The next step involves removing the cover of your chainsaw. While this may appear to be a simple, straightforward action, its importance cannot be overstated. The cover provides a protective barrier for the internal components of your chainsaw, including the carburetor. By removing the cover, you gain unobstructed access to these components, making your cleaning and maintenance tasks significantly easier. This step also allows you to visually inspect the condition of the internal parts and assess whether additional cleaning or maintenance is required. When removing the cover, do so gently and carefully to avoid any damage to the cover itself or the underlying components. Also, keep track of any screws or fasteners you remove, as losing them can lead to frustrations later during reassembly.
Understanding the Heat Control Mechanism
Before you proceed, it’s essential to understand the heat control mechanism of your chainsaw, especially if you use it in varying seasonal conditions.

- Winter Mode: Find the icon of a snowflake. When the mechanism is set to this mode, it allows heat from the motor to warm the carburetor, preventing the fuel from freezing.
- Summer Mode: Look for the sun icon. In this setting, the mechanism blocks the heat, ensuring the carburetor doesn’t get too hot, which could lead to vapor lock or other heat-related issues.
Dismantling the Carburetor
1. Removing the Air Cleaner
The air cleaner, also known as the air filter, serves as the first line of defense, preventing dirt and debris from entering the carburetor and engine. To begin, carefully remove the air cleaner to gain unobstructed access to the carburetor. This step not only facilitates easier access but also provides an excellent opportunity to inspect, clean, or replace the air filter itself. A clean air filter is essential for maintaining optimal engine performance. Consult your chainsaw’s manual for specific instructions, as the removal process may vary between models. Remember to handle the air cleaner gently to avoid any damage, especially if it’s made of a foam or paper element.
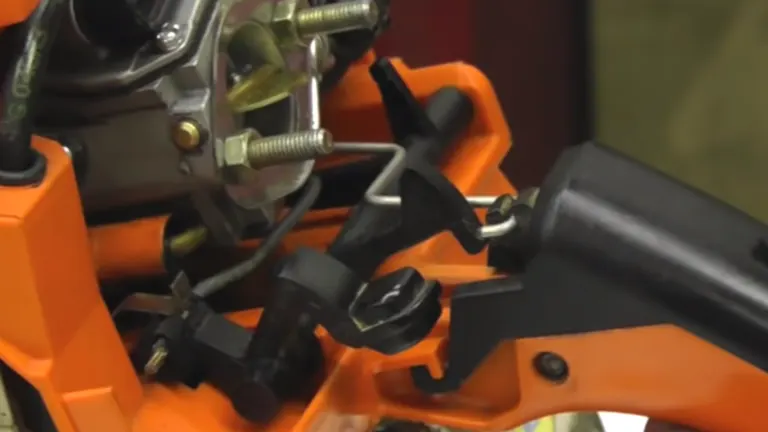
2. Detaching the Throttle Linkage
The throttle linkage is a crucial component that connects the carburetor to the throttle control, dictating the engine’s speed based on user input. Careful detachment of the throttle linkage is necessary to prevent any accidental bending or breaking. Before you start, take a moment to closely observe how the linkage is connected to the carburetor. It’s wise to take a photo or make a quick sketch to aid in reassembly later. If the linkage doesn’t disconnect easily by hand, gently use a screwdriver or pliers to coax it off, being mindful not to apply excessive force that might damage this delicate part.
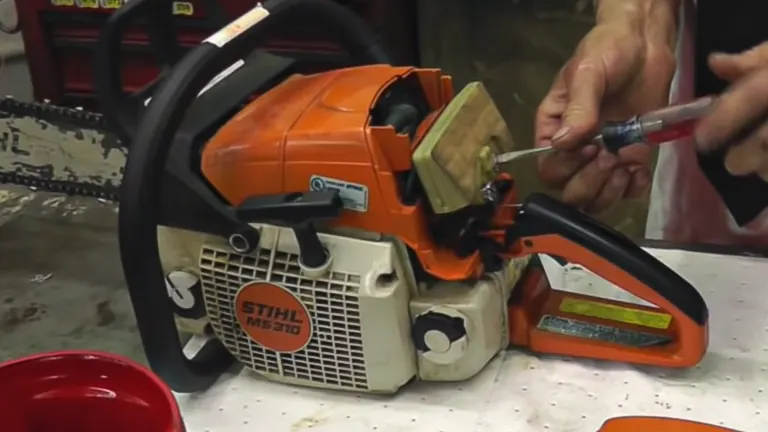
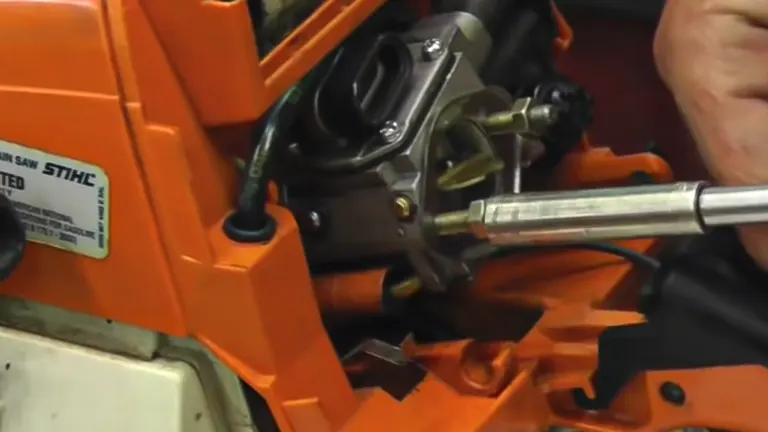
3. Unscrewing the Nuts
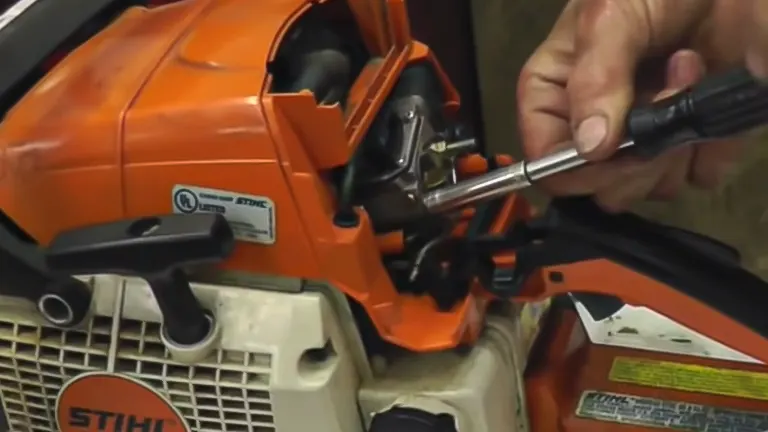
The carburetor is held in place by nuts that ensure it remains securely attached to the chainsaw. Removing these nuts is a critical step in accessing the carburetor for cleaning or maintenance. A socket wrench with the correct size socket (usually 5/16 or 8mm) is the ideal tool for this task, as it helps prevent stripping the nuts. It’s important to keep track of these small parts during disassembly. Place the nuts and any other small components in a container or on a magnetic parts tray to prevent them from getting lost or misplaced during the cleaning process.
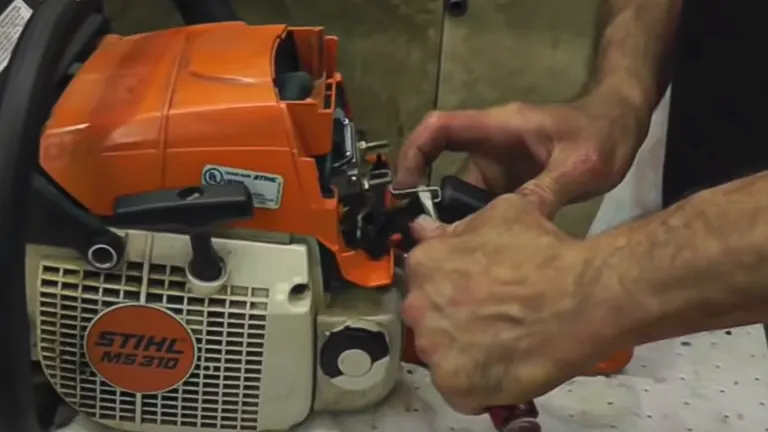
4. Disconnecting the Choke Lever and Fuel Line
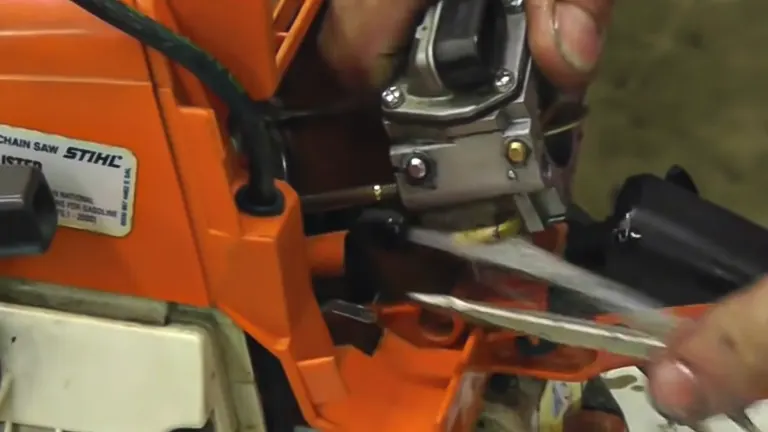
Isolating the carburetor completely from the chainsaw involves detaching the choke lever and fuel line. This step allows you to remove the carburetor entirely for thorough cleaning or repair. The choke lever regulates the air-fuel mixture during engine start-up, and the fuel line supplies gasoline to the carburetor. When detaching these components, it’s essential to proceed with caution to prevent any damage. If they are stubborn and don’t easily come off, a gentle wiggling motion while pulling can be effective. Be prepared for a small amount of gasoline to leak out when disconnecting the fuel line. Have a rag or paper towel ready to catch any drips and ensure you’re working in a well-ventilated area, away from any potential sources of ignition.
Cleaning the Carburetor
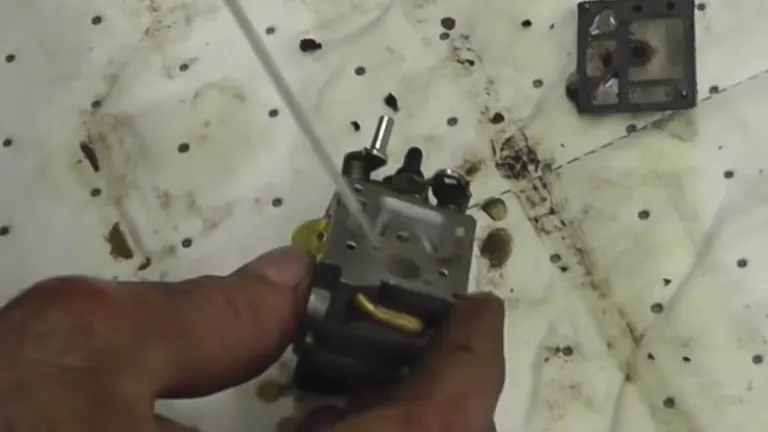
1. Inspect the Fuel Pump and Diaphragm Side
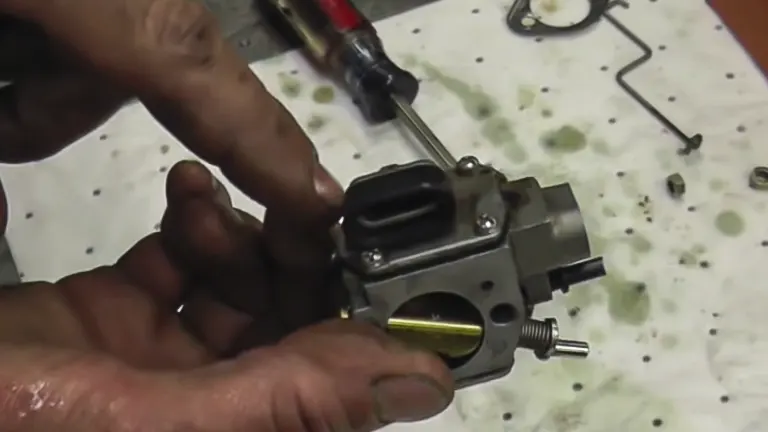
Initiate the cleaning process by opening the carburetor to inspect both the fuel pump side and the diaphragm side. The fuel pump side is prone to accumulating sawdust, dirt, and debris, which can lead to blockages that disrupt the flow of fuel. This, in turn, can affect the performance of your chainsaw. On the other hand, the diaphragm side is crucial for regulating fuel flow. The diaphragm must remain supple and intact. Any tears, stiffness, or signs of wear can impair the chainsaw’s functionality. A thorough inspection of these components is critical to identify any issues that might require cleaning or part replacement.
2. Clean Thoroughly
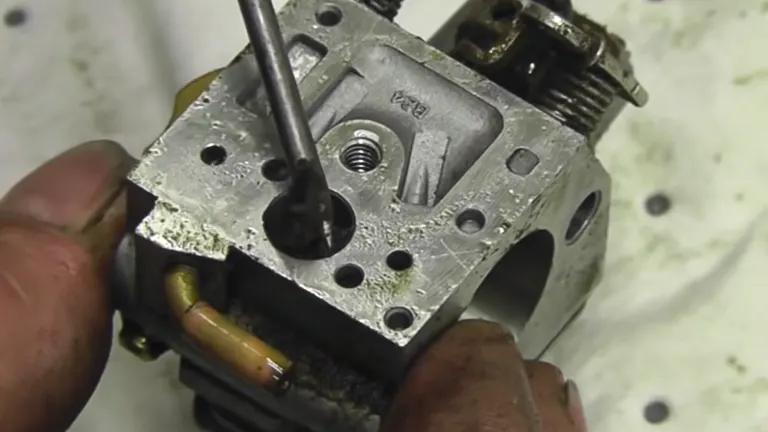
Once you’ve inspected the components, proceed to clean them meticulously. Utilize a cleaner specifically designed for carburetors. These cleaners are formulated to dissolve and remove tough residues without damaging the carburetor’s delicate parts. Apply the cleaner and use a soft brush to gently scrub away any dirt, sawdust, or residue. Pay extra attention to the carburetor’s screens and jets. These are narrow passages where blockages are most likely to occur and can be the most detrimental to your chainsaw’s performance.
3. Use Air Sparingly
After manually cleaning the parts, you might be tempted to use compressed air to blow away any remaining debris. While this can be effective, it must be done with caution. High-pressure air can easily damage sensitive parts of the carburetor or dislodge small components, leading to more serious problems down the line. If you choose to use air, do so sparingly and with low pressure, focusing on the passages and areas where debris might be lodged.
4. Inspect and Clean the Diaphragm
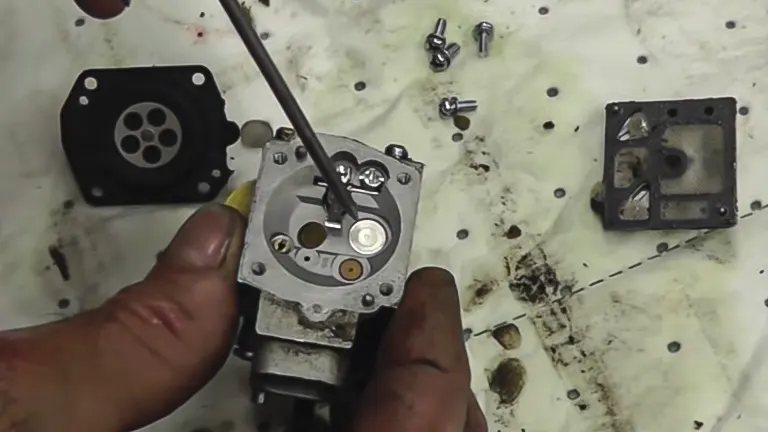
The diaphragm is a pivotal component of the carburetor, playing a key role in regulating fuel flow. A thorough inspection is necessary to ensure it’s in good condition. If you find the diaphragm to be stiff, cracked, or visibly damaged, it’s best to replace it. An impaired diaphragm can lead to a range of issues, from starting problems to erratic engine behavior. If the diaphragm is in good condition, clean it gently, being careful not to stretch or tear it.
Reassembling the Carburetor
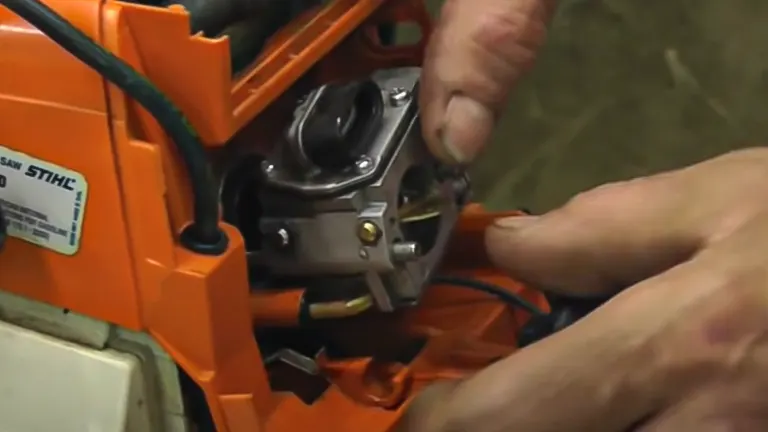
1. Reattaching the Carburetor
Begin by carefully aligning the carburetor onto the studs of the chainsaw. This step requires a gentle touch and a keen eye to ensure that everything lines up correctly. It’s paramount that all seals and gaskets are properly seated. These components are vital for maintaining the vacuum and pressure integrity of the carburetor. Even a small misalignment can lead to air leaks or fuel seepage, which can drastically affect the performance of your chainsaw. Take your time to ensure everything fits perfectly.
2. Reconnecting the Fuel Line and Choke Lever
Once the carburetor is in place, it’s time to reconnect the fuel line and choke lever. These should ideally click back into place, indicating a secure connection. However, it’s essential to ensure that the fuel line is not kinked or pinched. A kink in the fuel line can obstruct the flow of gasoline, leading to engine performance issues. Similarly, the choke lever must be correctly aligned for it to function properly. This lever plays a critical role during the start-up of the chainsaw, and any misalignment can make starting the chainsaw difficult or cause it to run improperly.
3. Reattaching the Throttle Linkage
The throttle linkage controls the speed of the chainsaw engine and hence needs to be reattached with care. This step can be tricky as the linkage needs to be both free-moving and correctly aligned. If the linkage is too loose or too tight, it can lead to erratic engine behavior. Ensure that the throttle moves smoothly without any sticking or resistance, indicating a proper alignment.
4. Screwing Everything Back in Place
With all components in place, it’s time to secure everything by replacing and tightening all nuts and screws. Use the appropriate tools to ensure that you’re not over-tightening, which can strip the threads or damage parts, or under-tightening, which can lead to parts coming loose during operation. As you work, double-check the alignment and snugness of each part. A well-assembled carburetor will fit seamlessly, with no parts out of place or undue tension in the connections.
Post-Cleaning Checks
After meticulously cleaning and reassembling your chainsaw’s carburetor, it’s essential not to rush into your regular tasks immediately. Conducting post-cleaning checks ensures that your efforts lead to a smooth, safe, and efficient operation. Here’s how to methodically wrap up your maintenance session:
- Set the Heat Control: The heat control mechanism is a feature not to be overlooked, especially if you’re working in areas with varying temperatures. It plays a pivotal role in ensuring your chainsaw operates optimally by regulating the temperature of the air entering the carburetor. For colder environments, adjust the control to allow warm air from the engine to prevent carburetor freezing. In warmer conditions, set it to prevent overheating. Ensuring this setting is appropriate for your current climate can significantly impact the performance and longevity of your chainsaw.
- Refill the Gas: Now that the carburetor is reassembled, it’s time to refuel your chainsaw. Use fresh gasoline, and if your chainsaw requires a fuel mix, ensure it’s mixed correctly according to the manufacturer’s specifications. Incorrect fuel mixtures can lead to poor performance or even damage the engine. Pour the gas carefully into the tank, avoiding spills, and ensure the cap is secured tightly to prevent any leakage.
- Test Run: Before getting back to work, it’s crucial to perform a few test runs. Start the chainsaw and let it idle, checking for smooth operation. Listen for any irregularities in the sound of the engine. The throttle should respond promptly and smoothly when you rev the engine. This test run is not just a check for the proper functioning of the carburetor but also for the overall health of your chainsaw. Any unusual behavior during the test run might indicate that further adjustments or checks are needed.
- Enjoy Your Handiwork: With the carburetor cleaned, reassembled, and tested, your chainsaw is now ready to perform at its best. Take a moment to appreciate your efforts in maintaining this vital tool. Whether you’re cutting wood, trimming trees, or tackling other tasks, you can proceed with confidence, knowing your chainsaw is in top condition. And of course, after the hard work, don’t forget to take a well-deserved break, perhaps with a refreshing juice box in hand!
Remember, regular maintenance, including thorough cleaning of the carburetor, not only extends the lifespan of your chainsaw but also ensures it operates safely and efficiently. By adhering to a meticulous maintenance routine, you’re investing in the reliability of your tool and the quality of your work. Happy sawing!
FAQs
- Why is it crucial to clean the carburetor of my Stihl chainsaw regularly?
Regular cleaning of the carburetor ensures optimal engine performance by maintaining the correct air-fuel mixture. It prevents common issues like starting difficulties, irregular idling, and lackluster power output, ensuring your chainsaw operates efficiently and safely. - Can I use any cleaning solution to clean my chainsaw’s carburetor?
No, it’s best to use a cleaner specifically designed for carburetors. These cleaners are formulated to dissolve and remove fuel residues and deposits without damaging the carburetor components. Using inappropriate cleaning solutions can lead to component damage or degradation. - How often should I clean my chainsaw’s carburetor?
The frequency can vary based on usage and working conditions. For regular users, a thorough cleaning every few months is advisable. However, if you’re working in particularly dusty or resin-rich environments, consider increasing the frequency to prevent build-up and ensure consistent performance. - What are the signs of a clogged carburetor in a chainsaw?
Common signs include difficulty in starting the engine, a noticeable decline in engine performance, erratic idling, and the engine dying when you try to accelerate. If you notice these symptoms, it’s time to inspect and likely clean your carburetor. - Do I need special tools to clean my chainsaw’s carburetor?
Basic tools like a screwdriver, a socket set, and pliers are usually sufficient for removing and cleaning the carburetor. However, for thorough cleaning, you might need specialized tools like a carburetor cleaning brush or compressed air to remove debris from narrow passages. - Is it necessary to replace the carburetor parts after cleaning?
Not always. However, if during the cleaning process, you notice any worn-out or damaged parts, such as gaskets, diaphragms, or seals, it’s best to replace them. These components are crucial for the proper functioning of the carburetor. - Can improper carburetor maintenance affect my chainsaw’s warranty?
Yes, it can. Most manufacturers require proper maintenance for warranty validity. Ensure you follow the recommended maintenance procedures and schedules to keep your warranty intact. - How do I know if my carburetor needs adjustment after cleaning?
After cleaning, if your chainsaw doesn’t start, idles erratically, or lacks power during operation, the carburetor might need adjustment. Refer to your chainsaw’s manual for guidance on adjusting the carburetor settings, or consult a professional if you’re unsure. - What safety precautions should I take while cleaning the carburetor? Always work in a well-ventilated area, away from open flames or sparks, as you’ll be dealing with flammable substances. Wear gloves and eye protection to avoid contact with harmful chemicals. Ensure the chainsaw is turned off and completely cooled down before starting your maintenance work.
- Can cleaning the carburetor improve the fuel efficiency of my chainsaw?
Yes, a clean carburetor ensures proper air-fuel mixture, leading to better combustion and, consequently, improved fuel efficiency. Regular maintenance can significantly reduce fuel consumption and operational costs in the long run.
Your insights matter! Share your chainsaw experiences, tips, or reviews below and help guide fellow woodcutting enthusiasts. Together, let’s create a knowledgeable community where everyone can make informed, confident chainsaw choices.

David Murray
Forestry AuthorI'm David Murry, a forestry equipment specialist with a focus on chainsaw operation. With over 13 years of experience, I've honed my skills in operating and maintaining a wide range of machinery, from chainsaws to log splitters. My passion for the outdoors and commitment to sustainable forestry drive my work, which emphasizes safety, efficiency, and staying updated with industry advancements. Additionally, I'm dedicated to sharing my expertise and promoting environmental awareness within the forestry community.


Leave your comment