How To Shorten a Chainsaw Chain Without Using Spinner and Breaker
- February 2, 2024
- 1 comment
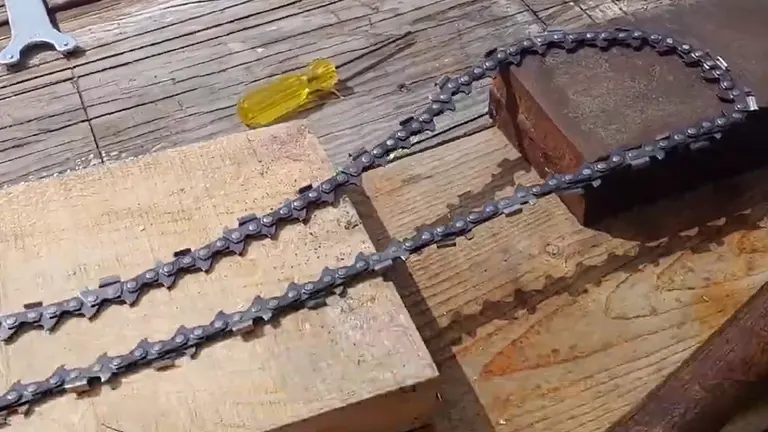
Shortening a chainsaw chain may seem like a task that requires specialized tools such as a spinner and breaker. However, it’s possible to accomplish this with a more DIY approach. This article will guide you through the process of shortening a chainsaw chain, specifically for a 42-inch bar, without the need for these specialized tools. The method outlined here involves removing links from a GB chain (3/8 pitch, 0.63 gauge) filed at ten degrees, commonly used for larger chainsaws.
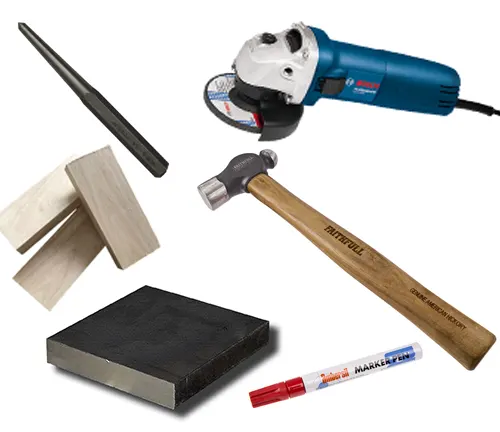
Tools Required
- Grinder: with a cutting disk (or grinding disk)
- Steel Plate: Used for tapping out saw plates and as a base when peening
- Ball-peen Hammer: For peening over the rivets
- Punch: To drive out the rivets from the chain links
- Marker: To mark the drive links for removal
- Rubber Block: To support the chain during the peening process
Preparation
Proper preparation is crucial for accurately shortening your chainsaw chain. Follow these detailed steps to ensure precision and avoid any confusion during the process:
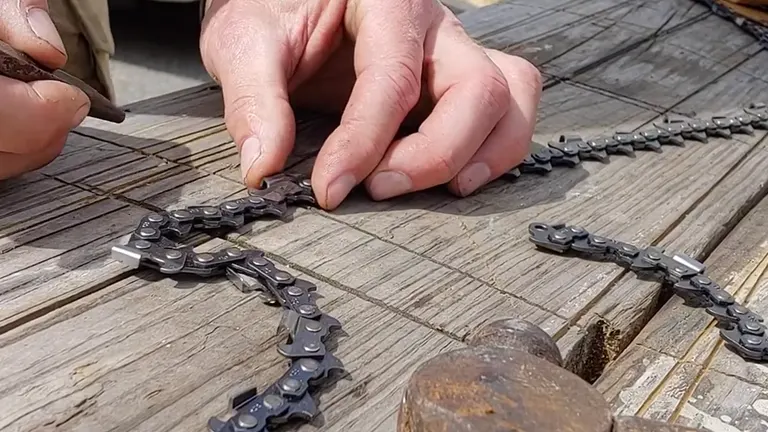
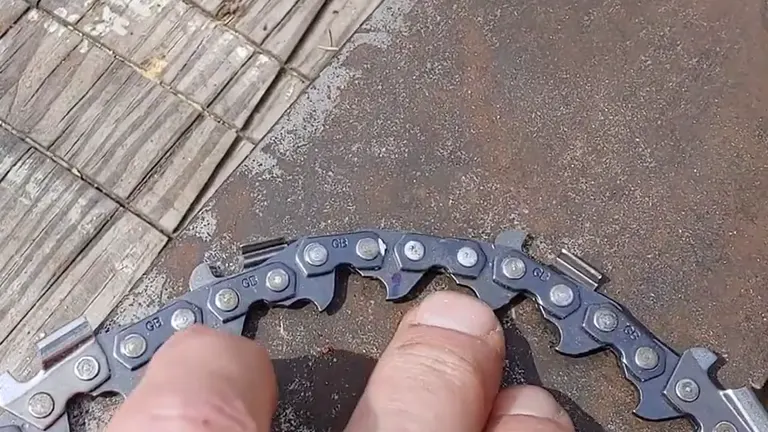
Chain Measurement and Marking
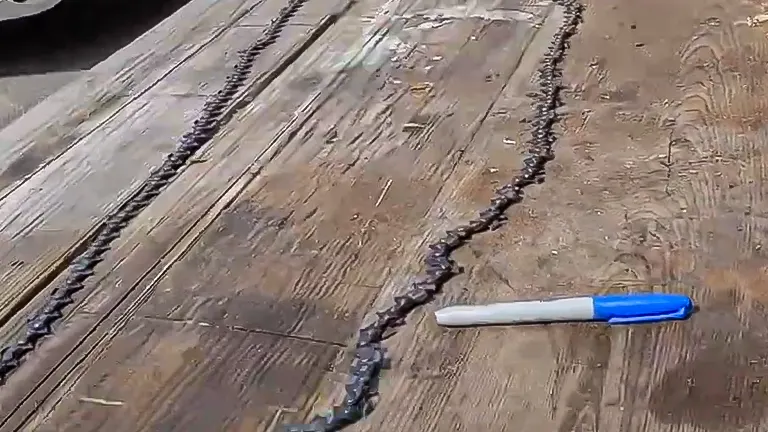
- Start by laying out your chain and counting each drive link. These are the links that sit inside the bar and drive the chain around it.
- To keep track of your count and simplify the process, use a marker to place a small but visible mark on every tenth drive link. This will help you maintain an accurate count and serve as a reference point during the chain shortening process.
- Assess the length required for your specific chainsaw bar. In this scenario, for a 42-inch bar, the chain started with 135 drive links. Knowing the original length is crucial for calculating how many links need to be removed.
Identify the Links to Remove
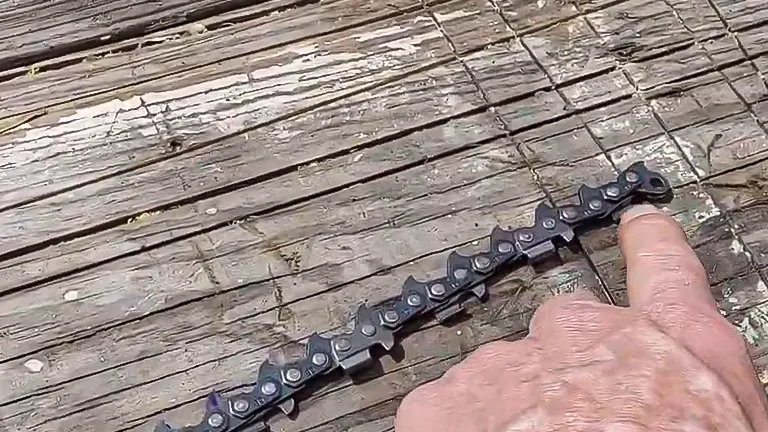
- Based on the desired length for your chainsaw bar, determine the number of links you need to remove. Remember, chains are designed with a specific number of drive links to fit different bar lengths, so this step is vital for proper chain function and safety.
- After determining which links need to be removed, use your marker to distinctly mark these links. This clear identification helps prevent any mistakes during the removal process.
- Before proceeding to the actual removal process, double-check your markings and counts. Ensuring accuracy at this stage will save you time and prevent potential issues when you fit the chain back onto the saw.
Taking the time to carefully prepare and mark your chain sets a solid foundation for the subsequent steps. Precision in these early stages is key to ensuring a successful modification of your chainsaw chain.
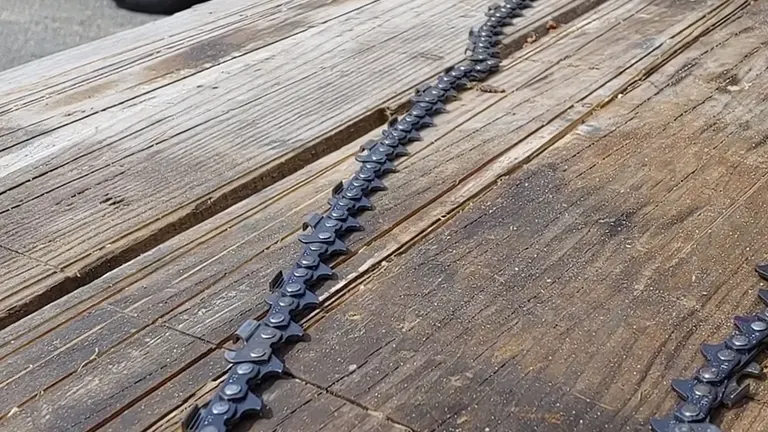
Process
Successfully shortening a chainsaw chain is a process that requires precision, patience, and the right technique. Here’s how you can accomplish this:
Grinding the Rivets
1. Set Up Your Grinder
Equip your grinder with a cutting disk suitable for metal work.
2. Grind the Rivets
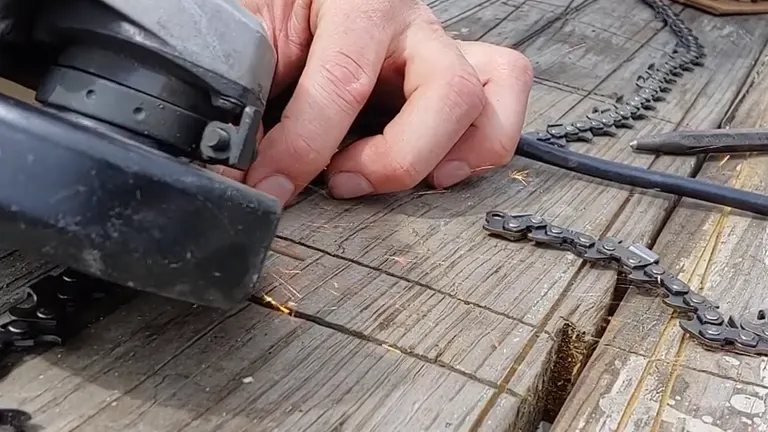
Carefully align the grinder with the marked rivets on the chain links you intend to remove. Gently grind the tops off these rivets. Exercise caution during this step to avoid cutting into the adjacent links or removing more material than necessary.
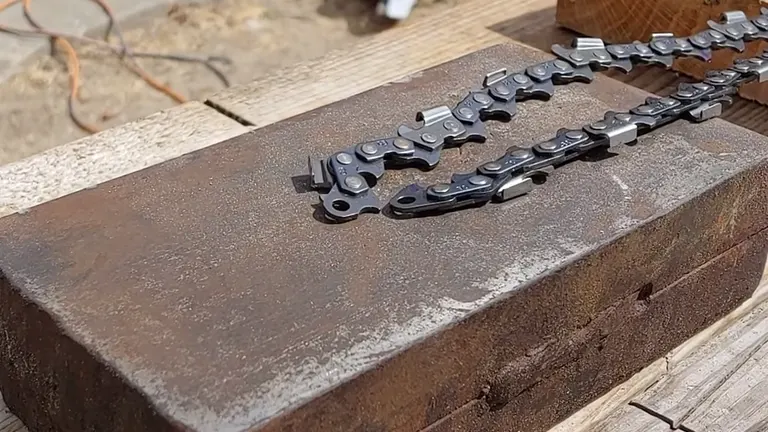
3. Inspect the Ground Rivets

After grinding, you should see the round part of the rivet, which indicates where to place the punch for removal. Ensure that the rivet’s top is sufficiently ground down to ease the punching process.
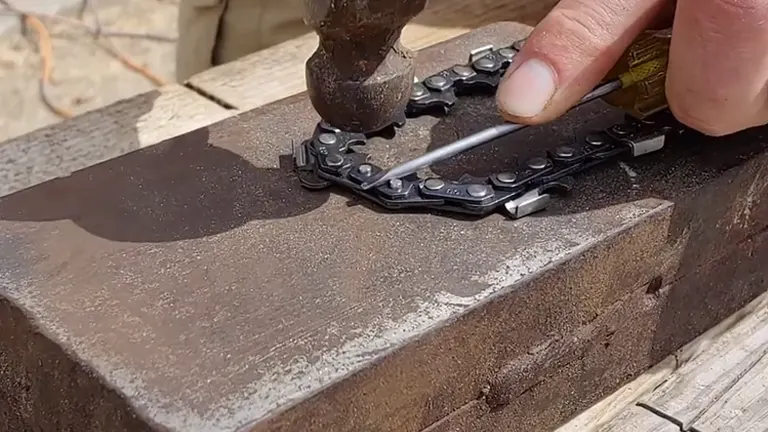
Punching Out the Rivets
1. Prepare the Chain
Lay the chain flat on the steel plate, ensuring it’s stable and well-positioned for punching.
2. Align and Punch

Place the punch centrally on the top of the ground rivet. Firmly strike the punch with the ball-peen hammer. The goal is to drive the rivet out of the link. Repeat this process for the second rivet of the link.
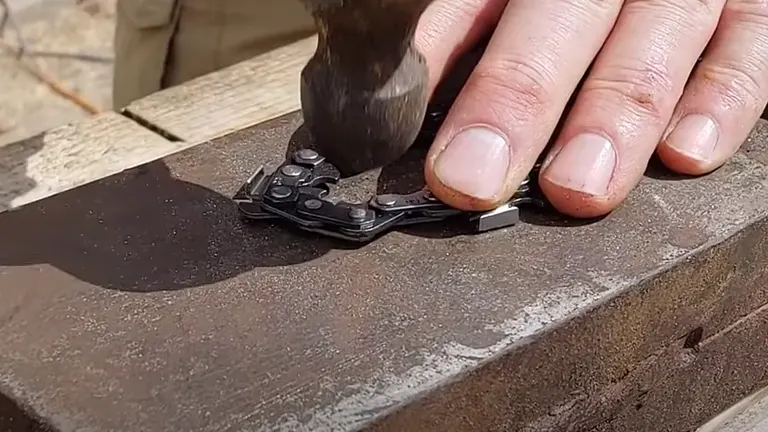
Peening the New Joint
1. Position the Chain
Move the chain so that the section you’re working on is above the rubber block placed under the steel plate. This setup provides stability and absorbs shock during peening.
2. Ensure Correct Link Orientation
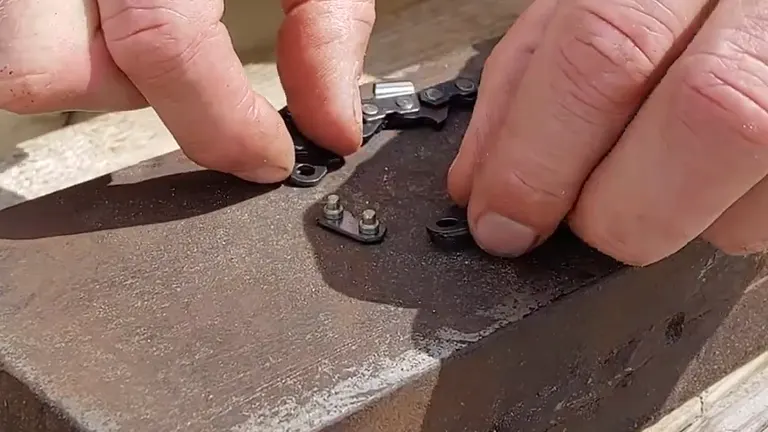
If your chain has a directional design, double-check that the new link’s orientation matches that of the existing links.
3. Start Peening
Use the rounded end of the ball-peen hammer to carefully peen the new rivet. Begin in the center and work your way outward in a circular motion making it like a mushroom head. This process secures the new link in place.
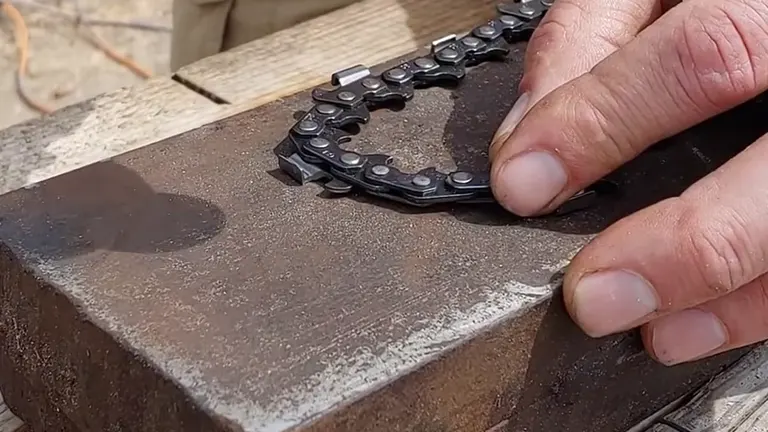
4. Check for Binding
Periodically move the chain to ensure there’s no stiffness at the newly joined links. The chain should articulate freely, without any binding or stiffness.
Final Checks and Adjustments
1. Verify Chain Length
Measure the modified chain to confirm it matches the required length for your chainsaw bar.
2. Fit and Test on the Chainsaw
Install the chain onto your chainsaw and ensure it fits correctly. The chain should sit snugly against the bar with proper tension.
3. Check Movement and Tension
After fitting the chain, check that it moves smoothly around the bar. Adjust the tension if necessary to ensure optimal performance and safety.
By following these detailed steps, you’ll be able to shorten your chainsaw chain accurately and safely, ensuring your chainsaw is ready for efficient and effective operation. Remember, taking your time and focusing on precision at each step is crucial for the best results.
Conclusion
Shortening a chainsaw chain without a spinner and breaker is indeed possible with the right technique and a few common tools. The key is precision in grinding, careful punching of the rivets, and meticulous peening to ensure the new links are securely attached. With this DIY method, you can customize your chainsaw chain length for various jobs, ensuring optimal performance and extending the utility of your chainsaw.
Remember, working with chainsaws and their components requires attention to safety and detail. Always wear protective gear, and ensure your workspace is secure and well-lit. With these precautions in mind, you’re ready to tackle chain adjustments and get back to your cutting tasks with confidence!
Related Articles:
- Why My Chainsaw Won’t Start
- Correct Way To Tune The Carburetor On A Chainsaw
- How to Store a Chainsaw So It Doesn’t Leak Oil
- Why Do Chainsaws Leak Bar Oil? Understanding the Causes and Solutions
- Do Electric Chainsaws Need Oil? Everything You Need to Know
- Can You Cut Bamboo With A Chainsaw?
FAQs
- Is it possible to maintain the original strength of the chain after shortening it using manual tools? Yes, if done correctly, the chain’s strength and integrity can be maintained. Ensuring that the rivets are properly mushroomed and the chain links are securely fastened will keep the chain strong.
- How often should a chainsaw chain be shortened instead of replaced? Shortening a chain should be a rare occurrence, mainly done when the chain stretches slightly due to wear. If the chain is noticeably damaged or the stretching is a recurring issue, it’s safer and more economical in the long run to replace it.
- Can the manual shortening method be used on all types of chainsaw chains? The method can be applied to most standard chainsaw chains. However, specialty chains with unique designs or metal compositions might not be suitable for manual shortening and may require specific tools or professional service.
- What are the signs that I’ve improperly shortened my chainsaw chain? Improperly shortened chains may exhibit uneven wear, cause the chainsaw to vibrate excessively, or lead to inefficient or unsafe cutting. If the chain doesn’t move smoothly or the links are not aligned correctly, it may need to be adjusted or professionally repaired.
- Is there a risk of damaging the chainsaw bar when shortening the chain manually? While the risk is minimal if you’re careful, improper handling or excessive force when mushrooming the rivets can lead to misalignment or damage to the chain links, which in turn can cause damage to the chainsaw bar over time. Always ensure proper alignment and smooth movement after any adjustments.
- How do I ensure the shortened chain maintains proper tension? After shortening, install the chain back on the chainsaw and adjust the tension according to the manufacturer’s guidelines. The chain should be snug against the bar but still able to rotate freely without sagging.
- Can I reuse the links or rivets that I remove from the chainsaw chain? Generally, it’s not recommended to reuse the removed links or rivets because they may have undergone wear or stress. For the best performance and safety, use new rivets and links when assembling or repairing chains.
- What safety precautions should I take when shortening a chainsaw chain manually? Always wear protective gloves and eyewear to protect against metal fragments or sharp edges. Work in a well-lit, stable environment and ensure your tools are in good condition to minimize the risk of accidents.
Join the discussion below by sharing your experiences, tips, or reviews. Your contributions help others make informed decisions and navigate their chainsaw choices with confidence. Let’s build a community of shared knowledge for all wood-cutting enthusiasts!

David Murray
Forestry AuthorI'm David Murry, a forestry equipment specialist with a focus on chainsaw operation. With over 13 years of experience, I've honed my skills in operating and maintaining a wide range of machinery, from chainsaws to log splitters. My passion for the outdoors and commitment to sustainable forestry drive my work, which emphasizes safety, efficiency, and staying updated with industry advancements. Additionally, I'm dedicated to sharing my expertise and promoting environmental awareness within the forestry community.


Good information the chains now days are for the most part junk I have over 25 that still have at least 3/4 or more of the cutting blade left that are stretch out to much to tighten it wasn't like that in the 70's,80's or early 90's thanks for the information.
Steve Thompson
February 4, 2024 4:12 pm