How to Plant a Palm Tree: Grow Your Tropical Paradise
- February 7, 2024
- 0 comment
Discover the steps to plant a palm tree & transform your garden into a tropical paradise. Learn selection, planting, & care tips for lush growth. Transform your garden into a tropical paradise by mastering the art of planting palm trees. In this comprehensive guide, you’ll discover the essential steps to select, plant, and care for palm trees, ensuring lush growth and a serene landscape. Whether you’re a novice gardener or an experienced green thumb, our tips will help you create your own slice of paradise right in your backyard. Join us as we delve into the world of palm trees and learn how to bring the beauty of the tropics to your outdoor space.
List of Guides on How to Plant a Palm Tree
Step 1: Prepare the Soil
Step 2: Dig the Planting Hole
Step 3: Remove the Palm from Its Container
Step 4: Position the Palm
Step 5: Backfill the Hole
Step 6: Water Thoroughly
Step 7: Mulch
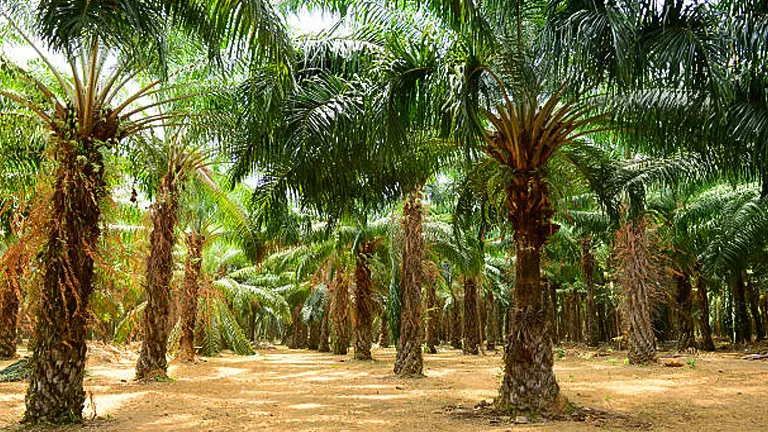
Understanding Palm Trees
Palm trees, with their distinctive silhouette, are synonymous with tropical and subtropical climates. However, their diversity means there’s a palm for nearly every landscape. From the majestic Royal Palm to the cold-hardy Windmill Palm, these versatile species can enhance a variety of garden settings. Understanding the ecological and aesthetic benefits of palm trees is the first step in integrating these iconic plants into your garden.
Different Types of Palm Trees
1. Coconut Palm (Cocos nucifera)
Iconic for its coconuts, this palm has a tall, slender trunk with a crown of large, feather-like fronds.
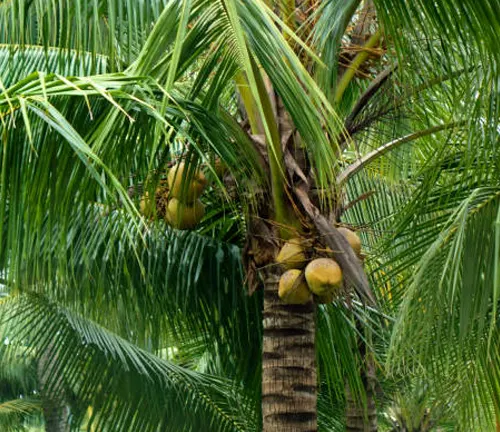
- Growth Conditions: Prefers tropical conditions, full sunlight, and sandy soils. It’s highly salt-tolerant, making it perfect for coastal areas.
- Height: Can reach up to 100 feet.
- Zones: Best suited for USDA zones 10-12.
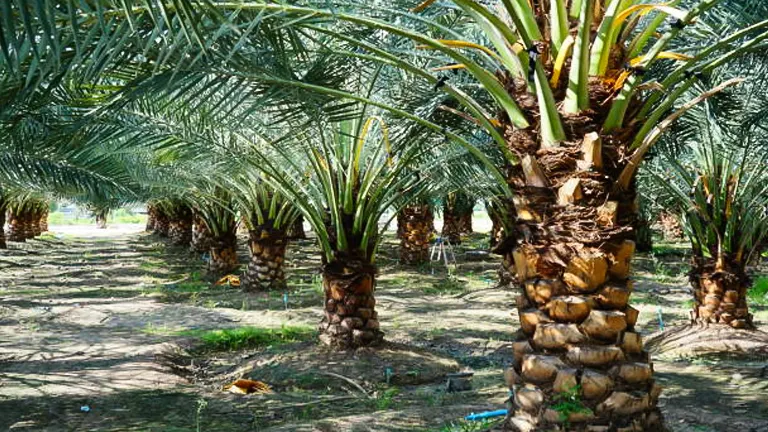
2. Date Palm (Phoenix dactylifera)
Known for producing sweet dates, this palm features a thick trunk with a crown of fronds that can grow up to 20 feet long.

- Growth Conditions: Thrives in hot, arid climates with well-drained soil.
- Height: Up to 75 feet tall.
- Zones: Suitable for USDA zones 9-11.
3. Royal Palm (Roystonea regia)
Distinguished by its smooth, white trunk and large, feathery fronds, the Royal Palm is often used as an ornamental tree in landscapes.
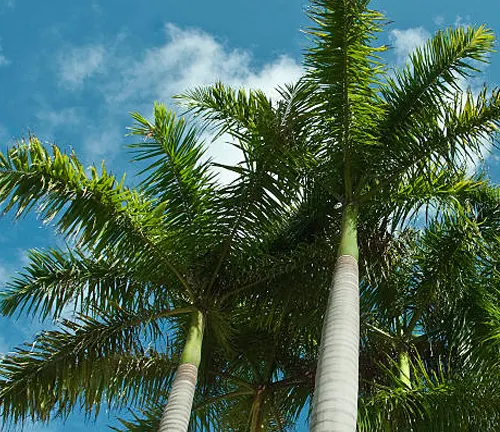
- Growth Conditions: Prefers moist, well-drained soils and full sun. Tolerant of a variety of soil types.
- Height: Can grow up to 80 feet.
- Zones: Best in USDA zones 10-11.
4. Queen Palm (Syagrus romanzoffiana)
This palm has a smooth, straight trunk with a crown of glossy, feathery fronds and produces clusters of orange fruits.
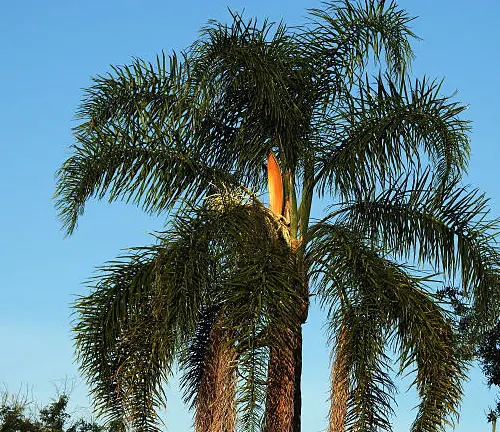
- Growth Conditions: Prefers full sun and well-drained soil. It’s moderately drought-tolerant once established.
- Height: Up to 50 feet tall.
- Zones: Suitable for USDA zones 9-11.
5. Sago Palm (Cycas revoluta)
Despite its name, it’s not a true palm but a cycad. It has a thick, shaggy trunk and stiff, feather-like fronds.
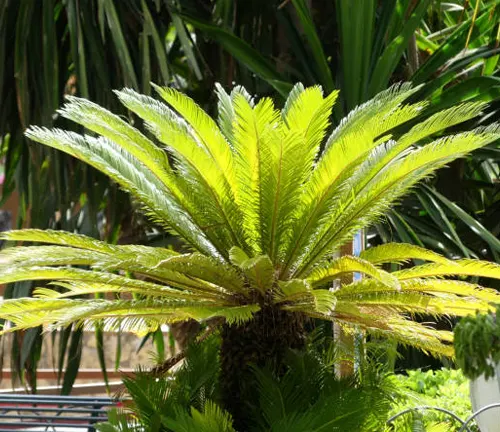
- Growth Conditions: Prefers well-drained soil and can tolerate partial shade to full sun. It’s fairly drought-tolerant.
- Height: Typically 2-10 feet, but can grow taller over many years.
- Zones: Best suited for USDA zones 8-11.
6. Washington Palm (Washingtonia robusta)
Also known as the Mexican Fan Palm, it has a tall, slender trunk with a crown of large, fan-shaped fronds.
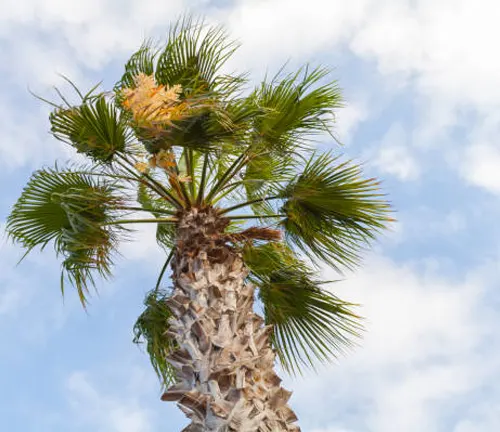
- Growth Conditions: Adaptable to various soils, it prefers full sun and can tolerate drought once established.
- Height: Can reach over 100 feet tall.
- Zones: Suitable for USDA zones 9-11.
7. Windmill Palm (Trachycarpus fortunei)
This palm is known for its tolerance to cold, featuring a hairy, fibrous trunk and fan-shaped fronds.
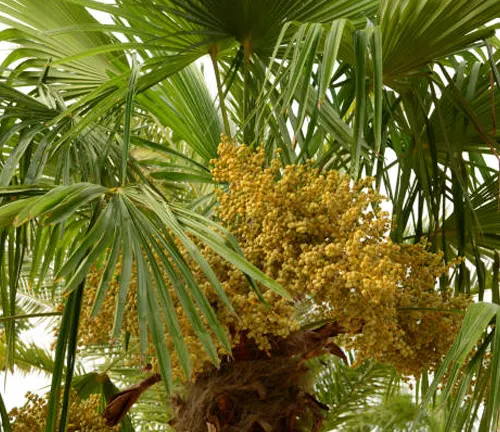
- Growth Conditions: Prefers well-drained soils and partial to full sun. It’s one of the more cold-hardy palms.
- Height: Up to 40 feet tall.
- Zones: Suitable for USDA zones 7-11.
Selecting the Right Palm Tree
The foundation of a thriving palm lies in choosing a species that matches your local climate, soil conditions, and landscape needs. Consider factors such as:
- Climate tolerance: Some palms withstand frost, while others thrive only in warmth.
- Growth habits: Understand the mature size and growth rate to ensure your choice fits your space in the long run.
- Maintenance needs: Some palms require more care than others, from regular pruning to specific soil preferences.
Highlighting popular palm species, this section will guide you through selecting the ideal palm tree for your garden, considering the unique conditions of your environment.
Pre-Planting Considerations
Proper preparation is key to your palm’s success. Selecting the right site involves considering sunlight, drainage, and space for growth. Soil preparation might require amendments to create the ideal growing conditions. Additionally, understanding the best planting times will set your palm up for success from the start. This section will delve into these critical pre-planting steps, providing a checklist for readying your garden for its new tropical addition.
Planting Your Palm Tree
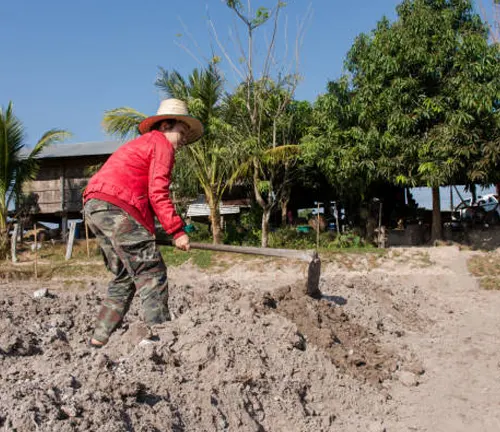
Step 1: Prepare the Soil
To prepare the soil for planting a palm tree effectively, aim for sandy loam soil that drains well, crucial for palm health. If dealing with heavy clay, it retains too much moisture, risking root issues. Conversely, sandy soil drains quickly, potentially depriving roots of nutrients and water. Address these extremes by incorporating organic matter, like compost, which enhances soil structure and fertility. Additionally, integrating a slow-release palm fertilizer into the planting hole provides essential nutrients, supporting the palm’s initial growth phase.
Tips:
- Test soil pH; palms favor a pH of 6.0-7.0. Adjust with sulfur or lime as needed.
- Ensure the site is clear of weeds and debris to reduce competition.
- For clay soils, improve drainage by constructing a raised bed.
- Evenly mix organic matter and fertilizer in the planting area, not just the hole.
- Pre-moisten soil before planting to settle it and provide a welcoming environment for the palm.
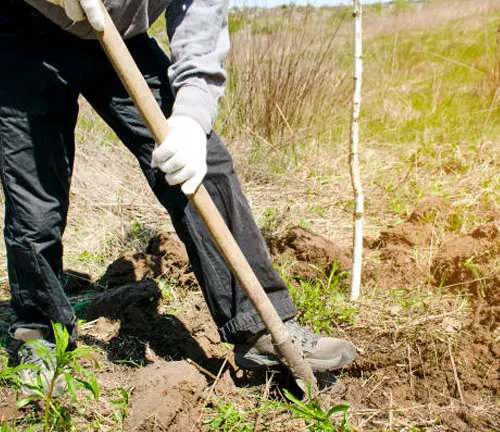
Step 2: Dig the Planting Hole
For effective palm tree planting, the hole’s dimensions are critical. It should be double the width of the palm’s root ball to facilitate root expansion, yet its depth should match the root ball’s height to prevent the base of the palm from being buried too deep, a common cause of waterlogging and root rot.
Tips:
- Use a sharp shovel for clean cuts, making it easier for roots to penetrate the surrounding soil.
- Keep the excavated soil nearby and loose for easy backfilling.
- If the soil is compacted, loosen an additional foot of soil around the hole to encourage root growth.
- Place the palm gently in the hole to avoid root damage.
- After positioning, fill the hole with water before backfilling to ensure deep soil moisture, aiding root establishment.
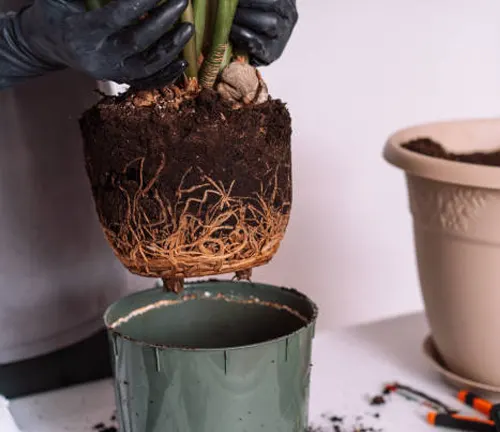
Step 3: Remove the Palm from Its Container
Removing the palm from its container correctly is essential to avoid damaging the root ball, which could hinder the tree’s growth. For palms in plastic pots, tip the pot sideways and tap the bottom and sides gently to loosen the palm. For larger palms that are difficult to maneuver, cut the container away without disturbing the root ball. When dealing with burlap-wrapped root balls, it’s okay to plant with the burlap initially in place to maintain the root structure but make sure to remove any ropes or wires that could restrict growth. After placing the palm in the planting hole, carefully cut away and remove the burlap from the top to prevent it from acting as a barrier to root expansion.
Tips:
- Water the palm in its container before removal to ensure the root ball is moist, making it easier to handle and lessening transplant shock.
- Support the palm from the bottom during removal to reduce stress on the stems and leaves.
- Inspect the root ball for circling roots and gently tease them outward to encourage proper growth.
- If roots are densely packed or pot-bound, make vertical cuts in the root ball to stimulate new growth outward into the surrounding soil.
- Handle the palm with care to avoid shaking or jarring, which can damage roots and slow recovery after planting.
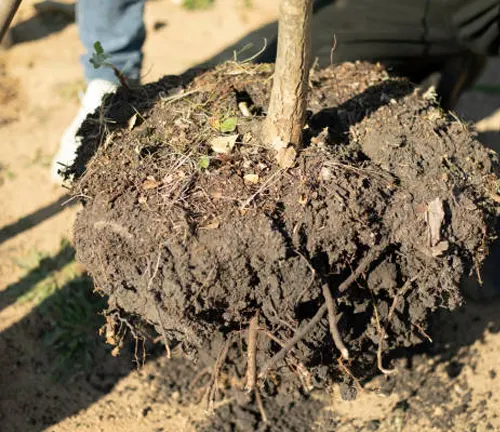
Step 4: Position the Palm
Place the palm in the center of the hole, ensuring that the top of the root ball is level with the surrounding soil surface. Adjust the depth by adding or removing soil underneath the root ball as necessary. It’s crucial not to plant the palm too deep, as this can suffocate the roots and lead to poor growth or death.
Tips:
- Before finalizing the palm’s position, step back to view it from multiple angles, ensuring it’s straight and aligned with your landscape design.
- Once satisfied with the palm’s placement, fill the hole halfway with soil, then water this layer to help settle the soil around the roots, removing air pockets.
- Continue filling the hole, compacting the soil gently around the base to stabilize the palm.
- Avoid packing the soil too tightly, as this can hinder root expansion and water penetration.
- After planting, create a water basin around the base of the palm by forming a soil berm. This helps direct water to the palm’s root zone, promoting deep root growth.
Step 5: Backfill the Hole
Fill the hole with the excavated soil, gently firming it down around the root ball to eliminate air pockets. Water the soil as you backfill to help settle it. You can mix in a palm-specific fertilizer to encourage root growth, but avoid placing fertilizer directly against the roots.
Tips:
- Layer the soil and water incrementally to ensure even settling and moisture distribution throughout the root zone.
- If the soil is particularly sandy or poor, mixing in organic compost with the backfill can enhance its nutrient content and water retention ability.
- After backfilling, gently tamp the soil with your hands rather than your feet to avoid excessive compaction, which could impede root growth.
- Leave a slight depression around the base of the palm to act as a watering well, facilitating water infiltration directly to the root zone.
- Check the palm’s stability by lightly pushing on the trunk; it should feel secure in the soil. If it wobbles, compact the soil more firmly around the base.
- Avoid burying the trunk deeper than it was in the container, as this can stress the palm and lead to rot.
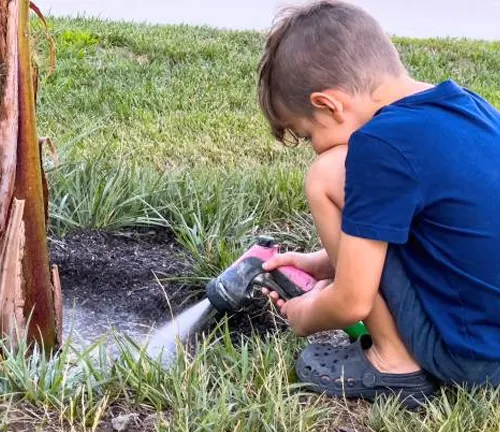
Step 6: Water Thoroughly
After planting, water the palm generously to hydrate the roots and settle the soil around them. This initial watering is crucial for establishing good contact between the roots and the soil, helping to reduce transplant shock.
Tips:
- Use a slow and steady watering approach to allow moisture to penetrate deeply, reaching the entire root zone.
- If the soil absorbs water too quickly, pause and let it soak in before adding more. This ensures water reaches deeper into the soil rather than running off.
- For the first few weeks, monitor the moisture level of the soil closely and water as needed to keep it consistently moist, but not waterlogged.
- Consider using a soaker hose or drip irrigation around the base of the palm for efficient, deep watering that minimizes water waste.
- In hot, dry conditions, you may need to water more frequently to support the palm’s recovery and growth.
- Mulching around the palm can help retain soil moisture and reduce the frequency of watering needed.
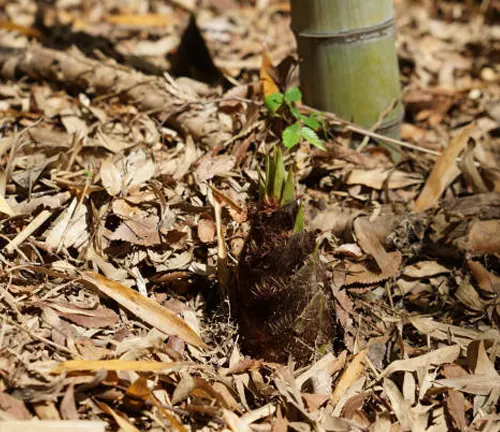
Step 7: Mulch
Apply a 2 to 3-inch layer of organic mulch around the base of the palm, leaving a small gap around the trunk to avoid moisture buildup against the bark. Mulch helps retain soil moisture, regulate soil temperature, and reduce weed competition.
Tips:
- Choose a mulch that complements the soil’s needs. For instance, compost can add nutrients to nutrient-poor soils.
- Extend the mulch layer out to the drip line of the palm, where the edges of its canopy would naturally drop water, to ensure the root area is covered.
- Avoid piling mulch against the palm trunk to prevent rot and pest issues.
- Refresh the mulch layer annually to maintain its benefits, as organic mulch will break down over time and contribute to soil health.
- Check under the mulch periodically for signs of pests or diseases and to ensure the soil moisture level is adequate.
Post-Planting Care
After planting comes the ongoing commitment to your palm’s health. Watering, fertilization, and pruning are crucial elements of care that contribute to a thriving palm. Each aspect of post-planting care will be detailed, from how often to water your new palm to recognizing the signs that it’s time to fertilize. This section ensures you have the knowledge to maintain the beauty and health of your palm, encouraging robust growth and longevity. Here’s a list of tips:
- Regular Watering: Newly planted palms require consistent moisture to establish their root systems. Water deeply to encourage roots to grow downward, promoting stability and drought resistance. Adjust frequency based on soil type, weather, and palm species needs, aiming for moist but not waterlogged soil.
- Monitoring Soil Moisture: Use a soil moisture meter or check manually by feeling the soil a few inches deep. This helps prevent over-watering or under-watering, both of which can stress the palm and lead to health issues.
- Mulching: Maintain a 2 to 3-inch layer of organic mulch around the palm, extending out to the canopy’s drip line but not touching the trunk. Mulch conserves moisture, regulates soil temperature, and suppresses weeds, creating optimal growing conditions.
- Fertilization: Wait several months before fertilizing new palms, as initial fertilizer was mixed into the planting hole. Use a slow-release palm-specific fertilizer to provide essential nutrients over time. Follow label instructions carefully to avoid nutrient burn.
- Pruning: Only prune dead or diseased fronds from the palm. Cutting green fronds can stress the tree and slow its growth. Use clean, sharp pruning tools to prevent damage and disease transmission.
- Pest and Disease Management: Regularly inspect your palm for signs of pests and diseases. Early detection is key to effective management. Treat infestations or infections promptly with appropriate, palm-safe products.
- Protection from Extreme Weather: Young palms are particularly vulnerable to frost, excessive heat, and strong winds. Provide frost protection with burlap or frost cloth during cold snaps. Consider temporary shade or windbreaks to mitigate extreme heat and wind.
- Staking (if necessary): If your palm is tall and thin or in a windy location, staking can provide additional support until the root system is established. Use soft ties and remove stakes after a year or when the palm is stable.
- Watering Basin: For the first few months, maintain a shallow watering basin around the base of the palm to direct water to the root zone. This can be gradually leveled as the palm establishes.
- Observation: Regularly observe your palm for changes in growth, leaf color, and overall vigor. Noticing changes early can be crucial for addressing issues before they become serious.
Common Challenges and Solutions
Even with the best care, palms can encounter issues, from pests to diseases and environmental stress. Identifying common problems and knowing how to address them will keep your palms in top condition. This part of the article will cover the most frequent challenges faced by palm growers, offering expert advice on prevention and treatment.
- Nutrient Deficiencies: Palms may show signs of nutrient deficiencies, such as yellowing leaves or stunted growth, due to the lack of specific nutrients like magnesium, potassium, or nitrogen.
- Solution: Use a balanced, slow-release palm fertilizer that includes micro-nutrients. Apply according to package directions, typically twice a year during the growing season.
- Pest Infestations: Common pests like spider mites, scale insects, and palm weevils can damage palms, causing yellowing leaves, holes, or general decline.
- Solution: Regularly inspect palms for pests. Treat infestations early with appropriate insecticides or natural predators. For severe cases, consult a professional.
- Diseases: Palms are susceptible to diseases such as lethal yellowing, Ganoderma butt rot, and Fusarium wilt, which can lead to the palm’s death if not addressed.
- Solution: Ensure proper planting and care to reduce stress on the palms, which can make them more susceptible to disease. Remove and destroy infected palms to prevent the spread of disease. Use fungicides when applicable and consult with a palm specialist for severe issues.
- Improper Watering: Both overwatering and underwatering can stress palms, leading to poor health or death. Symptoms include yellowing leaves, wilting, or root rot.
- Solution: Establish a consistent watering schedule that keeps the soil moist but not waterlogged. Adjust based on weather conditions, and use a moisture meter to monitor soil moisture levels accurately.
- Soil Problems: Poor soil conditions, such as compacted soil, incorrect pH, or lack of organic matter, can hinder palm growth.
- Solution: Amend compacted or poor soil with organic matter to improve structure and fertility. Test soil pH and adjust as needed using lime (to raise pH) or sulfur (to lower pH).
- Weather Damage: Frost, extreme heat, and strong winds can damage or stress palms.
- Solution: Protect palms from frost with burlap wraps or frost cloths. Provide shade during extreme heat and ensure adequate watering. Use stakes for young palms in windy areas to prevent leaning or uprooting.
- Improper Pruning: Over-pruning or cutting green fronds can weaken palms.
- Solution: Prune only dead or dying fronds and never cut the crown, where new fronds emerge. Use clean, sharp tools to avoid damaging the palm.
- Transplant Shock: Palms may experience shock after planting, shown by slowed growth or leaf browning.
- Solution: Minimize root disturbance during planting, water deeply and regularly after planting, and avoid fertilizing until new growth appears.
Enhancing Your Tropical Paradise
Beyond planting and care, creating a tropical paradise involves design, companion planting, and sustainable practices. Tips for landscaping with palms, choosing complementary plants, and adopting eco-friendly gardening techniques will help you design a cohesive, vibrant garden that reflects the essence of the tropics.
Conclusion
Growing palm trees can be a rewarding endeavor, bringing a slice of tropical serenity to your home. With the right knowledge and care, your garden can flourish, becoming a testament to the beauty and resilience of these iconic trees. This guide aims to equip you with everything you need to start your palm-growing journey, inspiring you to create a tropical paradise that thrives for years to come.
FAQs
- When is the best time to plant a palm tree?
Plant in spring to early summer to give the palm time to establish before colder weather. - How do I pick the right palm tree for my area?
Consider your climate, soil type, and the space you have. Look for palms that can thrive in your zone and consult with local nurseries. - What’s the correct way to prepare the planting hole?
The hole should be twice as wide as the root ball but only as deep, promoting proper root spread and avoiding waterlogging. - Can I plant a palm tree close to my house?
Yes, but ensure it’s planted at a distance that accommodates its full size at maturity, avoiding damage to your property. - What’s the right watering schedule for a new palm?
Water generously after planting, then maintain consistent moisture, especially in the first few months. Adjust frequency based on weather and soil. - When should I fertilize my newly planted palm?
Wait 2-3 months before fertilizing, then use a slow-release palm-specific fertilizer according to package instructions. - How can I protect my palm tree during winter?
Use frost cloths or blankets for cold-sensitive palms, and apply mulch to insulate the roots. Consider a portable greenhouse for smaller palms. - What are signs that my palm tree isn’t doing well?
Yellowing or browning leaves, stunted growth, and drooping fronds can indicate issues like nutrient deficiencies, improper watering, or disease. Adjust care as needed and seek professional advice for serious problems.
Planting a palm tree is the first step towards your very own tropical paradise. With the right care and attention, your garden will soon flourish into a serene oasis. Happy planting!

Benjamin Brooks
Forestry AuthorGreetings! I'm Benjamin Brooks, and my journey over the past 15 years has revolved around the fascinating realms of content creation, expertise in snow clearing, and the intricate world of lumberjacking and landscaping. What began as a simple curiosity about the natural world and heavy machinery has evolved into a passionate profession where my love for crafting words intertwines seamlessly with my lumberjacking and garden skills.


Leave your comment