When to Remove Humidity Dome for Seedlings: Timing for Optimal Growth
- February 15, 2024
- 0 comment
The journey from seed to seedling is one of the most critical phases in a plant’s life cycle. For gardeners, ensuring the health and vitality of seedlings during this early stage is paramount to the success of their garden. One key tool in this endeavor is the humidity dome, which creates a microenvironment conducive to seed germination and early seedling growth. This article aims to provide gardeners with a detailed guide on the optimal timing and methods for removing the humidity dome, ensuring that seedlings transition smoothly to their next growth phase.
What Are Humidity Domes and Why They Matter
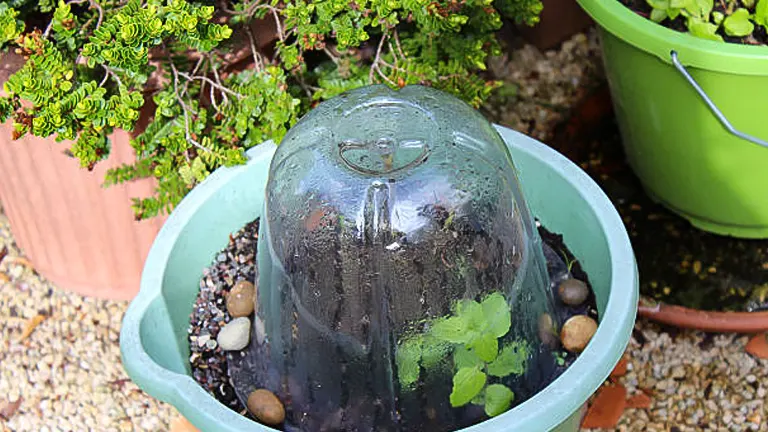
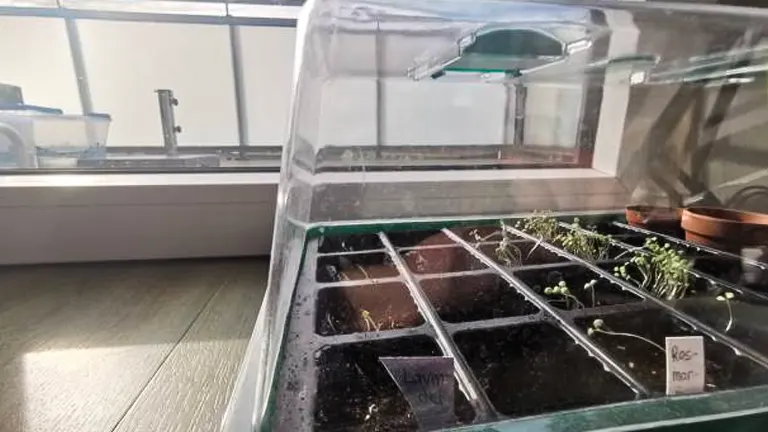
Humidity domes are clear, plastic covers designed to fit over seedling trays. Their primary purpose is to retain moisture and heat, creating a high-humidity environment that is ideal for seed germination and the initial stages of seedling development. The science behind humidity control is straightforward yet profound: high humidity levels reduce water loss through evaporation, ensuring that seedlings remain hydrated and can dedicate more energy to growth rather than survival. This controlled environment mimics the natural conditions seeds would find in the wild, offering them the best start in life.
The Right Time to Remove the Humidity Dome
Removing the humidity dome at the appropriate time is pivotal for ensuring the successful growth and development of seedlings. This decision should be informed by both observable growth milestones and environmental conditions, supported by a scientific understanding of plant physiology and environmental impact on seedling acclimatization.
Key Indicators for Dome Removal
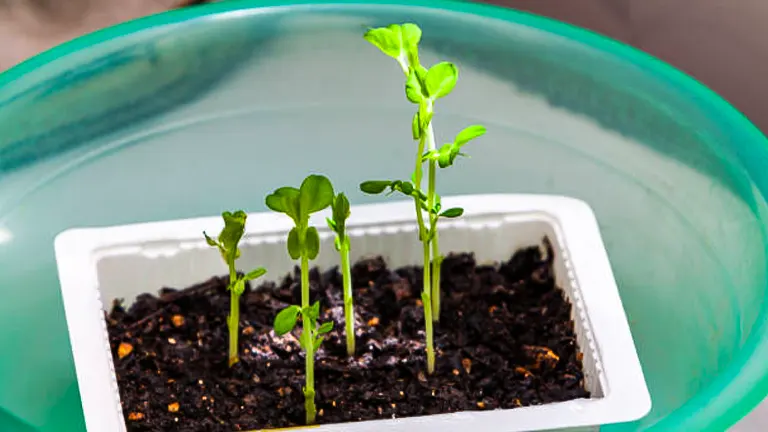
- True Leaf Development: The emergence of true leaves, as opposed to cotyledons (the first leaves), is a significant indicator of a seedling’s readiness. True leaves are a sign that the seedling has commenced photosynthesis actively, producing its own food, and is less reliant on the stored energy in the seed. Scientifically, this stage indicates a shift in the plant’s metabolic processes, requiring a gradual adjustment to external environmental conditions.
- Root System Growth: A well-developed root system is crucial for water and nutrient uptake. Visible roots at the bottom of the container or emerging from the soil signify that the seedling has established a network capable of supporting more independent growth. This root development correlates with the plant’s increased resilience and ability to sustain itself outside the high-humidity dome environment.
- Seedling Resilience: The ability of seedlings to withstand minor fluctuations in moisture and temperature is a testament to their readiness for transition. This resilience is often observed as a stable growth rate and vigor in the face of slight environmental changes, indicating that the seedling’s internal systems have adapted to manage stress effectively.
Scientific Parameters for Seedling Acclimatization
| Factor | Optimal Range | Scientific Notes | Importance for Seedlings |
|---|---|---|---|
| Relative Humidity (RH) | 60-70% | Gradual reduction from >90% inside dome. | Prevents sudden water loss through transpiration, easing the transition to ambient conditions. |
| Temperature | 18-24°C (65-75°F) | Mimics optimal germination and early growth temperatures. | Supports enzymatic activities and metabolic processes crucial for growth. |
| Light Intensity | 200-400 μmol/m²/s | Photosynthetically Active Radiation (PAR) range. | Ensures efficient photosynthesis without overwhelming young photosynthetic apparatus. |
| CO₂ Concentration | 400-600 ppm | Ambient levels are about 400 ppm; slight elevation promotes photosynthesis. | Enhances carbon assimilation, contributing to faster growth and development. |
| Oxygen Concentration at Root Zone | 8-10 mg/L | Essential for root respiration. | Supports nutrient uptake and prevents anaerobic conditions that could lead to root diseases. |
| Soil Moisture Content | 50-70% field capacity | Balance between water availability and aeration. | Ensures adequate hydration without compromising root oxygenation. |
| Photoperiod | 16/8 hours light/dark | Simulates long-day conditions conducive to vegetative growth. | Aligns with the natural growth cycle, promoting strong vegetative development. |
Additional Scientific Insights:
- Light Spectrum: Introducing full-spectrum LED lights or ensuring exposure to sunlight filtered through a shade cloth can provide the broad spectrum necessary for healthy seedling growth. Light in the blue spectrum (450-495 nm) is particularly important for promoting leaf development, while red light (620-750 nm) supports stem elongation and flowering.
- Environmental Stress Conditioning: Incremental exposure to varying conditions not only hardens seedlings but also activates their innate defense mechanisms. This process involves the upregulation of protective proteins and compounds, such as heat shock proteins and antioxidants, which safeguard cellular integrity and enhance resilience against environmental stresses.
- Nutrient Availability: Initial post-dome soil or growing medium should be lightly enriched with a balanced NPK (Nitrogen, Phosphorus, Potassium) formulation. For seedlings, a diluted solution at quarter strength can prevent nutrient burn while supporting essential growth.
Environmental Conditions and Scientific Analysis
The ambient conditions of your growing area play a crucial role in determining when to remove the humidity dome. Key factors include relative humidity and temperature, both of which should align closely with the seedlings’ adaptive capacities post-dome removal. Scientific analysis suggests that gradual exposure to varying conditions enhances plant resilience, promoting the development of stress-response mechanisms.
Preparing Seedlings for the Transition
Transitioning seedlings from the protective environment of a humidity dome to external conditions is a critical step that necessitates careful planning and execution. This process is not just about changing physical conditions but also about supporting the seedlings in developing resilience and adaptability. Enhanced preparation involves detailed strategies for gradual acclimatization, precise watering adjustments, and careful management of light and temperature.
Gradual Acclimatization: A Closer Look
- Stepwise Ventilation: Begin with incrementally opening the dome vents—or if your dome lacks vents, slightly prop open the dome—starting with just a few minutes each day and progressively increasing the duration. This controlled exposure helps seedlings adjust to the ambient air gradually.
- Humidity Monitoring: Use a hygrometer to monitor the humidity levels inside and outside the dome. Aim to decrease the dome’s humidity by 5-10% each day until it matches the ambient humidity, facilitating a smoother transition.
- Resilience Building: Introduce slight variations in temperature and airflow to stimulate the seedlings’ natural adaptive responses, strengthening their resilience. This can be achieved by placing a fan near the seedlings to create gentle air movement, simulating natural breezes.
Adjusting Watering Practices: Beyond Moisture
- Soil Moisture Sensors: Consider using soil moisture sensors to gauge the exact moisture levels in your seedlings’ environment. This technology can provide precise data, helping to avoid over or under-watering.
- Water Quality: The transition period is an excellent time to start using rainwater or filtered water to reduce the risk of salt accumulation, which can stress young plants. Soft water is preferable as it contains fewer salts than hard tap water.
- Watering Technique: Shift from top-watering to bottom-watering to encourage deeper root growth and prevent fungal issues on the soil surface. This method involves placing water in the tray beneath the seedlings’ containers, allowing the water to be absorbed upward into the soil.
Light and Temperature Considerations: Optimizing Growth Conditions
- Gradual Light Introduction: Use shade cloth or diffused light to initially shield seedlings from direct sunlight. Gradually decrease the shading over a week, allowing the seedlings to acclimate to full sunlight without experiencing photostress.
- Temperature Gradients: Implement a temperature gradient in your growing area to mimic the natural cooling off at night. This can be done by slightly lowering the temperature during the night, which can enhance root development and plant growth. Ideal temperature ranges during this stage are 20-24°C (68-75°F) during the day and 16-18°C (60-64°F) at night.
- Thermal Adaptation: Introducing seedlings to their future growing conditions can involve thermal adaptation practices. If seedlings are to be transplanted outdoors, exposing them to the temperature fluctuations they will face in their permanent location helps in building their thermal tolerance.
Step-by-Step Guide to Removing the Humidity Dome
The transition from a high-humidity environment under the dome to the ambient air is critical for seedling development. Following a structured approach can minimize stress and shock to the seedlings, encouraging healthy growth.
- Start with Short Intervals: Begin by opening the dome for just a few minutes each day. This gradual introduction to the external environment helps seedlings adapt without overwhelming them.
- Gradually Increase Exposure: Over the course of a week, gradually increase the amount of time the dome is removed. Pay attention to the seedlings’ response to these changes; signs of stress may indicate the need to slow down the process.
- Monitor Seedling Hydration: As the dome is progressively opened more, seedlings will begin to lose moisture more rapidly. Increase watering slightly to compensate, but be cautious of overwatering. The soil should be moist, not soggy.
- Adjust to Ambient Light and Temperature: Seedlings under domes are used to stable conditions. As you remove the dome, ensure that seedlings are not placed in direct sunlight or exposed to cold drafts. Gradual exposure to natural light conditions is key to strengthening them without causing damage.
- Complete Removal: Once seedlings have been acclimated to the open air for several hours a day without signs of stress, you can remove the dome entirely. Continue to monitor closely, as the first few days after dome removal are crucial for adapting to the new environment.
Troubleshooting Common Issues Post-Dome Removal
After the humidity dome is removed, you might encounter a few challenges. Here’s how to address them:
- Over-Watering and Under-Watering: Monitor the soil’s moisture level closely. Over-watering can lead to root rot, while under-watering can cause the seedlings to dry out. Use a finger to check soil moisture, and ensure drainage is adequate.
- Managing Light Exposure: Too much direct sunlight can scorch young seedlings, whereas too little can lead to weak, leggy growth. Find a balance with indirect light or use a grow light that can be adjusted in intensity.
- Signs of Distress: Wilting, discoloration, or drooping can indicate stress from over-watering, under-watering, or sudden changes in temperature or light. Adjust your care routine accordingly, and consider if any recent changes might have caused the stress.
Advanced Tips for Ensuring Seedling Success
For those looking to optimize their seedlings’ growth further:
- Fine-Tuning Environmental Factors: Use a hygrometer to monitor humidity and a thermometer for temperature, adjusting your gardening space as needed to maintain ideal conditions for your specific plants.
- Introducing Fertilization: Once seedlings have established their first true set of leaves, you can begin to introduce a diluted, balanced fertilizer to support their growth. Be cautious with the amount and frequency to avoid nutrient burn.
- Preparing for Transplanting: As seedlings outgrow their initial containers, prepare for transplanting by hardening them off to outdoor conditions if they will be moved to a garden, or potting them up into larger containers with fresh potting mix to encourage continued growth.
Conclusion
Removing the humidity dome is a significant step in the life of a seedling, marking its transition from a protected environment to one where it must withstand more variable conditions. By following the guidelines outlined in this article, gardeners can ensure this transition is as smooth and stress-free as possible, laying the foundation for healthy, robust seedlings ready to grow into thriving plants. Gardening is a journey of continuous learning and adaptation; applying these insights to your seedling care routine will enhance your gardening success and enjoyment.
FAQs
- When exactly should I start removing the humidity dome?
Begin removing the humidity dome when most of your seedlings have developed their first set of true leaves, which usually happens a couple of weeks after germination. This indicates that the seedlings are ready to start adapting to less humid conditions. - How can I tell if my seedlings are ready for less humidity if they haven’t developed true leaves yet?
Look for other signs of readiness, such as a strong stem, vigorous growth, and the seedling beginning to fill the space within the dome. Additionally, if you notice condensation significantly reducing inside the dome, it may indicate that the environment is becoming too moist, signaling a good time to start acclimatization. - What’s the risk of removing the humidity dome too early?
Removing the dome too early can expose seedlings to lower humidity levels than they can tolerate, leading to moisture stress, wilting, and potentially stunting their growth. It’s crucial to ensure they are sufficiently developed to handle the transition. - Can the type of plant affect when to remove the dome?
Yes, different plants have varying humidity needs and tolerance levels. Some seedlings, particularly those from tropical origins, might require longer under the dome, while others from drier climates may benefit from earlier exposure to ambient conditions. - How do I adjust the watering routine after removing the dome?
Once the dome is removed, seedlings will start losing moisture more quickly. Begin checking the soil moisture more frequently and water as needed to keep the soil consistently moist but not waterlogged. It’s a balance between maintaining moisture and preventing overwatering. - What if my seedlings look droopy after removing the dome?
If seedlings appear droopy immediately after dome removal, it might be a sign of shock from the sudden change in humidity. You can temporarily replace the dome for part of the day to gradually reintroduce them to the new conditions, ensuring a smoother transition. - Is there a way to harden off seedlings while still using the dome?
Absolutely. Start by opening any vents on the dome or propping it open with a small object for a few hours each day, gradually increasing the time over a week. This method allows you to control the transition process, hardening off the seedlings by slowly introducing them to the outside environment. - After removing the dome, should I immediately expose seedlings to direct sunlight?
No, direct sunlight can be too intense for newly exposed seedlings. Begin with indirect light or a shaded area, gradually increasing their exposure to direct sunlight over a week or more. This gradual introduction helps prevent sunburn and reduces the risk of stress on the plants.
As we’ve explored, removing the humidity dome at the right time is crucial for the healthy growth of seedlings. By observing your plants for signs of readiness and gradually acclimatizing them to their new environment, you can ensure a seamless transition. Remember, the goal is to nurture resilient plants capable of thriving under less controlled conditions. With patience and attentiveness, you’ll set the stage for a vibrant and robust garden. Happy gardening!

Benjamin Brooks
Forestry AuthorGreetings! I'm Benjamin Brooks, and my journey over the past 15 years has revolved around the fascinating realms of content creation, expertise in snow clearing, and the intricate world of lumberjacking and landscaping. What began as a simple curiosity about the natural world and heavy machinery has evolved into a passionate profession where my love for crafting words intertwines seamlessly with my lumberjacking and garden skills.


Leave your comment