How to Make a Planter Wall
- January 9, 2024
- 0 comment
Diving into the art of crafting your planter wall is not only enjoyable but also a fantastic way to personalize your space with a touch of nature. Building a planter wall allows you to showcase your favorite plants in a unique and visually appealing manner. Whether you’re a seasoned DIY enthusiast or a beginner looking to introduce greenery into your surroundings, this easy-to-follow guide will help you create a charming floating planter wall. Grab your tools, let your creativity flow, and transform your space into a thriving oasis that reflects your style and passion for plants!
List of Guides on How to Make a Planter Wall
- Dimensions and Precision
- Meticulous Marking and Drilling
- Aesthetic Staining or Painting
- Secure Joining with Screws and Glue
- Assembly
- Reinforcing with Backing
- Interlocking with Wire
- Elegant Hanging Options
- Add Potted Plants
Materials Needed:
- Cedar Picket Fence: Choose high-quality cedar for durability and a natural, appealing aesthetic.
- 2×4 and 2×8 Lumber: Opt for treated lumber to withstand outdoor conditions and ensure longevity.
- Metal Rods: Select corrosion-resistant steel rods to prevent rusting when exposed to the elements.
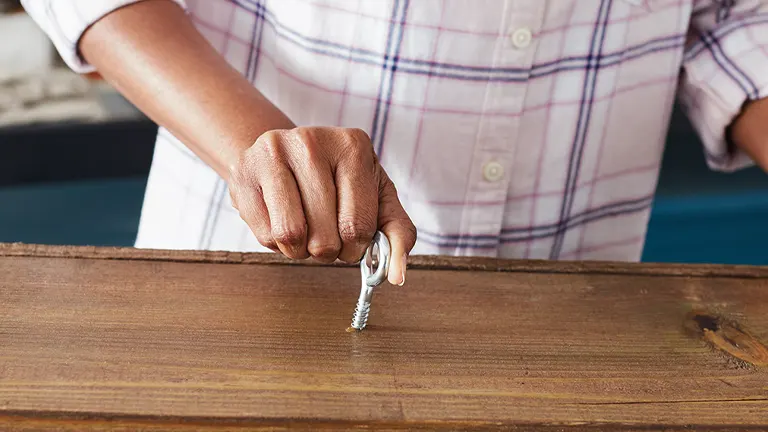
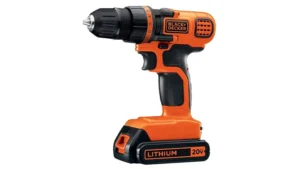
- Drills and Screws: Use a cordless drill for efficiency, and ensure screws are suitable for outdoor use.
- Paint and Wire: Consider outdoor-grade paint for longevity, and use durable wire for stability.
- Plants and Pots: Choose a variety of plants suitable for your climate, and ensure pots have lips for stability.
Tools Required:
- Saw: A compound miter saw or circular saw will provide precise cuts for a professional finish.
- Wire Cutters: Use quality wire cutters to easily manipulate and secure wires during assembly.
- Tape Measure and Pencil: Precision is key, so invest in a reliable tape measure and quality pencils.
Step-by-Step Instructions:
Step 1: Dimensions and Precision
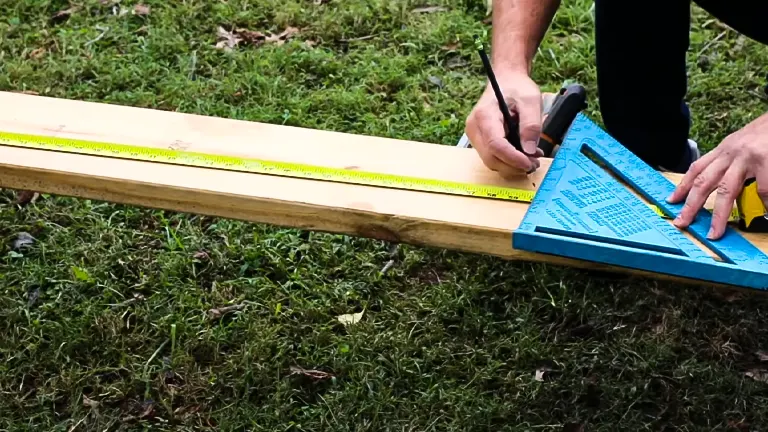
Begin by preparing your materials for the planter wall. Cut the 2- x 8-inch x 8-foot lumber into specific lengths: (2) at 64 inches and (2) at 35 inches. This foundational step sets the stage for the structure’s base, ensuring stability and balance.
Take a moment to consider the natural patterns and grains of the wood. Align your cuts with these features, enhancing the visual appeal of your planter wall. This attention to detail not only adds to the aesthetics but also showcases a thoughtful approach to craftsmanship.
Next, cut the 3/4- x 6-inch x 6-foot wood fence pickets into (11) pieces at 38 inches each. These pieces will contribute to the overall design and support of the planter wall, forming its external facade.
Now, turn your attention to the metal elements. Use a hacksaw to cut the 1/4- x 48-inch plain steel round rod into (16) pieces at 37 inches. Additionally, cut the 1/4- x 72-inch plain steel round rod into (8) pieces at 63 inches each. These metal rods will play a crucial role in the structural integrity of your planter wall, providing support for the plant-holding elements.
Tip:
- Lightly sand the edges of both the wood and metal before making final cuts to achieve a polished look and minimize sharp edges. This small detail adds to the overall craftsmanship of your planter wall.
- Prioritize safety when using the hacksaw. Wear appropriate protective gear, including safety glasses and gloves, to prevent any accidents or injuries during the cutting process. Ensuring a safe workspace contributes to a smooth and enjoyable DIY experience.
Step 2: Meticulous Marking and Drilling
For the 64-inch lumber, follow the established pattern, marking two rows 3/4-inch in from each edge at 4-inch intervals. This meticulous approach ensures uniformity in the placement of holes, contributing to the structural integrity of your planter wall.
For the 35-inch lumber pieces, adhere to the same 3/4-inch markings but adjust your intervals to 8-inch, 16-inch, 24-inch, and 32-inch. Be mindful of the 4-inch space left after the 32-inch mark; this serves as the bottom of the planter, adding a thoughtful touch to the overall design.
Before you proceed with drilling, take a moment to tape the drill bit at a 1-inch depth. This precautionary measure prevents over-drilling, safeguarding the integrity of your lumber pieces. When drilling holes with a 1/4-inch drill bit at marked intervals, maintain a steady hand for clean and precise holes that accommodate the metal rods seamlessly.
Tips:
- Simplify the measuring process by snapping a chalk line down the length of each board, positioned 3/4-inch in from the edge. This visual guide streamlines your measurements, ensuring accuracy and efficiency throughout the marking and drilling steps.
- When marking the lumber, maintain a consistent pressure with your pencil to achieve uniform lines. This ensures accuracy in placement and a clean, professional look.
- Pay attention to the spacing between your marks. Consistent intervals contribute to the aesthetic appeal and overall balance of your planter wall. A ruler or measuring tape can be invaluable for maintaining uniformity.
Step 3: Aesthetic Staining or Painting
Begin by applying stain or paint to all lumber pieces, ensuring a comprehensive transformation that enhances both the appearance and durability of your planter wall. Take the time to consider the natural characteristics of the wood; this mindful approach can accentuate the unique grains and patterns, adding a touch of organic elegance to your outdoor centerpiece.
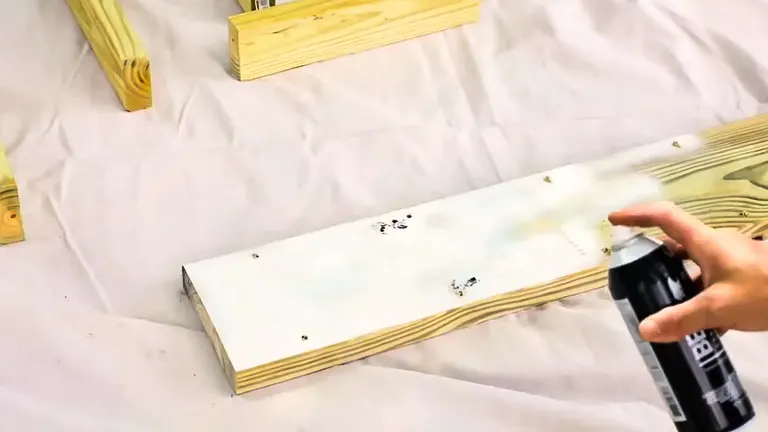
For the steel rods, opt for spray paint if you desire a sleek and uniform finish. This efficient method not only ensures an even coat but also reaches intricate details, contributing to a polished look. Be mindful that steel rods are prone to rust when exposed to weather conditions, making the protective layer of paint essential. Choosing a color that complements your overall design not only prevents rust but also adds a cohesive aesthetic element to your planter wall.
Consider experimenting with different finishing techniques to add depth and character to your project. Distressing or layering can create a textured effect, giving your planter wall a unique and personalized touch. This step allows you to express your creativity and contribute to the distinctiveness of your outdoor space.
Tip: When applying paint or stain, consider using a brush or sponge for an even application. This method allows you to work the product into the wood’s surface, ensuring optimal coverage and a professional finish
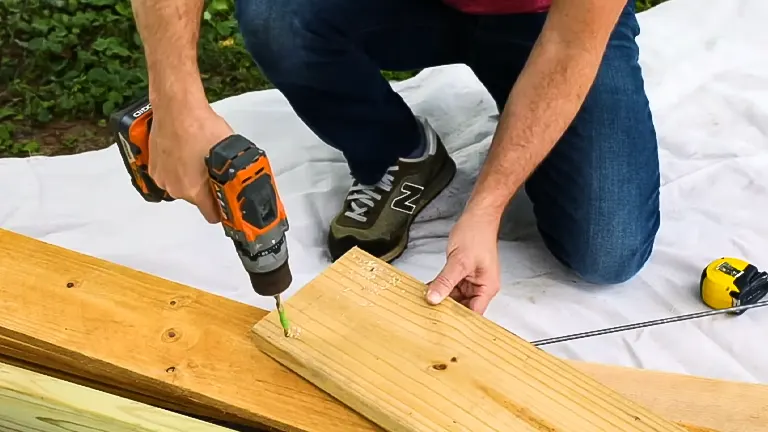
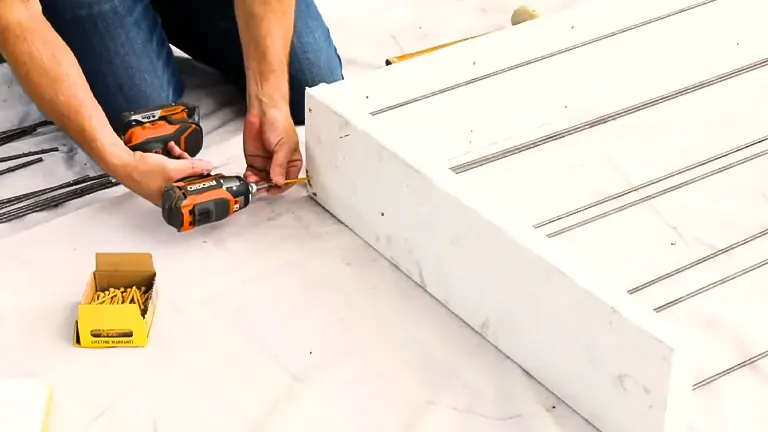
Step 4: Secure Joining with Screws and Glue
Begin by ensuring a flat and level surface for assembly. This simple step lays the groundwork for a planter wall that sits seamlessly in your outdoor space. Consider using a carpenter’s square to guarantee precise angles as you assemble the “L” shape, ensuring a sturdy and well-aligned structure.
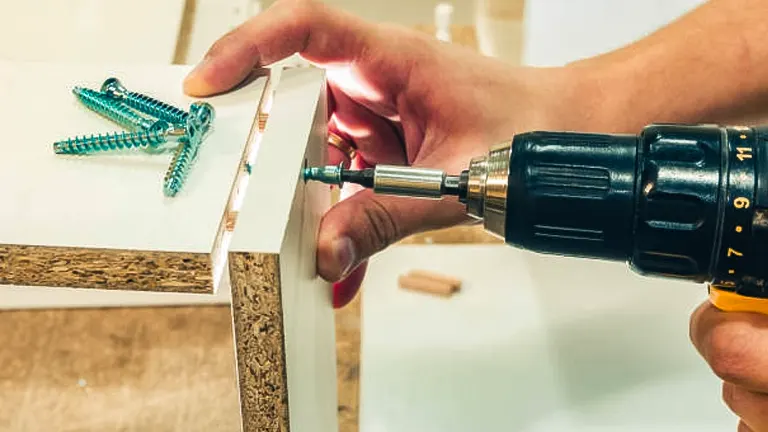
When screwing the 2- x 8- x 64-inch board to the side of the 2- x 8- x 35-inch board, strategically place screws at intervals along the length. To enhance the bond, consider using exterior wood glue between the boards before securing them with screws. This dual-application method fortifies the connection, providing both immediate stability and long-term resilience against outdoor elements.
Be mindful of screw length; using screws that are too long can compromise the structural integrity of the wood. As a general guideline, choose screws that penetrate the depth of the board without protruding excessively. This ensures a secure and visually appealing finish.
Consider pre-drilling pilot holes before inserting screws. This simple yet effective step minimizes the risk of wood splitting, especially near the board’s edges. It’s a small precaution that contributes to the overall longevity of your planter wall.
Once the “L” shape is assembled, take a moment to assess its stability. If needed, make adjustments to ensure that the boards are flush and the angles are precise. This attention to detail in the early stages sets the stage for a planter wall that stands not just physically but aesthetically.
Additional Tips:
- Even Pressure Application: When applying wood glue, distribute even pressure across the entire surface for uniform adhesion. This ensures a consistent bond that enhances both strength and longevity.
- Cleanup for Aesthetic Finish: Wipe away excess glue immediately with a damp cloth to prevent unsightly dried residue. This proactive step contributes to a cleaner finish that requires minimal post-assembly touch-ups.
- Consider Clamping: If feasible, use clamps to hold the boards together during the bonding process. This aids in maintaining alignment and allows for a tighter, more secure connection.
- Temperature Consideration: Be mindful of the ambient temperature during assembly. Extreme temperatures can affect the drying time of the glue, so choose a moderate environment for optimal bonding.
Step 5: Assembly
Start by laying the assembled unit on a flat surface, a critical step that establishes the foundation for the upcoming assembly. Gently insert the steel rods into the pre-drilled holes, ensuring a snug fit. Take a moment to verify that each rod is securely in place, applying slight pressure to guarantee a firm hold. For any resistant rods, a soft mallet or hammer can be employed judiciously to tap them into position, balancing force and finesse.
Position the second 2- x 8- x 35-inch board on the opposite side of the assembled unit. Align it meticulously to ensure the 4-inch space and holes correspond precisely with the opposite end. Insert the rods into the designated holes and, for added stability, apply a strategic combination of screws and exterior wood glue to anchor the board firmly to the bottom. This method not only reinforces the planter wall but also contributes to its longevity in outdoor conditions.
Moving to the top piece, align it meticulously and insert the rods vertically into the exterior of the horizontal rods. Secure the lumber in place by utilizing a combination of screws and exterior wood glue. This multi-pronged approach ensures a cohesive and enduring bond, elevating the overall stability of your planter wall.
Additional Tips:
- Avoid Over-tightening Screws: While it’s essential to secure components, over-tightening screws can lead to wood splitting or distortion. Exercise caution and use a torque-appropriate setting on your drill to prevent potential issues.
- Check Alignment Regularly: Throughout the assembly process, periodically check the alignment and symmetry of the planter wall. Adjustments made early on contribute to a visually pleasing and structurally sound finished product.
- Prevent Glue Squeeze-Out: When applying wood glue, be mindful of excess glue squeezing out during assembly. Use a damp cloth to wipe away any surplus glue promptly, preventing unsightly residue on the finished planter.
- Consider Using Wood Clamps: Utilize wood clamps to hold components in place during assembly. This additional support ensures precise alignment and facilitates a seamless joining of elements.
Step 6: Reinforcing with Backing
Begin by affixing wood fence pickets to the rear of the planter square, ensuring careful alignment with the existing structure. This added support not only strengthens the entire unit but also imparts durability to the planter wall. Use exterior wood glue in conjunction with screws to securely fasten the fence pickets, establishing a unified and long-lasting connection.
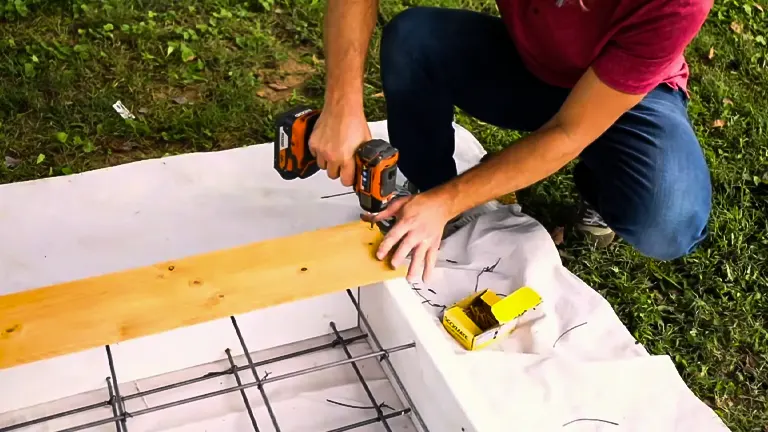
Intentionally create a 3/4-inch gap from both the top and bottom edges while attaching the wood fence pickets. This purposeful design choice enhances the overall refinement, introducing visual intrigue to the final result. The deliberate inclusion of these gaps offers a nuanced but effective detail, enhancing the aesthetic charm of your planter wall.
Execute the attachment of the wood fence picket to the back of the square with precision, ensuring a seamless fit with the existing structure. The combination of screws and glue not only reinforces the planter wall but also ensures its longevity in various outdoor conditions. Periodically check the alignment during this process to maintain a uniform and visually appealing result.
Additional Tips:
- Select Treated Wood: When choosing wood fence pickets for the backing, opt for treated lumber to enhance resistance against weathering and pests. This proactive choice contributes to the long-term durability of your planter wall.
- Weather-Resistant Fasteners: Utilize weather-resistant screws and glue to combat the effects of outdoor exposure. This precautionary measure safeguards against deterioration over time, ensuring the continued strength of the planter wall.
- Prevent Wood Splitting: Pre-drill pilot holes before inserting screws into the wood fence pickets. This small step minimizes the risk of wood splitting and maintains the structural integrity of the backing.
- Apply an Exterior Sealant: Consider applying an exterior sealant or wood preservative to the wood fence pickets after installation. This extra layer of protection enhances resistance to moisture, UV rays, and other environmental factors.
Step 7: Interlocking with Wire
Start by connecting the intersecting rods on both the front and back panels to weave the wires into the structure. This careful step brings everything together, making the planter wall strong and visually appealing. Use strong wire that matches the design, ensuring a connection that lasts. Make sure the wires are pulled tight as you integrate them. This is crucial for a neat and professional look, adding a touch of finesse to how it looks. Tight wires not only make it look good but also help in keeping the structure strong for a long time.
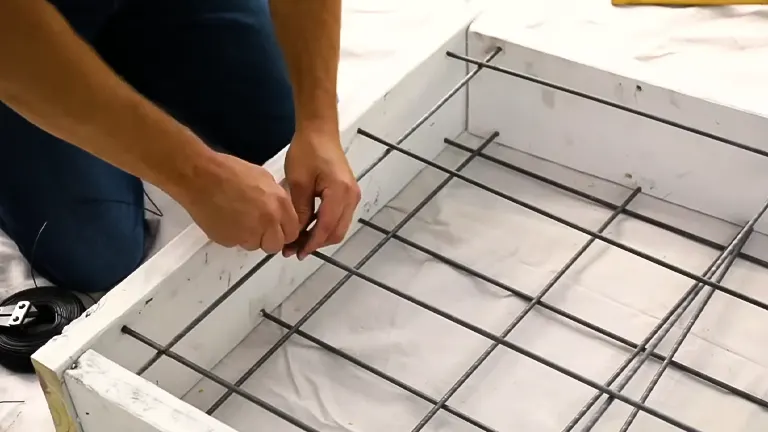
When connecting each rod intersection with wire, aim for consistency and precision. Keeping the tension and placement of the wire consistent ensures a smooth and polished result. Use wire cutters to trim any extra length, giving it a clean and refined appearance. Connect the front and back panels at four points, keeping them 5 and 3/4-inches apart. This specific spacing not only makes the planter wall strong but also brings in a thoughtful design element, making it visually interesting.
Additional Tips:
- Select Appropriate Gauge Wire: Choose a wire gauge that aligns with the weight and size of your planter wall. Opting for a heavier gauge provides additional strength, contributing to a more resilient overall structure.
- Consider Concealing Wires: To maintain a polished look, consider concealing the wires within the design. This can be achieved by threading them through pre-drilled holes or positioning them strategically behind certain elements of the planter wall.
- Secure Loose Ends: After wiring, secure any loose ends with twists or crimps to prevent potential snags or safety hazards. This minor yet essential step ensures the longevity and safety of your planter wall.
- Regularly Inspect for Wear: Periodically inspect the wired connections for signs of wear or stress. This proactive approach allows for timely maintenance, preserving the stability and appearance of your planter wall over time.
Step 8: Elegant Hanging Options
Start by choosing how you want to hang your planter wall – either use hidden brackets for a sleek look or opt for eye hooks with a rope or chain for a more decorative touch. This decision lets you customize the presentation based on your style and the surrounding space.
Consider the total weight of the planter wall, including both the structure and the potted plants. This is crucial when picking hanging hardware to make sure your display is safe and secure. Select hardware that not only looks good but can also support the weight without any concerns.
For a clean and modern appearance, go for hidden brackets attached to the back of the planter wall. This method keeps the focus on the plants and the wall’s craftsmanship, creating a seamless and unobtrusive look.
If you want to add a touch of charm, use eye hooks screwed into the top board. Pair them with a rope or chain for a more decorative hanging style. This not only serves a practical purpose but also brings a delightful element to the overall display.
Additional Tips:
- Verify Wall Load Capacity: Before hanging your planter wall, confirm the wall’s load capacity to ensure it can effectively bear the weight. This precaution is particularly vital for walls of diverse materials or those with specific weight limitations.
- Enhance Stability with Anchors: When mounting on drywall, bolster stability by using anchors. Anchors distribute the weight more evenly, diminishing the risk of gradual damage to the wall.
- Optimize Hanging Height: Consider adjusting the hanging height to accommodate plant growth. This optimization ensures a visually balanced planter wall and facilitates the optimal development of your plants.
- Regular Hardware Inspection: Conduct periodic inspections of the hanging hardware and connections to guarantee their ongoing security. This proactive approach prevents potential issues and extends the overall durability of your planter wall display.
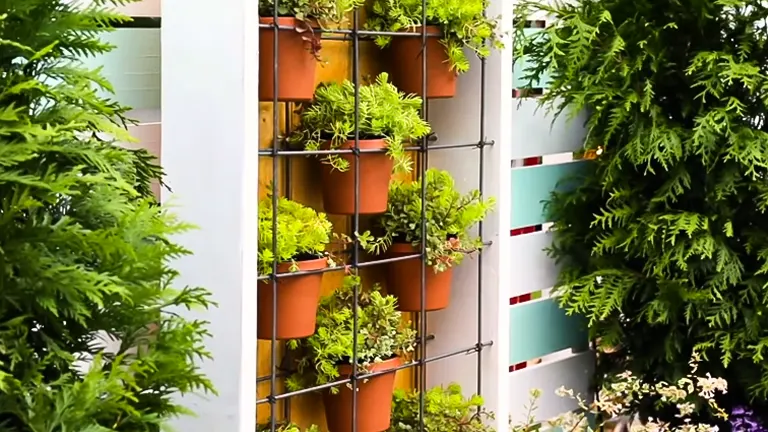
Step 9: Add Potted Plants
Make the most of your planter wall by incorporating up to 14 pots, each designed for a 6-inch diameter. This not only enhances the visual appeal but also allows for a diverse and lively assortment of plants, contributing to a dynamic outdoor aesthetic.

When choosing pots, prioritize those with lips. This strategic choice ensures a secure placement on the metal rods, preventing any unintentional dislodging. Opting for pots with this feature adds an extra layer of stability, safeguarding your plants and maintaining the pristine appearance of your planter wall.
Transform your planter wall into a personalized herb garden, adding both functionality and visual charm to your outdoor space. Herbs not only bring fragrance and freshness but also offer a practical aspect, allowing you to cultivate your own culinary essentials.
Keep in mind, the planter is designed to hold a 6-inch pot in each square, totaling up to 14 pots. While terra cotta and composite pots are suitable, prioritize those with a lip to ensure a secure fit on the metal rods, preventing any wobbling or instability.
Additional Tips:
- Strategic Plant Placement: Plan the arrangement of your plants based on their sunlight and water needs. This thoughtful placement ensures each plant receives optimal conditions for healthy growth.
- Utilize Pot Saucers: To prevent water from dripping onto the lower tiers, consider placing saucers under the pots. This not only keeps the area below clean but also prevents potential water damage to the planter wall.
- Periodic Plant Rotation: Rotate the pots periodically to promote even growth and exposure to sunlight. This practice prevents certain sides of the plants from becoming overshadowed and encourages balanced development.
- Mulch for Moisture Management: Apply a layer of mulch to the pots to retain moisture. This not only reduces the frequency of watering but also fosters a healthier and more sustained growth environment for your plants.
Building a custom planter wall is a fun and satisfying DIY project, turning raw materials into a personalized green haven for your outdoor space. Enjoy the creative process and showcase your skills with this rewarding endeavor.
Factors to Consider When Making a Planter Wall
- Location and Sunlight Exposure: When planning your planter wall, assess the location’s sunlight exposure. Different plants have varying light requirements, so understanding the sunlight patterns will influence your choice of planters and the types of plants you can nurture. Consider whether the wall will be in full sun, partial shade, or full shade, and choose plants that thrive in those conditions.
- Climate and Weather Resistance: Take into account the local climate and weather conditions when selecting materials for your planter wall. If your region experiences harsh weather, choose materials that are durable and weather-resistant to ensure the longevity of your project. This consideration extends to both the structural elements and the finish on your planter wall.
- Plant Selection and Growth Requirements: Carefully choose the types of plants you want to showcase on your planter wall. Consider their growth habits, sizes, and care requirements. Some plants may need more space to spread, while others may require specific soil conditions. This factor ensures that your planter wall not only looks appealing but also provides an optimal environment for the plants to thrive.
- Water Drainage and Soil Quality: Efficient water drainage is crucial to prevent waterlogging and ensure the health of your plants. Plan for proper drainage holes in the planters, allowing excess water to escape. Additionally, consider the quality of the soil you’ll be using. Well-draining soil with appropriate nutrients contributes significantly to the overall well-being of your plants.
- Aesthetics and Design Harmony: Create a planter wall that complements the overall aesthetics of your outdoor space. Consider the design harmony with existing landscaping elements, such as the color palette, architectural features, and surrounding vegetation. A well-thought-out design enhances the visual appeal and seamlessly integrates the planter wall into its surroundings.
- Maintenance and Accessibility: Factor in the maintenance requirements and accessibility for your planter wall. Consider the ease of reaching and caring for the plants, especially if the wall is in a higher or more challenging location. Opt for a design that aligns with your maintenance preferences and schedule, ensuring that your planter wall remains a sustainable and thriving feature in the long run.
- Structural Support and Installation: Assess the structural support needed for your planter wall, especially if it’s a vertical or hanging structure. Ensure that the wall is securely anchored and able to bear the weight of both the planters and the soil. Proper installation is critical for the stability and safety of the planter wall over time.
By carefully considering these factors, you can create a planter wall that not only enhances the beauty of your outdoor space but also provides an ideal environment for your plants to flourish.
Safety Tips When Making a Planter Wall
- Protective Gear and Clothing: Wear appropriate protective gear, including gloves and safety glasses, when working on your planter wall. Handling materials, cutting, and drilling can pose risks, and wearing the right gear safeguards you from potential injuries. Ensure your clothing provides adequate coverage to protect your skin from any sharp edges or materials.
- Proper Tool Usage: Utilize tools properly and follow safety guidelines for each tool you use. Whether you’re cutting wood, drilling holes, or assembling components, understanding and adhering to the correct usage of tools minimizes the risk of accidents. Keep tools well-maintained and sharp to enhance their efficiency and safety during the construction process.
- Ventilation in Work Area: Work in a well-ventilated area, especially if you’re using paints, stains, or other finishing materials. Proper ventilation helps dissipate fumes and prevents the inhalation of potentially harmful substances. If working indoors, consider using a fan or opening windows to maintain good airflow.
- Stability and Balance: Ensure a stable and balanced work environment. When working on ladders or elevated surfaces, use stable platforms and ensure the ground is level. Maintain your balance, and if possible, have someone assist you during tasks that require elevation. This precaution reduces the risk of falls and injuries.
- Electrical Safety: If using power tools, adhere to electrical safety practices. Ensure all tools are properly grounded, and avoid using damaged cords. Keep cords away from water and other potential hazards. Prioritize the use of tools with safety features, such as blade guards and trigger locks, to minimize the risk of electrical accidents.
- First Aid Kit Accessibility: Have a first aid kit readily available in your work area. Accidents can happen despite precautions, and having essential first aid supplies on hand ensures prompt attention to any minor injuries. Familiarize yourself with the kit’s contents and know how to use them effectively.
- Secure Working Space: Maintain a clutter-free and organized working space. Store tools and materials properly to prevent tripping hazards. A clean and organized workspace not only enhances efficiency but also reduces the risk of accidents caused by stumbling over tools or materials.
- Weather Considerations: Be mindful of weather conditions, especially if working outdoors. Slippery surfaces due to rain or snow can increase the risk of accidents. Plan your work schedule accordingly, and if adverse weather conditions arise, consider postponing construction activities until conditions improve.
- Adherence to Local Codes and Regulations: Familiarize yourself with local building codes and safety regulations applicable to your construction project. Adhering to these standards ensures the structural integrity and safety of your planter wall. Seek necessary permits if required, and consult with local authorities if you have any uncertainties.
Prioritizing safety throughout the construction process is essential for a successful and injury-free project. By incorporating these safety tips, you not only protect yourself but also create a secure environment for the construction of your planter wall.
Conclusion
Creating a planter wall is more than a do-it-yourself project it’s about turning materials into your own outdoor haven. From measuring and cutting to assembling and planting, each step adds to the joy of making something unique. The finished wall is not just a structure; it’s a personalized expression of your style and a thriving space for your plants. So, dive into the world of DIY, and watch as your vision transforms into a living display of creativity on your wall.
FAQs
- Can I use different types of wood for the planter wall?
Absolutely! While cedar is commonly used for its durability and resistance to decay, you can explore alternatives like redwood or pressure-treated lumber based on your preferences and local availability. - How do I ensure the planter wall is stable and won’t tip over?
Stability is crucial. Make sure to level the ground where you place the planter and, if necessary, anchor it to a wall for added support. Properly securing the steel rods during assembly enhances overall stability. - Can I customize the dimensions of the planter wall to fit my space?
Definitely! Feel free to adjust the measurements of the lumber pieces to suit your available space and aesthetic preferences. Just ensure a balanced and proportionate design. - What types of plants work best in a planter wall?
The versatility of a planter wall allows for various plant choices. Herbs, succulents, and trailing plants are popular options. Consider sunlight and water requirements when planning your plant selection. - Is it necessary to seal or protect the wood from the elements?
Yes, it’s advisable. Staining or painting the wood not only enhances the aesthetic but also protects it from weathering. Additionally, using weather-resistant paint for the steel rods prevents rusting. - Can I hang the planter wall on any type of wall surface?
Ideally, you should hang it on a sturdy surface like a concrete or wood wall. Ensure the wall can bear the weight of the planter and plants. Drywall may require additional support, such as anchors. - How often should I water the plants in the planter wall?
The frequency depends on the type of plants and local climate. Check the moisture level in the soil regularly and adjust watering accordingly. Consider saucers under pots to prevent water damage. - Can I disassemble and move the planter wall if needed?
Yes, you can disassemble and relocate the planter wall. Ensure proper labeling or documentation during assembly to make reassembly easier. Take precaution.
Your planter wall is more than a structure; it’s a canvas for creativity and a sanctuary for plants. Hang it with pride, and witness its bloom—a living masterpiece, a reflection of your distinctive style, and a celebration of your love for the outdoors.

Benjamin Brooks
Forestry AuthorGreetings! I'm Benjamin Brooks, and my journey over the past 15 years has revolved around the fascinating realms of content creation, expertise in snow clearing, and the intricate world of lumberjacking and landscaping. What began as a simple curiosity about the natural world and heavy machinery has evolved into a passionate profession where my love for crafting words intertwines seamlessly with my lumberjacking and garden skills.


Leave your comment