How to Grow Bell Peppers from Seeds: Step-by-Step Success Guide
- February 19, 2024
- 3 comment
Growing bell peppers from seeds is a simple yet rewarding process that every gardener can enjoy. These sweet peppers, known for their vibrant colors and versatility, can enhance countless dishes in the kitchen. In this guide, I’ll share how to grow bell peppers from seeds, including tips on germination, planting, and proper care, ensuring a healthy and productive harvest.
| Benefit | Description |
|---|---|
| Nutritional Value | Bell peppers are rich in vitamins A and C, potassium, folic acid, and fiber. They are low in calories and have no fat, making them a healthy addition to any diet. |
| Economic Savings | Growing your own bell peppers can save money compared to buying them at the store, especially if you grow organic peppers, which are usually more expensive. |
| Freshness and Flavor | Homegrown bell peppers often taste better and are fresher than store-bought ones, as they can be harvested at the peak of ripeness. |
| Control Over Cultivation | When you grow your own, you control the growing conditions and can avoid the use of harmful pesticides, ensuring a healthier product. |
| Variety and Heirlooms | Growing from seed allows access to a wider variety of peppers, including heirloom and exotic types not typically found in stores. |
| Gardening Experience | Gardening, including growing bell peppers, can be a relaxing and fulfilling hobby that contributes to mental and physical well-being. |
| Educational Value | Growing bell peppers can be educational, particularly for children, teaching them about the natural world and the source of their food. |
| Environmental Benefits | Home gardening can be more environmentally friendly, reducing the carbon footprint associated with transporting produce. |
| Community Engagement | Sharing your harvest with neighbors or community members fosters a sense of community and can inspire others to start their own gardens. |
| Aesthetic Appeal | Bell pepper plants, with their colorful fruits and green foliage, can enhance the visual appeal of your garden or balcony. |
Choosing the Right Seeds
Variety Selection
Selecting the right variety of bell pepper seeds is an important first step in ensuring a successful harvest. Bell peppers (Capsicum annuum) come in a range of colors, flavors, and growth requirements, so it’s essential to pick a type that suits your garden and culinary needs. Here’s what to consider:
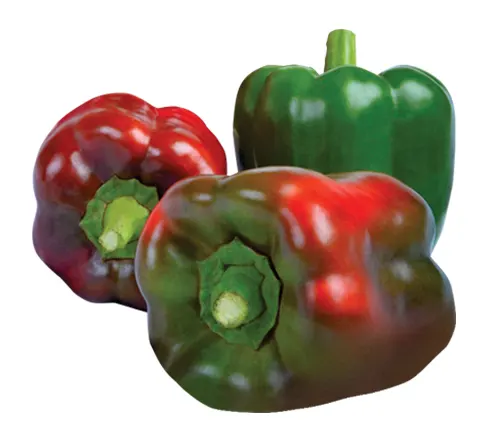
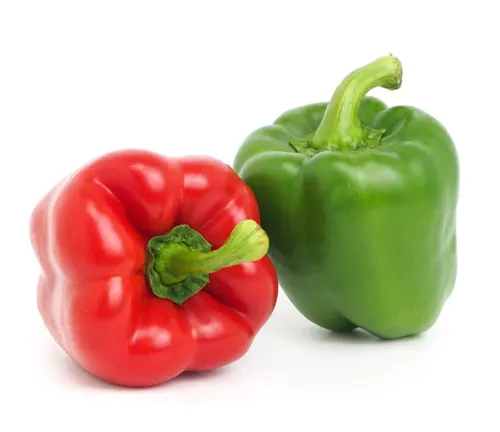
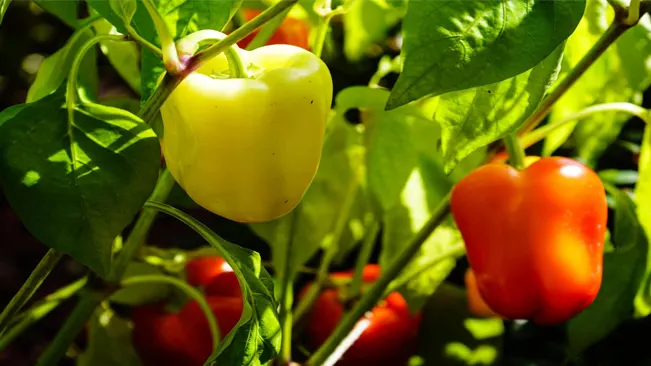
- Color and Flavor: Bell peppers come in green, red, yellow, orange, purple, and even chocolate hues. Green peppers are unripe and slightly bitter, while red, yellow, and orange varieties are sweeter and more flavorful.
- Climate Suitability: Some varieties, like the versatile ‘California Wonder,’ thrive in diverse climates, while others, such as ‘Big Red,’ perform best in warmer areas.
- Maturity Time: If you have a short growing season, opt for quick-maturing varieties like ‘Early Crisp,’ which are ideal for cooler climates.
- Size and Shape: Whether you need large, blocky peppers for stuffing or smaller ones for snacking and salads, choose a variety that matches your cooking preferences.
- Disease Resistance: Modern varieties with resistance to common diseases can make growing bell peppers easier, especially if you’ve had challenges with pests or plant health in the past.
Green Bell Peppers
California Wonder
A classic choice for gardeners, the California Wonder is celebrated for its large size and sweet flavor. These peppers start off green but will turn red when fully ripe, giving you versatile options for harvest.
Yolo Wonder
An enhanced version of the California Wonder, the Yolo Wonder offers larger peppers with better resistance to common diseases, making it a reliable choice for gardeners seeking a hardy and productive plant.
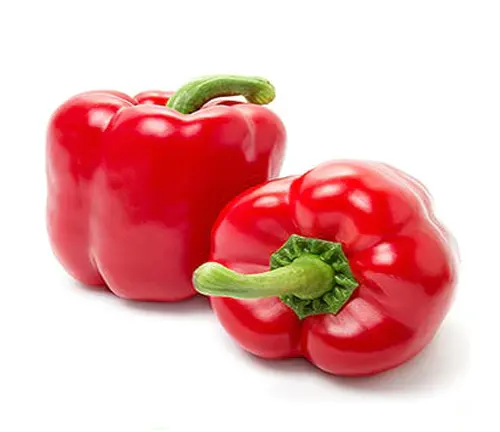
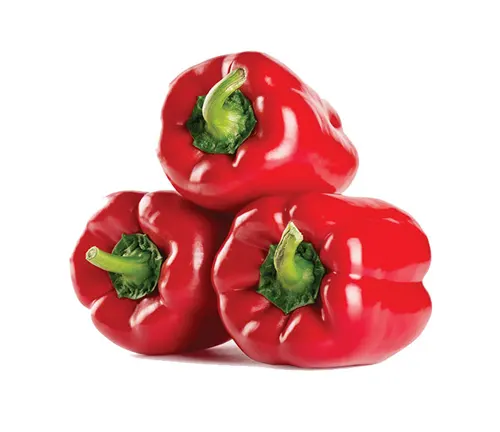
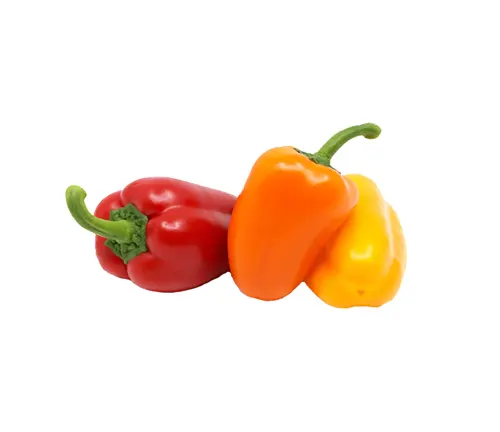
Red Bell Peppers
Bell Boy
This productive hybrid starts green and matures into a vibrant red when ripe. Its reliable yield makes it a favorite among gardeners.
Red Knight
Known for its impressive size and thick walls, the Red Knight variety offers exceptionally sweet peppers when fully ripe, making it perfect for fresh eating or cooking.
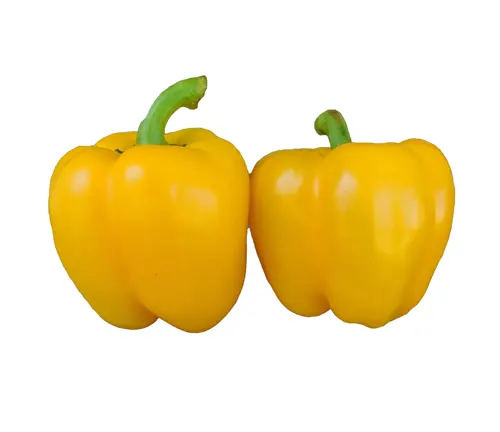
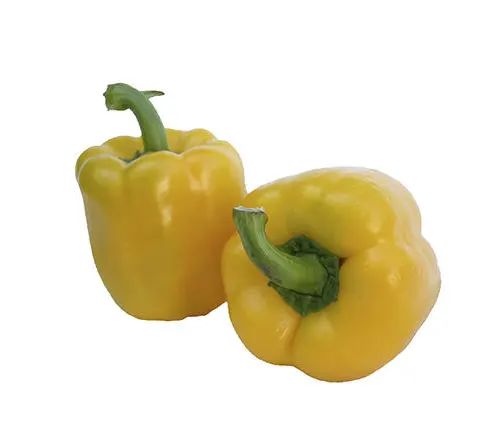
Yellow Bell Peppers
Golden California Wonder
A variant of the classic California Wonder, this pepper ripens into a stunning bright yellow. Its sweet flavor and vibrant color make it a standout choice.
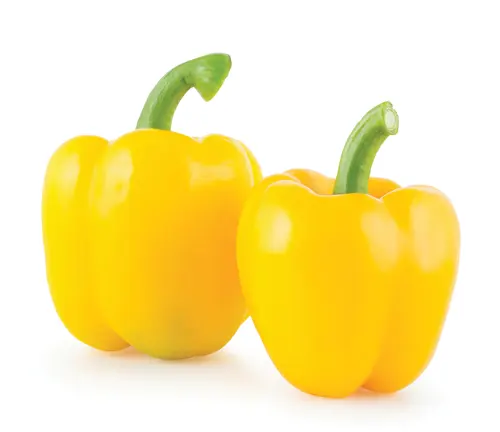
Golden Bell
Starting green and maturing into a rich golden-yellow, this variety is prized for its exceptional sweetness, perfect for fresh salads or cooking.
Orange Bell Peppers
Orange Sun
This variety produces large, brilliantly orange peppers with a rich, sweet flavor. Its vibrant color and size make it ideal for fresh eating or cooking.
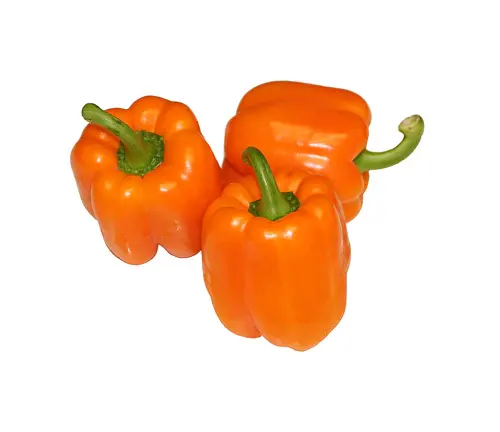
Klondike Bell
A versatile choice, the Klondike Bell starts green and ripens into a bright orange hue, delivering a naturally sweet taste that’s perfect for any dish.
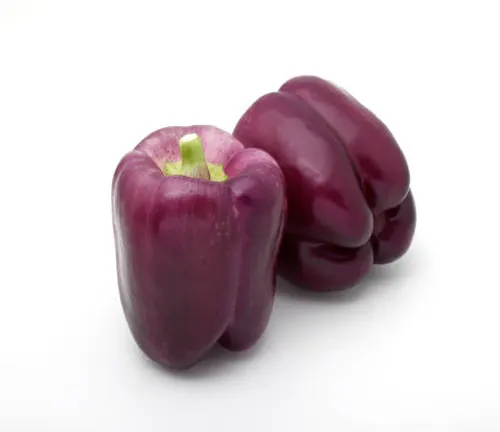
Purple Bell Peppers
Purple Beauty
This stunning variety features deep purple peppers that transition to red when fully ripe. With a crisp texture and slightly sweet flavor, it’s perfect for fresh use or cooking.
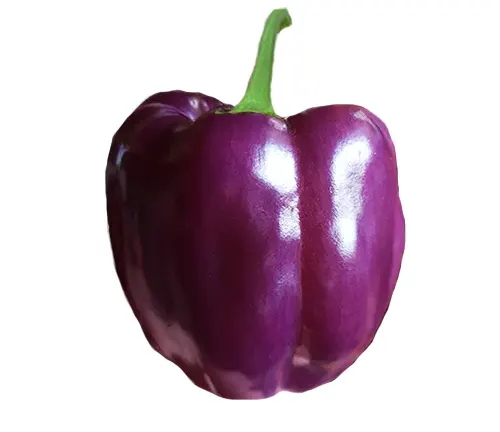
Islander
Starting as a soft lavender color, the Islander matures to a rich red or deep purple. Its mild, sweet taste and vibrant hues make it a favorite among gardeners and cooks alike.
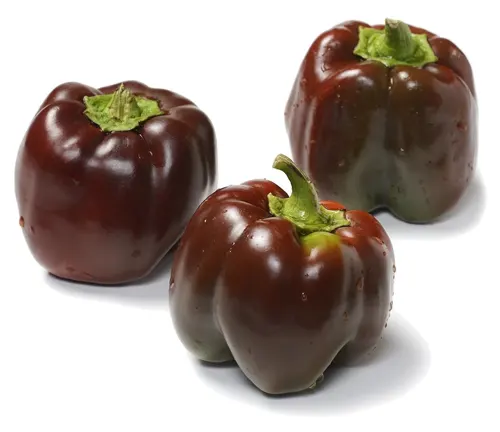
Chocolate or Brown Bell Peppers
Chocolate Beauty
This variety ripens into a rich chocolate-brown color and offers a sweet, slightly earthy flavor. Its unique appearance makes it a standout in the garden and kitchen.
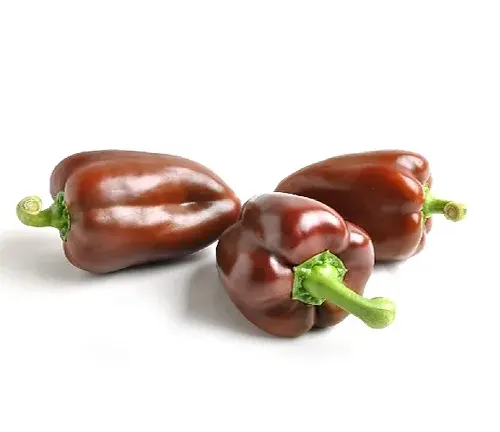
Sweet Chocolate
True to its name, this variety matures to a stunning chocolate-brown hue and delivers a delightfully sweet taste, perfect for snacking or adding to recipes.
Specialty and Heirloom Varieties
Mini Bell Mix
This delightful mix features miniature bell peppers in an array of vibrant colors. Their small size and sweet flavor make them ideal for snacking and adding to salads.
Corno di Toro
An Italian heirloom variety, the Corno di Toro is known for its long, horn-like shape and exceptional sweetness. It’s perfect for roasting or fresh use.

Cubanelle
With its thin skin and mild sweetness, the Cubanelle is a versatile choice often featured in Italian and Spanish dishes. Its unique flavor adds depth to a variety of recipes.

Seed Quality
- Reputable Supplier: Buy seeds from a well-known and reputable supplier. This increases the chances that the seeds are disease-free and have a high germination rate. Look for suppliers who offer heirloom, non-GMO, or organic seeds if those are your preferences.
- Germination Rate: Check the packaging for the germination rate. A higher germination rate indicates that more seeds are likely to sprout, which is a sign of quality.
- Seed Viability: Ensure that the seeds are fresh or have been stored properly. Seeds lose viability over time, so check the packaging date.
- Disease-Free Certification: Some suppliers offer seeds that are certified disease-free. This can be especially important for avoiding soil-borne diseases that can devastate your crop.
- Customer Reviews: Look for customer reviews or ask for recommendations from other gardeners. Feedback from others can provide real-life insights into how the seeds perform in various conditions.
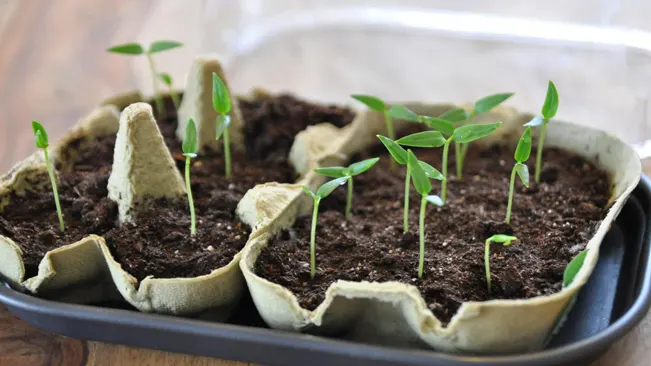
Starting Seeds Indoors
Timing
- The timing of starting your bell pepper seeds indoors is crucial for their success. Begin 8-10 weeks before the last expected frost date in your area. This timing ensures that the seedlings are strong enough to be transplanted outdoors once the risk of frost has passed.
- To find the last frost date, you can consult local gardening groups, agricultural extension offices, or online gardening resources specific to your region.
Soil Preparation
- Use a high-quality seed-starting mix, which is designed to promote good drainage and aeration, essential for seedling growth. These mixes usually don’t contain actual soil, which helps prevent disease problems that are common in garden soil.
- Alternatively, you can make your own mix using equal parts peat moss, vermiculite, and perlite. This combination provides a light, sterile environment that retains moisture while allowing excess water to drain, reducing the risk of root rot.
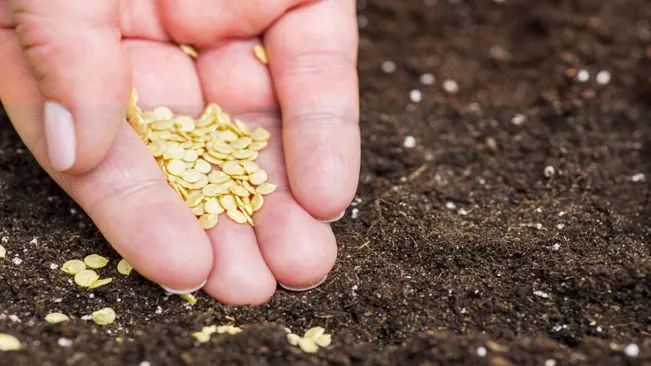
Sowing

- Plant the bell pepper seeds about ¼ inch deep in the soil. This depth is ideal for ensuring that the seeds have enough coverage to retain moisture, but are not so deep that they struggle to germinate.
- After planting, gently water the soil. The key is to keep the soil consistently moist but not waterlogged, as overly wet conditions can lead to fungal diseases and hinder germination.
Temperature and Light
- Bell pepper seeds require warmth to germinate effectively. The ideal soil temperature is between 70-85°F (21-29°C). You can achieve this by using heat mats specifically designed for seed starting.
- Light is also crucial once the seeds start to germinate. If you don’t have a sunny south-facing window, consider using grow lights. Place the lights a few inches above the seedlings and keep them on for 14-16 hours per day to simulate natural daylight. As the seedlings grow, raise the lights to prevent them from getting leggy.
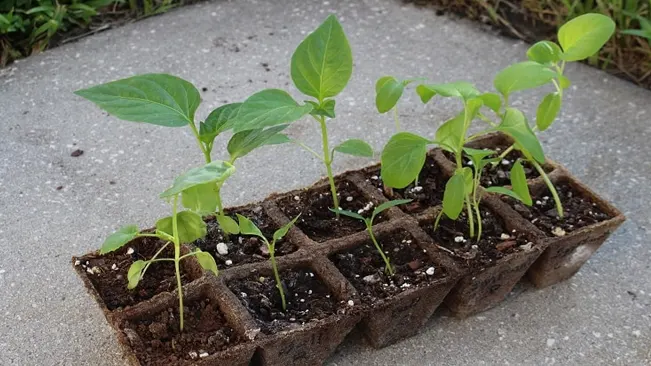
Transplanting Seedlings
Hardening Off
Hardening off is a crucial step in the transplanting process. It involves gradually acclimating your indoor-grown seedlings to the outdoor environment. This process usually takes about a week and is essential to prevent transplant shock, which can occur if plants are suddenly exposed to harsher outdoor conditions.
- Start Slowly: Begin by placing your seedlings outside in a sheltered, partially shaded area for just a few hours each day. Avoid direct sunlight and strong winds initially.
- Gradual Exposure: Gradually increase the amount of time your seedlings spend outdoors each day. Over the week, gradually expose them to more sunlight and outdoor temperatures.
- Monitor Weather: Be mindful of the weather conditions. If there’s a risk of frost or harsh weather, bring the seedlings back indoors.
- Watering: Keep the seedlings well-watered during the hardening off process. The goal is to mimic the conditions they will face in the garden without causing stress or shock.
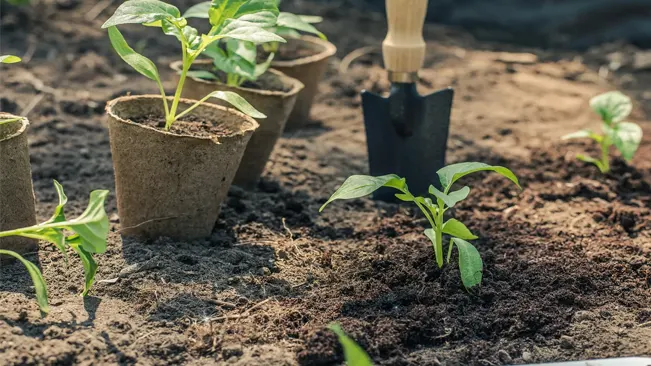
Transplanting
Once your seedlings are hardened off and have at least two sets of true leaves, they are ready to be transplanted into the garden. This is also contingent on outdoor temperatures staying consistently above 60°F (16°C), as bell peppers are sensitive to cold.
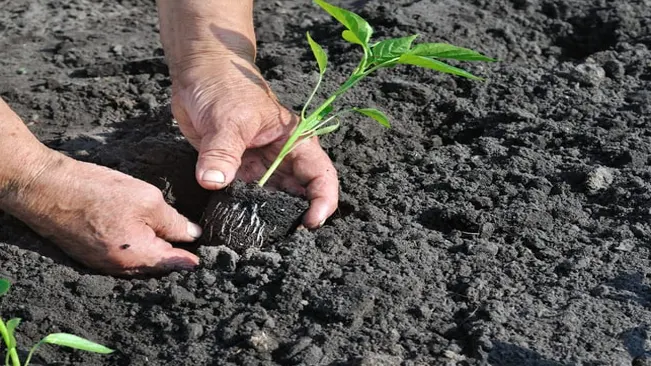
- Choosing the Time: Transplant on a cloudy day or in the late afternoon to reduce stress from the sun.
- Soil Preparation: Prepare your garden bed by loosening the soil and adding compost or a balanced fertilizer. Ensure the soil is well-draining and has a slightly acidic to neutral pH (6.0 to 6.8).
- Transplanting Technique: Dig a hole for each seedling large enough to accommodate the root ball. Carefully remove the seedling from its container, trying not to disturb the roots. Place the seedling in the hole at the same depth it was growing in the container and gently fill in with soil. Press lightly around the base of the plant.
- Spacing: Space the seedlings about 18-24 inches apart, with rows spaced 24-36 inches apart. This allows enough room for growth and air circulation.
- Watering: Water the seedlings immediately after transplanting to help settle the soil around the roots. Continue to water regularly, keeping the soil consistently moist but not waterlogged.
- Mulching: After transplanting, apply a layer of mulch around the base of the plants to help retain moisture and control weeds.
Planting in the Garden
Soil and Location
- Sunlight: Bell peppers require full sun, which means they need at least 6-8 hours of direct sunlight per day. More sunlight leads to better yield.
- Soil Quality: The soil should be rich in organic matter. You can improve your soil by adding compost or well-rotted manure. This not only enhances the nutrient content but also improves soil structure, aiding in better root growth and water retention.
- Drainage: Ensure the soil has good drainage. Bell peppers do not like soggy soil, as it can lead to root rot and other diseases. If drainage is an issue, consider raised beds or containers.
- Soil pH: Bell peppers prefer slightly acidic to neutral soil, with a pH between 6.0 and 6.8. You can test your soil’s pH with a test kit available at garden centers. Adjust the pH if necessary using lime (to increase pH) or sulfur (to decrease pH).
Spacing

- Proper Spacing: Planting seedlings about 18-24 inches apart allows each plant enough space to grow and access nutrients without competition. Crowded plants can lead to poor air circulation and increase the risk of disease.
- Row Spacing: Rows should be spaced 24-36 inches apart. This spacing is important for ease of access during maintenance and harvesting and ensures adequate airflow between the plants.
Watering
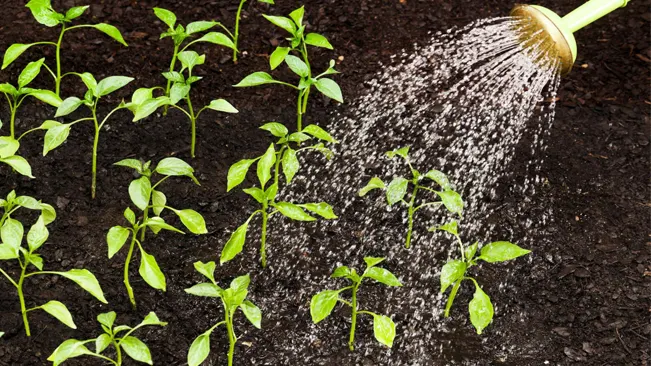
- Consistent Moisture: Bell peppers need a consistent supply of moisture to develop properly. Irregular watering can lead to problems like blossom end rot or cracking fruits.
- Method of Watering: Water the plants at the base to keep the foliage dry. Wet foliage can lead to fungal diseases. Drip irrigation or a soaker hose is ideal for this.
- Mulching: Applying a layer of mulch around the plants can help retain soil moisture and reduce watering frequency.
Fertilizing
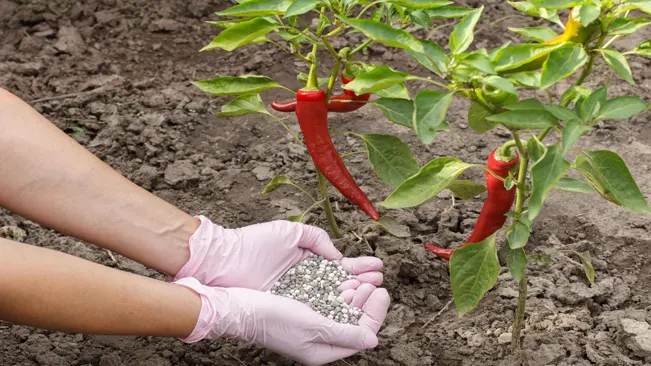
- Initial Fertilizing: After transplanting, use a balanced fertilizer, something with equal parts nitrogen, phosphorus, and potassium (like a 10-10-10 formula). This will help establish strong roots and healthy growth.
- Fertilizing During Fruit Set: When the first fruits begin to form, apply fertilizer again. This helps in the development of the fruits and ensures a good yield.
- Organic Options: If you prefer organic gardening, use compost, fish emulsion, or other organic fertilizers. Remember to follow the instructions on the label for proper application rates.
Care and Maintenance
Support for Growing Plants
- Why It’s Necessary: Bell pepper plants, especially when laden with fruit, can become top-heavy and may bend or break. Providing support ensures healthy growth and prevents damage to the plant.
- Staking: A simple method is to drive a stake into the ground next to the plant and gently tie the plant to the stake with soft ties. Make sure the stake is tall enough to support the plant as it grows.
- Caging: Alternatively, you can use a wire cage. Place the cage around the plant when it is small, and the plant will grow to fill the cage. This method is great for providing all-around support and is less labor-intensive than staking.
Pest and Disease Control
- Common Pests: Aphids, spider mites, and whiteflies are common pests that can affect bell peppers. These pests suck the sap from the plants, weakening them and potentially spreading diseases.
- Organic Control: Use a strong water spray to knock off aphids or introduce beneficial insects like ladybugs that feed on these pests. Neem oil and insecticidal soaps are also effective organic options.
- Common Diseases: Blossom end rot, a condition where the end of the fruit turns black and rots, is common in bell peppers. This is usually caused by a calcium deficiency often due to uneven watering.
- Prevention: Ensure consistent watering and consider adding calcium to the soil. Mulching helps maintain soil moisture.
- Fungicides: For other diseases like fungal infections, use appropriate organic or chemical fungicides as a preventative measure or at the first sign of disease.
Mulching
- Benefits: Mulching is crucial for maintaining soil moisture, regulating soil temperature, and suppressing weed growth. It can also help prevent soil-borne diseases from splashing up onto the plants.
- Materials: Organic mulches like straw, bark, compost, or leaf litter are ideal. These materials also gradually break down and add nutrients to the soil.
- Application: Apply a 2-3 inch layer of mulch around the base of the plants, being careful not to pile it up against the stems, as this can cause rot.
Harvesting
Understanding the Right Harvesting Time
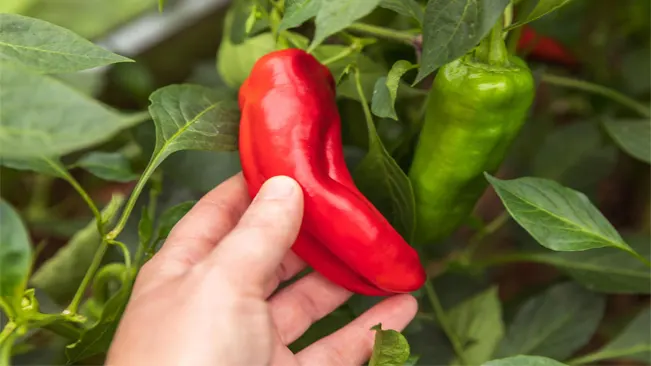
- Color and Size: Bell peppers can be harvested when they are green or after they change to their final color, which can be red, yellow, orange, purple, or even chocolate brown, depending on the variety. The size can vary, but a typical bell pepper reaches 3-4 inches in length when mature.
- Texture and Firmness: A mature bell pepper will feel firm to the touch. If it feels soft or overly pliable, it may be overripe or suffering from a disease or pest problem.
- Checking the Skin: Look for a glossy skin. Dull or wrinkled skin can be a sign of aging or dehydration.
- Seed Development: Another indicator of maturity is the development of seeds inside. Mature peppers will have fully formed seeds.
The Right Method to Harvest Bell Peppers
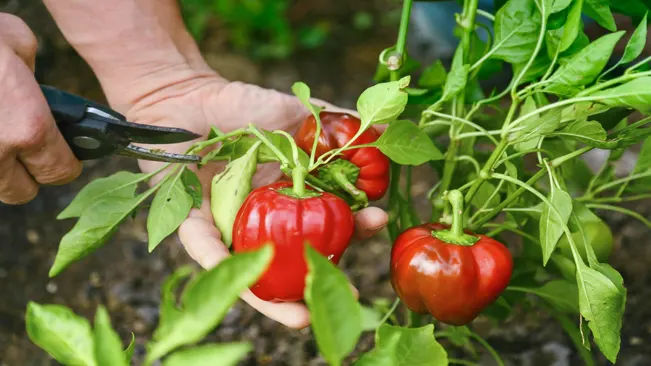
- Using the Right Tools: A sharp pair of garden scissors or a knife is essential. This ensures a clean cut which is less likely to harm the plant.
- Cut, Don’t Pull: Gently grasp the pepper and cut through the stem about half an inch above the fruit. Avoid pulling the pepper as this can damage the plant and reduce future yields.
- Supporting the Plant: When cutting the pepper, support the branch with your other hand to prevent it from breaking or bending excessively.
- Regular Harvesting: Regularly harvesting the peppers encourages the plant to produce more fruit.
Post-Harvest Tips
- Handling: Handle the harvested peppers gently to prevent bruising.
- Storage: If not used immediately, store them in the refrigerator. They can last for about a week to 10 days when stored properly.
- Ripening Off the Plant: Peppers picked green will not continue to ripen significantly off the plant. However, peppers picked in their final color stage may soften and deepen in color slightly.
Understanding Harvest Impact on Plant Health
- Encouraging More Fruit: Regular harvesting encourages the plant to focus its energy on producing new fruits.
- Health Check: Each harvest is a good opportunity to check the health of your plants, looking for signs of pests or diseases.
Conclusion
Growing bell peppers from seeds is a rewarding and enjoyable journey for any gardener. By choosing the right varieties, providing proper care, and paying attention to their needs, you can look forward to a vibrant harvest of fresh, flavorful bell peppers. Whether you’re planting bell pepper seeds for snacks, salads, or cooking, the effort is well worth the delicious results.
FAQs (Frequently Asked Questions)
1. How long does it take for bell pepper seeds to germinate?
Bell pepper seeds typically germinate in 7-14 days under optimal conditions, which include a consistent soil temperature of 70-85°F (21-29°C) and adequate moisture.
2. Can I plant bell pepper seeds directly in the garden?
It’s best to start bell pepper seeds indoors 8-10 weeks before the last frost date, as they need a warm, controlled environment to germinate. Direct sowing in the garden is possible in warmer climates but may result in a later harvest.
3. How deep should I plant bell pepper seeds?
Bell pepper seeds should be planted about ¼ inch deep in the soil.
4. Do bell pepper seeds need light to germinate?
While light is not required for germination, it is crucial immediately after sprouting to prevent seedlings from becoming leggy. Provide bright light or place under grow lights after seeds have sprouted.
5. How often should I water bell pepper seedlings?
Keep the soil consistently moist but not waterlogged. Watering when the top inch of soil feels dry is a good rule of thumb.
6. When is the right time to transplant bell pepper seedlings outdoors?
Transplant them after the last frost when night temperatures consistently stay above 60°F (16°C) and seedlings have at least two sets of true leaves.
7. How much spacing do bell pepper plants need?
Space bell pepper plants about 18-24 inches apart in rows that are 24-36 inches apart to ensure adequate air circulation and sunlight.
8. Do I need to fertilize bell pepper plants?
Yes, use a balanced fertilizer after transplanting and again when the first fruits begin to form. Avoid high nitrogen fertilizers as they promote leaf growth over fruit development.
9. How do I protect bell pepper plants from pests and diseases?
Regularly check for pests like aphids and diseases like blossom end rot. Employ organic methods or recommended pesticides and fungicides if necessary. Good air circulation and avoiding wetting the foliage can also help prevent issues.
10. When should I harvest bell peppers?
Harvest when they reach the desired size and color. They can be picked when green or allowed to ripen to their final color (red, yellow, orange, etc.). Use a sharp knife or scissors to cut the fruit from the plant to avoid damage.

Kristine Moore
Forestry AuthorI'm Kristine Moore, a seasoned garden landscaping professional with over 30 years of experience. My extensive career has been dedicated to transforming outdoor spaces into stunning, sustainable landscapes. With a deep understanding of horticulture, design principles, and environmental stewardship, I have become a respected figure in the field, known for creating harmonious, visually appealing, and eco-friendly gardens. My commitment to excellence and continuous learning in landscaping trends and techniques has solidified my reputation as an expert in garden design and implementation.
3 comments
Please put me on your vegetable email list.Thank you
Ed Flamm
February 22, 2024 12:58 pmThat's awesome you're interested! We've got a newsletter packed with gardening tips and updates. To join, just head over to our website Forestry.com

Thank you I'm a beginner gardener this information is so helpful
Judy
February 24, 2024 12:40 pm