How to Carve Wood: Techniques and Tips for Beginners
- August 9, 2023
- 0 comment
If you’re looking for a new hobby or creative outlet, wood carving is an excellent choice that combines artistry with personal expression. This timeless craft allows you to turn simple pieces of wood into stunning sculptures or functional items, showcasing your unique style. In this beginner’s guide, we’ll cover wood carving basics, essential techniques, and practical tips to help you get started. Whether you’re exploring wood carving ideas or eager to try your hand at a new craft, this guide will inspire your first steps into the fascinating world of wood carving for beginners.
1. Selecting the Right Wood
Choosing the right wood is a crucial step in starting your wood carving journey. For beginners, softwoods are ideal because they are easier to carve and forgiving as you practice wood carving techniques.
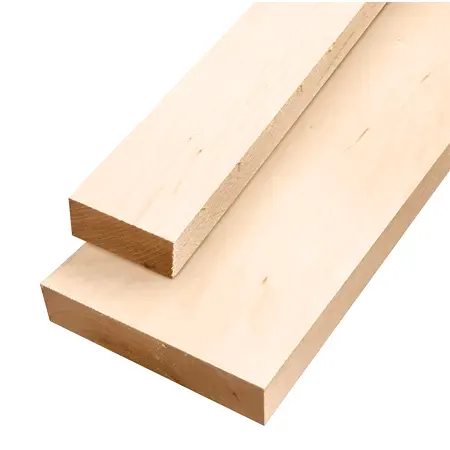
Basswood
A favorite among beginners and professionals, basswood is soft, fine-grained, and nearly knot-free, making it perfect for crafting detailed wood carving projects.

Pine
Readily available and budget-friendly, pine is a great option for whittling and small wood carving ideas.

Aspen
Known for its soft texture and white appearance, aspen is another excellent wood for learning wood carving basics.
2. Equipping Yourself with the Necessary Tools
Starting your wood carving journey requires the right tools to bring your ideas to life. A well-rounded toolkit ensures precision, creativity, and ease as you explore various wood carving techniques and projects. Here are the must-have wood carving tools for beginners:
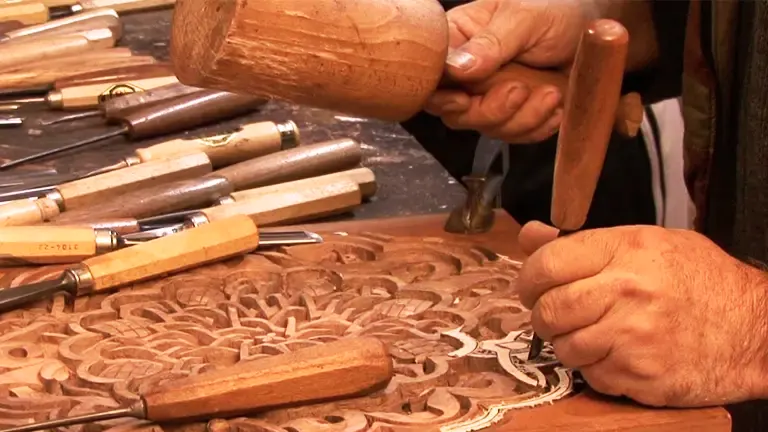
- Carving Knives: The cornerstone of any wood carving for beginners, carving knives come in various shapes and sizes to suit different tasks. From intricate patterns to delicate details, a high-quality carving knife is essential for executing your wood carving ideas.
- Gouges: These tools, with their curved cutting edges, are indispensable for crafting rounded shapes and contours. Gouges come in diverse sizes and curve depths, making them versatile for creating everything from subtle curves to bold arches in your wood carving projects.
- Chisels: Featuring straight edges, chisels are ideal for making straight cuts and removing larger sections of wood. They form the backbone of shaping and structure, allowing you to master the basics of wood carving with precision and versatility.
- Mallets: Perfect for working with hardwoods, mallets provide the controlled force needed to drive chisels and gouges. They help you make clean, decisive cuts, enhancing the efficiency of your wood carving techniques.
- Sandpaper: The finishing touch for any project, sandpaper smooths out rough surfaces and refines your work to a professional level. Available in various grits, it’s a crucial tool for polishing and perfecting your wood carving projects.
With these essential tools, you’ll be equipped to tackle a range of beginner wood carving projects and unlock your artistic potential.
3. Prioritizing Safety
Safety is essential when starting your wood carving journey. By taking the right precautions, you can enjoy your craft while minimizing risks. Here are some key safety practices for wood carving beginners:
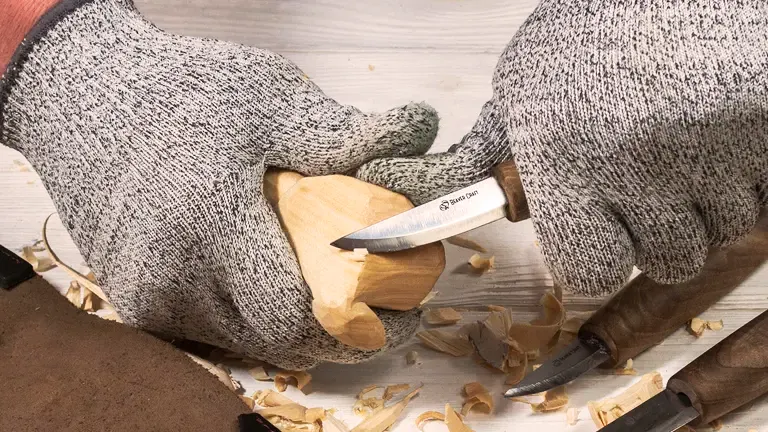
- Protective Gear: Always wear safety glasses to shield your eyes from flying wood chips or debris during carving. If you’re sanding, use a dust mask to prevent inhaling fine particles. To protect your hands from accidental nicks and slips, consider a specialized carving glove. These essentials create a solid layer of protection, allowing you to focus on your wood carving techniques with confidence.
- Sharp Tools: Keeping your wood carving tools sharp is not just about precision; it’s also a critical safety measure. Sharp tools require less force to cut through wood, giving you better control and reducing physical strain. Dull tools, on the other hand, can slip unexpectedly, increasing the risk of accidents. Regularly sharpening your tools ensures a smoother, safer experience as you refine your wood carving projects.
By following these safety tips, you can create stunning wood carving ideas while staying protected and confident in your craft.
4. Familiarizing Yourself with Basic Wood Carving Techniques
Mastering a few basic wood carving techniques is crucial when you’re starting out. Each technique offers unique possibilities for your wood carving projects and helps build your confidence as a beginner.
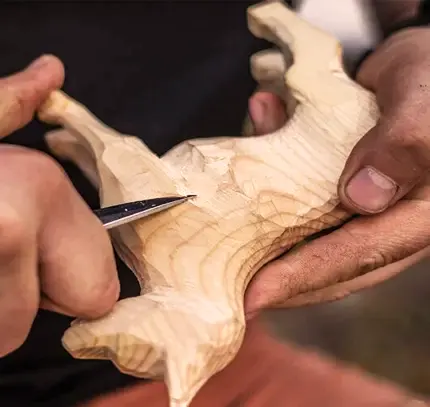
Whittling
The simplest and most common technique for beginner wood carving, whittling involves using a knife to shave off small bits of wood. It’s perfect for creating basic shapes and exploring your first wood carving ideas.
Relief Carving
This technique involves carving figures into a flat wooden surface, making them appear slightly raised from the background. It’s a great way to create decorative panels and hone your precision with wood carving tools.

Chip Carving
Ideal for intricate designs, chip carving removes small chips of wood to form patterns and detailed artwork. It’s a fun way to practice precision and add flair to your wood carving projects.

Carving in the Round
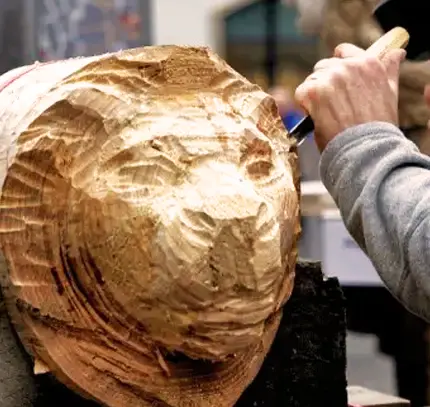
For more advanced carvers, this three-dimensional technique involves sculpting objects like figurines or statues. It’s a rewarding challenge that can bring your wood carving techniques to the next level.
5. Starting with Simplicity
Embarking on a new skill like wood carving is both exciting and challenging. It’s natural to aspire to create intricate masterpieces right away, but diving into complexities too soon can lead to frustration. For beginners, the key to success lies in the mantra: “Start with simplicity.”
- Building Foundations: Starting with straightforward wood carving projects helps you build a solid foundation. Simple shapes like squares, circles, or basic animal figures are ideal for beginners. Much like learning to build with blocks, these projects familiarize you with wood carving techniques and develop your skills step by step.
- Mastering Basics: Instead of rushing into intricate designs, focus on perfecting simpler forms. This approach lets you understand your tools and materials, make mistakes, and refine your technique. Mastering these wood carving basics is essential before tackling more advanced wood carving ideas.
- Boosting Confidence: Completing basic projects, no matter how small, is a confidence booster. Each finished piece showcases progress and prepares you for more challenging wood carving techniques. Starting simple allows you to enjoy the process without the pressure of perfection.
- Progressing Gradually: Once you’ve mastered the basics, advancing to complex designs becomes more manageable. Think of it like learning a language: first letters, then words, and finally stories. As your understanding of tools, materials, and methods deepens, you’ll naturally progress to creating intricate wood carving projects.
Every expert starts as a beginner. By prioritizing patience and practice, starting with simple designs, and gradually building your skills, you’ll set yourself up for success in wood carving for beginners. This method ensures a solid foundation and paves the way for future growth and creativity.
6. The Importance of Planning Your Design
In any creative endeavor, having a clear plan is essential, and wood carving is no exception. Whether you’re crafting a simple project or tackling intricate wood carving ideas, planning your design before starting ensures better results. Here’s why sketching your design onto the wood is a vital step for every wood carving project:
- Visualization: Just like an architect uses a blueprint, a wood carver benefits from a visual guide. Sketching your design on the wood helps you conceptualize the final product, ensuring that your idea is both achievable and visually appealing. This step allows you to plan the depth, dimensions, and details, making your wood carving techniques more precise.
- Roadmap for Carving: A sketched design acts as a roadmap for your tools, providing clear guidelines and boundaries. This outline keeps you on track, ensuring your carving stays true to the intended design without unnecessary deviations or errors.
- Minimizes Mistakes: Planning and sketching your design in advance helps identify potential challenges. For example, you may spot areas that are too intricate or too close to another element, which could compromise the structure. Addressing these issues early can save time, materials, and frustration.
- Boosts Confidence: Having a visible design boosts confidence, especially for beginners in wood carving for beginners. The uncertainty of freehand carving can be daunting, but a well-thought-out plan serves as a reassuring guide to help you carve with confidence and consistency.
- Improves Efficiency: A clear design eliminates the need for frequent pauses to rethink your approach. By following the outline, you can carve more fluidly, saving time and achieving a polished finish faster. This method makes even complex wood carving projects more manageable and rewarding.
7. Unique Tips and Tricks for Wood Carving
As you progress in your wood carving journey, incorporating these tips and tricks can elevate your skills and enhance your wood carving projects:
- Patience is Key: Wood carving is a meticulous craft that rewards patience. Every stroke contributes to your final piece, so take your time and enjoy the process of bringing your wood carving ideas to life.
- Experiment with Texture: Adding different textures smooth, rough, or patterned can bring depth and realism to your carvings. Don’t shy away from exploring new finishes to make your work stand out.
- Understand the Grain: The wood’s grain plays a significant role in carving. Learn to carve both with and against the grain to achieve unique effects and better control. Mastering this skill is essential for refining your wood carving techniques.
- Embrace Technology: Modern tools like Dremel tools and 3D carving machines can speed up the process and add precision to your wood carving projects. Don’t hesitate to blend traditional techniques with modern innovation.
- Maintain Your Tools: Keeping your wood carving tools sharp and well-maintained is crucial for both safety and ease of carving. Regular sharpening ensures clean cuts and minimizes strain during long sessions.
Wood carving is not just a craft it’s a journey of creativity and self-expression. With practice, persistence, and these unique tips, you’ll continue to grow and refine your skills. Pick up your tools, explore new wood carving techniques, and let the wood reveal its story through your hands.
FAQs
- How do I transfer a design onto wood for carving?
You can trace or draw your design directly onto the wood using carbon paper, or create a template and trace the lines onto the wood’s surface. - How do I prevent splintering and tear-out while carving?
Carve with the grain of wood to minimize splintering. Additionally, using sharp tools and making shallow cuts before deepening them can help reduce tear-out. - What finishing techniques should I use after carving?
After carving, sand the surface to smooth out any rough areas. You can apply wood finishes like oil, wax, or varnish to enhance the wood’s appearance and protect it. - How can I improve my wood carving skills?
Practice regularly and seek out tutorials, online courses, or workshops to learn from experienced carvers. Don’t be afraid to experiment and make mistakes – they’re part of the learning process. - Are there any common mistakes beginners should avoid?
Avoid rushing through a project, as patience is key to achieving good results. Also, don’t remove too much material at once, as it’s difficult to fix over-carved areas. - Can I make a career out of wood carving?
Yes, wood carving can lead to various career paths, including creating and selling your carvings, teaching carving classes, or working in the woodworking and restoration industries. - What’s the most important tip for beginners starting with wood carving?
Start with a positive attitude and a willingness to learn. Wood carving can be challenging, but with persistence and dedication, you’ll see improvement over time. - What is wood carving?
Wood carving is the art of shaping and creating designs in wood using various tools. It involves removing material from a wooden block to reveal a desired form or pattern. - Can anyone learn wood carving, or is it only for skilled artists?
Wood carving can be learned by anyone, regardless of skill level. While artistic aptitude can help, with practice and guidance, even beginners can create impressive carvings. - How do I choose a wood carving project suitable for my skill level?
Start with simple projects that involve basic shapes and minimal intricate details. As you gain confidence and skill, you can gradually move on to more complex designs. - What safety precautions should I take when wood carving?
Wear safety goggles to protect your eyes, use gloves to prevent cuts, and keep your tools sharp to avoid slip-ups. Work in a well-ventilated area, and always carve away from your body to prevent accidents.
Excited to start your wood carving journey or have some tips to share from your own experiences? We’d love to hear about your projects or any advice you have for fellow beginners. Drop a comment below and let’s craft a creative community together!


Leave your comment