How To Plant Brassicas Seeds: Plant Once, Harvest All Season
- February 23, 2024
- 2 comment
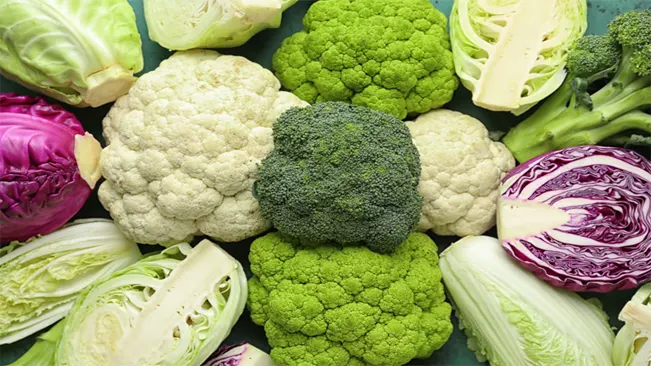
Brassicas, a genus of plants in the mustard family, are popular for their nutritional value and diverse varieties, including broccoli, cabbage, kale, cauliflower, and Brussels sprouts. Planting brassicas can be a rewarding experience for any gardener. This article provides a step-by-step guide on how to plant brassicas seeds, ensuring a thriving garden.
| Brassica Type | Nutritional Benefits | Health Benefits |
|---|---|---|
| Broccoli | High in vitamins C and K, fiber, and potassium | Supports immune system, bone health |
| Cabbage | Rich in vitamin C, folate, fiber, and antioxidants | Aids in digestion, anti-inflammatory properties |
| Kale | Loaded with vitamins A, C, K, calcium, and antioxidants | Promotes heart health, vision, and skin health |
| Cauliflower | High in vitamin C, K, and B-vitamins, fiber | Supports brain health, reduces cancer risk |
| Brussels Sprouts | Packed with vitamins C and K, fiber, omega-3 fatty acids | Improves bone health, reduces oxidative stress |
| Collard Greens | Abundant in vitamins A, C, K, calcium, and iron | Supports bone health, aids in detoxification |
| Bok Choy | Contains vitamins A, C, and K, calcium, and iron | Promotes bone strength, cardiovascular health |
| Turnips | Rich in fiber, vitamin C, and potassium | Aids in digestion, supports lung health |
| Mustard Greens | High in vitamins A, C, K, and antioxidants | Boosts immune system, anti-inflammatory benefits |
| Arugula | Contains vitamins A, C, K, calcium, and folate | Promotes bone health, supports metabolism |
Choosing Your Seeds
Before planting, decide which brassicas you want to grow. Consider your local climate, soil type, and the space available in your garden. Brassicas generally prefer cooler temperatures, so plan your planting schedule accordingly.
Consider Your Local Climate
- Brassicas generally prefer cooler weather, making them excellent for spring and fall planting in many regions. However, some varieties are more heat-tolerant than others. For example, collards and some types of kale can withstand higher temperatures. Research the typical growing seasons for brassicas in your area, and choose varieties that align with your local climate conditions.
Assess Your Soil Type
- Brassicas perform best in fertile, well-draining soil with a slightly acidic to neutral pH (around 6.0-7.0). If your soil is heavy clay or very sandy, you may need to amend it with organic matter to improve its structure and fertility. Some brassicas, like cabbages and Brussels sprouts, require richer soil to develop fully, so consider the soil quality in your garden when selecting your seeds.
Space Availability in Your Garden
- Different brassicas require varying amounts of space. For instance, cabbages and Brussels sprouts need more room compared to kale or mustard greens. Plan your garden layout, keeping in mind the mature size of each brassica variety. If you have limited space, consider growing smaller varieties or using containers.
Personal Preferences and Culinary Uses
- Think about your dietary preferences and cooking habits. If you love making salads, kale and arugula might be your go-to choices. For hearty stews or roasts, consider growing cabbages or Brussels sprouts. Also, explore different varieties within each type of brassica to find flavors and textures that appeal to you.
Disease Resistance
- Some brassica varieties have been bred for resistance to common diseases like clubroot or black rot. If these diseases are prevalent in your area, look for resistant varieties to ensure a healthier crop.
Seed Source and Quality
- Purchase seeds from reputable sources to ensure high germination rates and plant health. Consider organic seeds, especially if you aim for an organic garden. Also, check the seed packets for information on planting times, spacing, and care specific to each variety.
Preparing the Soil
Brassicas thrive in well-drained, fertile soil with a slightly acidic to neutral pH. Before planting, prepare your soil by incorporating organic matter like compost or well-rotted manure. This improves soil fertility and drainage.
Steps to Prepare the Soil
- Soil Testing: Before you begin, consider testing your soil. This will provide information on pH levels and nutrient content. Soil test kits are readily available at garden centers or through local cooperative extension services.
- Adjusting pH: If your soil is too acidic (below 6.0), you can raise the pH by adding lime. If it’s too alkaline (above 7.0), incorporating sulfur can help lower the pH. The amount required depends on the soil test results and the existing soil condition.
- Improving Soil Structure: Brassicas need well-drained soil to prevent root diseases. If you have clay soil, which tends to be heavy and poorly drained, incorporate organic matter to improve its structure. Similarly, if you have sandy soil, which drains quickly but doesn’t hold nutrients well, adding organic matter can help retain both moisture and nutrients.
- Incorporating Organic Matter: Organic matter, such as compost or well-rotted manure, is key to creating fertile soil. It adds essential nutrients, improves soil texture, and enhances the soil’s ability to retain water and nutrients. Spread a 2 to 4-inch layer of organic matter over your garden bed and work it into the top 6 to 8 inches of soil.
- Fertilizing: Brassicas are heavy feeders, meaning they require nutrient-rich soil. Along with organic matter, you may need to add a balanced fertilizer. Look for a fertilizer with equal parts nitrogen, phosphorus, and potassium (N-P-K), such as a 10-10-10 formula, and apply according to the package instructions.
- Pre-planting Preparation: A few weeks before planting your brassicas, prepare your beds. This allows time for the soil amendments to integrate and stabilize. Use a garden fork or tiller to loosen the soil and mix in the amendments, then rake the beds smooth.
- Mulching: After planting, consider adding a layer of mulch around your brassicas. Mulch helps retain soil moisture, suppresses weeds, and can add organic matter back into the soil as it decomposes.
Sowing the Seeds
Indoor Sowing
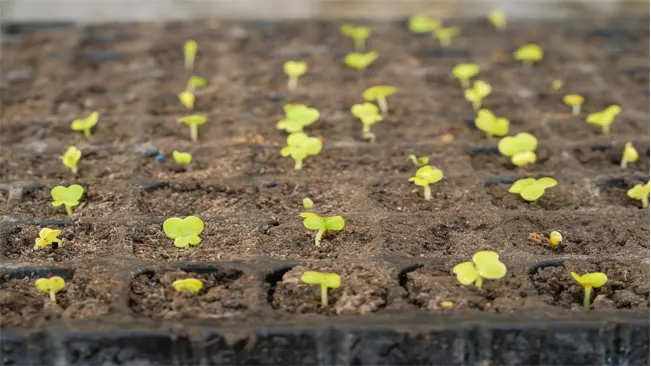
- Equipment and Setup: Begin with clean, sterile seed trays or small pots. Fill them with a high-quality seed-starting mix, which is typically lighter and more sterile than regular potting soil. This mix helps in maintaining moisture and provides a good environment for seed germination.
- Planting Depth and Technique: Brassica seeds should be sown about 1/4 inch deep. You can place two seeds per cell or pot to increase the chances of germination. Gently press the seeds into the soil and cover them lightly with the mix.
- Moisture and Temperature: Keep the soil consistently moist but not waterlogged. Brassica seeds generally germinate best at temperatures between 65°F and 75°F (18°C to 24°C). You can use a heat mat to maintain a consistent temperature if your environment is cooler.
- Light: Once seeds sprout, they need plenty of light to grow strong. If you’re growing them indoors, place them near a sunny window or under grow lights. This prevents the seedlings from becoming leggy.
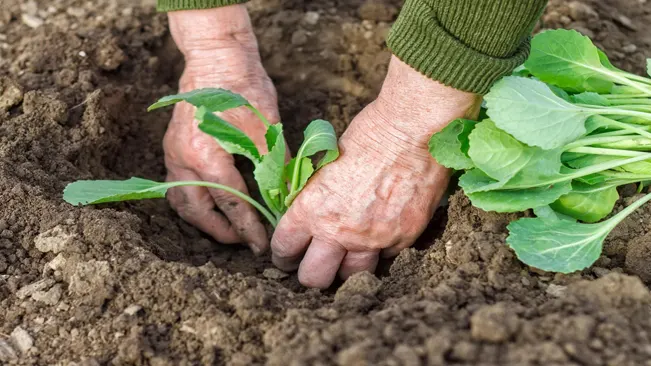
- Transplanting: When the seedlings have at least two sets of true leaves (not counting the initial seed leaves), they are ready to be transplanted outdoors. But first, they need to be ‘hardened off’ – gradually acclimatized to outdoor conditions over a week.
Direct Sowing
- Timing: Direct sowing of brassica seeds into the garden should be timed so that plants mature in cooler weather. This usually means planting after the last frost date in spring or in late summer for a fall harvest.
- Soil Preparation: Prepare your garden bed by loosening the soil and adding compost or organic matter. Brassicas need well-drained, nutrient-rich soil.
- Sowing Technique: Sow the seeds 1/4 inch deep in rows. The spacing between seeds will depend on the brassica variety. Consult the seed packet for specific spacing recommendations. After sowing, cover the seeds lightly with soil.
- Watering: Water the seeds gently to avoid washing them away. A fine mist or a watering can with a rose attachment is ideal. Keep the soil moist but not soggy until germination, which typically occurs in 5 to 10 days, depending on the variety and soil conditions.
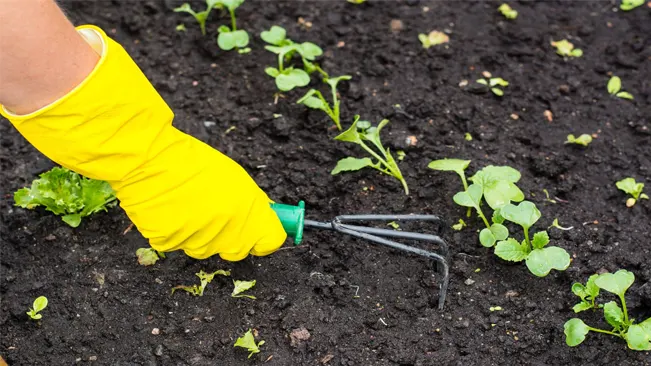
Thinning and Spacing
Thinning and spacing are crucial steps in the cultivation of brassicas, ensuring that each plant has sufficient room to grow and access to necessary resources such as sunlight, water, and nutrients. Here’s a detailed look at these processes:
Understanding the Importance of Thinning
- Reduces Competition: Brassica seedlings often emerge densely if sown directly into the ground or in seed trays. If left unthinned, the young plants compete for light, water, and nutrients, which can stunt their growth and reduce yields.
- Improves Air Circulation: Adequate space between plants allows for better air circulation. This is important because good air flow reduces the risk of fungal diseases, which brassicas can be prone to.
- Enhances Plant Health: Thinning prevents the overcrowding that can stress plants, making them more susceptible to pests and diseases. Healthy, well-spaced plants are generally more robust and productive.
How to Thin Brassica Seedlings
- Timing: Start thinning when the seedlings are a few inches tall and have developed their first set of true leaves (the leaves that appear after the initial seed leaves).
- Method: Gently pull out the weakest and smallest seedlings, leaving the stronger ones with ample space to grow. Alternatively, you can use a pair of scissors to snip off the unwanted seedlings at soil level. This method is less disruptive to the roots of the remaining plants.
- Disposal of Thinned Seedlings: The removed seedlings can be composted, or in some cases, they can be transplanted elsewhere if they’re still healthy and vigorous.
Watering and Feeding
Brassicas require consistent moisture, especially during their early growth stages and head formation. Water regularly, keeping the soil evenly moist but not waterlogged. Use a balanced fertilizer to provide essential nutrients, especially if your soil is less fertile.
Watering Brassicas
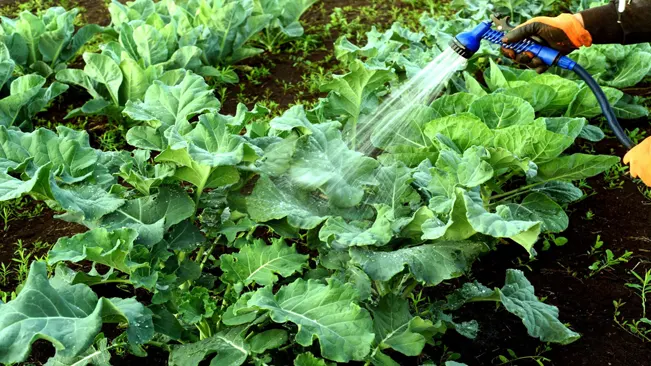
- Consistent Moisture: Brassicas require consistent soil moisture to thrive. This is particularly crucial during their early growth stages and as they form heads. Inconsistent watering can lead to problems like split heads in cabbage or poor head formation in broccoli and cauliflower.
- How to Water: The goal is to keep the soil evenly moist. This usually means watering deeply once or twice a week, depending on your climate and soil type. In hotter, drier climates, more frequent watering may be necessary. Use a soaker hose or drip irrigation for deep, even watering that keeps leaves dry and reduces disease risk.
- Signs of Over or Under-Watering: Over-watering can lead to waterlogged soil, promoting root diseases. Under-watering, especially during dry spells, can stress the plants, leading to poor development. Watch for wilting or yellowing leaves as signs of water stress.
Feeding Brassicas
- Soil Preparation: Before planting brassicas, enrich the soil with compost or well-rotted manure. This provides a good start by enhancing soil fertility and structure.
- Fertilizer Use: Even with good soil preparation, additional feeding is beneficial. Use a balanced, all-purpose vegetable garden fertilizer. The three main nutrients required are nitrogen (N), phosphorus (P), and potassium (K). A balanced fertilizer will have these in equal or nearly equal proportions, such as 10-10-10 or 20-20-20.
- When to Fertilize: Apply fertilizer when transplanting seedlings outdoors and again when they start to form heads. This second application is crucial as it provides the necessary nutrients for proper head formation and growth.
- Organic Options: For organic gardens, fish emulsion or seaweed extract are excellent options. They provide a balanced range of nutrients and are gentle on the plants. Additionally, applying compost as a top dressing mid-season can provide a slow-release nutrient boost.
- Monitoring Plant Health: Observe your brassicas’ growth and color. Dark green, healthy leaves indicate good nutrition, while yellowing leaves or stunted growth might suggest a need for additional feeding.
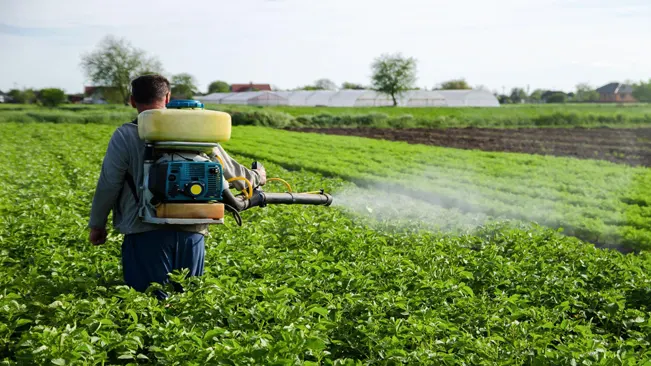
Pest and Disease Management
Brassicas are susceptible to pests like cabbage worms and aphids, as well as diseases like clubroot. Regularly inspect your plants and use organic methods like neem oil or insecticidal soap to control pests. Crop rotation and good sanitation can help prevent diseases.
Common Pests
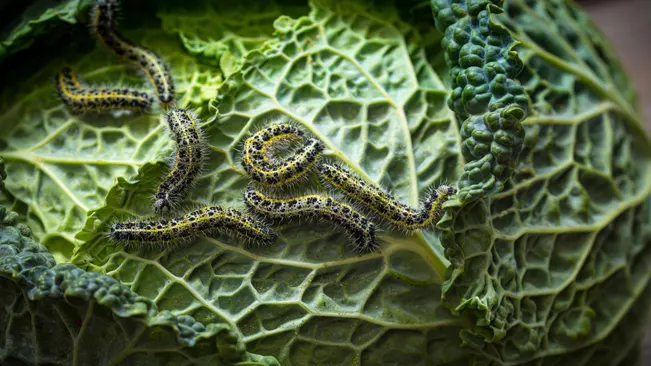
- Cabbage Worms: These caterpillars, including the cabbage looper and imported cabbageworm, are common brassica pests. They chew large, irregular holes in leaves, reducing the plant’s vigor.
- Aphids: Small, sap-sucking insects that can stunt growth and spread disease. They often cluster on the undersides of leaves.
- Flea Beetles: Tiny beetles that jump like fleas and chew small holes in leaves.
Pest Management Strategies
- Regular Inspection: Early detection is crucial. Inspect your brassicas frequently for signs of pests, especially on the underside of leaves.
- Organic Pesticides: Neem oil and insecticidal soaps are effective against many pests and are less harmful to beneficial insects and the environment compared to synthetic pesticides.
- Biological Controls: Introduce beneficial insects like ladybugs and parasitic wasps, which prey on aphids and caterpillars.
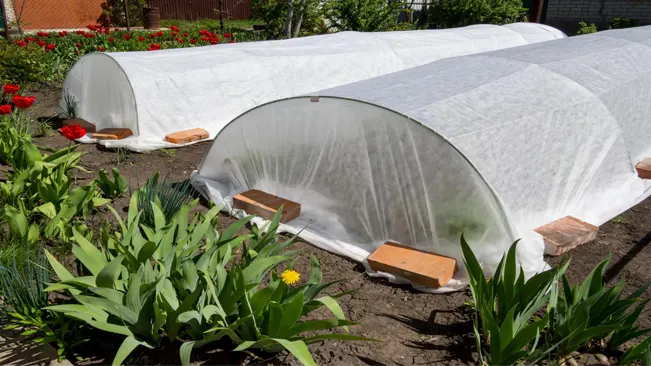
- Barriers: Floating row covers can prevent pests from accessing plants. Ensure they are secured to the ground to block access.
Common Diseases

- Clubroot: A soilborne disease that causes swollen, deformed roots, leading to stunted growth and wilting.
- Black Rot: A bacterial disease characterized by yellow, V-shaped lesions on leaf edges.
- Downy Mildew: Appears as yellow patches on leaf surfaces and white, cottony mold on the undersides.
Disease Management Strategies
- Crop Rotation: Avoid planting brassicas in the same spot each year. Rotating crops helps reduce the buildup of soilborne diseases.
- Good Sanitation: Remove and destroy infected plant debris. Avoid composting diseased plants as this can spread the pathogen.
- Resistant Varieties: Choose brassica varieties known for their resistance to specific pests and diseases.
- Soil pH Adjustment: Clubroot thrives in acidic soils. Liming the soil to raise the pH can help prevent this disease.
- Proper Spacing and Airflow: Ensure plants are spaced according to their needs. Good air circulation reduces the humidity around the plants, making them less susceptible to diseases like downy mildew.
Integrated Pest Management (IPM)
Consider using an Integrated Pest Management approach, which combines cultural, biological, and chemical methods to manage pests and diseases. This approach minimizes environmental impact and encourages a sustainable, healthy garden ecosystem.
Harvesting
The harvesting time varies depending on the brassica variety. Most are ready when the heads are firm and tight for cabbages and cauliflowers or when the leaves are large enough for kale and collards. Harvest in the morning when the plant’s moisture content is highest.

- Cabbages and Cauliflowers: These are typically ready when the heads are firm, dense, and have reached their expected size. For cabbages, the heads should feel solid when squeezed gently. In the case of cauliflowers, look for tightly packed curds; once they begin to separate, they’re past their prime.
- Kale and Collards: These leafy greens can be harvested when the leaves are large enough to eat but before they become too tough. Younger leaves are generally more tender and flavorful. You can start harvesting the outer leaves first, allowing the inner leaves to continue growing.
- Broccoli and Brussels Sprouts: Broccoli should be harvested when the head is fully formed but before the yellow flowers start to bloom. For Brussels sprouts, the sprouts are ready when they are firm and green, usually about 1 inch in diameter.
Harvesting Techniques
- Cutting: Use a sharp knife or scissors to cut the heads of cabbages, cauliflowers, and broccoli. When harvesting leafy greens like kale and collards, cut the outer leaves near the base of the plant, taking care not to damage the central bud.
- Twisting: For some varieties like cabbages, you can twist and pull the head from the stem. However, this method may disturb the plant’s roots, so cutting is often preferred.
Tips for a Successful Harvest
- Morning Harvest: Harvesting in the early morning is ideal because the plants are full of moisture, which can enhance their crispness and flavor.
- Regular Checks: Regularly check your brassicas as they near maturity. Overripe vegetables can become tough and lose flavor.
- Successive Harvesting: For leafy greens like kale, you can harvest leaves over a period of time. This successive harvesting encourages new growth and can extend the productivity of your plants.
- Handling Gently: Handle your brassicas gently during harvesting to prevent bruising, especially for tender varieties like cauliflower.
Post-Harvest Care
- Immediate Cooling: To preserve freshness, cool your harvested brassicas as soon as possible. This slows down the degradation process and maintains quality.
- Storage: Most brassicas can be stored in the refrigerator. Cabbages and Brussels sprouts, for example, can last several weeks when kept cool and humid. Leafy greens should be consumed sooner as they wilt more quickly.
Conclusion
Planting brassicas from seeds can be an enjoyable and rewarding process. By following these simple steps and providing the right care, you can enjoy a bountiful harvest of healthy, home-grown brassicas. Remember, gardening is a learning experience, so don’t be afraid to experiment and see what works best in your garden.
FAQs (Frequently Asked Questions)
- What are brassicas, and which vegetables are included in this category?
Brassicas, also known as cruciferous vegetables, include a variety of plants like broccoli, cabbage, kale, cauliflower, Brussels sprouts, and collards. They are known for their health benefits and are a staple in many vegetable gardens. - When is the best time to plant brassicas seeds?
The best time to plant brassicas seeds depends on the specific variety and your local climate. Generally, they prefer cooler temperatures. In temperate climates, sowing in early spring or late summer is ideal. - Can I start brassicas seeds indoors?
Yes, starting brassicas seeds indoors is a common practice. It allows for an earlier start, especially in regions with short growing seasons. Seedlings can be transplanted outdoors once they have a few true leaves and the risk of frost has passed. - How deep should I plant brassicas seeds?
Brassicas seeds should be planted about 1/4 inch deep in the soil. This shallow depth helps ensure that they have enough light and warmth to germinate effectively. - How much space do brassicas need to grow?
Spacing requirements vary depending on the variety. For example, broccoli and cauliflower plants need about 18 inches between each plant, while smaller plants like kale may require less space. - Do brassicas need full sun or can they grow in partial shade?
Brassicas generally prefer full sun but can tolerate partial shade. However, too much shade can lead to less robust growth and lower yields. - How often should I water brassicas seedlings?
Brassicas seedlings need consistent moisture to establish well. Water them regularly to keep the soil evenly moist but not waterlogged. As they mature, they may require less frequent but deeper watering. - What kind of soil is best for growing brassicas?
Brassicas thrive in well-drained, fertile soil with a slightly acidic to neutral pH. Enriching the soil with organic matter like compost can improve soil health and provide nutrients for the plants. - How do I protect my brassicas from pests and diseases?
Keep an eye out for common pests like cabbage worms and aphids. Organic methods, such as using neem oil or insecticidal soap, can be effective. Crop rotation and good sanitation practices help prevent diseases like clubroot. - When and how do I harvest brassicas?
The harvesting time varies by variety. For example, cabbage and cauliflower are harvested when the heads are firm, while kale and collards can be picked when the leaves are large enough to eat. Use a sharp knife to cut the heads or leaves, and try to harvest in the morning when moisture content is highest.
Set your brassicas now for a season full of fresh harvests. Enjoy the bounty!

Kristine Moore
Forestry AuthorI'm Kristine Moore, a seasoned garden landscaping professional with over 30 years of experience. My extensive career has been dedicated to transforming outdoor spaces into stunning, sustainable landscapes. With a deep understanding of horticulture, design principles, and environmental stewardship, I have become a respected figure in the field, known for creating harmonious, visually appealing, and eco-friendly gardens. My commitment to excellence and continuous learning in landscaping trends and techniques has solidified my reputation as an expert in garden design and implementation.
2 comments
Every year I have problems with my brassica seedlings, except the kale usually does ok. They will sprout up fine and healthy then they just turn yellow and curl up and die. It isn't damping off. I don't know what it is and I cannot find any info online. I seed them in standard Pro-Mix potting soil, peat based. I germinate them at about 70 degrees. I usually have to resow them. I will generally get the plants I need because I seed a lot of extras, but this is frustrating. I have been gardening a long time and grow just about everything. I sell produce and plants. I should know what the problem is, but I am simply stumped on this one.


Fertilizing: I don't start fertilizing anything until the first true leaves start growing, with a weak water soluble 20-20-20 (half strength). Maybe brassis need fertilizer sooner?
Kevin Straub
April 20, 2024 12:26 am