How to Build a Raised Herb Planter
- January 10, 2024
- 0 comment
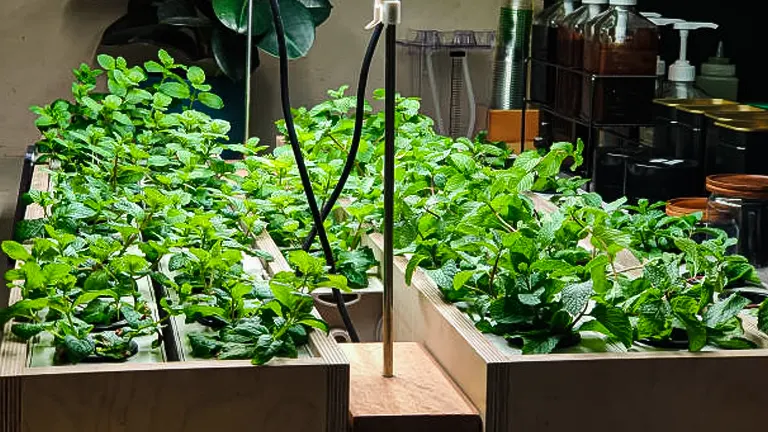
Creating your own raised herb planter is an exciting venture that brings the goodness of fresh flavors right to your home. With basic materials like cedar boards and simple tools such as a circular saw, this do-it-yourself project not only provides a practical gardening solution but also offers a personalized space for growing aromatic herbs. Follow along as we guide you through the steps, encouraging you to enjoy the process of nurturing and harvesting your favorite culinary herbs in a handy planter. Get ready to add a homegrown touch to your dishes and relish the satisfaction of building something green and delightful. Happy gardening!
List of Guides on How to Build a Raised Herb Planter
- Gather Materials and Tools
- Cut the Wood
- Prepare the 4×4 Posts
- Modify Cedar Boards
- Assemble the Bottom Frame
- Assemble the Upper Frame
- Add Side Panels
- Line the Planter
- Fill with Soil and Plant Herbs
- Optional Finishing Touches
Materials:
- 1×6 cedar boards (tongue and groove paneling)
- 1×4 cedar boards
- 4×4 cedar boards (or other wood if cedar is not available)
- 2″ wood screws
- Steel wire fencing (1/4″ holes)
- Landscaping Fabric
- 2 bags of soil
Tools:
- Circular saw
- Table Saw
- Drill and Impact Driver
- Speed Square
- Clamps
- Wire Snips
- Staple gun
Cut List:
- (4) 4×4 – 30″
- (4) 1×6 – 24″
- (4) 1×6 – 46.5″
- (5) 1×4 – 24″
Step 1: Gather Materials and Tools
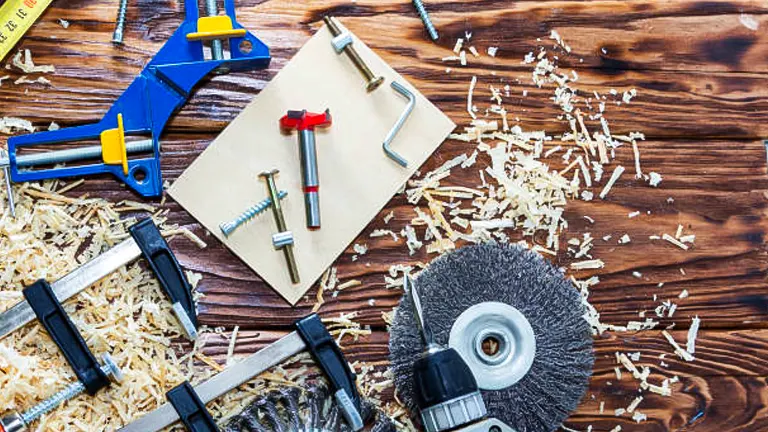
Initiate the project by gathering all the necessary materials and tools essential for your raised herb planter. Acquire the following items: 1×6 cedar tongue-and-groove paneling boards for a polished appearance, Douglas fir for robust 4×4 posts, and crucial tools including a circular saw, table saw, drill, impact driver, speed square, and clamps. Equip yourself with wire snips and a staple gun for securing wire fencing, ensuring a well-organized and safe workspace for your herb cultivation. Prioritize safety by including essential safety gear such as safety glasses and gloves to guarantee a secure and comfortable working experience.
Additional Tips:
- When selecting cedar boards, inspect them for straightness and minimal knots to enhance the planter’s overall appearance.
- Invest in wood sealant or exterior-grade paint to protect the cedar from weathering, extending its lifespan.
- Consider pre-drilling holes for screws to prevent wood splitting and ensure a smoother assembly process.
- Lay out all materials in an organized manner before starting to streamline the building process.
- If using reclaimed wood, ensure it is thoroughly cleaned and treated to avoid potential issues with pests or mold.
Step 2: Cut the Wood
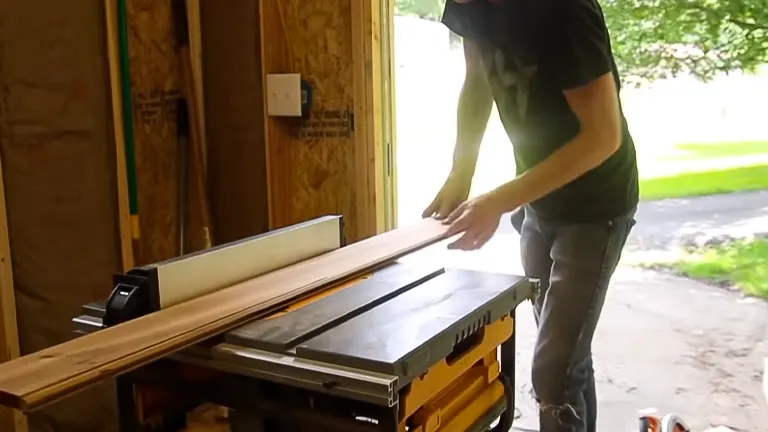
Begin the wood-cutting process by using the circular saw and table saw on the chosen 1×6 cedar boards, which are specifically tongue-and-groove paneling boards. The decision to opt for cedar is strategic, as it boasts superior resistance to water and prevents rot, ensuring the durability of your herb planter.
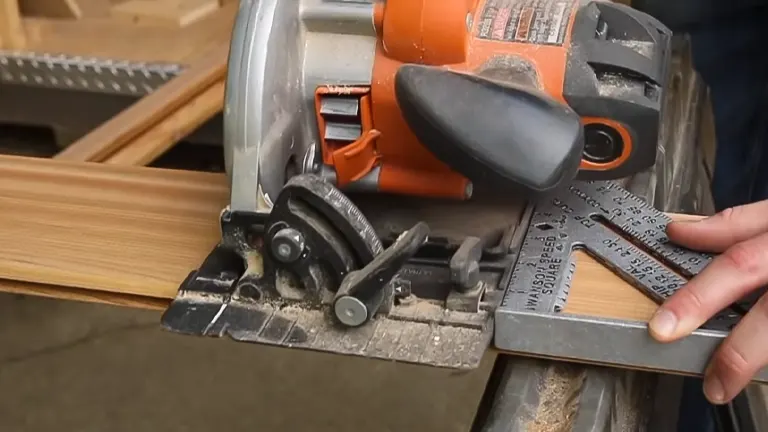
For the 4×4 posts, made from Douglas fir, precision is crucial. Mark your cutting points and utilize a circular saw, flipping the posts to ensure an even cut on both sides. Some adjustments may be necessary, and if needed, smooth out any irregularities with sandpaper to achieve the desired results.
Once all components are cut to size, the next step involves refining the appearance of the cedar boards. Given their tongue-and-groove nature, remove the tongue from the top board and cut off the groove from the bottom. This modification ensures that each side presents a flat surface for a neat and polished look.
Continue the wood-cutting process with meticulous attention to detail, as these adjustments significantly contribute to the overall craftsmanship of your raised herb planter.
Additional Tips:
- Blade Selection: Choose a fine-tooth blade for cleaner finishes and a coarse-tooth blade for faster cuts, selecting the most appropriate blade for your intended outcome.
- Test Cuts: Prior to cutting the actual material, make test cuts on scrap pieces to refine your technique and understand the behavior of the saws.
- Clamping Strategy: Secure the wood pieces firmly using clamps to minimize vibrations and enhance cutting accuracy.
- Cutting Order: Plan a systematic cutting order, especially for multiple pieces of the same dimension, maintaining consistency across all components.
- Measure Twice: Double-check measurements before making cuts to prevent errors and ensure precise dimensions for each component.
- Blade Maintenance: Regularly inspect and sharpen saw blades to optimize cutting efficiency and prolong the lifespan of your tools.
Step 3: Prepare the 4×4 Posts
Carefully mark the precise points on the 4×4 posts where you plan to make cuts. Employ a circular saw on each side, flipping the post to guarantee a uniform and clean cut. Take extra care during this step, as the accuracy of your cuts directly impacts the stability and aesthetics of the final planter structure.
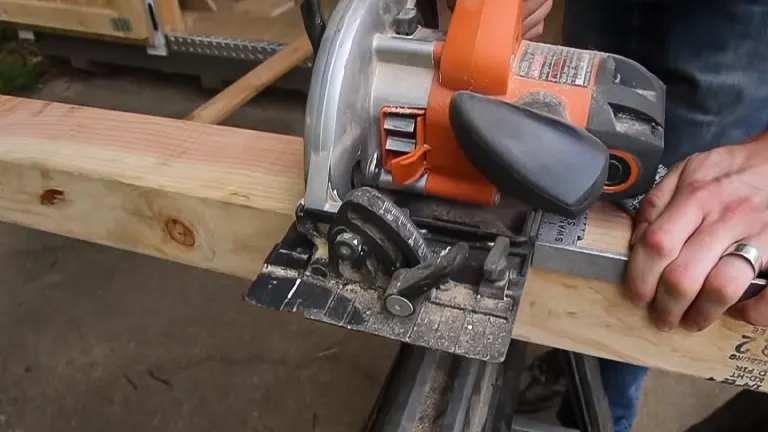
Once the cuts are made, inspect the posts for any uneven portions. Use sandpaper to smooth out these areas, ensuring a polished and professional finish. This additional step not only enhances the visual appeal but also contributes to the overall quality of the planter.
Additional Tips:
- Secure the Post: Use clamps to secure the 4×4 post firmly in place before making cuts, minimizing vibrations and enhancing cutting precision.
- Test Cuts: Make preliminary cuts on scrap pieces of wood to fine-tune your technique and settings before working on the actual posts.
- Check for Squareness: Utilize a carpenter’s square to confirm that the cuts create a square shape, ensuring proper alignment during assembly.
- Stabilize with a Workbench: If possible, perform the cutting on a stable workbench to enhance control and accuracy.
- Use a Guide: Consider using a cutting guide or straight edge to maintain straight cuts and minimize the risk of deviation.
Step 4: Modify Cedar Boards
Enhance the visual sophistication of your planter by carefully refining the cedar boards. Begin by removing the tongue from the top board and cutting off the groove from the bottom. This process creates a uniform, smooth, and flat surface on both sides, contributing to a cohesive and polished appearance that elevates the overall aesthetic of the herb planter.
While modifying the cedar boards, focus on the finer details, ensuring a consistent removal of the tongue and groove across all boards. This uniformity is crucial for achieving a professional and seamlessly assembled structure.
Additional Tips for Modifying Cedar Boards:
- Use a Jigsaw for Intricate Cuts: If your design requires intricate cuts, consider using a jigsaw for more controlled and precise modifications.
- Minimize Wood Splinters: To reduce the risk of splinters when making cuts, score along the cutting line with a utility knife before using the saw.
- Fine Sanding: After modifying the boards, perform a fine sanding to eliminate any rough edges and achieve a silky smooth finish.
- Protective Measures: Wear a dust mask and safety glasses during the modification process to safeguard yourself from wood particles and debris.
Step 5: Assemble the Bottom Frame
Initiate the construction of your planter by arranging the 4×4 posts in a square configuration on a flat and level surface. Use 2″ wood screws to securely attach the 1×6 – 24″ boards to the top of the posts. This action serves the dual purpose of creating the foundational structure and setting the framework for the entire planter.
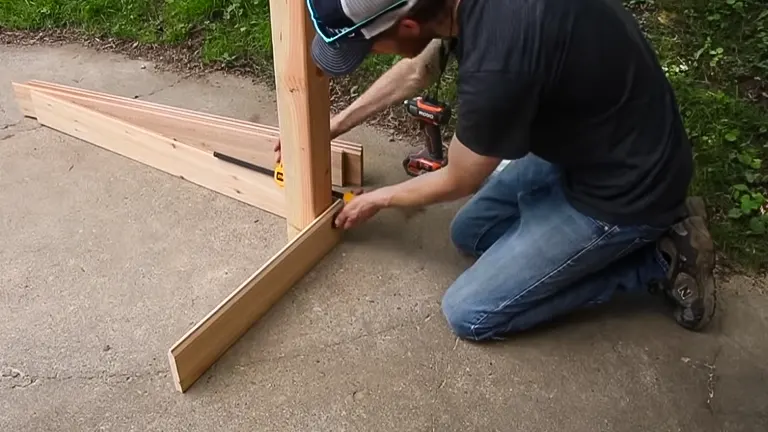
To ensure a robust and precisely aligned base, verify that the frame is perfectly square. Employ a measuring tape or carpenter’s square to confirm uniform length on all sides, promoting balance and a visually pleasing structure.
Additional Tips:
- Pre-drilling: Before inserting screws, pre-drill holes to prevent wood splitting and promote easier screw insertion.
- Use a Level: Ensure the flat surface is level before assembling the frame to prevent an uneven foundation.
- Check Diagonals: Measure the diagonals of the frame; if they are equal, it indicates a square frame.
- Alternate Screw Placement: Stagger the placement of screws along the boards to enhance overall stability.
- Apply Wood Glue: For added strength, consider applying wood glue to the joints before securing them with screws.
- Work on a Stable Surface: Assemble the bottom frame on a stable workbench or level ground to facilitate accurate alignment.
- Verify Dimensions: Double-check the dimensions of the frame against the intended measurements in the cut list for precision.
Step 6: Assemble the Upper Frame
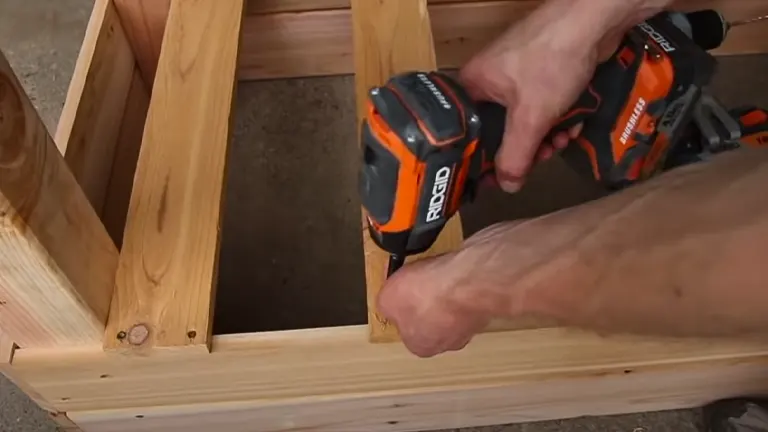
Continue the assembly process by attaching the 1×6 – 46.5″ boards to the tops of the 4×4 posts, forming the upper frame of your planter. Ensure accuracy by using a Speed Square, an essential tool for verifying and preserving right angles in this critical step.
Additional Tips:
- Secure Attachment: Ensure a strong connection by using high-quality wood screws, and consider applying wood glue for added strength.
- Equal Overhangs: Verify that the 1×6 boards have consistent overhangs on all sides to achieve a balanced and visually appealing upper frame.
- Check for Levelness: Use a level to confirm the horizontal alignment of the upper frame, preventing any tilting or instability.
- Pre-drilling Holes: Before inserting screws, pre-drill holes to minimize the risk of wood splitting and facilitate smoother screw insertion.
- Use Clamps: Temporarily secure the boards with clamps before attaching them to the posts to maintain stability throughout the assembly process.
- Square Confirmation: Regularly utilize the Speed Square to check right angles during assembly, ensuring a well-aligned upper frame.
- Quality Inspection: Inspect the 1×6 boards for any defects or irregularities before attaching them to maintain the overall quality of the planter.
Step 7: Add Side Panels
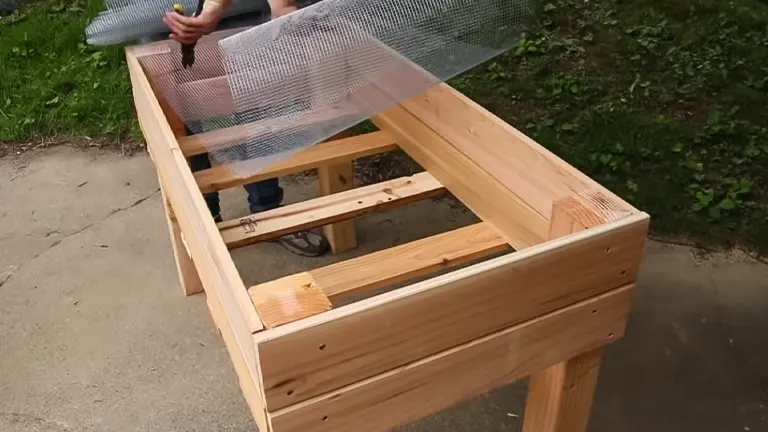
Ensure accuracy as you meticulously trim the steel wire fencing to match the dimensions of the planter sides using wire snips. After cutting, use a staple gun to firmly attach the fencing to the inner sides of the 1×6 frame.
Additional Tips:
- Use Safety Gear: Wear gloves to protect your hands when handling wire fencing, reducing the risk of cuts or injuries.
- Ensure Tautness: Stretch the wire fencing tightly across the inner sides of the 1×6 frame to avoid sagging and maintain a neat appearance.
- Staple Placement: Space staples evenly along the frame, ensuring a secure attachment and preventing the fencing from coming loose.
- Inspect for Sharp Edges: After attaching the wire fencing, inspect for any sharp edges or protruding wires that may pose a safety hazard.
- Consider Decorative Options: If aesthetics are a priority, explore the possibility of painting or coating the wire fencing to complement the overall look of the planter.
- Customize for Climbing Plants: If growing climbing plants, consider adding vertical supports within the wire fencing for plants to climb and flourish.
Step 8: Line the Planter
Enhance the functionality of your planter by carefully lining its interior with landscaping fabric, firmly securing it using staples. This thoughtful step not only ensures efficient containment of the soil but also facilitates optimal drainage for excess water, promoting a healthy environment for your herbs.
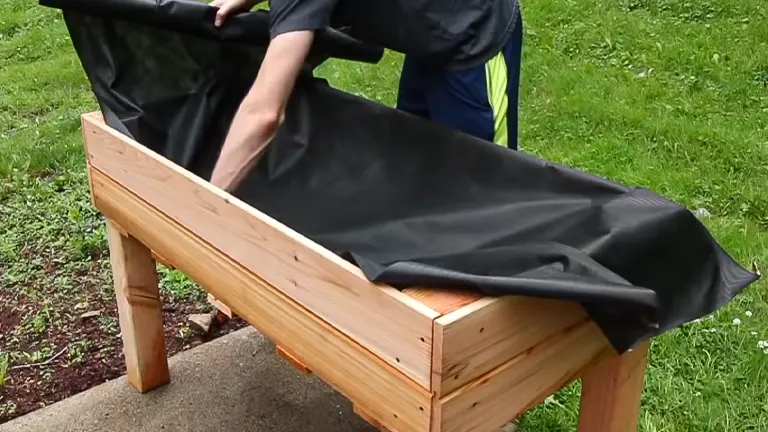
It’s advisable to choose a breathable landscaping fabric to maintain soil aeration and prevent waterlogged conditions. Additionally, double-check the fabric’s coverage to minimize the risk of soil escaping, providing a practical and tidy solution for your raised herb planter.
Additional Tips:
- Overlap Seams: When placing multiple pieces of landscaping fabric, overlap the seams to ensure a continuous barrier against soil leakage.
- Extra Staple Support: Add extra staples along the edges and corners of the fabric to prevent shifting and maintain a secure lining.
- Drainage Holes: If the planter lacks natural drainage, consider creating small drainage holes in the fabric at the bottom to facilitate water flow.
- Use High-Quality Fabric: Invest in durable and high-quality landscaping fabric to prolong its lifespan and effectiveness.
- Leave Excess Fabric: Allow a bit of excess fabric at the top of the planter to fold over, providing a clean and finished appearance.
- Consider Double Layering: For added reinforcement, especially if using lightweight fabric, consider double layering for increased durability.
- Inspect for Tears: Before adding soil, inspect the fabric for any tears or weak points, repairing them promptly to prevent soil spillage.
- Trim Excess Fabric: Trim any excess fabric hanging over the top of the planter neatly to maintain a tidy and polished look.
Step 9: Fill with Soil and Plant Herbs
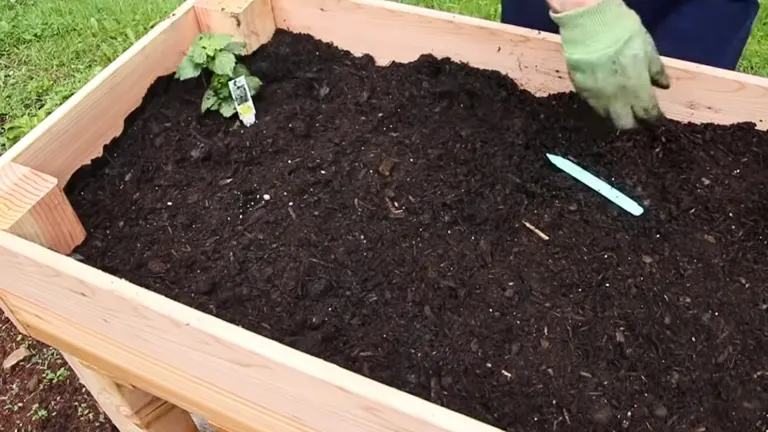
Transition to the final stage of your project by filling the planter with quality soil and planting your favorite herbs. Ensure you choose a well-balanced potting mix suitable for herbs, providing essential nutrients for healthy growth. When planting, consider the following tips to maximize success:
Additional Tips:
- Layer for Drainage: Add a layer of gravel or broken terracotta pots at the bottom of the planter to enhance drainage and prevent waterlogging.
- Mind Sunlight Exposure: Be mindful of the sunlight requirements for each herb and position the planter accordingly to optimize their growth.
- Spacing Consideration: Follow recommended spacing guidelines when planting herbs to allow proper airflow and prevent overcrowding.
- Mulch Application: Apply a thin layer of organic mulch on top of the soil to conserve moisture, suppress weeds, and regulate soil temperature.
- Watering Routine: Establish a consistent watering routine, ensuring the soil remains consistently moist without becoming waterlogged.
- Rotate Herbs: Periodically rotate herb pots to promote even exposure to sunlight and encourage uniform growth.
- Companion Planting: Explore companion planting strategies to enhance the overall health and pest resistance of your herb garden.
- Monitor Growth: Regularly monitor the growth of your herbs, adjusting care practices as needed based on their individual requirements.
Step 10: Optional Finishing Touches
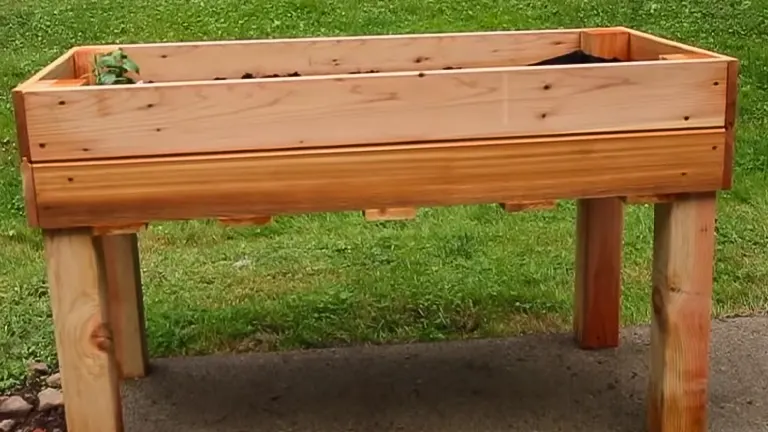
Enhance the visual appeal of your planter by considering optional finishing touches. Add a decorative top trim using extra cedar boards to infuse style. Preserve the planter’s beauty and protect it from weathering by applying a wood sealer or stain, improving its overall appearance and durability.
Additional Tips:
- Highlight Design Elements: Incorporate the top trim to emphasize specific design features or create a unified appearance with the surrounding environment.
- Explore Stain Options: Experiment with various wood stains to achieve the desired aesthetic, whether it’s a natural finish or a more vibrant color.
- Ensure Safety with Rounded Edges: If safety is a concern, consider rounding the edges of the top trim to minimize sharp corners and potential hazards.
- Careful End Grain Sealing: Pay extra attention to sealing the end grain of any additional cedar boards to prevent moisture absorption and potential decay.
- Regular Maintenance Schedule: Establish a routine for periodic maintenance, including reapplying wood sealer or stain, ensuring the protective finish and the planter’s appearance endure over time.
- Enhance with Lattice: For a more intricate design, contemplate incorporating lattice panels into the top trim, creating a delightful backdrop for climbing plants.
Building a raised herb planter is a rewarding endeavor, offering both a functional gardening space and an opportunity to showcase your DIY skills. Enjoy the process and the bountiful harvest of homegrown herbs!
Factors to Consider When Building a Raised Herb Planter
- Material Selection: Choose a durable and weather-resistant material for the planter. Cedar is a popular choice due to its resistance to decay and insects.
- Design and Dimensions: Plan the dimensions of the planter based on available space and the number of herbs you want to grow. Consider the design elements, such as adding decorative trims or features, to enhance the overall aesthetics.
- Soil Quality: Select a high-quality potting mix or create a well-balanced soil blend with proper drainage for optimal herb growth.
- Drainage: Ensure the planter has adequate drainage holes to prevent waterlogging, promoting healthy root systems.
- Sunlight Exposure: Place the planter in a location that receives sufficient sunlight based on the sunlight requirements of the herbs you plan to grow.
- Watering System: Consider the watering needs of different herbs and implement an appropriate watering system, such as drip irrigation or a well-designed watering schedule.
- Protection from Pests: Implement measures to protect your herbs from pests. This may include using companion planting techniques or installing fencing.
- Accessibility: Design the planter at a height that is comfortable for you to reach, minimizing the need for excessive bending or stretching.
- Climate Considerations: Take into account the local climate and weather conditions. Consider adding features like covers or shades for extreme weather protection.
- Herb Selection: Choose herbs that complement each other in terms of growth requirements and can thrive together in the same planter.
- Seasonal Considerations: Plan for seasonal changes by selecting herbs that can adapt to varying weather conditions or by adding protective coverings during harsh seasons.
- Maintenance and Upkeep: Consider the ease of maintenance. Plan features like easy-access panels for replanting, cleaning, and general upkeep.
By carefully considering these factors, you can create a raised herb planter that not only looks aesthetically pleasing but also provides an optimal environment for your herbs to flourish.
Conclusion
In summary, constructing a raised herb planter involves careful material selection, precise measurements, and thoughtful considerations for factors like drainage and sunlight exposure. The step-by-step process, coupled with optional finishing touches, results in a personalized and functional herb garden. The project, when filled with quality soil and flourishing herbs, not only enhances culinary experiences but also adds natural beauty to your space. Building a raised herb planter is a harmonious blend of functionality and aesthetics, bringing the joy of fresh herbs within arm’s reach.
FAQs
- Why should I build a raised herb planter instead of planting herbs directly in the ground?
A raised herb planter offers better control over soil quality, drainage, and accessibility. It minimizes the risk of soil-borne diseases, provides optimal growing conditions, and is easier to maintain. - Can I use any type of wood for the planter, or is cedar the best choice?
While cedar is an excellent choice due to its durability and resistance to decay, you can use other rot-resistant woods like redwood or pressure-treated lumber. Ensure the wood is safe for growing edibles and won’t leach harmful chemicals. - How can I protect my herbs from pests in a raised planter?
Implement pest control measures such as companion planting, introducing beneficial insects, or installing fencing around the planter. Regularly inspecting plants for signs of pests also helps in early intervention. - What is the ideal soil mix for a raised herb planter?
A well-balanced potting mix with good drainage is ideal. You can use a combination of quality potting soil, perlite, and organic matter. Consider adding compost to provide essential nutrients. - Can I place my raised herb planter indoors or on a balcony?
Yes, you can place a smaller raised herb planter indoors or on a balcony, provided there is sufficient sunlight. Be mindful of the weight when placing it on elevated surfaces. - How often should I water the herbs in a raised planter?
The frequency of watering depends on factors like the herbs’ water needs, weather, and soil moisture. It’s crucial to maintain consistent moisture without overwatering, which can lead to root rot. - Are there any specific herbs that are best suited for a raised planter?
Herbs like basil, rosemary, thyme, and mint thrive in raised planters. Choose herbs with similar sunlight and water requirements for a harmonious and healthy herb garden. - Can I disassemble and relocate my raised herb planter?
Yes, most raised herb planters can be disassembled and relocated. Ensure you carefully follow the assembly instructions during disassembly and be mindful of any potential damage to the structure.
Building a raised herb planter is a delightful project that blends practicality with nature’s charm. From selecting materials to final touches, each step contributes to a personalized herb haven. Whether you’re a seasoned gardener or a beginner, this DIY venture brings joy to your culinary adventures and adds natural beauty to your space. Happy gardening!

Benjamin Brooks
Forestry AuthorGreetings! I'm Benjamin Brooks, and my journey over the past 15 years has revolved around the fascinating realms of content creation, expertise in snow clearing, and the intricate world of lumberjacking and landscaping. What began as a simple curiosity about the natural world and heavy machinery has evolved into a passionate profession where my love for crafting words intertwines seamlessly with my lumberjacking and garden skills.


Leave your comment