How to Build an Indoor Outdoor Planter
- January 8, 2024
- 0 comment
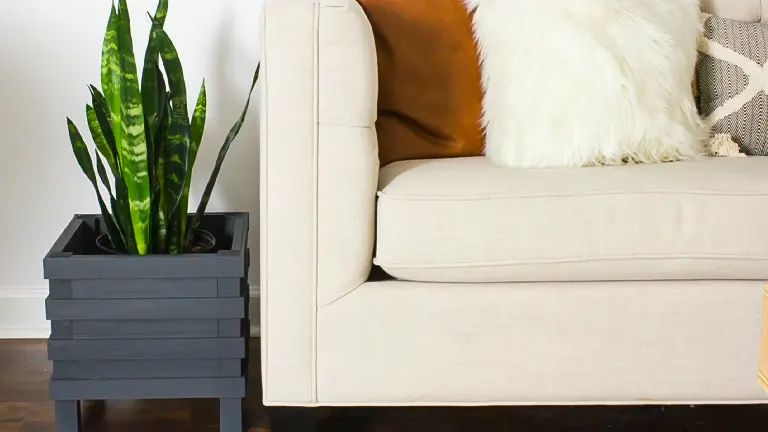
Discover how to build an indoor outdoor planter with our easy guide. Perfect for adding greenery to any space. Surrounding yourself with greenery is a simple yet effective stress-reliever and mood-booster. Consider a customized planter that effortlessly brightens up your space with its tailored size. Whether placed in your bathroom, bedroom, or any living area, this planter, complete with interchangeable pots, makes it easy to refresh your indoor environment with different plants whenever you fancy. It’s a straightforward and refreshing way to bring a touch of nature into your home.
List of Guides on How to Build an Indoor Outdoor Planter
1. Cut Your Wood
2. Sand Any Rough Edges
3. Drill Pocket Holes
4. Attach the Legs
5. Attach the Bottom Slats
6. Glue the Stir Sticks
7. Clean Up Edges
8. Fill Nail Holes
9. Paint or Stain
10. Add Plants and Enjoy!
Materials Needed When Building an Indoor Outdoor Planter:
Boards:
- 3/4-inch thick project panel
- 1 x 2 board
- 2 x 2 board
Fasteners:
- 3/4-inch brad nails
- 1 1/4-inch pocket hole screws
- 2-inch deck screws
Tools:
- Saw
- Brad nailer
- Drill/Driver
- Pocket hole jig
- Countersinking drill bit
- Sander
- Measuring tape
- Pencil
- Paintbrush
- Putty knife
Finishing:
- Wood glue
- Wood filler
- Paint or stain
Cut Dimensions:
- (1) Project Panel cut into 4 pieces at 10” x 10”
- (4) 1 x 2 pieces cut to 11 1/2 inches long
- (4) 2 x 2 pieces cut to 13 inches long
- (8) Paint Stir Sticks cut to 13 inches long
- (8) Paint Stir Sticks cut to 13 1/2 inches long
Step 1: Cut Your Wood
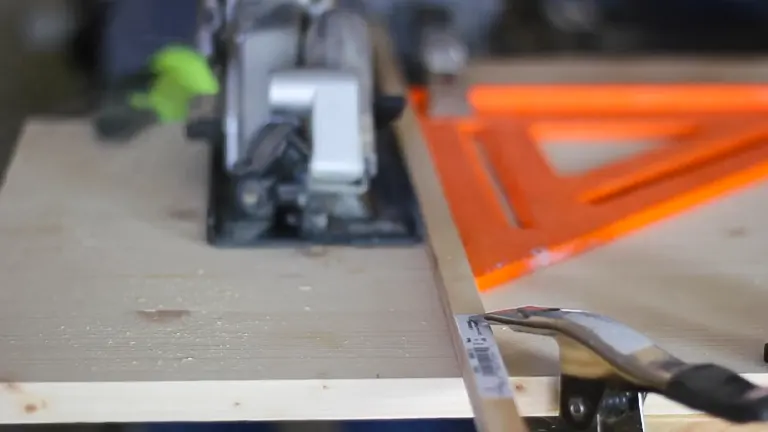
Begin by cutting the project panel into four equal pieces, each measuring 10 inches by 10 inches, using a handheld circular saw. To ensure precise cuts, employ a clamp to secure a board or a speed square as a straight edge guide for the saw. Once the project panel pieces are cut to the appropriate width, switch to a miter saw to complete the remainder of the cuts. Cut the 2×2 board into four pieces, each 13 inches long, and the 1×2 into four pieces, each measuring 11.5 inches. Additionally, cut eight paint stir sticks at 13 inches and eight at 13.5 inches to add a three-dimensional stripe design to each side of the planter. Consider stacking and cutting multiple stir sticks at once for efficiency.
Tips:
- Measure twice, cut once: Ensure the accuracy of your measurements before making any cuts to avoid discrepancies in dimensions.
- Safety first: Don’t forget your safety gear—gloves and safety glasses are your crafting companions.
Step 2: Sand Any Rough Edges
After all the cutting is complete, use a random orbit sander to thoroughly sand all surfaces of the cut wood pieces, ensuring a smooth and polished finish.
Guidance:
- Grit Selection: Start with a coarse grit sandpaper and gradually move to finer grits for a polished result. This step ensures a gradual refinement of surfaces, eliminating coarse marks left by the cutting process.
- Even Strokes: Glide the sander over all surfaces with even strokes. Let it dance across the wood, smoothing out any imperfections or rough patches.
- Edges and Corners: Don’t neglect the edges and corners. The sander’s nimble moves can bring out the beauty even in those intricate details. Just ensure a gentle touch to maintain the wood’s integrity.
- Patience is a Virtue: Take your time. Sanding is a therapeutic process that rewards patience. Enjoy the transformation as the wood transitions from rugged to refined.
Tips:
- Check Your Progress: Periodically stop and run your hands over the wood to feel for any remaining rough spots. It’s a tactile way to ensure a consistently smooth finish.
- Dust Control: Keep the work area tidy. The sander produces dust, and a clear workspace not only aids visibility but also contributes to a healthier work environment.
- Final Inspection: Before moving to the next step, give your pieces a close look. This is your chance to catch any overlooked imperfections and ensure a truly polished outcome.
Step 3: Drill Pocket Holes
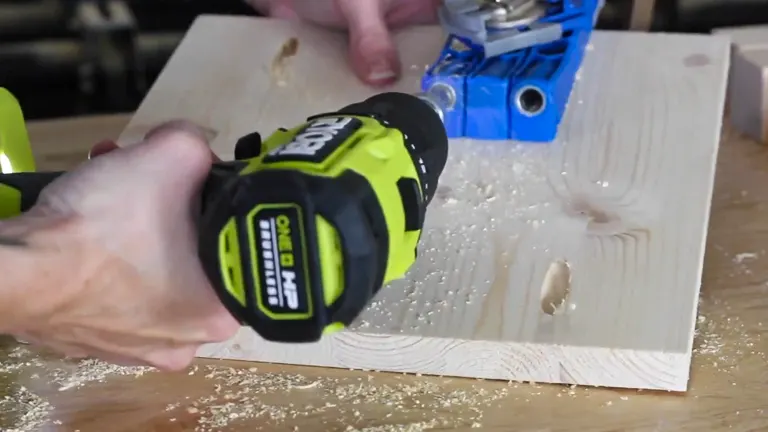
Insert the pocket hole jig drill bit into your drill and drill three pocket holes along two opposite sides of each of the ten-inch project panel pieces. Alternatively, you can use a countersinking drill bit to drill holes from the outside and attach everything with two-inch long deck screws. Consider using a combination of both methods to minimize the need for patching over holes later. Swap out the pocket hole drill bit with the driver bit that came with your pocket hole jig.
Guidance:
- Tool Setup: Put the pocket hole jig drill bit in your drill.
- Strategic Drilling: Drill three pocket holes on two opposite sides of each ten-inch project panel piece.
- Alternative Option: Use a countersinking drill bit to make holes from the outside. Secure with two-inch deck screws.
- Combination Approach: Consider using both methods to minimize future hole patching.
- Tool Swap: Change to the driver bit that comes with your pocket hole jig.
Tips:
- Consistent Depth: Keep a steady hand for a uniform hole depth.
- Balanced Approach: If using a combination, balance the use of both methods.
Step 4: Attach the Legs
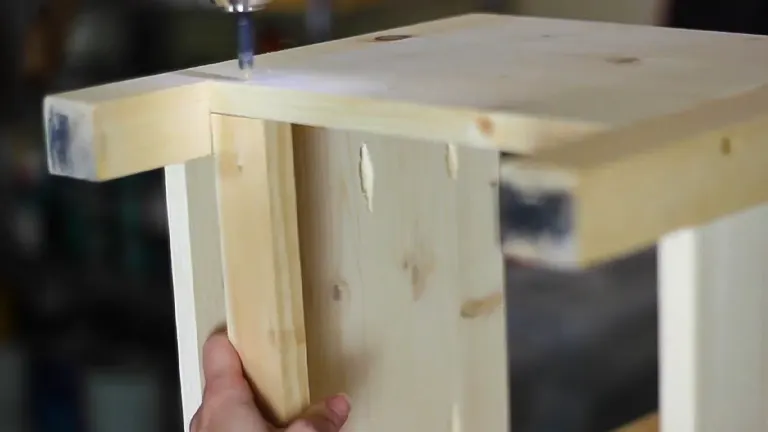
Attach three of the four sides of the planter to the 2×2 legs using one and a quarter-inch long pocket hole screws. For added reinforcement, apply wood glue, ensuring it’s suitable for outdoor use if the planter is intended for outdoor use. Due to the size of the planter, attaching the final piece with pocket hole screws may be challenging. In this case, pre-drill holes with a countersinking drill bit and attach the back piece using two-inch long deck screws.
Guidance:
- Piece Alignment: Take three sides of your planter and connect them to the 2×2 legs. Precision matters – let’s ensure a snug fit.
- Screw It In: Use one and a quarter-inch long pocket hole screws for secure attachment. It’s like putting together a puzzle – each screw finds its place.
- Reinforcement Bonus: To beef up the structure, consider adding wood glue along with the screws. This is the kind of teamwork that makes everything hold up well.
- Outdoor Assurance: If your planter is destined for the outdoors, make sure the wood glue is suitable for outdoor use. It’s like giving your creation a protective shield against the elements.
- Final Piece Challenge: Given the planter’s size, attaching the last piece with pocket hole screws might get tricky. No worries – here’s a workaround.
- Countersinking Drill Bit: Pre-drill holes using a countersinking drill bit. Think of it as laying the groundwork for a solid connection.
- Secure with Deck Screws: Attach the back piece using two-inch long deck screws. It’s a reliable alternative when space is tight.
Tips:
- Gentle Handling: When attaching the sides, handle the pieces carefully to avoid any misalignments.
- Even Glue Distribution: If using wood glue, spread it evenly for uniform reinforcement.
Step 5: Attach the Bottom Slats
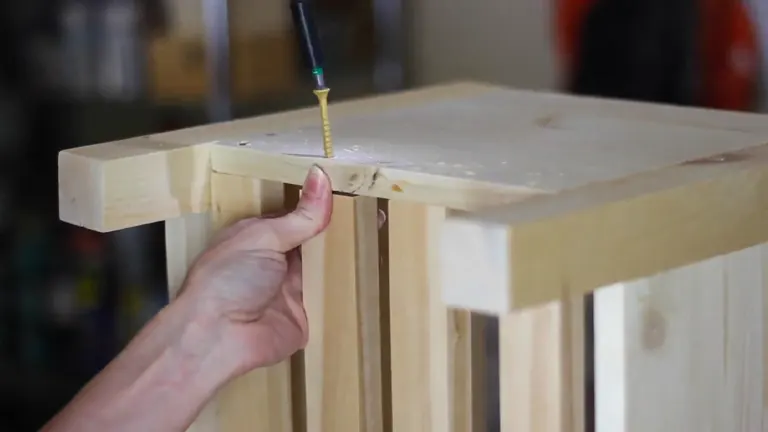
Attach the bottom slats by pre-drilling holes with a countersinking drill bit and driving two-inch long deck screws in from the outside. Ensure even spacing between the slats, attaching all four on one side before flipping it over and securing them from the other side.
Guidance:
- Prepare Your Arsenal: Get your countersinking drill bit and two-inch deck screws ready. It’s like having your tools at the ready for a smooth operation.
- Strategic Drilling: Pre-drill holes into the sides using the countersinking drill bit. Think of it as laying the groundwork for a sturdy foundation.
- Screw It In: Drive those two-inch deck screws from the outside into the pre-drilled holes. It’s like connecting the dots – each screw finding its designated spot.
- Even Spacing Magic: Ensure there’s even spacing between the slats. Consistency is key for a polished finish.
- Side-to-Side Strategy: Attach all four slats on one side first. Once that’s done, flip it over like a pancake and secure them from the other side. It’s a strategic move for balanced support.
Tips:
- Gentle Pre-Drilling: When using the countersinking drill bit, apply gentle pressure to avoid splintering the wood.
- Spacing Perfection: Use a measuring tool to guarantee uniform spacing between the slats. It’s the little details that make a big difference.
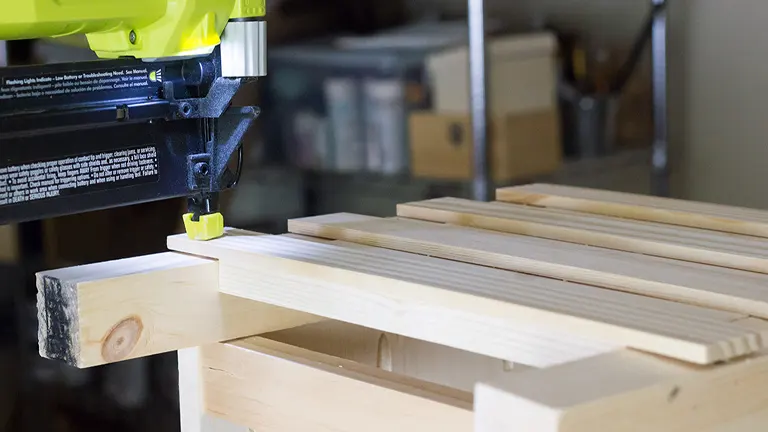
Step 6: Glue the Stir Sticks
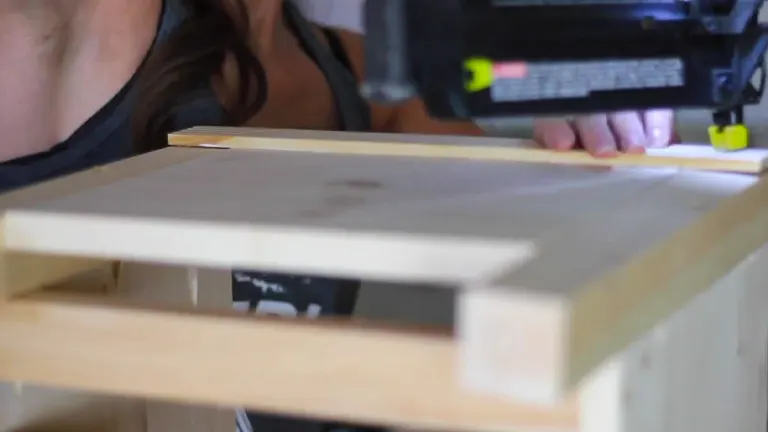
With all sides and bottom slats attached, it’s time to add the decorative stick stripes. Use wood glue and a brad nailer to attach each stick, starting at the top edge. Utilize a stir stick as a spacer to ensure equal spacing. Use the 13-inch long stir sticks for each side and the 13.5-inch sticks for the front and back. Move the spacer stick along as you progress, ensuring an even distribution of the stripes.
Guidance:
- Prep Tools: Get your wood glue and brad nailer ready for this decorative step.
- Start at the Top: Begin at the top edge to set the foundation.
- Apply Glue & Nail: Use wood glue generously and secure each stick with the brad nailer.
- Use a Spacer: Grab a stir stick as a spacer for equal spacing between decorative sticks.
- Choose Stick Lengths: Utilize 13-inch sticks for the sides and 13.5-inch sticks for the front and back.
- Maintain Spacing: Move the spacer stick along for consistent spacing.
Tips:
- Even Glue Application: Apply glue evenly for a strong bond without mess.
- Steady Nailing: Keep a steady hand when using the brad nailer for precision.
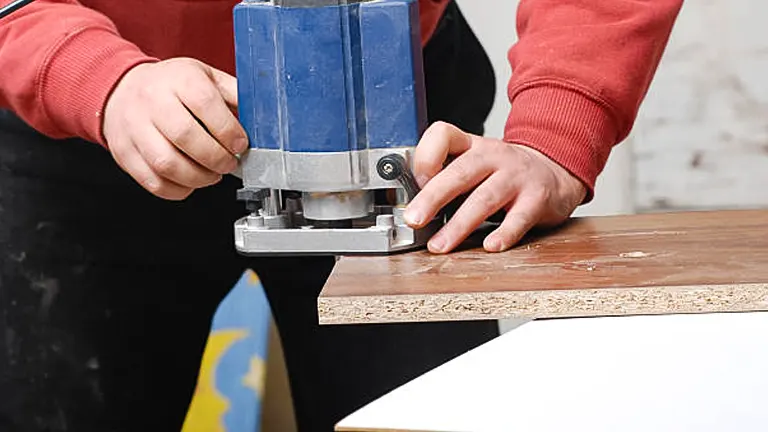
Step 7: Clean Up Edges

After attaching the stir sticks, use your sander to clean up the edges and smooth out the surfaces, ensuring a neat and polished appearance.
Guidance:
- Check Your Work: Take a moment to review the placement of the stir sticks. Ensure they are secure and positioned as intended.
- Grab the Sander: Retrieve your sander. This step focuses on eliminating any remaining rough spots or irregularities.
- Systematic Passes: Approach the task systematically. Make even passes with the sander across the edges, maintaining a consistent and uniform treatment.
- Achieve a Neat Finish: The goal here is straightforward – aim for a clean and polished appearance. The edges should be smooth to the touch and visually appealing.
Tips:
- Apply Light Pressure: When using the sander, remember that gentle and controlled pressure is key for effective smoothing. Avoid excessive force.
- Periodically Check Progress: As you work, take breaks to assess the progress. Check the edges to ensure they meet your expectations, making any necessary adjustments.
Step 8: Fill Nail Holes
Apply wood filler to patch over the nail holes and any visible screw holes. Once the filler has dried, use a sheet of sandpaper to sand it smooth, creating a seamless and flawless surface.
Guidance:
- Apply Wood Filler: Begin by applying wood filler to cover the nail holes and any visible screw holes. Use a putty knife or a similar tool for precise application. Ensure all holes are adequately filled.
- Allow Drying: Give the wood filler sufficient time to dry completely. Refer to the product instructions for the recommended drying duration. This step sets the foundation for a smooth surface.
- Sand to Smoothness: Once the filler is dry, grab a sheet of sandpaper. Sand the filled areas gently and evenly until you achieve a seamless and flawless surface. This process ensures a consistent and polished look.
Tips:
- Precise Application: Use a putty knife or a similar tool for accurate and tidy application of the wood filler.
- Patience is Key: Allow the wood filler to dry thoroughly before moving on to sanding. Rushing this step may compromise the final result.
- Gentle Sanding: Be gentle while sanding to avoid uneven surfaces. The goal is to create a smooth finish.
Step 9: Paint or Stain
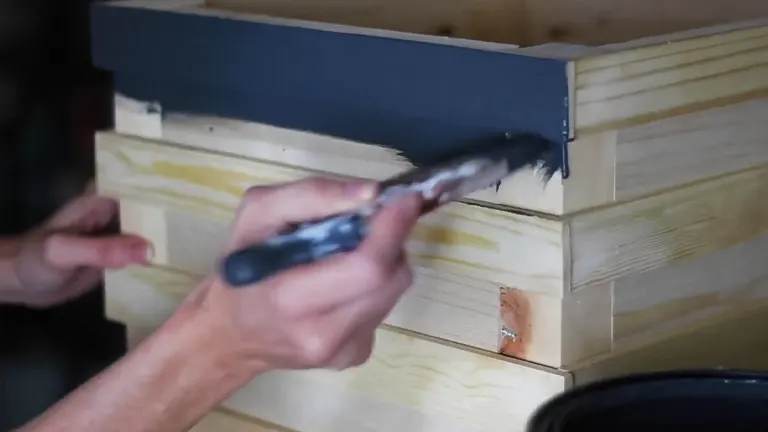
Now, it’s time to add color to your planter. If you’re painting, use exterior latex paint, especially if the planter will be used outdoors. Priming is recommended before painting. If staining, be sure to use a sealer meant for outdoor use. The example mentions the use of Bear Marquee paint in the color Nightfall.
Guidance:
- Choose Your Finish: Decide whether you want to paint or stain your planter. Each option offers a unique aesthetic, so pick what aligns with your vision.
- For Painting: If you opt for paint, use exterior latex paint, especially if the planter will reside outdoors. Consider priming the surfaces before applying the paint for enhanced durability.
- For Staining: If staining is your preference, ensure you use a sealer specifically designed for outdoor use. This step protects the wood and preserves the finish against the elements.
- Color Selection: Pick a color that suits your style and surroundings. In the example, Bear Marquee paint in the color Nightfall was used, but feel free to choose any shade that resonates with you.
Tips:
- Priming for Paint: Priming surfaces before painting creates a solid foundation and helps the paint adhere better, resulting in a longer-lasting finish.
- Sealing for Stain: A good-quality sealer for stain ensures protection against weathering, extending the life of your planter.
- Even Application: Whether painting or staining, strive for an even and consistent application. Take your time to achieve a professional-looking finish.
Step 10: Add Plants and Enjoy!
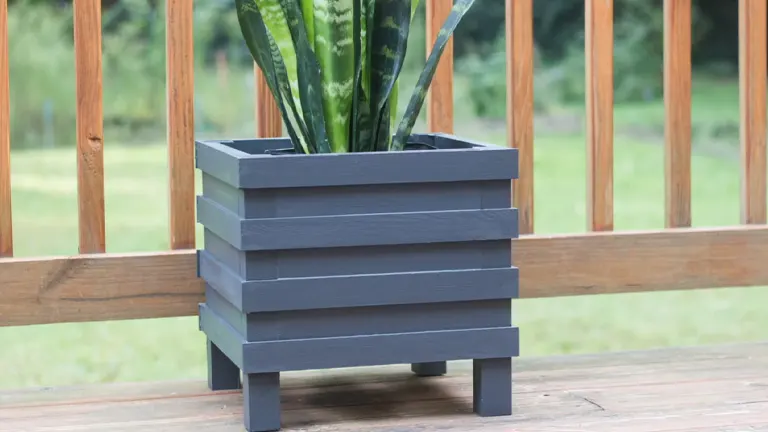
Once the paint has dried, your indoor-outdoor planter is ready for use. Add your favorite plants, and whether placed inside or outside, revel in the beauty of your handcrafted green oasis.
Guidance:
- Wait for Drying: Ensure the paint or stain has thoroughly dried before moving forward. This patience ensures the best results for your handcrafted masterpiece.
- Choose Your Green Companions: Now comes the fun part – selecting plants to grace your planter. Consider the lighting conditions of the chosen location (indoor or outdoor) to pick plants that thrive in their environment.
- Planting Tips: When adding your plants, consider using well-draining soil and providing adequate drainage within the planter. This ensures a healthy environment for your green companions.
- Indoor Placement: If your planter is destined for indoor use, place it in areas with appropriate sunlight levels for the selected plants. Consider rotating the planter occasionally to promote even growth.
- Outdoor Delight: For outdoor placement, find the perfect spot that complements your garden or patio. Ensure the planter is well-supported and positioned for optimal sunlight or shade, depending on your plant selection.
Tips:
- Patient Planting: Take your time selecting and planting your greenery. A well-thought-out arrangement enhances the overall aesthetic.
- Watering Routine: Establish a regular watering routine based on the needs of your plants. Consistent care ensures their well-being.
- Admire Your Creation: Stand back and admire your handiwork. Your indoor-outdoor planter is now a vibrant focal point, blending nature with your personal touch.
Factors to Consider When Building a Indoor Outdoor Planter
- Location: Evaluate where the planter will be placed – indoors or outdoors. Consider factors like sunlight exposure, temperature variations, and the overall aesthetic of the chosen location.
- Material Selection: Choose materials suited for both indoor and outdoor environments. Consider the durability and resistance of the materials to weather conditions, pests, and potential water exposure.
- Drainage: Adequate drainage is crucial to prevent waterlogged soil. Ensure the planter has drainage holes and consider adding a layer of gravel or drainage material at the bottom to promote proper water flow.
- Size and Space: Assess the available space for the planter. Consider the size of the area, whether it’s a cozy corner indoors or a specific spot in your outdoor space. The planter’s dimensions should harmonize with the surroundings.
- Plant Selection: Choose plants that thrive in the intended environment. Consider the lighting conditions, temperature range, and humidity levels. This ensures the longevity and health of the greenery within the planter.
- Weather Resistance: If the planter will be exposed to the elements outdoors, select materials and finishes that are weather-resistant. This includes using outdoor-friendly paints or stains and ensuring the construction can withstand various weather conditions.
- Maintenance Ease: Consider the ease of maintenance for both the planter and the selected plants. Choose materials that are easy to clean, and plan for convenient access to the soil for planting and adjustments.
- Aesthetic Appeal: Ensure the design of the planter complements the overall aesthetics of the chosen space. Consider factors such as color, style, and any decorative elements that enhance the visual appeal.
- Indoor Air Quality: For indoor planters, take into account the impact on indoor air quality. Select plants known for air-purifying qualities and ensure proper ventilation in the chosen location.
- Weight and Mobility: Consider the weight of the planter, especially for indoor setups. If the planter needs to be moved, ensure it is manageable in terms of weight and has features like built-in casters for easy mobility.
Remember, a well-thought-out planter takes into account both functional and aesthetic aspects, ensuring a harmonious blend with its surroundings while providing a healthy environment for your chosen plants.
Safety Tips When Building an Indoor Outdoor Planter
- Protective Gear: Wear appropriate personal protective equipment (PPE), including safety glasses and gloves. These items safeguard against potential splinters, dust, or sharp edges during cutting and assembly.
- Ventilation: Work in a well-ventilated area, especially when using paints, stains, or wood sealants. Proper ventilation reduces the inhalation of fumes and ensures a healthier working environment.
- Tool Familiarity: Familiarize yourself with the tools you’ll be using, especially power tools. Understanding how to safely operate tools minimizes the risk of accidents and promotes efficient work.
- Secure Work Area: Keep your work area clean and well-organized, minimizing tripping hazards. A clutter-free space reduces the risk of accidents and allows for better concentration on the task at hand.
- Stable Work Surface: Ensure your work surface is stable and secure. A stable work surface prevents wobbling or shifting during cutting or assembly, reducing the risk of injuries.
- Proper Lifting Techniques: Lift heavy materials or tools using proper lifting techniques to avoid strains or injuries. Incorrect lifting can lead to back or muscle injuries. Bend at the knees and keep your back straight when lifting heavy objects.
- Ear Protection: Use ear protection when operating loud tools, such as a circular saw or power sander. Prolonged exposure to loud noises can damage hearing. Ear protection is crucial for minimizing this risk.
- Steady Footing: Wear appropriate footwear with good traction. Solid footing reduces the risk of slips or falls, especially when handling tools or materials.
- Read Instructions: Read and follow the manufacturer’s instructions for all tools and materials. Adhering to instructions ensures proper usage and mitigates the risk of accidents caused by misuse.
- First Aid Kit: Have a basic first aid kit on hand. In case of minor injuries like cuts or scrapes, having a first aid kit nearby allows for prompt treatment.
- Emergency Plan: Know the location of emergency exits and have a plan in case of accidents. Being prepared for emergencies ensures a swift and organized response in the event of an unexpected situation.
- Child Safety: If building with children nearby, create a safe distance and secure tools to prevent access. Children should be kept at a safe distance to avoid accidental injuries or exposure to hazardous materials.
By prioritizing safety throughout the building process, you can create a secure environment for crafting your indoor-outdoor planter. Always exercise caution, follow guidelines, and take preventive measures to ensure a safe and enjoyable DIY experience.
Tutorial on How to Build an Indoor Outdoor Planter
Conclusion
In summary, crafting an indoor-outdoor planter is a fulfilling DIY venture that seamlessly integrates greenery into your living spaces. From material selection to the final touches of paint or stain, each step contributes to a unique and personalized creation. As you add your favorite plants, the planter transforms into a living masterpiece that enhances both indoor and outdoor settings, offering a satisfying blend of functionality and aesthetic appeal.
FAQs
- Can I use any type of wood for building an indoor-outdoor planter?
While various woods can be used, it’s recommended to choose durable and weather-resistant options like cedar or redwood for outdoor use. For indoor planters, you have more flexibility, and materials like pine or plywood can work well. - Do I need special tools to build an indoor-outdoor planter?
Basic tools such as a saw, drill, and sander are essential. A pocket hole jig is handy for a clean finish. Ensure you have safety gear like gloves and safety glasses for protection. - Can I customize the size of the planter to fit my space?
Absolutely! Adjust the dimensions according to your space and personal preference. Just remember to maintain stability and consider the needs of the plants you plan to house. - Is it necessary to seal or paint the planter for outdoor use?
Yes, sealing or painting is crucial for outdoor planters. It helps protect the wood from the elements, ensuring longevity. Use exterior paint or stain, and consider applying a weather-resistant sealant. - What types of plants are suitable for indoor-outdoor planters?
The versatility of these planters allows for a wide range of choices. Herbs, succulents, and flowers are popular for indoor planters, while outdoor planters can accommodate shrubs, small trees, or flowering plants. - How do I prevent water damage to the planter over time?
Incorporate drainage holes in the bottom of the planter to allow excess water to escape. Elevating the planter slightly can also prevent waterlogging, ensuring the longevity of the wood. - Can I build an indoor-outdoor planter if I’m a beginner at DIY projects?
Certainly! This project is beginner-friendly, provided you follow the step-by-step guide. Take your time, use proper safety measures, and enjoy the process of creating your own planter. - How often should I maintain an indoor-outdoor planter?
Maintenance frequency depends on the type of wood and the environmental conditions. Inspect the planter regularly for any signs of wear, and reseal or repaint when needed. For indoor planters, occasional cleaning and checking for pests suffice.
In wrapping up, building your indoor-outdoor planter is not just about cultivating greenery but also crafting a piece of personalized decor. Whether it graces your living room or adorns your patio, this DIY project brings a touch of nature into your surroundings, elevating both your space and your sense of accomplishment. Happy crafting!

Benjamin Brooks
Forestry AuthorGreetings! I'm Benjamin Brooks, and my journey over the past 15 years has revolved around the fascinating realms of content creation, expertise in snow clearing, and the intricate world of lumberjacking and landscaping. What began as a simple curiosity about the natural world and heavy machinery has evolved into a passionate profession where my love for crafting words intertwines seamlessly with my lumberjacking and garden skills.


Leave your comment