Best Uses of Sawdust 2024
- August 29, 2023
- 2 comment
Sawdust, often viewed as a mere byproduct of woodworking, is actually an invaluable resource with a myriad of applications. Not only does making use of sawdust promote environmental sustainability, but it also offers cost-saving and innovative solutions for everyday problems. Below are some of the most fascinating and efficient uses for this wooden wonder:
Best Uses of Sawdust List:
- Mulch and Compost
- Animal Bedding
- Fire Starter
- Cleaning Agent
- Homemade Particleboard
- Mushroom Cultivation
- Smoking Meat
- Natural Dye
- Ice Traction
- Soil Amendment
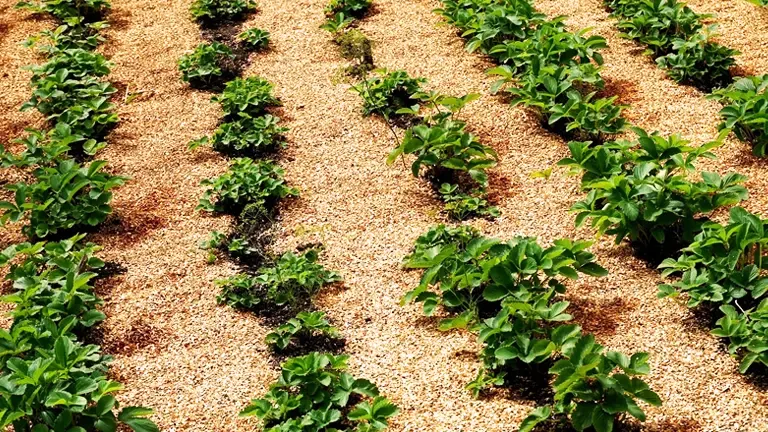
1. Mulch and Compost
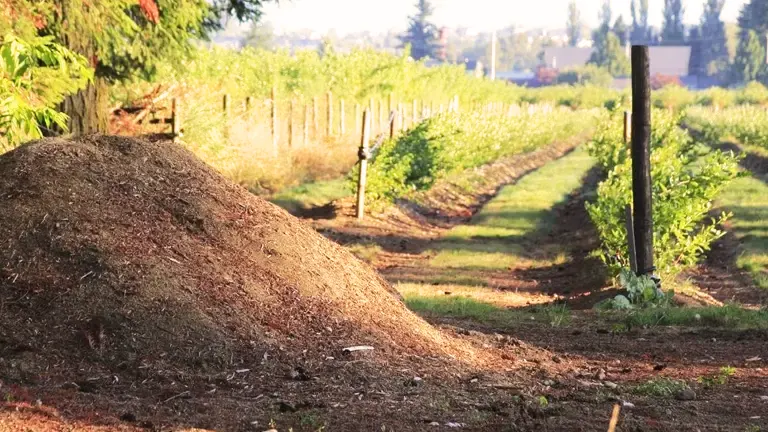
Mulching with Sawdust
When I first heard about using sawdust as mulch, I was intrigued. The texture and natural look appealed to me. Once I started, I noticed how efficiently sawdust helped in conserving soil moisture. My plants seemed to thrive better, especially during the hotter days, as the sawdust mulch reduced the rate of water evaporation. Moreover, the layer of sawdust around my plants suppressed the growth of weeds, saving me quite a bit of weeding time.
However, there was a catch. I observed a slight yellowing in some of my plants, a sign of nitrogen deficiency. I realized that as sawdust decomposes, it tends to absorb nitrogen from the soil. To counteract this, I began adding a nitrogen-rich fertilizer whenever I applied sawdust as mulch. This not only restored the health and green hue of my plants but also regulated the soil temperature, ensuring my plants weren’t too stressed during temperature fluctuations.
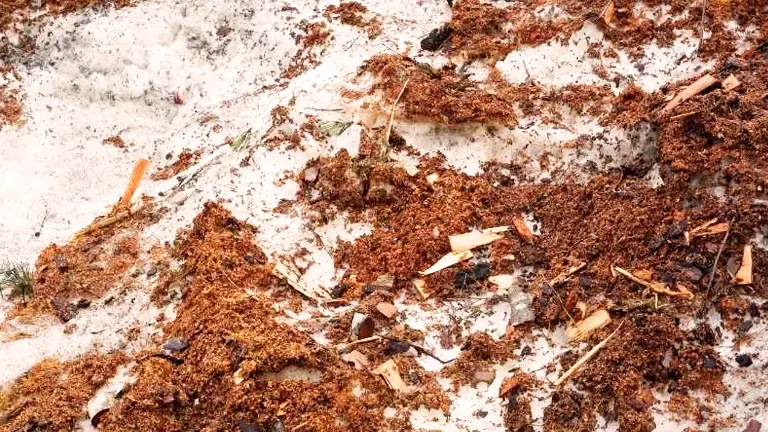
Composting with Sawdust
I’m a big advocate for composting kitchen waste. It’s a sustainable way to manage waste and produce nutrient-rich compost for the garden. On a friend’s suggestion, I began adding sawdust to my compost bin, mixing it with green kitchen scraps like vegetable peels, fruit remnants, and other biodegradable waste.
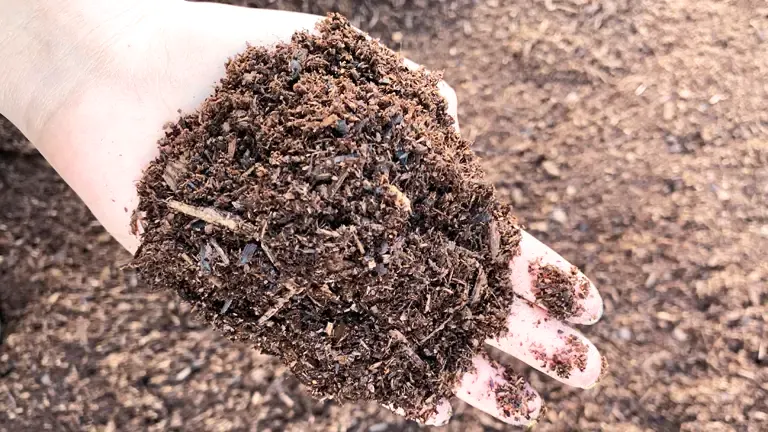
At first, I was skeptical. How would the woody texture of sawdust integrate with my wet kitchen waste? But to my surprise, sawdust acted as a perfect ‘brown’ component, balancing out the ‘greens’ in the compost pile. The result was a well-aerated, non-smelly compost pile that decomposed efficiently. It seemed the sawdust helped to create air pockets, facilitating the microbial activity and speeding up the decomposition process. Within a few months, I had a heap of dark, crumbly, and odorless compost ready to nourish my garden.
In conclusion, sawdust has become an integral part of my gardening routine. While it does have its nuances, like the nitrogen absorption issue, with a little attention and tweaking, it has proved to be invaluable in maintaining the health and productivity of my garden.
2. Animal Bedding
From my own journey with keeping animals, I’ve come to truly appreciate the versatility and effectiveness of sawdust as bedding. Let me share some of my experiences.
Chickens
When I first started my backyard chicken coop, the choice of bedding was a bit overwhelming. I tried everything from straw to shredded paper. But it wasn’t until I tried sawdust that I found the perfect solution. My hens seemed to love the soft texture under their feet. The nesting boxes were cozy, and the sawdust did a phenomenal job of absorbing moisture, which in turn kept odors at bay. An additional benefit was that, when cleaning out the coop, the soiled sawdust could be easily composted, turning waste into a resource.

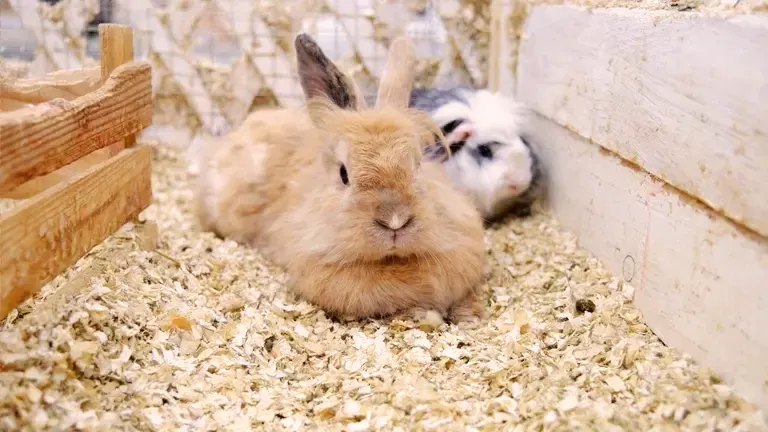
Rabbits
My two pet rabbits, Thumper and Daisy, are quite particular about their living conditions. Initially, I used hay as their primary bedding. But during the wet season, I found that it got damp quite easily. Transitioning to sawdust was a game-changer. Its high absorbency meant that their hutch remained dry and fresh for longer. It was easier on their feet, and the reduced dampness helped prevent potential fungal infections. Plus, the bunnies seemed to enjoy burrowing in the sawdust, which added a fun activity for them.
Horses
My experience with using sawdust as bedding for horses was a bit different. I keep a couple of horses on my property, and they have spacious stables. When I first introduced sawdust as bedding, I noticed a significant reduction in the usual ammonia smell. The sawdust absorbed urine quickly, ensuring the stables remained relatively dry. However, I had to be cautious and ensure the sawdust source was free from black walnut, as it’s toxic to horses. Also, I found it essential to keep a check on the dust levels to avoid respiratory issues for my horses. Regularly misting the sawdust with water helped to keep the dust down.

All in all, my journey with sawdust as animal bedding has been largely positive. Its high absorbency is its standout feature, but like with all things, it’s essential to understand each animal’s unique needs and ensure the sawdust is safe and suitable for them.
3. Fire Starter
I’ve often found myself seeking the best techniques to start fires. While store-bought fire starters or the classic newspaper method do work, nothing beats the thrill and satisfaction of using a DIY method. My personal favorite? Fire starters made from sawdust and wax. If you’re looking to enhance your fire-starting game, let me guide you through this simple yet transformative process.
Why Sawdust and Wax?
Both these components offer unique benefits. Sawdust, being a wood byproduct, has natural combustibility. When combined with wax, which acts as a binding agent and slow-burning fuel, the mixture becomes a fire starter powerhouse.
Making the Fire Starters: A Simple Guide
- Gather Materials: Collect some sawdust. The finer, the better. For the wax, old candles or paraffin wax work best. You’ll also need an old saucepan and parchment paper.
- Melt the Wax: In the saucepan, slowly melt your wax over low to medium heat. Ensure the wax doesn’t come to a boil. A gentle melt will suffice.
- Mix in the Sawdust: Once your wax is liquified, gradually stir in the sawdust. Ensure it’s evenly saturated. Your mixture should have a dough-like consistency—malleable but not runny.
- Shape Your Fire Starters: Lay out your parchment paper. Using your hands, mold the mixture into small bricks or balls, depending on your preference.
- Cool and Store: Allow your creations to cool and harden. Once set, they’re ready for use! Store them in a cool, dry place.
When it’s time to light your fire, place your sawdust-wax starter amidst your kindling or logs. Light it up and watch as it burns steadily, giving ample time for the surrounding wood to ignite.
In my personal experience, these fire starters have proven invaluable. They’re efficient, cost-effective, and sustainable. And while the warmth of the fire is undoubtedly comforting, the added pride of knowing you made the fire starter yourself? That’s simply unbeatable.
4. Cleaning Agent
In a workshop, a spill can be more than just a mess; it can be a safety hazard. Slippery floors from oil or solvents can lead to accidents, and certain chemicals can damage surfaces if not cleaned up promptly. Hence, finding an efficient cleaning agent is crucial.
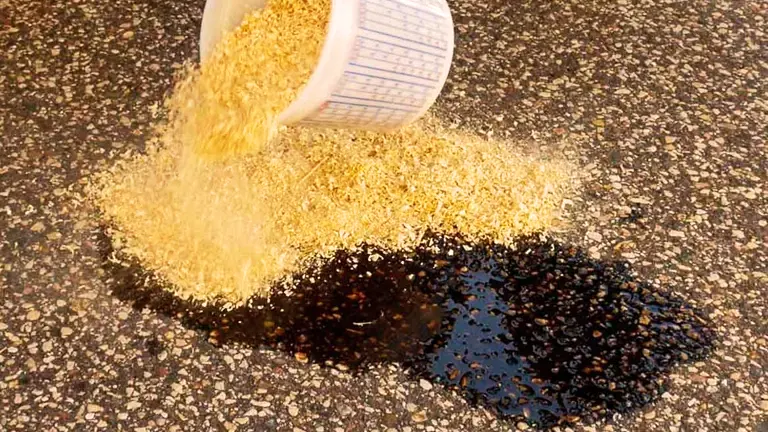
One day, after an accidental paint spill, I found myself without my usual commercial cleaning agent. In a mild state of panic and looking around for a solution, my eyes landed on a bag of sawdust. I remembered reading somewhere about its absorbent properties. With nothing to lose, I sprinkled a generous amount of sawdust over the spill.
To my amazement, the sawdust started absorbing the paint, turning it from a liquid pool into a semi-solid clump. I let it sit for a few more minutes and then easily scooped up the sawdust-paint mixture, leaving behind a nearly clean surface.
Making Sawdust a Cleaning Staple
Since that day, sawdust has become my go-to cleaning agent in the workshop. Its high absorbency was perfect for oil spills, making the cleanup process quicker and reducing the risk of slips. The coarse texture also provided a gentle abrasive quality, useful for scrubbing away tougher residues without scratching surfaces.
For those looking to utilize sawdust as a cleaning agent, here’s a simple guide:
- Immediate Action: As soon as a spill occurs, sprinkle a liberal amount of sawdust over it.
- Let it Sit: Allow the sawdust to absorb the spill. The duration will depend on the nature and volume of the liquid. Usually, a few minutes suffice.
- Scoop and Clean: Once the sawdust has absorbed most of the spill, scoop up the clumps. For any remaining residues, you can use a bit of fresh sawdust as a scrub.
- Dispose of Properly: Ensure you dispose of the soiled sawdust appropriately, especially if it has absorbed hazardous materials.
5. Homemade Particleboard
Commercially made particleboards are quite ubiquitous and relatively cheap. So, why make one at home? For me, it was about repurposing waste, having control over the quality, and the sheer joy of creation. With bags of sawdust accumulated from previous projects and the desire to make something functional, homemade particleboard was the obvious choice.

The Making Process:
- Preparation: The first step was sieving the sawdust to ensure uniformity in particle size. This ensures consistency in the finished product.
- Choosing a Binder: After some research, I opted for a urea-formaldehyde resin. It’s commonly used in commercial particleboards and is known for its binding strength. For those concerned about formaldehyde emissions, there are other eco-friendly binders available, like pMDI (polymeric diphenylmethane diisocyanate).
- Mixing: In a large container, I combined the sawdust and resin. The ratio largely depends on the specific resin’s instructions and the desired board density. Thorough mixing ensured every particle of sawdust was coated.
- Molding and Pressing: I used a wooden mold, slightly larger than the desired board size. Lining it with plastic ensured easy removal later. After filling the mold with the sawdust-resin mixture, I used a heavy flat board and clamps to press it down, ensuring it was packed tightly.
- Curing: The board was left to dry and cure for several days. This is crucial as it allows the resin to set and bind the sawdust particles firmly.
- Finishing Touches: After demolding, the board was sanded to smooth out any uneven surfaces.
Applications and Considerations:
The resulting particleboard was sturdy and had a rustic charm to it. I used it to create a unique side table for my living room. However, homemade particleboards might not have the same strength as commercially produced ones, so it’s essential to consider their intended use.
For those looking to experiment further, you can create ‘bricks’ or blocks using a similar method. These can be useful for small DIY projects around the house.
6. Mushroom Cultivation
In my garden shed turned mushroom chamber, I’ve seen bags of sawdust transform into lush landscapes of Shiitake and Oyster mushrooms. The joy of watching them grow, and the bonus of harvesting fresh, organic mushrooms for the kitchen, has been immensely rewarding.
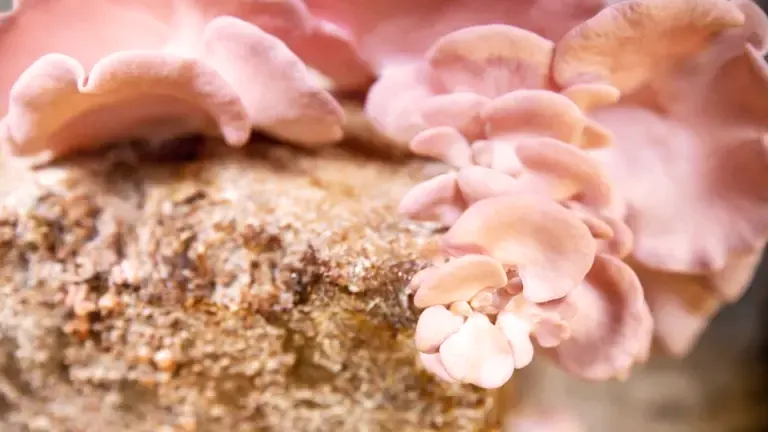
Mushrooms, the fruiting bodies of certain fungi, emerge from a complex network of thread-like structures called mycelium. This mycelium grows and spreads through the chosen substrate, deriving nutrients and setting the stage for eventual mushroom growth.
Why Sawdust?:
Different mushrooms have different substrate preferences. While some may thrive on straw or grain, many wood-loving species prefer a sawdust-based substrate. Sawdust offers several benefits:
- Texture and Porosity: Its fine, porous nature allows for efficient colonization by the mycelium.
- Nutrient Profile: Being a byproduct of wood, sawdust provides essential lignin and cellulose, which certain mushrooms utilize as food.
- Flexibility: It’s easy to mix sawdust with other ingredients, like wood chips or bran, to enhance the substrate.
Getting Started with Sawdust Substrates:
- Choosing the Right Mushroom: Not all mushrooms are suitable for sawdust. Species like Shiitake, Oyster, and Lion’s Mane have an affinity for wood-based substrates.
- Preparing the Substrate: To enhance the nutrient profile, I often mix sawdust with a bit of wheat bran or rice bran. This combination provides additional nutrients essential for robust mushroom growth.
- Sterilization: Before introducing the mushroom spawn, the substrate needs to be sterilized to eliminate any competing microorganisms. I typically do this by packing the moistened sawdust mixture in autoclave bags and pressure-cooking them for a couple of hours.
- Inoculation: Once cooled, the bags are inoculated with mushroom spawn (essentially, seed for mushrooms) under sterile conditions.
- Colonization: Over the next few weeks, the mycelium will colonize the sawdust, turning the substrate white and web-like.
- Fruiting Conditions: After full colonization, altering environmental conditions, such as introducing fresh air, dropping temperatures, or exposing to light, will trigger the mycelium to produce mushrooms.
For those with an interest in mycology or simply seeking a sustainable hobby, sawdust-based mushroom cultivation offers a captivating entry point. The process is both science and art, teaching patience, observation, and respect for the intricate world of fungi.
7. Smoking Meat
During one of my early smoking endeavors, I decided to use apple sawdust for a salmon fillet. The result was phenomenal. The delicate applewood smoke infused the salmon, giving it a gentle sweetness that was both surprising and delightful. That experience was a testament to the transformative power of sawdust in the realm of smoked meats.
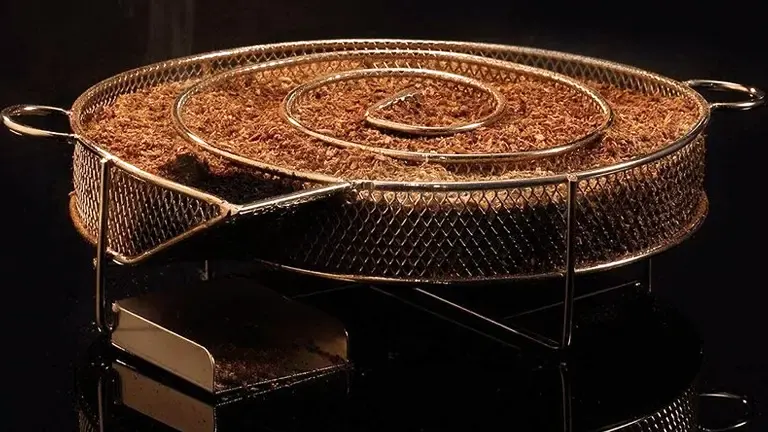
Smoke plays a dual role in the cooking process. It not only imparts a unique flavor to the meat but also preserves it. While logs or wood chips are commonly used, sawdust, due to its fine nature, can produce smoke rapidly, making it perfect for cold smoking or quick smoking sessions.
Types of Sawdust and Their Flavors
Different types of sawdust impart various flavors to the meat. Here’s a brief rundown of my personal experiences with some of them:
- Apple: This sawdust produces a mild and fruity smoke, perfect for poultry, pork, or fish. The subtle sweetness it imparts beautifully complements these meats.
- Hickory: Often described as the “king” of smoking woods, hickory sawdust provides a robust and hearty smoke. It’s ideal for larger cuts like pork shoulders or ribs. However, moderation is key, as excessive hickory can overshadow the meat’s natural flavors.
- Cherry: Another fruitwood, cherry sawdust gives a subtle, sweet, and fruity smoke. It’s versatile and works well with almost all types of meat. Plus, it adds a beautiful reddish hue to the meat’s exterior.
- Mesquite: A more intense smoke, mesquite is powerful and earthy. It’s particularly popular in the Southwest US and pairs excellently with beef. But, like hickory, it’s essential to use mesquite judiciously.
Using Sawdust for Smoking:
- Preparation: Before using sawdust, ensure it’s from untreated wood. Chemicals or additives can produce harmful smoke.
- Moistening: I usually dampen the sawdust slightly before using it. This prevents it from burning too quickly and produces a more consistent smoke.
- Placement: In a smoker, place the damp sawdust either directly on the charcoal or in a smoke box, depending on your setup.
- Monitor: Keep an eye on the smoke. You’re aiming for thin, blue smoke, which indicates clean combustion and imparts the best flavor. Thick, white smoke can give the meat a bitter taste.
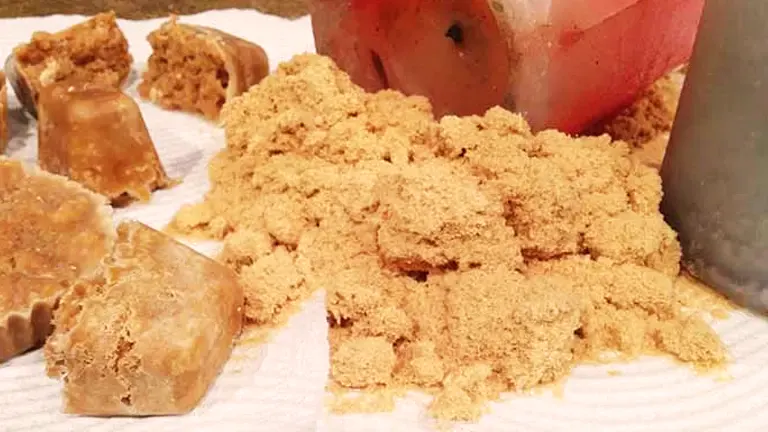
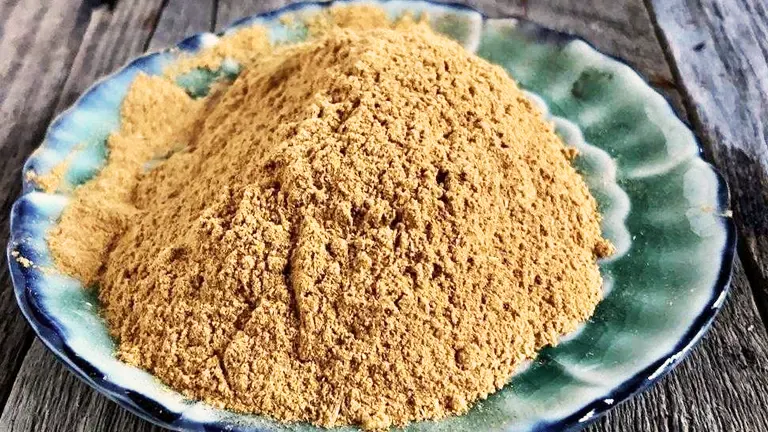
8. Natural Dye
I decided to experiment with walnut sawdust. I had some leftover linen that I thought would pair beautifully with earthy brown tones. As the linen absorbed the walnut’s hues, it transformed into a canvas of rich browns with subtle variances, reminiscent of aged parchment or vintage sepia photographs. The final piece exuded a rustic charm and felt like a memory from the past.
Dyeing with sawdust opened up a world of possibilities. It’s a dance between the unpredictability of nature and the dyer’s intent. Every piece becomes unique, embodying the essence of the tree it came from.
The Color Spectrum of Sawdust
Various woods impart different hues, ranging from delicate golds to deep browns and even vibrant reds. Here are some woods and the colors they are known to produce:
- Walnut: The sawdust from walnut trees is a treasure trove for natural dyers. It imparts rich browns, creating warm, earthy tones on fabrics.
- Brazilwood: A tropical wood, Brazilwood offers vibrant reds and pinks. The shades can range from soft coral pinks to deep ruby reds.
- Osage Orange: This wood provides bright yellows and golds. The intensity can vary based on the duration of dyeing and the concentration of sawdust.
- Eucalyptus: Depending on the variety, eucalyptus can offer a range of colors from soft oranges to deep rusts and even browns.
The Process of Dyeing with Sawdust:
- Preparing the Fabric: Before dyeing, fabrics need to be mordanted. Mordanting helps the dye bond with the fabric fibers, ensuring the color lasts. Common mordants include alum and iron.
- Extracting the Color: To extract color from sawdust, I simmer it in water for a few hours. The water gradually takes on the hue of the wood. The longer the sawdust is simmered, the deeper the color extraction.
- Dyeing: Once the color is extracted, strain out the sawdust, leaving only the colored liquid. The fabric can then be submerged in this liquid. The duration of immersion will influence the final color. Longer immersion results in deeper shades.
- Setting and Rinsing: After achieving the desired shade, the fabric is removed, rinsed in cool water, and then hung to dry.
9. Ice Traction
After a night of freezing rain, I stepped outside to find my driveway transformed into a skating rink. It was a treacherous sheet of ice. With my daily commitments awaiting, I needed a quick solution. Remembering the leftover sawdust from a recent woodworking project, I decided to give it a try.
Sprinkling the sawdust across the driveway was oddly satisfying. It immediately provided the necessary grip, turning the once perilous path into a safely navigable route. Not only did it make my driveway safer for walking, but it also helped car tires grip better, making driving safer as well.
The Physics of Sawdust on Ice:
- Texture and Porosity: Sawdust, with its rough and porous nature, interlocks with ice, creating a gritty layer on the surface. This new layer increases friction, reducing the chances of slipping.
- Absorbency: Sawdust can absorb some moisture. When sprinkled on thin layers of ice or frost, it can help in melting or reducing it, further aiding in traction.
- Visibility: Its contrasting color on the usually white or transparent ice makes hazardous areas more noticeable, alerting pedestrians of potential slippery zones.
Using Sawdust for Ice Traction:
- Preparation: Always have a bucket or bag of sawdust handy near entrances or other areas you might need to treat.
- Application: A light, even sprinkle is usually sufficient. You don’t need a thick layer; just enough to provide traction and highlight the area.
- Reapplication: Over time, especially in active areas, the sawdust may get dispersed or covered with fresh snow. Periodic reapplication might be necessary, depending on the weather conditions.
While there are several commercial products available for ice traction, sawdust offers a natural, eco-friendly, and cost-effective alternative. It embodies the beauty of repurposing, turning a simple byproduct into a tool of safety and utility. For those who live in icy climes, sawdust is not just a carpenter’s residue; it’s a winter ally, guarding against slips and falls.
10. Soil Amendment
I recall a particular corner of my garden where the soil was so clay-heavy that it felt almost like pottery when dry. Plants struggled, and water often stood stagnant for days after a heavy rain. Remembering the sawdust leftover from a carpentry project, I thought of giving it a shot as a soil amendment.
I began by working the sawdust into the top few inches of the soil, ensuring it was well mixed. To counteract the potential nitrogen depletion, I also mixed in some well-composted manure, which is rich in nitrogen.
The transformation, while not immediate, was evident in the subsequent months. The soil felt looser, and the water no longer pooled as it used to. The true testament came with the plants. They seemed happier, with more vigorous growth and brighter foliage.
Sawdust’s Role in Soil Amendment:
- Aeration: One of the primary problems with clay-heavy soils is their compact nature. The fine particles of clay tend to stick together, leaving little room for air. Sawdust, being coarse and fibrous, introduces pockets of air when mixed with clay. This increased aeration allows roots to breathe and grow more freely.
- Drainage: Another issue with clay soils is their tendency to retain water, which can lead to root rot and other complications. Sawdust helps in breaking up the soil structure, thereby improving drainage. This ensures that excess water doesn’t stay logged near the roots.
- Organic Matter: Over time, as sawdust decomposes, it contributes to the organic matter in the soil, improving its overall fertility and structure.
But, A Word of Caution:
- Nitrogen Depletion: Sawdust, especially when fresh, tends to absorb nitrogen from the soil as it breaks down. Nitrogen is vital for plant growth, and its depletion can lead to stunted growth and yellowing leaves. This is why it’s essential to monitor and supplement nitrogen levels when introducing sawdust into the garden.
Sawdust, often seen as a waste material, holds within it the power to rejuvenate and breathe life into stubborn soils. It’s a reminder of nature’s cyclical beauty, where even waste has a purpose, and transformations are but a natural intervention away. For those grappling with challenging soils, sawdust offers a bridge to a greener, more flourishing garden. But as with all things in gardening, the key lies in balance and observation.
Don’t let that pile of sawdust gather dust in your workshop! Instead, let’s put it to innovative and eco-friendly use. Explore the potential of this wood byproduct and be amazed by the transformations it can bring, just as I was!
Frequently Asked Questions
- What is sawdust made of?
Sawdust is the tiny particles produced from cutting, grinding, drilling, or sanding wood. It primarily consists of wood fibers, but its exact composition can vary based on the type of wood and the cutting process used. - Is sawdust dangerous to inhale?
Yes, prolonged inhalation of sawdust can be harmful. It can lead to respiratory issues, especially for those with allergies or asthma. Some woods produce sawdust that can be toxic or irritant. It’s essential to wear appropriate masks and ensure proper ventilation when working with wood to minimize inhalation. - Can sawdust be used as a fertilizer?
While sawdust can be used as a soil amendment, it isn’t a fertilizer by itself. As it decomposes, sawdust can pull nitrogen from the soil, which is essential for plant growth. However, if combined with nitrogen-rich materials, like manure, it can be beneficial for the soil. - Is all sawdust suitable for animal bedding?
Mostly, yes. However, it’s crucial to ensure the wood type is safe for the specific animal. For instance, sawdust from black walnuts can be toxic to horses. - How can I store sawdust?
Sawdust should be stored in a dry place, preferably in sealed containers to prevent moisture absorption. If storing for extended periods, ensure it’s free from pests or mold. - Can I use sawdust in my compost?
Absolutely! Sawdust can be a great “brown” or carbon-rich material for compost piles. Just be sure to balance it with “green” or nitrogen-rich materials to ensure proper decomposition. - Are there any woods I shouldn’t use for smoking meats?
Yes, not all woods are suitable for smoking. Some, like pine, spruce, or cedar, can give a resinous flavor to the meat. It’s best to stick to hardwoods like apple, hickory, maple, and oak for smoking. - Can I use sawdust to clean oil spills?
Sawdust is highly absorbent and can be used to clean up small oil or grease spills, especially in workshops. - Is sawdust flammable?
Yes, sawdust is flammable. It’s often used as a fire starter when combined with wax or other binders. However, its flammability also means one should be cautious when storing large quantities to prevent accidental combustion. - Can sawdust be used in crafts?
Certainly! Sawdust can be mixed with adhesives to create items like particleboard or crafts. It’s also used in some natural dyes and as a filler in certain craft projects.
We’re eager to learn from you! Feel free to discuss your creative applications and ideas for utilizing sawdust effectively in the section provided. Your input might just be the key to assisting others in making the most of their sawdust resources!

David Murray
Forestry AuthorI'm David Murry, a forestry equipment specialist with a focus on chainsaw operation. With over 13 years of experience, I've honed my skills in operating and maintaining a wide range of machinery, from chainsaws to log splitters. My passion for the outdoors and commitment to sustainable forestry drive my work, which emphasizes safety, efficiency, and staying updated with industry advancements. Additionally, I'm dedicated to sharing my expertise and promoting environmental awareness within the forestry community.
2 comments
Excellent article, great info. I'm familiar with the danger in using black walnut but I have quite a bit of English walnut sawdust. Do I have to be as cautious with that, on can I use it as a "brown" in my compost?


Surprised with uses
Moses Ntamu
September 14, 2023 4:06 am