10 Simple Woodworking Projects for Beginners
- August 1, 2023
- 0 comment
Unlock the world of woodworking, where imagination melds seamlessly with function. Whether you’re just dipping your toes into this captivating craft or eager to polish your foundational skills, we’ve got you covered. Dive into these 10 brilliantly curated and refreshingly unique woodworking projects tailor-made for beginners. Your journey to crafting masterpieces starts now!
List of Woodworking Projects for Beginners:
- Floating Shelves
- Wooden Picture Frames
- Simple Wooden Bench
- Personalized Wood Coasters
- Wooden Smartphone Stand
- Simple Birdhouse
- Miniature Wooden Bowls
- Wooden Planters
- Key Holder
- Magazine Rack
1. Floating Shelves
Not only do they save space, but floating shelves also add a contemporary look to any room. All you need are some quality wood boards, a saw, screws, a drill, and a spirit level for precision. You can tailor the length and number of shelves to your liking, and to personalize it further, choose a unique staining or painting pattern.

Materials Needed:
- Solid Wood Boards (Choose the dimensions based on your preference, but a common size is 1.5 inches thick, 10 inches wide, and 36 inches long)
- Screws (long enough to securely mount into the wall studs, usually 2.5-3 inches)
- Wall brackets (to match the length of your shelves)
- Drill with drill bits
- Saw (if you need to adjust the board length)
- Spirit Level (to ensure your shelves are perfectly horizontal)
- Stud Finder (to locate studs in the wall for secure mounting)
- Paint or stain (optional)
- Sandpaper (80, 150, and 220 grit)
Steps:
- Prepare the Wood: If your wood boards aren’t the right size, cut them to your desired length. Sand the boards using 80-grit sandpaper, followed by 150-grit and then 220-grit for a smooth finish.
- Paint/Stain: If you wish to paint or stain your shelves, do so before you mount them. Apply your chosen finish following the instructions on the can and let it dry completely.
- Find and Mark the Studs: Use a stud finder to locate the studs in the wall where you want to mount your shelves. Mark the positions with a pencil.
- Mount the Brackets: Align the brackets with your marks, ensuring they are level using the spirit level. Then drill pilot holes into the wall studs and screw the brackets into place.
- Attach the Shelves: Place the shelves on the mounted brackets. Make sure the shelves are level, and then secure them with screws through the pre-drilled holes in the brackets.
- Finishing Touches: If you haven’t painted or stained your shelves yet, you can do it now. Apply a coat, let it dry, then apply a second coat for a more finished look.
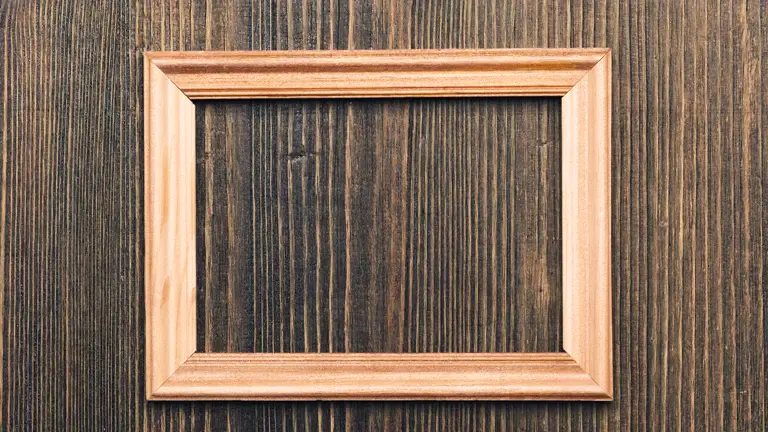
2. Wooden Picture Frames
A handmade picture frame is a wonderful personal touch for treasured photos. Choose your wood, cut four pieces to the desired dimensions, and use a router to cut the rabbet (the groove into which the picture and glass will fit). Glue and clamp the pieces together, then finish with sandpaper and your choice of paint or varnish.
Materials Needed:
- Wood strips (size depends on the size of the picture, but typically 2 inches wide)
- Glass or acrylic sheet for the picture (same size as your picture)
- Picture or artwork
- Router (or you can use a table saw to make the rabbets)
- Wood glue
- Clamps (corner clamps would be helpful)
- Sandpaper (80, 150, and 220 grit)
- Paint or varnish (optional)
- Saw (a miter saw is best for this, but you can use a handsaw with a miter box)
- Thin plywood or cardboard for the back of the frame
- Small nails or a staple gun to secure the back
- Hanging hardware (like picture wire and D-rings)
Steps:
- Measure and Cut the Wood: Measure the dimensions of your picture. Cut four pieces of wood to fit your picture, adding twice the width of your wood to each dimension. For example, if your picture is 8×10 and your wood is 2 inches wide, cut two pieces 12 inches long (for the top and bottom) and two pieces 14 inches long (for the sides).
- Cut the Rabbets: Using a router or table saw, cut a Rabbet into the back of each piece of wood. The rabbet should be wide enough to hold the glass, picture, and backing, and about half the depth of your wood.
- Sand the Wood: Sand each piece of wood with 80-grit sandpaper, followed by 150-grit and then 220-grit for a smooth finish.
- Glue and Clamp: Apply wood glue to the ends of your pieces of wood and assemble them into a square or rectangle (depending on the dimensions of your picture). Use clamps to hold the pieces together while the glue dries. Corner clamps can help keep the frame square.
- Finish the Frame: Once the glue has dried, sand any rough edges or excess glue. If desired, you can now paint or varnish the frame. Let it dry completely.
- Insert the Picture: Once your frame is dry, you can insert the glass into the rabbet, followed by the picture, and then the backing. Secure the backing with small nails or staples.
- Attach Hanging Hardware: Attach the hanging hardware to the back of the frame according to the instructions on the packaging.
- Hang the Frame: Once the hanging hardware is secured, your frame is ready to hang!
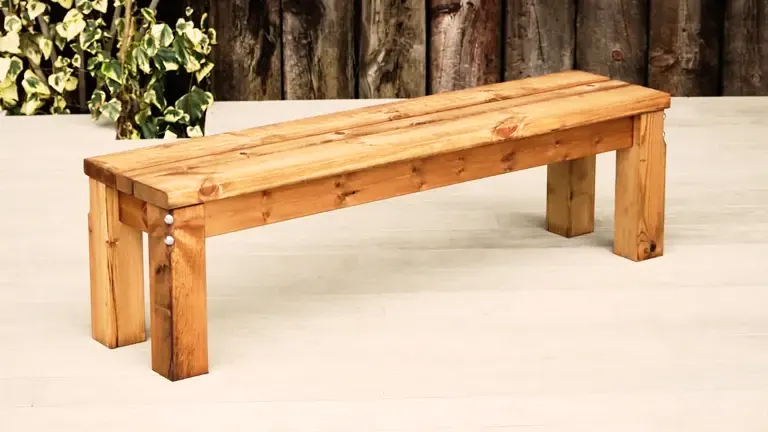
3. Simple Wooden Bench
A small wooden bench can be both a practical piece of furniture and a great beginner’s project. Choose a sturdy wood type like oak or pine, cut your pieces (two for the seat, four for the legs), then join them using wood glue and screws. Sanding and staining or painting can bring out the wood grain and match your home decor.
Materials Needed:
- Two wooden boards for the seat (dimensions will depend on how long you want the bench to be, but a common size is 4 feet long, 1 foot wide, and 2 inches thick)
- Four wooden boards for the legs (typically around 1.5 feet long, 3 inches wide, and 2 inches thick)
- Wood glue
- Screws (long enough to go through the seat and into the legs, usually around 2.5 – 3 inches)
- Sandpaper in various grits (80, 150, and 220 are common)
- Stain or paint of your choice
- Protective finish (like polyurethane or varnish)
- Tools: Saw, drill, screwdriver, clamps
Steps:
- Cut the Wood: First, cut your wood to the desired dimensions. If you don’t have the tools to do this yourself, most home improvement stores can do it for you.
- Attach the Legs: Apply wood glue to the top of one of the legs. Position it on the underside of the seat board so that it’s flush with the edge. Use a clamp to hold it in place while you drill pilot holes and then insert the screws. Repeat this process with the other three legs.
- Attach the Second Seat Board: If you’re using two boards for the seat, repeat the above process with the second board. Make sure it’s flush with the legs and the other seatboard.
- Sand: Once your bench is assembled, start sanding. Start with the 80-grit sandpaper to smooth out any rough spots, then move to the 150-grit, and finish with the 220-grit for a nice smooth finish.
- Stain or Paint: If you’re using a stain or paint, apply it now according to the instructions on the can. Be sure to let it dry completely before moving on.
- Protective Finish: Once your stain or paint is dry, apply a protective finish. This will protect your bench from scratches and other damage, and give it a nice shine.
- Enjoy Your Bench: Now that your bench is finished, you can enjoy it! Whether you use it as a place to sit and relax, or as a display piece, you can be proud knowing you made it yourself.
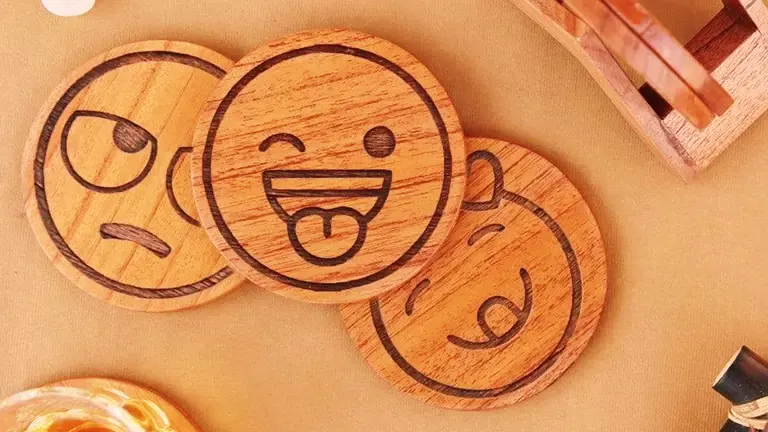
4. Personalized Wood Coasters
Wooden coasters are an excellent beginner’s project. They’re simple, useful, and offer plenty of room for personalization. Use a jigsaw to cut the wood into squares or circles, sand them smooth, then customize them with wood-burning tools or paint.
Materials Needed:
- Wood (type of your choice, but hardwoods like oak or maple are more durable. A board around 1/2 inch thick is ideal)
- Jigsaw (or a bandsaw if you have one)
- Sandpaper (80, 150, and 220 grit)
- Paint or wood-burning tool (for personalization)
- A clear wood sealant or varnish
- A ruler or straight edge (for measuring and marking cuts)
- Pencil (for marking cuts)
- Clamps (for securing the wood while cutting)
Steps:
- Measure and Mark: Using your ruler or straight edge, measure and mark the shape of your coasters on the wood. A size of 4×4 inches is common for square coasters.
- Cut-Out Coasters: Clamp your wood securely to a workbench or other stable surface. Use your jigsaw to cut along the lines you marked.
- Sand Edges: Start with the 80-grit sandpaper to smooth the edges and surfaces of your coasters. Work your way up to 150-grit and then 220-grit for a smooth finish.
- Personalize: Now comes the fun part! Use paint or a wood-burning tool to personalize your coasters. You can add designs, initials, quotes – anything you like.
- Seal: Once the paint or burn marks have dried or cooled, apply a clear wood sealant or varnish to protect the wood and your design. Allow it to dry fully.
- Enjoy Your Coasters: Now that your coasters are finished, you can enjoy using them yourself or give them as personalized gifts.
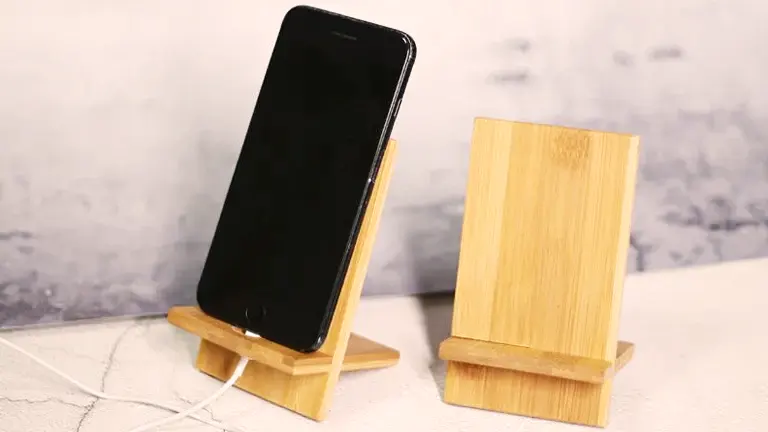
5. Wooden Smartphone Stand
A wooden smartphone stand is an incredibly practical accessory. All you need is a single piece of wood, with cuts to hold the phone upright and a hole for a charging cord. This project offers a lot of room for creative design choices, from the shape of the stand to the kind of wood used.
Materials Needed:
- A piece of wood (hardwood like oak or maple is good. Size can be around 6 inches long, 4 inches wide, and 3/4 inch thick, but you can adjust it to suit your needs)
- Saw (a bandsaw or jigsaw would work well)
- Drill with a bit that matches the size of your charging cord
- Sandpaper (80, 150, and 220 grit)
- Wood finish (like varnish, oil, or wax)
- A pencil (for marking)
- Ruler or measuring tape
Steps:
- Mark the Design: Draw the design of your stand on a piece of wood. This will usually involve drawing two cuts for where the phone will rest.
- Cut Out the Stand: Using your saw, cut along the lines you’ve drawn. Remember to also cut a slot where the bottom of the phone will sit.
- Drill the Hole for the Cord: Decide where you want the charging cord to go and mark this spot with your pencil. Then, using your drill, make a hole at this mark. Make sure the hole is big enough for your charging cord to fit through.
- Sand the Stand: Start with the 80-grit sandpaper to smooth any rough edges or surfaces. Then move to 150-grit, and finish with the 220-grit for a smooth finish.
- Apply the Finish: Apply your chosen finish according to the instructions on the packaging. Let it dry completely.
- Enjoy Your Stand: Once the finish has dried, your stand is ready to use!
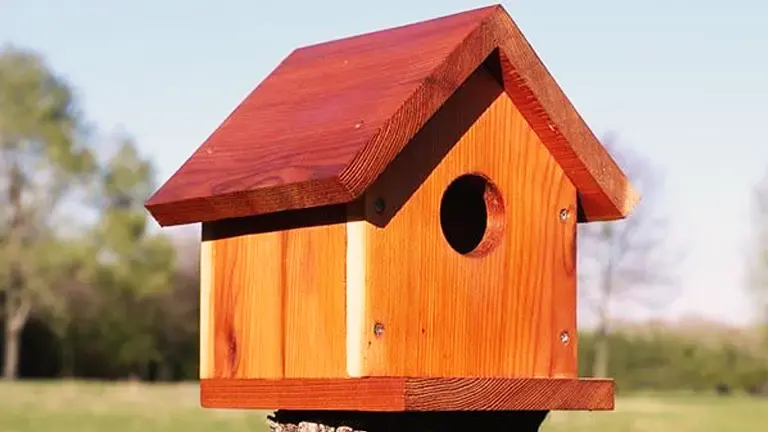
6. Simple Birdhouse
Building a birdhouse can be as simple or as complex as you want. Start with a straightforward design: five planks to make a small box a roof, and a hole in the front. As your skills improve, you can add more features, such as an opening for cleaning or a perch for the birds.
Materials Needed:
- Five wooden planks (for the box and roof)
- A piece of dowel rod (for a perch, optional)
- Screws or nails
- Saw
- Drill with bits (one for pilot holes and a larger one for the entrance hole)
- Sandpaper (80, 150, and 220 grit)
- Wood finish (non-toxic, safe for birds)
- Pencil (for marking)
- Ruler or measuring tape
Steps:
- Measure and Cut the Wood: Cut two planks to the same length for the front and back of the birdhouse (this could be around 8 inches, but it depends on the size of the birdhouse you want). Cut two shorter pieces for the sides, remembering that they need to fit between the front and back pieces. Cut a slightly longer piece for the base. Lastly, cut two pieces for the roof that when placed together form a peaked roof.
- Drill the Entrance Hole: On the front piece, mark where you want the entrance hole to be. This should be a decent distance from the base to protect the birds from predators. Drill the entrance hole using a larger bit. The size of the hole will depend on the type of bird you want to attract. For a small bird like a chickadee, a 1-1/8 inch hole is good.
- Assemble the Box: Screw or nail the front, back, and side pieces together to form a box. Add the base last. Remember to drill pilot holes first to prevent the wood from splitting.
- Attach the Roof: Attach the two roof pieces together at an angle to create a peak, then secure them to the top of the box with screws or nails.
- Sand the Birdhouse: Sand all surfaces of the birdhouse, starting with 80-grit sandpaper and moving up to 220-grit for a smooth finish.
- Finish (Optional): If desired, apply a non-toxic wood finish to help the birdhouse last longer. Be sure it’s safe for wildlife before you use it.
- Add the Perch (Optional): If you want to add a perch, drill a small hole below the entrance hole and insert the dowel rod. Secure it with wood glue.
7. Miniature Wooden Bowls
Creating miniature wooden bowls using a lathe is a great way to introduce beginners to the process of woodturning. They can be used as decor pieces or practical containers for small items like jewelry. Different wood types, finishing oils, or even epoxy resins can add a unique touch to your bowls.

Materials Needed:
- A small block of wood (choose a type of wood you like, such as oak, maple, or walnut)
- Lathe
- Woodturning tools (including a bowl gouge, parting tool, and skew chisel)
- Sandpaper (80, 150, 220, and 400 grit)
- Finishing oil or epoxy resin
- Safety gear (safety glasses, dust mask, and possibly ear protection)
Steps:
- Prepare the Wood: Start with a small block of wood. The dimensions will depend on how big you want your bowl to be, but 3x3x2 inches could be a good starting point for a miniature bowl.
- Mount the Wood: Mount the wood on your lathe. This is usually done by attaching it to a faceplate or using a chuck.
- Shape the Outside: Turn on your lathe and begin shaping the outside of the bowl using your bowl gouge. Always work from the base of the bowl toward the rim for the best results.
- Shape the Inside: Once you’re happy with the outside shape, start hollowing out the inside of the bowl with your bowl gouge.
- Refine the Shape: Use your parting tool and skew chisel to refine the shape of your bowl and add any details you want.
- Sand the Bowl: Start sanding your bowl with 80-grit sandpaper while the lathe is running. Work your way up through the grits until you reach 400-grit for a super smooth finish.
- Finish the Bowl: Apply your chosen finish according to the product’s instructions. You could use a finishing oil to enhance the natural beauty of the wood, or an epoxy resin for a glossy, durable finish.
- Remove the Bowl: Once the finish has completely dried, remove your bowl from the lathe.
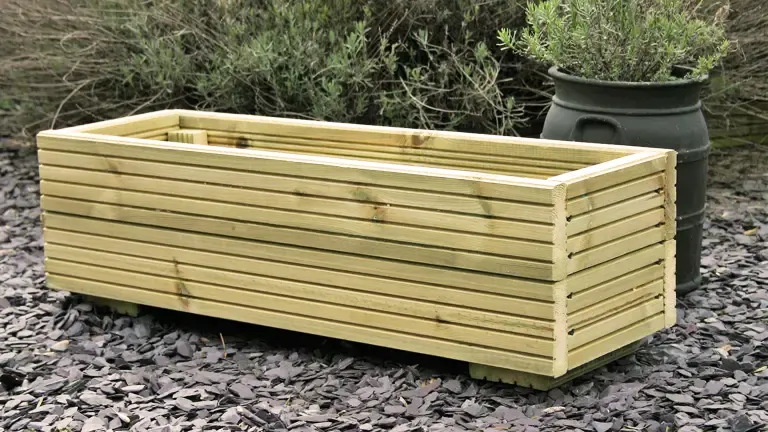
8. Wooden Planters
A wooden planter is a great way to bring some green into your home. With just a few straight cuts and some nails, you can create a box that can accommodate plants of all sizes. Remember to add drainage holes at the bottom and consider using a wood that’s weather-resistant if it’ll be kept outside.
Materials Needed:
- Planks of wood (like cedar, which is naturally weather-resistant)
- Saw (a handsaw or circular saw would work)
- Screws or nails
- Drill (with drill bits suitable for wood and a larger one for the drainage holes)
- Sandpaper (80, 150, and 220 grit)
- Wood finish or paint (optional, and should be non-toxic if growing edibles)
- Landscape fabric (optional)
- Pencil (for marking)
- Ruler or measuring tape
- Safety gear (safety glasses, gloves)
Steps:
- Measure and Cut the Wood: Decide how large you want your planter to be. Cut four planks for the sides and a slightly larger one for the base. Remember, the size of your planter will depend on what you plan to grow.
- Drill the Drainage Holes: On the base piece, mark where you want your drainage holes to be. Drill holes at these marks using a larger drill bit.
- Assemble the Planter: Arrange the side pieces into a box shape, placing them on the edges of the base plank. Using your drill, make pilot holes to prevent the wood from splitting, and then secure the pieces together with screws or nails.
- Sand the Planter: Using your sandpaper, start with the 80-grit to smooth any rough surfaces and edges. Work your way up to the 220-grit for a nice smooth finish.
- Add the Finish (Optional): If you want to add color or extend the life of your planter, apply a non-toxic finish or paint. Be sure to let it dry thoroughly before moving to the next step.
- Add Landscape Fabric (Optional): If you want to prevent soil from falling out of the drainage holes, you can line the inside of your planter with landscape fabric. Cut the fabric to size and secure it with a staple gun or small nails.
- Fill and Plant: Once everything is dry and secure, fill your new planter with potting soil and add your plants.
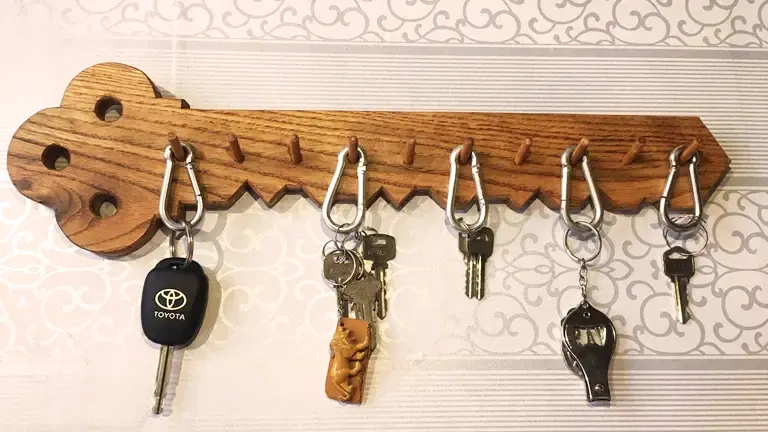
9. Key Holder
A wooden key holder is a simple project that adds a personalized touch to your home. Cut a piece of wood to your preferred size, sand it smooth, and add hooks for keys. Customize it by wood-burning or painting your family’s name, a favorite quote, or a design that complements your home decor.
Materials Needed:
- A wooden board (the size depends on how many keys you want to hang and where you want to place it)
- Hooks (you can get these from any hardware store)
- Sandpaper (80, 150, and 220 grit)
- Paint or wood stain (optional)
- Wood-burning tool (optional)
- Drill (with drill bits)
- Screwdriver
- Ruler or measuring tape
- Pencil (for marking)
- Hanging hardware (for attaching it to the wall)
- Safety gear (safety glasses, gloves)
Steps:
- Prepare the Wood: Sand your board starting with 80-grit sandpaper and working your way up to 220-grit for a smooth finish.
- Measure and Mark: Decide where you want your hooks to be. Use your ruler or measuring tape to ensure equal spacing between hooks. Mark these spots with a pencil.
- Drill the Holes: At each pencil mark, drill a pilot hole for the hooks. Ensure you use a drill bit slightly smaller than the screw part of the hook.
- Attach the Hooks: Screw each hook into its pilot hole. You can usually do this by hand, but if the hooks are stubborn, you can use a pair of pliers to help turn them.
- Customize Your Key Holder (Optional): You can use paint or wood stain to give your key holder some color. Let the paint or stain dry according to the instructions on the can. If you want to personalize it further, use a wood-burning tool to etch your family’s name, a favorite quote, or a design onto the board.
- Attach Hanging Hardware: On the back of your key holder, attach your chosen hanging hardware according to the package instructions. Make sure it’s securely attached and can handle the weight of the keys.
- Hang Your Key Holder: Find the perfect spot in your home for your new key holder and hang it up. Now it’s ready to hold all your keys!
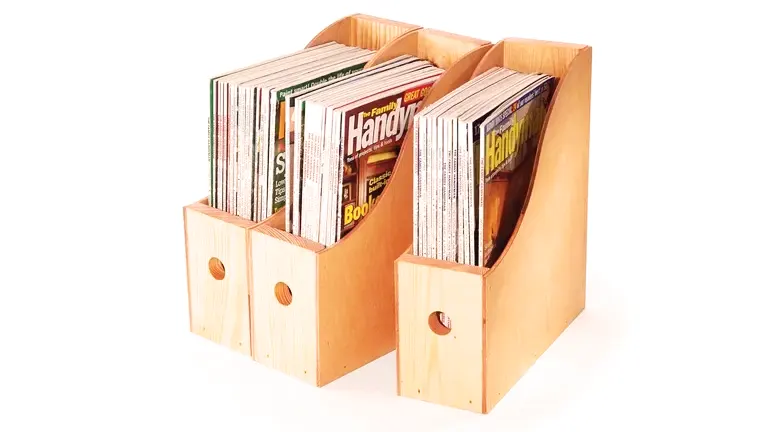
10. Magazine Rack
A wooden magazine rack is a beginner-friendly project that adds rustic charm and organization to your living room. It typically involves creating a simple frame and adding slats for holding magazines. You can vary the design according to your style preferences and the space you have available.
Materials Needed:
- Planks of wood (the amount and size depend on your desired magazine rack size)
- Saw (a handsaw or circular saw would work)
- Screws
- Drill (with drill bits suitable for wood)
- Sandpaper (80, 150, and 220 grit)
- Wood finish or paint (optional)
- Ruler or measuring tape
- Pencil (for marking)
- Safety gear (safety glasses, gloves)
Steps:
- Measure and Cut the Wood: Decide how large you want your magazine rack to be. You will need four pieces for the frame (two for the sides and two for the top and bottom), and several more narrow pieces for the slats where the magazines will sit.
- Assemble the Frame: Lay out your four pieces in a rectangular shape. Using your drill, make pilot holes to prevent the wood from splitting, and then secure the pieces together with screws.
- Attach the Slats: Measure and mark where each slat should be attached, ensuring they are evenly spaced. Use the drill to make pilot holes, then attach each slat with screws.
- Sand the Magazine Rack: Start sanding your assembled rack with 80-grit sandpaper to smooth any rough surfaces and edges. Then, work your way up to 150 and 220-grit for a nice smooth finish.
- Finish the Rack (Optional): You can leave the rack natural, or if you prefer, add a finish or paint to it for a more polished look or to match your home decor. If you’re painting, let it dry thoroughly before you start using it.
- Position and Fill: Once everything is dry and secure, choose the perfect spot for your new magazine rack and fill it with your favorite magazines or books.
Essential Safety Tips for Woodworking Enthusiasts
- Dress Smart, Stay Safe: Always wear safety glasses, hearing protection, and dust masks or respirators. If you’re dealing with heavy materials, steel-toed boots can save your feet from potential accidents.
- Choose the Correct Tool: Make sure you’re using the right tool for the task at hand. Each tool in your kit has a specific purpose and using the wrong one can lead to mishaps.
- Perform Regular Tool Inspections: Regularly inspect your tools for any signs of damage, wear, or defects. A well-maintained tool is less likely to malfunction and cause accidents.
- Maintain a Clutter-free Workspace: Keep your workspace tidy. Unnecessary clutter can lead to dangerous trips and falls. After using tools, especially sharp ones, store them safely out of the way.
- Follow Safe Operating Techniques: Always keep your hands away from the cutting line of saws and other similar tools. Use safety equipment like push sticks to guide wood through saws and never force tools or apply excessive pressure.
- Stay Focused: Woodworking requires your full attention. A momentary distraction can result in an accident. Ensure you’re fully concentrating on your task.
- Know Your Machines Inside Out: Understand the workings of every power tool you use. Read the manual thoroughly and get professional training if required.
- Patience is Key: Don’t rush through your projects. Take your time and complete each step with care to avoid mistakes that can lead to accidents.
- Ensure Good Ventilation: It’s crucial to have a well-ventilated workspace, especially when working with finishes that can emit harmful fumes.
- Listen to Your Instincts: If something doesn’t feel right or safe, it probably isn’t. Use your common sense and stay safe.
Frequently Asked Questions
- What are the basic tools needed for a beginner in woodworking?
For a beginner, basic tools like a hammer, screwdriver set, tape measure, square, handsaw, chisels, clamps, and a workbench are usually recommended. - Is woodworking dangerous?
Woodworking can be dangerous if the proper safety precautions are not followed. This includes wearing appropriate safety gear, maintaining tools correctly, and using the right tool for the job. - What type of wood is best for beginners?
Softwoods, like pine, are generally considered good for beginners because they are easier to cut and shape than hardwoods. - How do I make my woodworking projects look professional?
A well-planned design, accurate measurements, fine craftsmanship, and a good finish can make your woodworking projects look professional. Practicing regularly and developing your skills over time also contribute significantly. - Can I start woodworking at home?
Yes, you can start woodworking at home. However, you will need a dedicated workspace that is safe and big enough to handle your projects and store your tools. - What safety equipment is needed for woodworking?
Safety equipment for woodworking includes safety glasses or goggles, a dust mask or respirator, hearing protection, and in some cases, steel-toed boots. - How can I prevent my wood from splitting?
Preventing wood from splitting can be achieved by drilling pilot holes before inserting screws, not over-tightening screws, and ensuring the wood is not too dry. - How do I finish and protect my woodworking project?
Woodworking projects can be finished and protected using a variety of methods including paint, varnish, stain, or wax. The choice of finish depends on the project and the look you want to achieve. - Can children do woodworking?
Yes, children can do woodworking under adult supervision. It’s a great way for them to learn practical skills, but safety precautions must always be followed. - Is woodworking an expensive hobby?
The cost of woodworking can vary greatly depending on the complexity of the projects, the type of wood used, and the tools needed. Starting with simpler projects and gradually working your way up can help control costs.
We’d love to hear your feedback! Have you tried any of these 10 Simple Woodworking Projects for Beginners? Share your experiences and tips in the comments section below. Your insights could be the guiding light for fellow enthusiasts embarking on their woodworking journey!


Leave your comment