How To Insulate a Chicken Coop
- January 16, 2024
- 4 comment
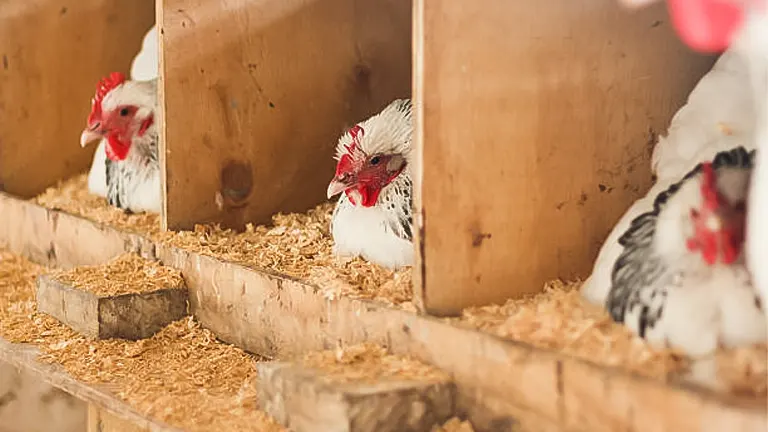
Insulating our chicken coop was primarily driven by the issue of moisture. During winter, the cold external air causes condensation inside the coop, leading to a damp floor and potential structural damage. Insulation helps maintain a warmer environment, reducing condensation without the need for additional heat sources.

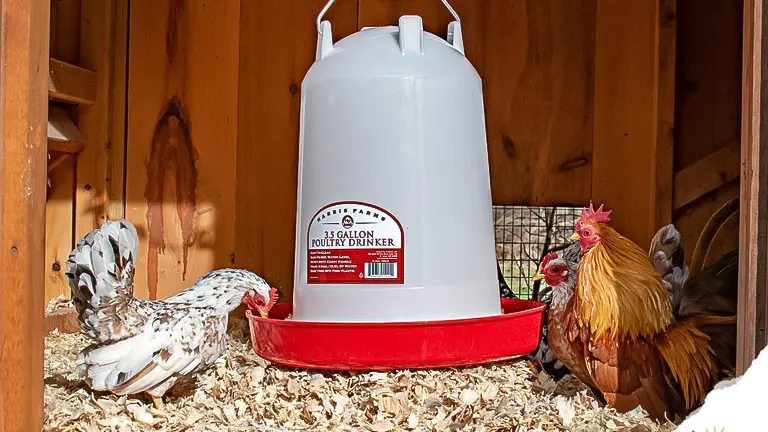
The moisture also contributes to frostbite in chickens, a condition exacerbated by the combination of cold and dampness. Therefore, addressing and reducing moisture levels in the coop is crucial, not only for the structure’s integrity but also for the chickens’ health.
List on How To Insulate Chicken Coop List:
- User-Friendly Insulation Materials
- Recycled and/or Scrap Insulation Materials
- Utilizing Repurposed Styrofoam for Chicken Coop Insulation
- Interior Paneling
- Enhancing Cold-Weather Comfort: Upgrading Your Coop’s Roosts
- Defend Against Winter Chill with Spray Insulation
Insulating Your Chicken Coop: A Step-by-Step Guide
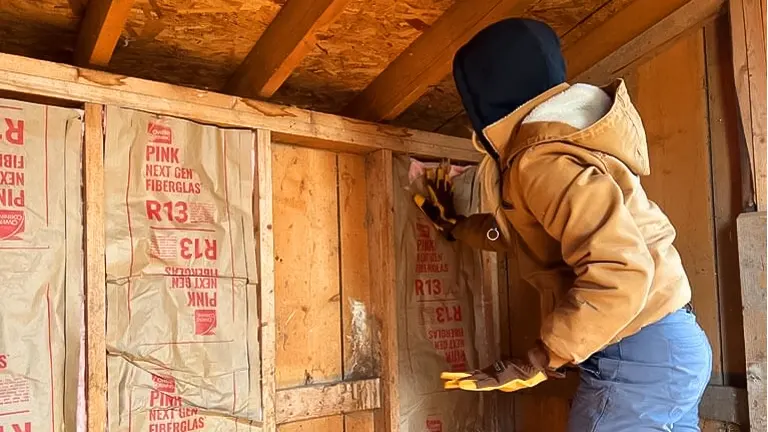
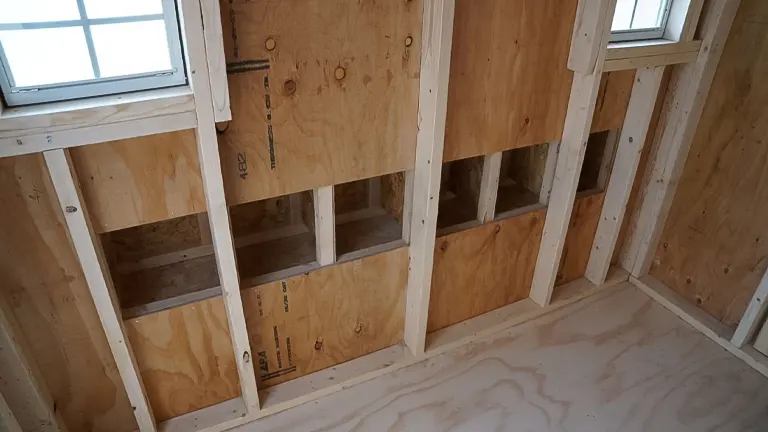
Insulating a chicken coop can be a straightforward yet impactful DIY project. In our case, we opted for the silver heat-reflective roll type of insulation, although various options are available. Using a staple gun, we securely fastened the insulation to the wooden beams. The key is to align it carefully and staple without overlapping to ensure the staples penetrate the wood effectively, preventing any potential pullouts.

For guidance during the installation process, we found a helpful installation guide at Lowe’s that provided step-by-step instructions, making the task more manageable.
The application of insulation on the coop ceiling proved to be a quick and effortless process, resulting in a significant improvement in the coop’s moisture control. This particular insulation not only effectively addresses the moisture issue but also has the added benefit of reflecting light from fixtures, creating a brighter interior.
Surprisingly, the chickens adapted well to the insulated environment, showing no signs of discomfort. Considering the size of our coop (10’X20′), the cost of insulating it was reasonable, totaling under $100. Each roll of insulation, measuring 2 feet in width and 25 feet in length, proved to be sufficient for our larger coop. If dealing with a smaller coop, one roll would likely be adequate for the entire insulation project.
In conclusion, our experience with DIY chicken coop insulation using the silver heat-reflective roll type has been positive. It’s a cost-effective solution that’s easy to implement, and the benefits extend beyond moisture control, enhancing the overall comfort and brightness within the coop.
Best Materials To Use To Insulate A Chicken Coop
Insulating a chicken coop with top-quality materials is expensive- and unnecessary! Many different types of affordable insulation can be used in chicken coops.
1. User-Friendly Insulation Materials
In my quest for an insulation material that seamlessly blends effectiveness with user-friendly attributes, I conducted a comprehensive exploration of various options. My investigation spanned materials ranging from traditional fiberglass to cutting-edge reflective foil, and it was the versatile foam board insulation that stood out as the ultimate choice.
The distinct advantage of foam board lies in its interlocking panels, presenting a remarkably straightforward installation process. This feature not only facilitates ease of use but also positions foam board insulation as a top-tier option suitable for individuals at all levels of poultry-keeping expertise, whether they are beginners or seasoned chicken enthusiasts.
The appeal of foam board insulation extends beyond its user-friendly nature. The interlocking panels not only simplify the installation for DIY enthusiasts but also contribute to a snug fit, enhancing the overall effectiveness of the insulation. Its adaptability makes it an ideal choice for various coop sizes and structures, accommodating the diverse needs of chicken keepers.
In essence, the user-friendliness of foam board insulation ensures that individuals, regardless of their familiarity with coop maintenance, can effortlessly create a well-insulated and comfortable environment for their cherished feathered companions.
2. Recycled and/or Scrap Insulation Materials
Embrace the world of sustainable insulation solutions by flexing your thrift-shopping skills and paying a visit to your local Habitat for Humanity ReStore. This hidden gem offers a variety of recycled and surplus building materials, including insulation, at a fraction of the cost compared to buying new.
Often, lumber yard resale stores receive generous donations of leftover insulation, making it an eco-friendly and budget-friendly option for savvy chicken keepers. Scrap insulation, a common find in these treasure troves, is typically available at a staggering 80-90% discount off the retail price.
The versatility of insulation scraps opens up numerous possibilities for fortifying your chicken coop against the elements. A strategic starting point involves lining the coop walls with these recycled materials, creating a protective barrier that retains warmth and wards off the chill.
Once this step is accomplished, extending the insulation to the coop floor becomes an additional consideration. For elevated coops, especially those not directly in contact with the ground, insulating beneath the floor can further enhance the overall thermal efficiency of the coop, ensuring a cozy and well-insulated haven for your feathered friends.
3. Utilizing Repurposed Styrofoam for Chicken Coop Insulation
Unveiling an ingenious approach to sustainable insulation, repurposed styrofoam emerges as a game-changer for enhancing the thermal efficiency of chicken coops. While traditional recycling methods may find styrofoam challenging, repurposing styrofoam sheets proves to be a remarkably effective and environmentally friendly alternative. Not only is recycled styrofoam lightweight, simplifying the installation process, but it also offers excellent insulation properties.
A practical way to incorporate repurposed Styrofoam into your coop insulation strategy is by salvaging sheets that come with purchased products. These Styrofoam panels, when strategically added to the ceiling (underside of the roof), yield substantial temperature benefits. In my own experience, this simple adjustment has notably improved the coop’s temperature regulation, keeping it warmer during winter and cooler in the summer months. While Styrofoam can be challenging to glue, I found success using Elmer’s Pro-bond Glue*, ensuring a secure and durable attachment.
For those eager to embark on a weekend project, a convenient solution lies in acquiring a 4×8 foot panel of rigid foam garage door insulation from a reputable big-box store. By customizing the size and affixing it to the ceiling and roof of your coop, you can achieve an immediate and significant enhancement in insulation. This strategic use of repurposed Styrofoam not only contributes to a more comfortable coop environment but also aligns with sustainable practices by giving a new purpose to a material that is often overlooked in traditional recycling processes.
4. Interior Paneling
Navigating the intricacies of insulating a chicken coop requires a thoughtful approach, especially considering the curious and sometimes messy nature of our feathered companions. Unlike a typical storage building, where fiberglass insulation might be left exposed, a chicken coop demands a different strategy due to the risk of chickens pecking at the insulation or causing harm to themselves or the structure.
Enter the solution that not only mitigates these risks but also enhances insulation – interior paneling. Now, when I mention paneling, don’t envision opulent studies filled with cigar-smoking elites; rather, think of a practical and straightforward application.
A visit to a Habitat for Humanity Restore can yield cost-effective options like plywood half-sheets or quarter-sheets. Armed with a jigsaw, you can customize these sheets to fit the unique contours of your coop.
By strategically placing and affixing these panels, you not only safeguard the insulation along the walls from chicken interference but also elevate the overall insulation capacity of your coop. This approach marries functionality with practicality, ensuring a cozy and secure environment for your chickens without sacrificing aesthetics or breaking the bank.
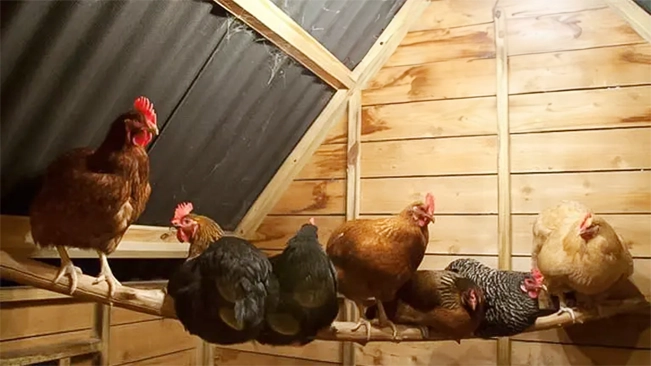
5. Enhancing Cold-Weather Comfort: Upgrading Your Coop’s Roosts
In the realm of chicken comfort during chilly weather, it’s essential to acknowledge the natural insulation prowess of feathers that envelop our feathered friends. While feathers effectively keep hens warm, their feet can be susceptible to the cold. In the wild, chickens instinctively roost on wide branches, allowing their plumage to envelop their entire feet, including their delicate toes.
The challenge arises in many chicken coops that feature inexpensive, narrow roosts. Unlike the broad branches found in the wild, these compact roosts force chickens to curl their toes around them, extending away from the warmth generated by their feathers and body heat. This positioning makes chickens particularly vulnerable to the cold, increasing the risk of frostbite and hypothermia, especially during the night when temperatures drop.
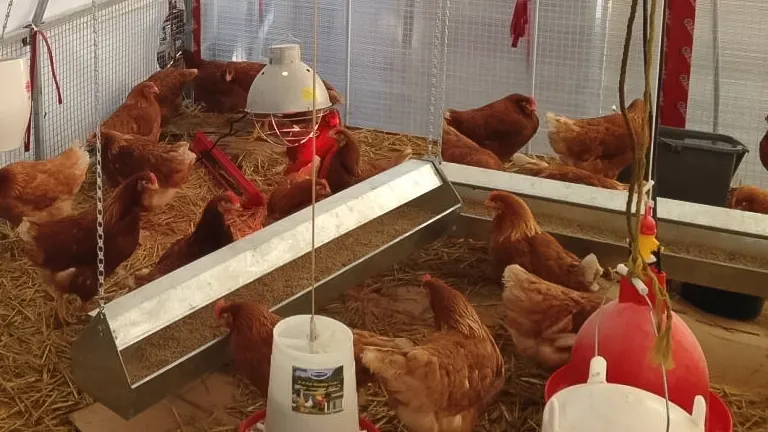
To fortify your chicken coop against winter’s bite, a pivotal step involves replacing any narrow roosts with wider boards. A practical choice is utilizing the broad side of a 2 x 4, providing a spacious and comfortable platform for chickens to roost. This modification not only aligns with their natural roosting tendencies but also ensures that their feathers effectively cover and insulate their feet, contributing significantly to their well-being during colder nights.
6. Defend Against Winter Chill with Spray Insulation
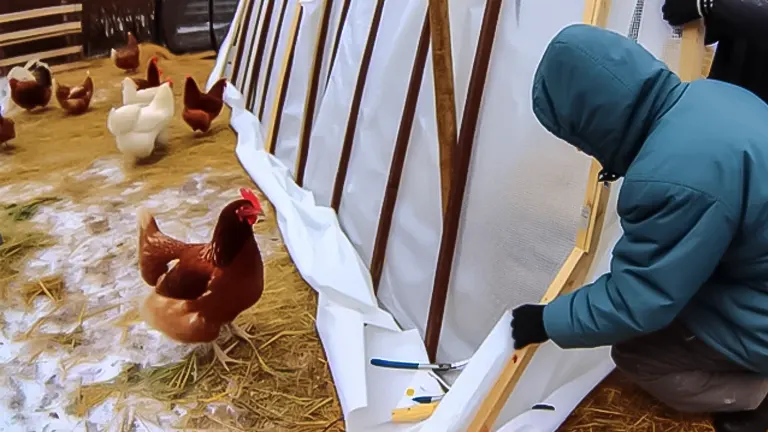
For an effective approach to improving your coop’s insulation, a practical starting point is to experience the conditions firsthand. Stand inside your coop on a blustery, rainy day and observe any potential water leaks. These entry points for water are indicative of pathways for cold drafts. Make a note of these vulnerable locations and, when the coop is dry, return to seal the gaps with spray foam insulation.
Identifying and addressing these weak spots is a key step in winterizing your coop, promoting longevity and ensuring a cozy environment for your chickens. A can of insulation foam spray can make a significant impact in maintaining warmth throughout the winter. A noteworthy tip: given that spray foam has a limited shelf life, any surplus should be directed into the space between wall panels and insulation panels to enhance their overall insulation capabilities.
Spray foam stands out as an exceptional insulation material for chicken coops due to its durability, ease of application, and effectiveness in providing insulation against the cold. While it excels at sealing larger gaps and challenging-to-insulate areas, it’s crucial to strike a balance, ensuring that the coop maintains sufficient ventilation for the well-being of your chickens, even during winter months.
Enhancing Winter Egg Production with Supplemental Feeding
During the winter months, the availability of fresh food for backyard chickens is often limited to kitchen scraps until the arrival of spring. However, if your chicken run receives some natural light, there’s an opportunity to boost their diet with grazing boxes and cold-weather grasses, such as oat grass*. These provisions not only offer access to fresh greens throughout winter but also provide a stimulating activity for your flock. For a comprehensive guide on constructing and maintaining chicken grazing boxes, check out our dedicated article.
Economical Coop Insulation Strategies
Recognizing the financial constraints many chicken keepers face, insulating your chicken coop need not be a costly endeavor. It’s an ideal space to repurpose leftovers from other construction projects, employ a mix of various materials, and repurpose items sourced from thrift stores, flea markets, or recycling centers. This budget-friendly approach allows for creativity and resourcefulness, ensuring that your coop remains warm and snug during winter without breaking the bank. In a separate article, we delve into specific strategies and materials to consider when insulating your coop on a budget, offering practical insights for poultry enthusiasts with limited financial resources.
Final Thoughts
In conclusion, the task of insulating your chicken coop may initially appear daunting, but it’s a manageable and rewarding one-person DIY project. You don’t need to tackle every item on the chicken coop winterization checklist all at once; instead, consider a gradual approach. Choose one or two insulation methods each season, and over time, you’ll transform your coop into a warm and cozy haven for your hens. By taking it step by step, you’ll find that the process becomes not only more feasible but also allows you to tailor your insulation strategies based on the specific needs and conditions of your coop. Ultimately, this incremental approach ensures that come next winter, your coop will be well-prepared to provide a comfortable environment, encouraging consistent egg production even in the coldest months.
Read Our Related Articles on Chicken Coop:
- Best Bedding For Chickens
- How to Build a Chicken Coop
- How To Build Chicken Nesting Boxes
- How To Keep Water from Freezing in Chicken Coop
Frequently Asked Questions
- Why is insulation important for a chicken coop?
Insulation helps regulate the temperature inside the coop, providing a comfortable environment for chickens, especially during extreme weather conditions. It also aids in moisture control and can contribute to energy efficiency. - What are the signs that my chicken coop needs insulation?
Signs may include temperature extremes inside the coop, excessive condensation, frozen water, and a decrease in egg production during colder months. If you notice drafts or your chicken huddling together for warmth, it might be time to consider insulation. - Which insulation material is best for a chicken coop?
The best insulation material depends on factors like your budget, local climate, and personal preferences. Common options include foam board, fiberglass, recycled materials, and even repurposed styrofoam. Each has its own set of advantages and considerations. - Can I insulate my chicken coop on a budget?
Yes, it’s possible to insulate a chicken coop on a budget by repurposing materials, using leftover construction items, and exploring cost-effective insulation solutions like recycled or scrap materials. - How do I determine if my coop is well-insulated?
Assess the coop for consistent temperature, minimal drafts, and controlled moisture levels. Observe chicken behavior – if they are comfortable, active, and laying eggs consistently, it’s a good indicator of effective insulation. - Is it necessary to insulate the floor of the chicken coop?
Insulating the coop floor is beneficial, especially in colder climates. Elevating the coop and insulating the floor helps prevent cold air from creeping in and maintains a more stable temperature for the chickens. - Can I insulate my coop without professional help?
Yes, insulating a chicken coop is often a manageable DIY project. Many insulation materials, such as foam board or recycled materials, are user-friendly and can be easily installed with basic tools. - How can I prevent moisture buildup in the coop during winter?
Adequate ventilation is crucial for preventing moisture buildup. Ensure there are adjustable vents to control airflow and avoid condensation. Additionally, using moisture-resistant insulation materials can help mitigate this issue. - Will insulated roosts make a significant difference for my chickens?
Yes, wider and insulated roosts contribute to the overall comfort of chickens during winter. Chickens naturally fluff their feathers over their feet for warmth, and insulated roosts help maintain this behavior, minimizing the risk of frostbite. - Can I add insulation to an existing coop, or is it only for new constructions?
You can definitely add insulation to an existing coop. The process may involve some modifications, but it’s a feasible and worthwhile endeavor to improve the coop’s thermal efficiency and create a more comfortable environment for your chickens.
We’re eager to learn from your firsthand experiences! Please take a moment to share your insights and thoughts on your chicken coop insulation journey in the comments section below. Your valuable experiences and tips could be a game-changer for fellow chicken keepers seeking to enhance their coop’s comfort. Let’s build a community of shared wisdom and help each other create the coziest spaces for our feathered friends!

Edward Smith
Forestry AuthorWoodworking is about more than crafting; it's a harmonious connection with nature, mastering tools, and preserving our environment. I'm here to share my knowledge and experiences with you, forging a future where we can embrace wood's beauty and utility while safeguarding our forests' health and diversity.
4 comments
Good info thanku!
Tami O
January 17, 2024 3:48 pmI’m glad you found the information useful! Happy chicken coop insulating!


My 8+8 coop walls were insulated at construction. The interior walls are recycled 8inch lap board pulled from a dumpster. Pulled all the nails, squared then all. The were painted just faced them inward and got a nice looking coop. One step I did not do was ceiling rafters. The biggest problem was summer heat. The asphalt shingles made the coop extremely hot. Insulated the bays and brought the temperature down 15 degrees. Added an exhaust fan for another 10. Heat can also be a problem as well.
William Jarvis
January 17, 2024 7:41 pmHi William Jarvis, Impressive work on your coop! Your recycling and heat management strategies are very effective. It’s a great reminder that insulation is crucial for both winter and summer. Keep sharing your experiences! Thank You!
Edward Smith
January 18, 2024 5:59 am