Troubleshooting Common Welding Machine Problems
- November 29, 2023
- 0 comment
Welding is both an art and a science, but even the most skilled welders can find themselves in a bind when their trusty welding machine starts acting up. Having encountered my fair share of welding machine conundrums, I decided to put together a comprehensive review to help fellow welders troubleshoot common problems. From sparking arcs to mysterious malfunctions, let’s dive into the world of welding machine troubleshooting.
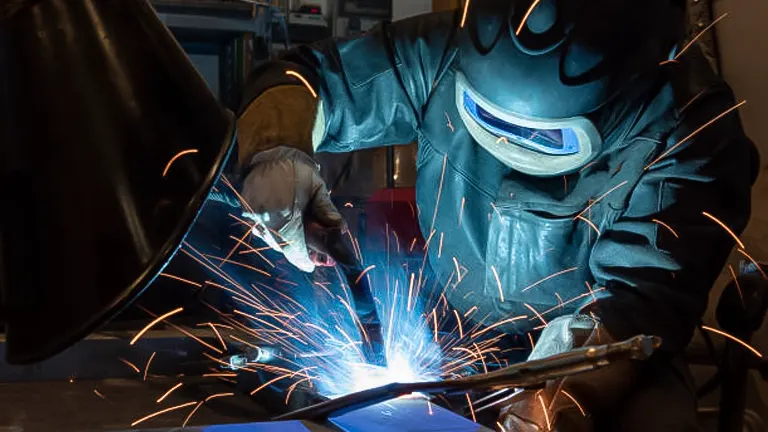
The welding process stands out as one of the most intricate manufacturing procedures, demanding a profound comprehension of factors linked to base and filler materials, environmental variables such as changes in pressure, temperature, and wind speed, as well as the intricacies of welding machines and associated tools that exert an influence on the overall process. Various challenges, arising either from the welder or the welding machine, frequently emerge during welding, disrupting workflow and consequently diminishing the productivity of the welder.
While some of these issues can be addressed by the operator, others prove more elusive. Hence, it is imperative for the welding operator to possess a robust understanding of common problems that may arise, along with potential solutions whenever feasible. This knowledge not only saves time but also minimizes disruptions in work, enhancing overall efficiency.
Troubleshooting Common Welding Machine Problems List:
- Power Supply Check
- Poor Arc Quality
- Overheating
- Wire Feeding Issues
- Strange Sounds or Vibrations
- Error Codes or Indicator Lights
- Professional Inspection
What You Need To Know About Troubleshooting For Common Welding Machine Problems?
Troubleshooting common welding machine problems is a crucial skill for any welder, whether a seasoned professional or a novice. One key aspect to grasp is the significance of power management. Often, sudden power losses or fluctuations can be traced back to issues with the power source rather than the welding machine itself. It’s essential to regularly inspect and verify the adequacy of the power supply, ensuring it meets the machine’s specifications. Inconsistent arcs pose another challenge, stemming from factors like improper wire feeding or electrode issues.
To address this, meticulous attention to the welding gun’s condition, replacing worn-out contact tips, and maintaining optimal wire tension becomes imperative. Moreover, understanding gas flow anomalies is crucial for welders employing gas shielded processes. Whether it’s leaks, blockages, or incorrect regulator settings, a comprehensive inspection of the gas system is vital to maintain welding quality. By delving into the intricacies of power, arcs, and gas flow, welders can empower themselves to troubleshoot effectively and keep their welding machines operating at peak performance.
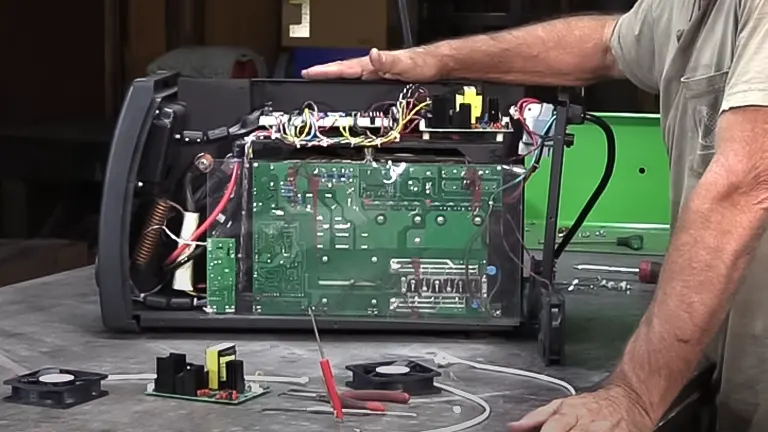
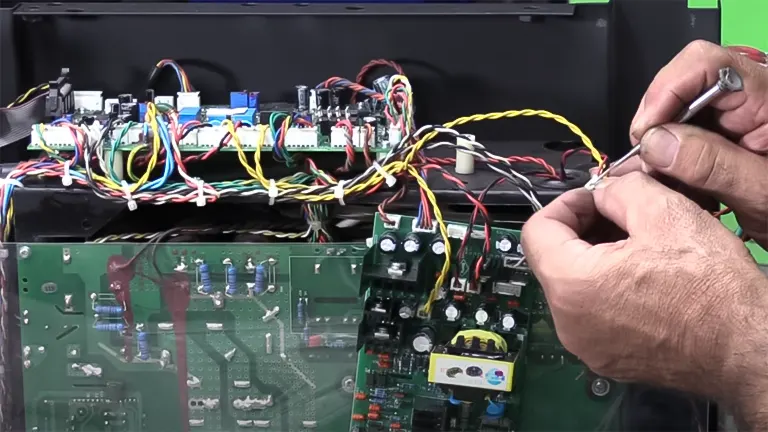
Prior to delving into the intricacies of maintenance routines and troubleshooting common problems, it is essential to familiarize ourselves with the machine duty cycle, as well as the names and locations of certain components. This foundational knowledge provides a necessary baseline for effectively managing and addressing issues with our welding equipment.
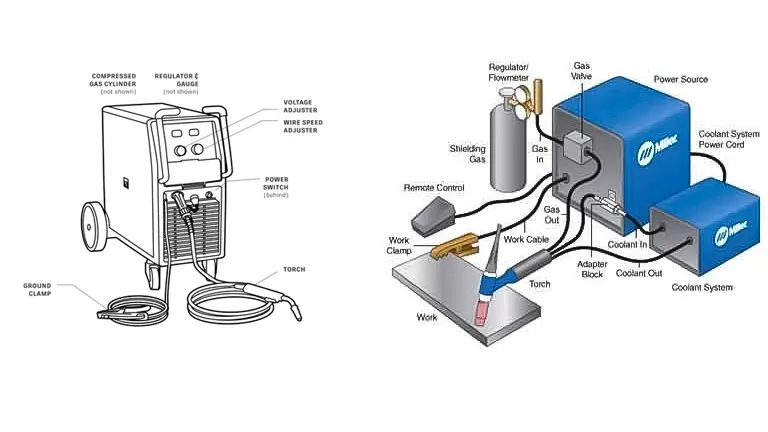
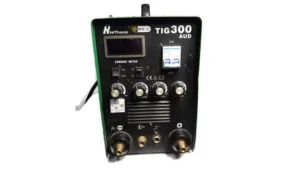
Machine Components
Understanding machine components is essential, and for illustration purposes, we will use the ARC200 as an example to provide a foundational overview:

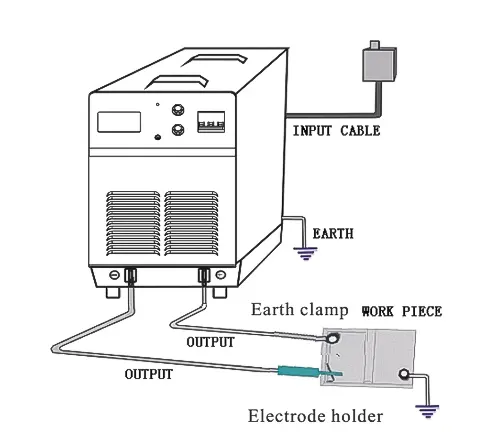
Ensuring The Correct Setup of the Welding Machine On-Site is Crucial
Before initiating the welding process, it’s imperative to adhere to certain general guidelines:
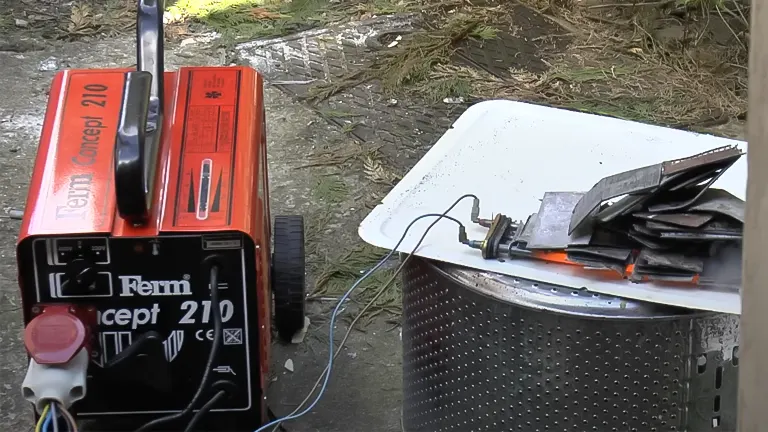
- Establishing proper grounding for both the machine body and the workpiece.
- Confirming that the input electricity matches the required specifications, considering factors such as voltage rate (single phase, two phase, or three phase).
- Ensuring the correct connection of the electrode holder and the return cable.
Detailed instructions for these procedures are provided below:

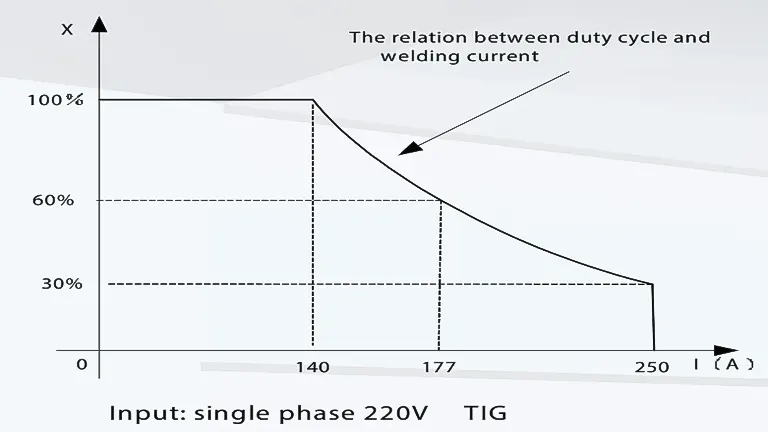
Machine Duty Cycle
The machine duty cycle is a crucial factor in understanding a welding machine’s operational limitations. Defined as the proportion of time a machine can work continuously within a specified timeframe (typically 10 minutes), it plays a pivotal role in maintaining optimal performance. For instance, a welding machine with a 60% duty cycle can operate continuously at the rated current for 6 minutes out of every 10 minutes. However, exceeding this time frame risks overheating, triggering the machine’s overheat protection mechanism and halting operations. The relationship between duty cycle (X) and welding current is graphically represented below, highlighting that higher welding currents correspond to lower duty cycles. This implies that when working with higher currents, it becomes imperative to operate the machine for a shorter duration than the standard rated time to prevent overheating and ensure sustained efficiency.
Before delving into an in-depth troubleshooting session for common welding machine problems, let’s first discuss the primary maintenance routine that needs to be adhered to.
Step by Step Guide: Troubleshooting Common Welding Machine Problems
Welding machines are essential tools for any welder, but like any piece of equipment, they can encounter issues. If you find yourself facing problems with your welding machine, follow this step-by-step guide to troubleshoot and get back to seamless welding.
Step 1: Power Supply Check
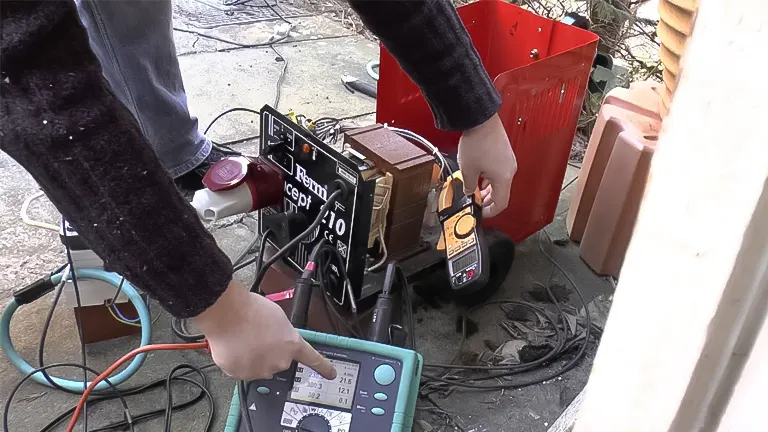
In the initial step of troubleshooting a welding machine’s power supply issues, the focus is on addressing the common problems of no power or intermittent power. Firstly, it is crucial to Inspect the Power Source to ensure the stability and adequacy of the electrical supply to the welding machine. This involves checking that the power source is active, and the voltage is within the specified range. Fluctuations or inadequacies in the power supply can directly impact the performance of the welding machine.
Following this, the next point of scrutiny is to Check Cables. This involves a thorough examination of the power cables connected to the welding machine. Look for any visible signs of damage, such as cuts, frays, or exposed wires. Additionally, check for secure and tight connections, as loose cables can lead to power interruptions or fluctuations. Identifying and rectifying issues in the power cables is fundamental to ensuring a consistent and reliable power supply to the welding machine.
Lastly, for cases where the welding machine is equipped with a circuit breaker, it is advised to Reset the Circuit Breaker. Circuit breakers are designed to protect the machine from electrical overloads or faults. If there is a power interruption or if the machine suddenly stops working, checking the circuit breaker for any tripping and resetting it can often resolve the issue. This step is particularly crucial in scenarios where the welding machine unexpectedly loses power.
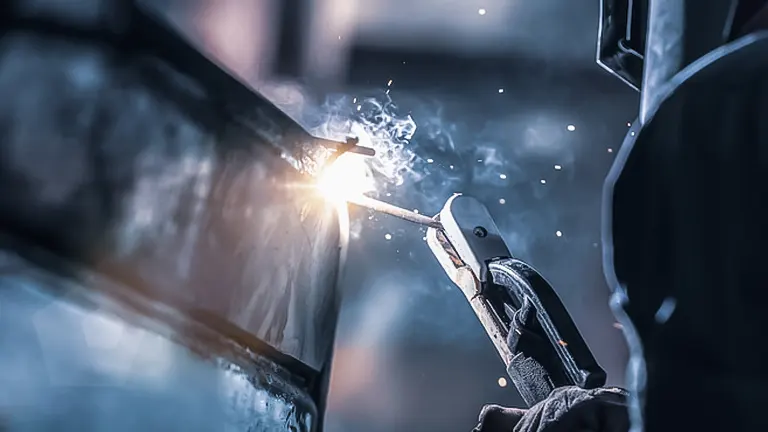
Step 2: Poor Arc Quality
In the second step of troubleshooting welding machine issues, the focus is on addressing problems related to poor arc quality, characterized by an unstable or inconsistent arc during welding. The first point of consideration is the Electrode Condition. A thorough inspection of the electrode is essential to identify any signs of damage or wear. Damaged or worn electrodes can significantly impact the stability of the welding arc. By ensuring that the electrode is in good condition, welders can promote a more reliable and consistent arc during the welding process.
The next critical aspect is Grounding. It is imperative to ensure that both the workpiece and the welding machine are properly grounded. Inadequate grounding can lead to erratic arcs, spatter, and overall poor welding performance. A solid ground connection provides a clear and stable path for the electrical current, resulting in a more controlled and reliable welding arc. Regular checks and maintenance of grounding connections are essential to avoid disruptions in the welding process.
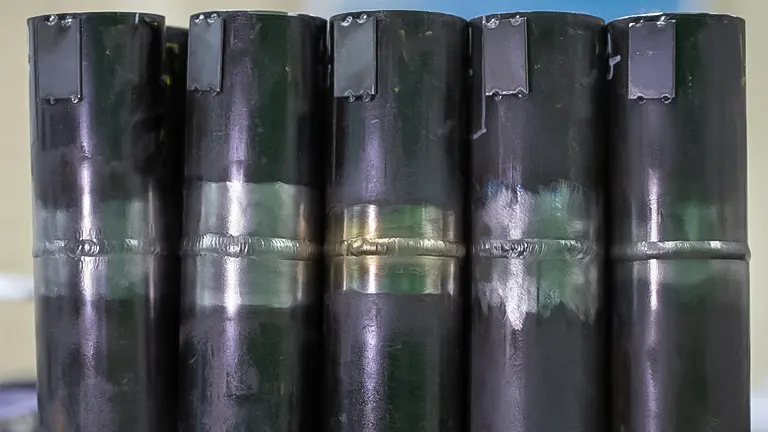
Finally, the troubleshooting process involves Adjusting Settings. This step requires a comprehensive review of the welding settings, including voltage and wire feed speed. Welders should refer to the material being welded and make adjustments accordingly. Incorrect settings can contribute to an unstable arc, causing issues such as spattering, uneven welds, or difficulty in maintaining the welding pool. By fine-tuning the settings based on the specific material and welding requirements, welders can optimize the welding parameters to achieve a stable and high-quality arc.
Step 3: Overheating
In the third step of troubleshooting welding machine problems, the focus is on addressing issues related to overheating, which can lead to the welding machine shutting down unexpectedly. The first consideration in tackling overheating is to ensure Proper Ventilation. It’s crucial to check that the welding machine is situated in an environment with adequate ventilation. Placing the machine in an enclosed space can impede the dissipation of heat generated during welding, contributing to overheating. Adequate ventilation allows for efficient heat dispersion, preventing the welding machine from reaching critical temperatures.
The next vital step is to Clean Air Vents. Over time, dust and debris can accumulate in the air vents of the welding machine, obstructing the airflow needed for effective cooling. Regular cleaning of these vents is essential to maintain optimal airflow and prevent overheating. This preventative measure not only aids in the cooling process but also extends the lifespan of the welding machine components by reducing the risk of heat-related damage.
Simultaneously, it’s imperative to Check the Cooling System, including fans and cooling fins, for proper operation. The cooling system is designed to dissipate heat generated during welding, preventing the components from reaching excessive temperatures. If the fans or cooling fins are malfunctioning or blocked, the cooling efficiency is compromised, leading to overheating issues. Regular inspection and maintenance of the cooling system ensure that it operates smoothly, providing effective heat dissipation and preventing sudden shutdowns due to excessive temperatures.
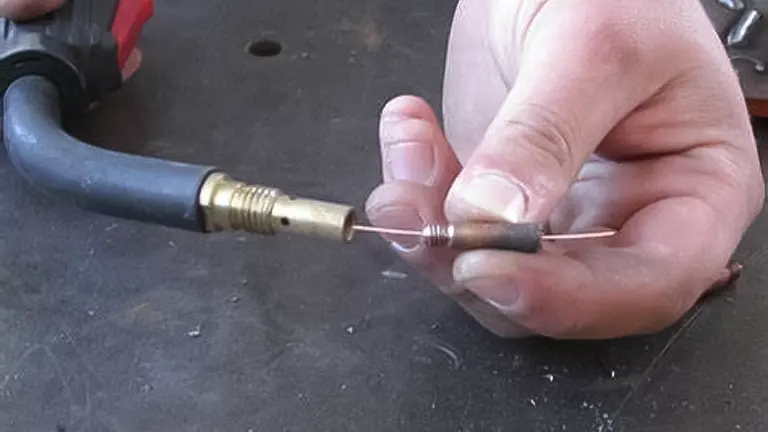
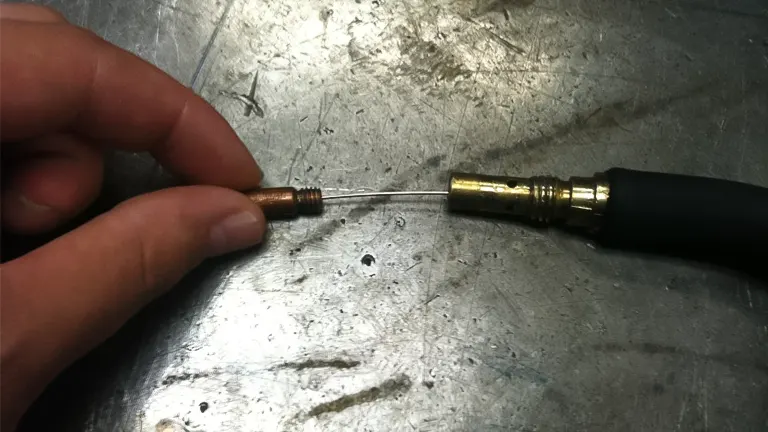
Step 4: Wire Feeding Issues
In the fourth troubleshooting step focusing on wire feeding issues in welding machines, the primary concern is addressing irregular or non-existent wire feeding. The first crucial aspect in resolving this problem is to Check Wire Quality. Welders must verify that the welding wire used is of the correct diameter and type specified for the welding process. This is paramount to guaranteeing a smooth and consistent wire feeding process. Using the wrong wire can lead to various complications, including erratic feeding, which can result in uneven welds or disruptions in the welding arc.
Ensuring the compatibility and quality of the welding wire sets the foundation for successful wire feeding. The next critical element in troubleshooting wire feeding issues involves a meticulous examination of the Drive Rolls. Drive rolls play a pivotal role in guiding and facilitating the smooth feeding of the welding wire. Any obstructions, damage, or misalignment in the drive rolls can disrupt the wire feeding process, leading to irregularities in the weld.
Welders should carefully inspect the drive rolls for any signs of obstruction or wear, addressing these issues promptly to maintain the integrity of the wire feeding mechanism. Additionally, the troubleshooting process includes Tension Adjustment. It is essential to adjust the wire tension according to the manufacturer’s recommendations. Incorrect tension settings can result in problems such as birdnesting, where the welding wire becomes tangled in the welding gun, causing interruptions in the welding process. By adhering to the specified tension guidelines, welders can align the wire feeding system correctly, preventing jams and promoting a consistent and controlled wire feed.
Step 5: Gas Flow Problems
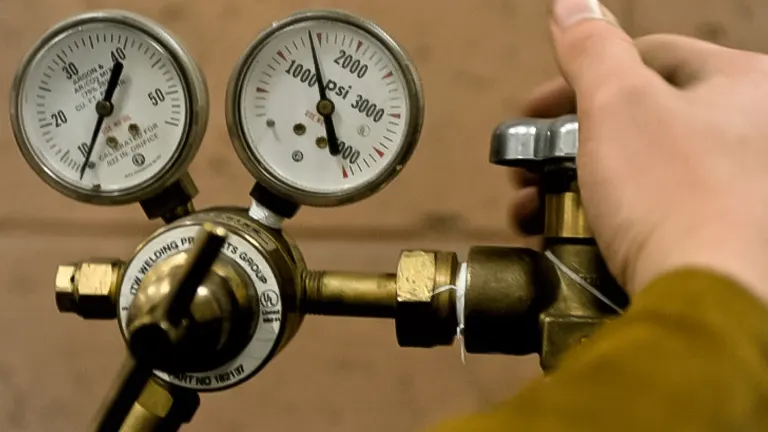
In the fifth step of troubleshooting welding machine issues, the focus is on addressing problems related to gas flow, specifically issues such as insufficient or erratic gas flow during the welding process. The initial consideration in resolving this matter is to Check the Gas Supply. It is imperative to confirm the availability of an adequate supply of shielding gas and to meticulously examine the system for any potential gas leaks. Inadequate gas supply or leaks can result in compromised weld quality due to insufficient shielding, leading to issues such as porosity and lack of fusion. Ensuring a consistent and sufficient gas supply is fundamental to achieving high-quality welds.
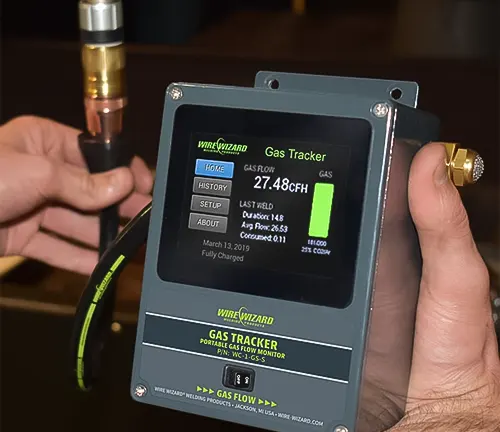
Following this, the troubleshooting process involves Adjusting Regulator Settings. Welders should carefully assess and adjust the regulator settings to meet the recommended flow rate. Incorrect regulator settings can impact the gas flow, leading to problems such as turbulence in the shielding gas stream. Achieving the proper flow rate is essential for maintaining an effective shield around the welding arc, protecting the molten weld pool from atmospheric contaminants.
Additionally, attention turns to the Cleaning of the Gas Nozzle. Over time, debris or spatter can accumulate in the gas nozzle, obstructing the flow of shielding gas. Regular cleaning of the gas nozzle is crucial to remove any buildup and ensure unobstructed gas flow. A clean gas nozzle promotes a stable and consistent flow of shielding gas, contributing to the overall quality and integrity of the weld.
Step 6: Strange Sounds or Vibrations
In the sixth step of troubleshooting welding machine issues, the focus is on addressing unusual sounds or vibrations during operation, which can be indicative of underlying problems. The initial step in resolving this issue involves a meticulous inspection of Moving Parts. Welders should check for any loose components or parts, such as fans or motor mounts, that may be contributing to the unusual noises or vibrations.
Loose parts not only compromise the efficiency of the welding machine but can also lead to more severe mechanical issues if left unattended. A comprehensive examination of moving parts ensures the identification and tightening of any components that may be causing disruptions during operation. Simultaneously, attention is given to Lubrication. Proper lubrication is essential for the smooth functioning of moving parts within the welding machine.
Inadequate lubrication can result in increased friction, leading to unusual sounds and vibrations. Welders should ensure that all moving parts are well-lubricated according to the manufacturer’s recommendations. Regular maintenance in this regard not only diminishes the occurrence of disruptive sounds but also extends the lifespan of the welding machine by minimizing wear and tear.
Finally, the troubleshooting process advises welders to Consult the Manual. The manufacturer’s manual often contains valuable information and specific guidance on addressing unusual sounds or vibrations. It may provide insights into the expected operational sounds of the welding machine and offer troubleshooting steps tailored to the model. Referring to the manual ensures that welders follow manufacturer-recommended procedures, allowing for a more accurate diagnosis of the issue and effective resolution.
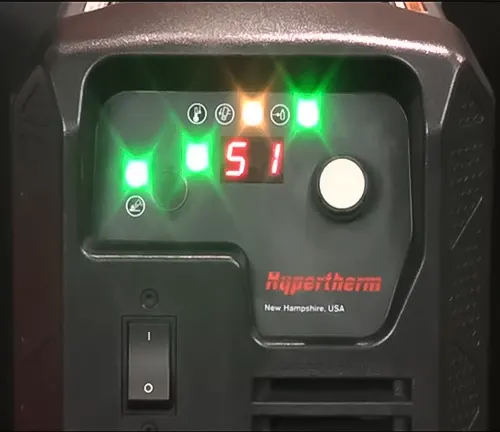
Step 7: Error Codes or Indicator Lights
In the seventh step of troubleshooting welding machine issues, the focus is on addressing problems signaled by the appearance of error codes or indicator lights on the machine. The first and foremost action in tackling this issue is to Refer to the Manual. The user manual for the welding machine serves as a comprehensive guide, providing detailed information about the meaning and interpretation of specific error codes or indicator lights.
By consulting the manual, welders can gain insights into the nature of the problem, allowing for a more informed and targeted approach to resolution. If the error persists, the next step is to Reset the Machine. Some issues can be resolved by resetting the welding machine, effectively clearing error codes, or addressing transient faults.
Welders should follow the manufacturer’s instructions for the correct reset procedure. This step is particularly valuable for instances where the error might be attributed to a temporary glitch in the system. Attempting a reset can often restore the machine to normal functioning.
However, if the issue persists despite attempted resets, the final course of action is to Contact Support. Manufacturers typically provide customer support services to assist users in diagnosing and resolving complex issues. Contacting the manufacturer’s support team allows welders to access expert guidance, troubleshoot the problem more effectively, and obtain recommendations for further action. Manufacturer support is especially crucial when dealing with persistent issues that may require technical expertise or potential equipment servicing.
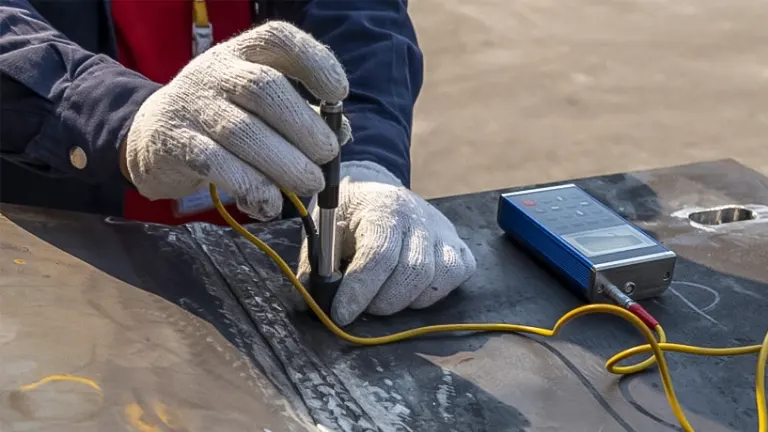
Step 8: Professional Inspection
If all else fails or if you’re unsure about a particular issue, it’s advisable to seek professional assistance. Contact the manufacturer’s customer support or a certified technician to inspect and repair the welding machine.

By following these steps, you can systematically identify and address common welding machine problems, ensuring your equipment operates at its best and minimizing downtime during your welding projects. Always prioritize safety and refer to the manufacturer’s guidelines for specific troubleshooting recommendations.
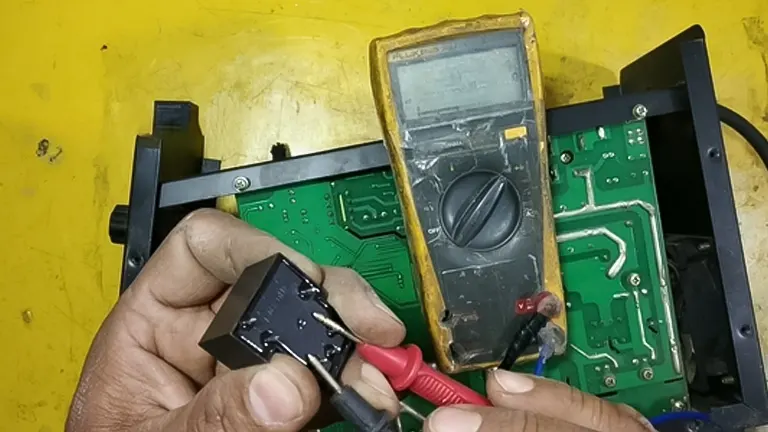
Materials and Tools Needed When Fixing A Welding Machine
Here’s a list of materials and tools that you may need when fixing a welding machine:
- Multimeter: Used to measure voltage, current, and resistance, helping diagnose electrical issues in the welding machine.
- Wrench Set: Essential for tightening or loosening nuts and bolts on various components of the welding machine.
- Screwdriver Set: Needed for removing and securing screws on the machine’s panels and covers during inspection and repair.
- Wire Brush: Useful for cleaning electrical connections and removing any debris or oxidation that may affect conductivity.
- Replacement Fuses: It’s prudent to have a selection of fuses on hand, as blown fuses are a common issue that may need immediate replacement.
- Lubricants: Necessary for ensuring smooth operation of moving parts; lubricants help prevent friction and reduce wear.
- Welding Wire and Electrodes: Having spare welding wire and electrodes is crucial for quick replacements, ensuring minimal downtime during repairs.
- Cooling System Cleaner: Used to clean the cooling system components, such as fans and cooling fins, to maintain optimal heat dissipation.
- Manufacturer’s Manual: A reference guide for understanding the welding machine’s specifications, troubleshooting steps, and maintenance procedures.
- Safety Gear: Always prioritize safety; wear appropriate personal protective equipment, including gloves, safety glasses, and other gear depending on the specific repair task.
Guidelines for Maintaining and Caring for Welding Machine
Here are eight guidelines for maintaining and caring for a welding machine:
- Regular Cleaning: Remove dust, debris, and welding spatter from the machine’s exterior and internal components regularly to prevent buildup and ensure optimal performance.
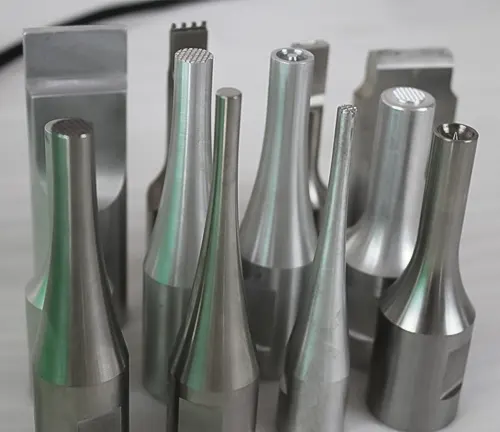
- Check and Replace Consumables: Regularly inspect and replace consumables such as welding tips, nozzles, and electrodes to maintain efficiency and quality in welding.
- Inspect Power Cables: Examine power cables for signs of damage or wear, ensuring a safe and reliable power supply to the welding machine.
- Monitor Cooling System: Regularly check the cooling system, including fans and cooling fins, to ensure proper operation and prevent overheating.
- Verify Grounding Connections: Ensure that both the welding machine and workpiece are properly grounded to prevent electrical issues and ensure operator safety.
- Calibrate Settings: Periodically review and calibrate welding settings, including voltage and wire feed speed, to match the requirements of different materials and welding processes.
- Perform System Checks: Conduct comprehensive system checks, including the gas delivery system and wire feeding mechanism, to identify and address issues before they impact welding quality.
- Refer to the Manufacturer’s Manual: Consult the user manual for specific maintenance guidelines, troubleshooting steps, and any manufacturer-recommended procedures to ensure proper care for the welding machine.
By adhering to these guidelines, welders can prolong the lifespan of their welding machines, maintain consistent performance, and minimize the risk of unexpected issues during critical welding tasks.
Importance of Safety Features
Here are eight important safety features to consider when troubleshooting common welding machine problems:
- Overheat Protection: Prevents the welding machine from reaching dangerous temperatures by automatically shutting down or activating cooling systems, ensuring operator safety and equipment longevity.
- Emergency Stop Button: Allows for immediate cessation of welding operations in case of an emergency, providing a quick and accessible means to stop the machine.
- Voltage and Current Limiters: Limits the maximum voltage and current to prevent electrical hazards, protecting both the welder and the welding machine from potential overloads.
- Insulated Handles and Cables: Minimizes the risk of electric shock by providing insulation on handles and cables, safeguarding the welder against accidental contact with live electrical components.
- Fault Indicator Lights: Quickly identifies and communicates potential issues through indicator lights, allowing the operator to take corrective actions and avoid unsafe conditions.
- Ground Fault Circuit Interrupter (GFCI): Detects ground faults and interrupts the circuit to prevent electric shocks, adding an extra layer of protection for welders working in potentially damp or wet conditions.
- Thermal Overload Protection: Safeguards against excessive current or overheating by automatically shutting down the machine, reducing the risk of damage and fire hazards.
- User-Friendly Interface: Intuitive controls and clear displays enhance user understanding, reducing the likelihood of errors that could lead to unsafe operating conditions.
Conclusion
To sum up, mastering the art of troubleshooting common welding machine problems is paramount for welders seeking efficiency, safety, and prolonged equipment life. By systematically addressing issues related to power supply, arc stability, overheating, wire feeding, gas flow, mechanical vibrations, error codes, and incorporating regular maintenance, welders can not only identify and rectify problems but also prevent potential issues before they escalate. Investing time and attention in understanding and resolving these challenges ensures a smoother and more productive welding experience, empowering welders to tackle diverse projects with confidence and precision. Remember, a well-maintained welding machine is not just a tool; it’s a reliable partner in crafting quality welds.
Frequently Asked Questions
- What should I do if my welding machine suddenly stops working?
Check the power supply, inspect cables for damage, and review the circuit breaker. Ensure a stable power source and look for visible issues that may be impeding the machine’s operation. - How can I address inconsistent arc quality during welding?
Examine the condition of the electrode, confirm proper grounding, and adjust welding settings according to the material being welded. These steps can help stabilize and improve the welding arc. - What might cause my welding machine to overheat, and how can I prevent it?
Overheating may result from poor ventilation or a malfunctioning cooling system. Ensure proper machine placement for ventilation, clean air vents regularly, and inspect the cooling system components for optimal operation. - What steps can I take to troubleshoot wire feeding issues?
Verify the quality and type of welding wire, examine drive rolls for obstructions, and adjust wire tension according to the manufacturer’s recommendations. These actions can address irregular or no wire feeding. - How do I interpret error codes or indicator lights on my welding machine?
Refer to the manufacturer’s manual for guidance on interpreting error codes. Attempt to reset the machine following instructions in the manual. If the issue persists, contact the manufacturer’s support for further assistance.
Got some welding wisdom to share? Whether you’ve conquered a tricky power supply glitch or smoothly navigated through wire feeding challenges, your experiences matter! Drop your troubleshooting tales and insights in the comments below. Let’s build a community of savvy welders, helping each other troubleshoot common welding machine problems and enhance our craft together!

Edward Smith
Forestry AuthorWoodworking is about more than crafting; it's a harmonious connection with nature, mastering tools, and preserving our environment. I'm here to share my knowledge and experiences with you, forging a future where we can embrace wood's beauty and utility while safeguarding our forests' health and diversity.

Leave your comment