First Welder Guide for DIYers: Practical Tips
- December 29, 2023
- 0 comment
Embarking on the venture of welding as a do-it-yourself enthusiast is a venture filled with both excitement and challenges. Having personally immersed myself in the world of welding with the eagerness of a novice, I fully comprehend the significance of selecting the appropriate equipment to initiate this enriching craft.
Within this inaugural guide to welding, I intend to provide detailed practical advice and insights drawn from my journey, with the ultimate goal of facilitating a seamless entry into welding for you, comparable to the smoothness of a meticulously executed welding bead.
The array of welding processes available is diverse, and each process has its own set of applications. Consequently, it becomes imperative to take into account your skill level, the fundamental processes at your disposal, and the distinctive capabilities and advantages each process offers. This thoughtful consideration allows you to discern which welding process aligns best with your specific needs and applications. Subsequently, armed with this understanding, you can then identify the welder that suits you most effectively.
Comprehensive Overview of Welding Processes
In the realm of welding, various processes exist, with MIG, TIG, and Stick standing out as the most common. However, it’s crucial to recognize that there’s no universal approach suitable for all applications; instead, each method comes with distinct advantages and limitations tailored to specific tasks.
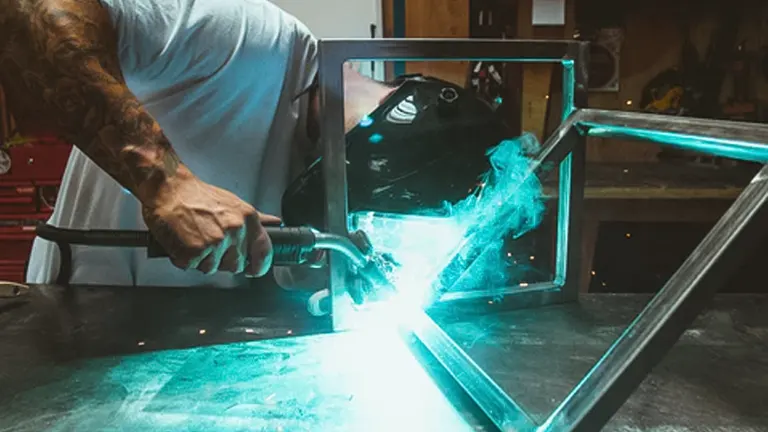
MIG/Gas Metal Arc Welding (GMAW)
MIG welders employ a wire welding electrode, automatically fed at a consistent pre-selected speed from a spool. The resulting arc, formed by the electrical current between the base metal and the wire, melts the wire and fuses it with the base material. This yields a high-strength weld with an appealing finish, often requiring minimal post-weld cleaning. MIG welding is user-friendly, applicable to both thin and thick metals, and excels in producing clean welds on steel, aluminum, and stainless steel.
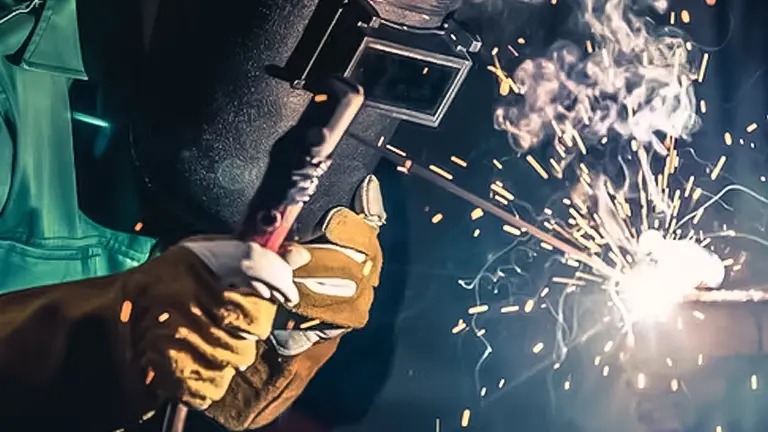
A variation of MIG, flux-cored arc welding (FCAW), utilizes a wire-feed process but eliminates the need for shielding gas in self-shielded FCAW. Instead, flux-cored wire shields the arc from contamination, proving advantageous in outdoor, windy, or challenging conditions. FCAW is a preferred method in construction due to its speed and portability, showcasing its efficiency in various scenarios.
TIG/Gas Tungsten Arc Welding (GTAW)
TIG welding involves a non-consumable tungsten electrode to create welds. Shielding gas, usually argon, and filler metal (though not always necessary) protect the weld area from atmospheric contamination. A constant-current power supply generates energy conducted across the arc through a plasma column of highly ionized gas and metal vapors.
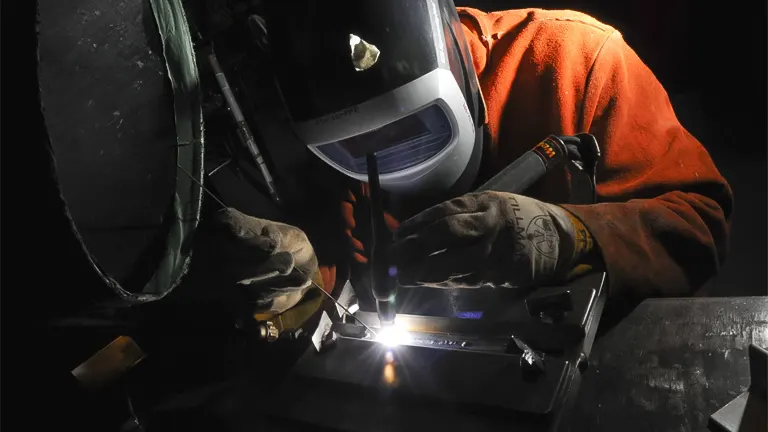
TIG welding finds its niche in joining thin sections of alloy steel, stainless steel, and nonferrous metals like aluminum, magnesium, and copper alloys. Offering superior control over the arc, TIG delivers strong, high-quality welds. Despite its complexity and slower pace compared to other processes, TIG welding remains an excellent choice for intricate projects requiring meticulous precision.
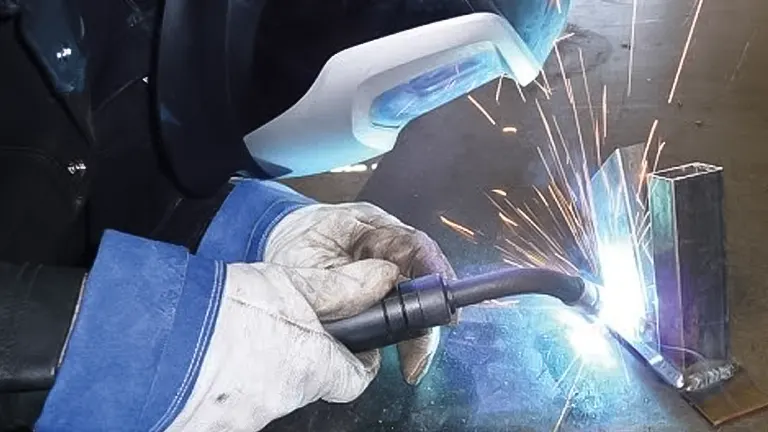
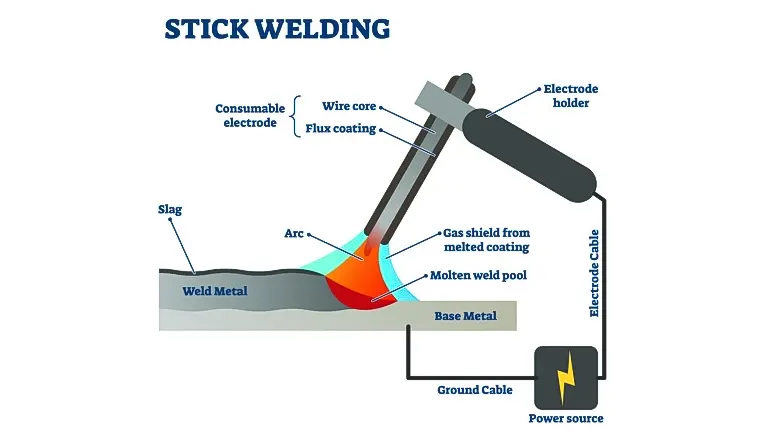
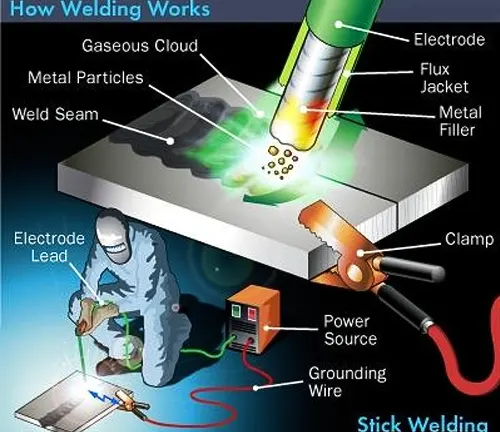
Stick/Shielded Metal Arc Welding (SMAW)
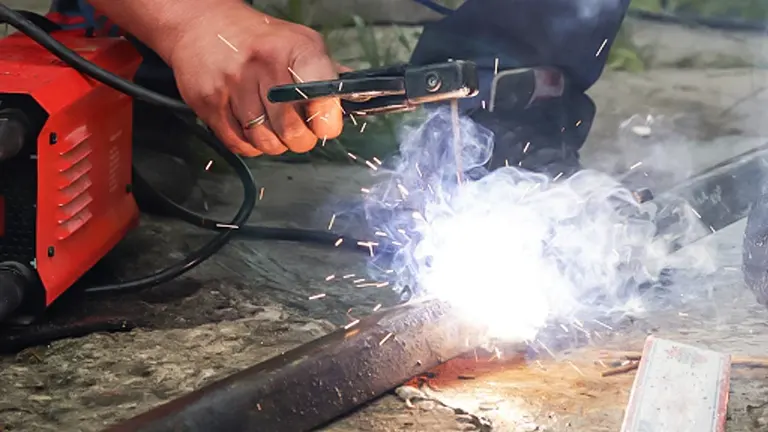
Stick welding has been a staple in home-shop work for years. This process involves an electric current flowing from the gap between the metal and the arc-welding electrode. While effective for welding most alloys or joints, Stick welding’s versatility extends to indoor and outdoor use, making it suitable for work in drafty conditions. Cost-effective and capable of creating robust bonds on rusty or dirty metals, Stick welding is a practical choice.
However, Stick welding does have its limitations, including the ability to handle metals no thinner than 18 gauge, frequent rod changes, notable spatter emission, and the necessity for post-weld cleaning. It demands a steeper learning curve, particularly in striking and maintaining an arc. Available in AC, DC, or AC/DC, Stick welders are economical and find favor among farmers, hobbyists, and those engaged in home maintenance tasks, particularly when dealing with thicker metals of 1/16 inch or greater.
| Welding Process | Key Features and Advantages |
|---|---|
| MIG Welding | – Easiest process to learn |
| – High welding speeds possible | |
| – Better control on thinner metals | |
| – Clean welds possible with no slag to clean | |
| – Same equipment can be used for flux-cored welding | |
| TIG Welding | – Provides the highest quality, precise welds |
| – Highly aesthetic weld beads | |
| – Allows adjustment of heat input while welding with a foot control | |
| – More forgiving when welding on dirty or rusty material | |
| Stick Welding | – Better suited for windy, outdoor conditions |
| – More forgiving when welding on dirty or rusty metal | |
| – Works well on thicker materials |
Which Welding Process Aligns With Your Requirements?
Consider the predominant types of projects and materials that will be the focus of your welding endeavors. Are you engaged in crafting metal sculptures? Do you have plans to revive an antique muscle car within the confines of your garage? Perhaps there’s a motorcycle from years past that demands fabrication attention. Alternatively, do you find yourself primarily involved in basic repairs for farm equipment? Identifying the specific nature of your projects and materials is pivotal in determining the most suitable welding process for your needs.
| Possible Projects | Average Material Thickness |
| Auto body | 3/16 inch or less |
| Trailer frames and fencing | 1/4 inch to 5/16 inch |
| Farm, ranch and landscape | 5/16 inch to 3/8 inch |
| Thick structural components | Over 3/8 inch |
| Bicycles, lawnmowers or tube frames | 1/16 inch |
| Boats, cars and motorcycles | 1/16 inch to 1/8 inch |
| Hunting stands and utility trailers | 1/16 inch to 1/8 inch |
| General to heavy repair | 3/16 inch to 1/4 inch |
Investing time initially to pinpoint the predominant projects in your workflow is crucial. This effort aids in identifying the specific metal thickness you’ll frequently encounter, thereby facilitating a more informed selection of the most appropriate equipment.
Moving forward, let’s delve into specifics and examine the applicable welding processes for each type of metal. It’s essential to note that many materials undergo processing with combinations of two or more metals to enhance strength and functionality.
| Metal | Weld Process |
|---|---|
| Steel | MIG, Stick, TIG |
| Stainless Steel | MIG, Stick, TIG |
| Aluminum Alloys | MIG, TIG |
| Cast Iron | Stick |
| Chromoly | TIG |
| Copper | TIG |
| Brass | TIG |
| Exotic Metals | (Magnesium, Titanium, etc.) |
What considerations should guide your welder purchase?
When selecting welding equipment, it’s crucial to tailor your choice to the specific functions and projects that will dominate your welding activities. Ponder over your ultimate objectives and explore possibilities to enhance the versatility of your equipment. Consider future needs, such as a potential requirement for increased power or amperage, and evaluate if you foresee the desire to delve into additional welding processes.
Amperage and power requirements, along with the duty cycle, are pivotal factors to note. Understanding these specifications ensures optimal operational efficiency and economic viability for the projects on your agenda. Utilize tools like our new Product Selector to pinpoint welding machine matches based on your specific needs and preferences.
In addition to the upfront cost of the welder, it’s essential to factor in expenses for necessary accessories and supplies. This encompasses welding protection gear (helmet, gloves, jacket, etc.), as well as gas and consumables vital for seamless operation. Don’t rush the decision-making process; take the time to clearly define your needs.
Should uncertainties arise or questions linger, Miller is at your service to provide comprehensive information on welding processes, benefits, limitations, and machine operation. When you’re ready to align a specific model with your task, hobby, or business requirements, Miller stands ready to suggest the ideal product that suits you best.
With a legacy dating back to 1929, Miller has consistently delivered quality welders. When the time comes to make a purchase, it would be an honor for your inaugural welder to bear the Miller name.
Review of Visual Concepts
The Visual Concepts in the First Welder Guide for DIYers truly elevate the learning experience. The guide masterfully combines clear, step-by-step visuals with concise and practical tips, making it an invaluable resource for beginners. Each concept is visually demystified, ensuring that even those new to welding can grasp essential techniques effortlessly. From understanding welding processes to choosing the right equipment, the visual aids provide a solid foundation for DIYers venturing into welding.
The inclusion of detailed graphics not only enhances comprehension but also instills confidence, empowering users to embark on their welding journey with a strong understanding of the fundamental concepts. Overall, the incorporation of visual elements in this guide significantly enhances its effectiveness, making it an essential tool for aspiring welders.
What Machine is Best for you?
Now that you’re more familiar with each welding process, let’s review the recommended models Miller offers.
MIG/Flux-Cored Welder Machine:
- Millermatic 142: This all-in-one 120-volt wire welder effortlessly handles welding tasks for mild steel, allowing for a seamless weld on materials ranging from 24 gauge to 3/16-inch thick (0.8-4.8 mm) in a single pass.
- Millermatic 211: Capable of welding materials from 24 gauge to 3/8-inch thick in a single pass, the Millermatic 211 offers enhanced versatility with its Multi-voltage plug (MVP™). This feature allows the welder to adapt to either 120- or 240-volt input power, providing flexibility to suit various welding requirements.
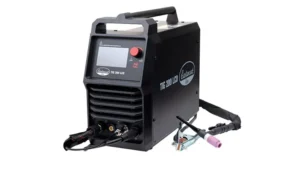
TIG Welder Machine:
- Diversion 180: Tailored for individual users, this AC/DC TIG machine upgrade boasts the capability to operate on both 120- and 240-volt input power, ensuring adaptability to various electrical configurations.
- Syncrowave 210: Striking a balance between affordability and performance, this AC/DC TIG and DC stick machine caters to light-industrial applications and personal users. It leverages inverter technology without compromising on power or efficiency.
- Dynasty 210: Offering maximum flexibility, the Dynasty® 210 is an advanced AC/DC TIG/stick power source equipped with Auto-Line™ technology. This feature enhances adaptability by automatically adjusting to varying input power conditions.
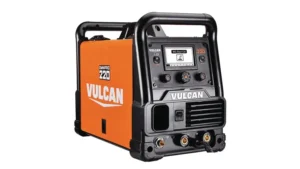
Stick Welder Machine:
- Thunderbolt 210: Offering top-tier reliability, portability, and robust stick welding capabilities, the Thunderbolt 210 stands out as a dependable choice. It features the flexibility of 120- and 240-volt input power, with the added convenience of MVP (Thunderbolt 160 only).
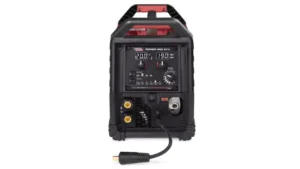
Multi-process
For those seeking versatility in welding capabilities, a multiprocess welder proves to be a valuable investment. This type of welder allows users to employ various welding processes without the need to purchase multiple machines.
- Multimatic 215: stands as a prime example, serving as a MIG, flux-cored, DC TIG, and DC stick welder that effortlessly connects to both 120- and 240-volt input power, accommodating welding tasks on materials up to 3/8-inch thick mild steel.
- Multimatic 220: AC/DC Providing unparalleled freedom in welding processes, the Multimatic® 220 AC/DC supports MIG, flux-cored, DC TIG, DC stick, and introduces AC TIG capabilities. This welder allows users to tackle an extensive range of welding tasks with the flexibility to choose the ideal process for each application.
Final Concluding Final Thoughts
In conclusion, the First Welder Guide for DIYers provides a comprehensive and practical resource for individuals venturing into the world of welding. Offering valuable insights and tips, this guide equips beginners with the essential knowledge needed to embark on welding projects confidently. From understanding amperage requirements to decoding duty cycles, the guide covers crucial aspects that empower DIYers to make informed decisions about their choice of welder. The emphasis on versatility, especially with multiprocess welders, adds a layer of flexibility for users to explore various welding techniques without the need for multiple machines. Overall, this guide serves as an indispensable companion for DIY enthusiasts, laying a solid foundation for their welding journey with practical advice and expert tips.
Frequently Asked Questions
- What amperage is required for welding?
The measure of electricity flow, or amperage, in welding is synonymous with heat. A general rule is that for every 0.001 inch of material thickness, 1 amp of output is needed. For instance, welding a base material that is 0.125-inch thick requires 125 amps, while welding material that is 0.250-inch thick demands 250 amps. - What does duty cycle mean in welding?
The duty cycle in welding refers to the duration within a 10-minute period that a power source can operate continuously before overheating. For instance, a machine with a 40% duty cycle can operate for four minutes and then must rest for six minutes. Duty cycle ratings are specified in a machine’s product specifications and are typically based on the amps and welding process in use. Lower outputs result in increased duty cycle, and vice versa. For example, the Multimatic 220 AC/DC has a 60% duty cycle at 105 amps for MIG or flux-cored welding and a 20% duty cycle at 200 amps for the same processes. - What duty cycle is suitable for a welder?
The appropriate duty cycle rating for a power source depends on the type of work performed most frequently. In a shop or garage setting, a machine with a lower duty cycle can usually handle most jobs, as operators often use lower amperages and pause more frequently, allowing the machine to cool down. In a light manufacturing or fabrication production environment where higher amperages are used more frequently, a machine with a 60% duty cycle is typically employed. - Which welder is best for outdoor welding?
For outdoor welding, processes like stick or self-shielded flux-cored welding are preferred, as they don’t require a shielding gas. Versatile multiprocess equipment, such as the Multimatic 215, is recommended for outdoor jobs, providing the flexibility to tackle various tasks with either stick or flux-cored welding. Stick welding is suitable for quick jobs or repairs on dirty metal, while wire-feed flux-cored welding is more efficient for larger projects. An engine-driven welder like the Bobcat™ 265, with its 9,500-watt output, is suitable for power generation needs. - What is the ideal welder for shop welding?
When choosing a welder for a shop, consider amperage needs and available power. Multiprocess welders, such as the Multimatic 220 AC/DC, are advantageous for shop work as they allow versatility in using different processes like stick, TIG, MIG, and flux-cored welding without the need for multiple machines. However, if MIG welding is the primary task, the Millermatic 211 is a reliable choice, capable of welding up to 3/16-inch material at 120V and up to 3/8-inch material at 240V.
We welcome your input! Feel free to share your personal experiences and insights about the first welder guide for DIYers in the comments section below. Your valuable thoughts could be instrumental in guiding fellow DIYers towards making informed decisions in their welding endeavors!

Edward Smith
Forestry AuthorWoodworking is about more than crafting; it's a harmonious connection with nature, mastering tools, and preserving our environment. I'm here to share my knowledge and experiences with you, forging a future where we can embrace wood's beauty and utility while safeguarding our forests' health and diversity.


Leave your comment