How to Blow Out Your Lawn Sprinkler System: Essential Lawn Care
- March 21, 2024
- 0 comment
Learn how to blow out your lawn sprinkler system with our comprehensive guide. Follow our step-by-step process to prepare your system for winter and prevent freezing and damage. One crucial maintenance task is blowing out the system before the cold winter months to prevent freezing and damage. This comprehensive guide will walk you through the process step by step, ensuring you can confidently and safely prepare your sprinkler system for winter.
List on How to Blow Out Your Lawn Sprinkler System
- Step 1: Shut Off the Water Supply
- Step 2: Manually Drain the System
- Step 3: Connect the Air Compressor
Why Use the Blow Out Method?
The blow-out method is widely recommended for winterizing irrigation systems, particularly in regions where temperatures drop below freezing. This method involves using an air compressor to forcefully expel all remaining water from the pipes, valves, and sprinkler heads. The primary reason for employing this technique is to prevent water from freezing within the system. When water freezes, it expands, and this expansion can cause significant damage to the irrigation infrastructure, including cracked pipes and broken valves, which can lead to costly repairs in the spring. By ensuring the system is entirely devoid of water, the blow-out method effectively mitigates the risk of freeze damage, maintaining the integrity and longevity of the irrigation system.
Moreover, the blow-out method offers a thorough approach to system winterization, providing peace of mind to homeowners and property managers. Unlike other methods that might leave residual water in certain parts of the system, blowing out the system with compressed air ensures that even the most susceptible components are protected against the cold. This method is particularly crucial for intricate systems with numerous zones and varied terrain, where water might collect and stagnate, leading to potential freeze points. Additionally, the process of blowing out the system can serve as an opportunity to assess and troubleshoot the overall health of the irrigation system, allowing for the identification and rectification of issues such as leaks or malfunctioning sprinkler heads before they become more significant problems.
Types of Sprinkler Systems
Traditional Spray Systems
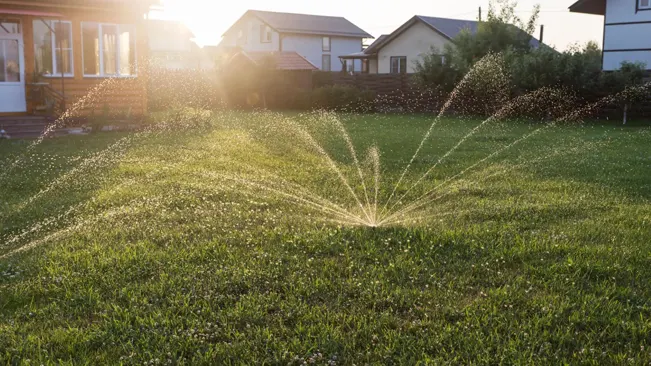
Traditional spray systems are the quintessence of residential irrigation, known for their simplicity and effectiveness in small to medium-sized lawns. The hallmark of these systems is the fixed spray heads, which pop up from the ground when the system is activated and distribute water in a predetermined, fan-shaped pattern. These spray patterns can be circular, semi-circular, rectangular, or square, allowing for versatile application across various lawn shapes and sizes. The spray heads are designed to operate at a higher precipitation rate, making them suitable for delivering quick, even coverage to grass and ground cover. However, this also means they are less suited to areas requiring deep watering, as runoff can occur if the soil cannot absorb water quickly enough. Traditional spray systems are generally more straightforward to install and maintain, making them a popular choice for homeowners looking for a reliable and efficient lawn watering solution.
Rotor Systems
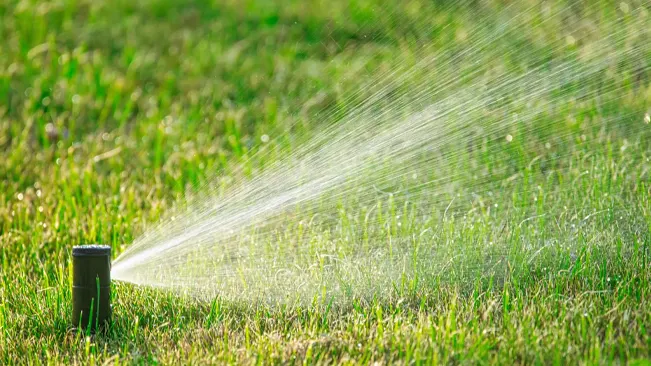
Rotor systems elevate lawn irrigation by employing rotating sprinkler heads that deliver water over a more extensive area, making them ideal for larger lawns and open spaces. Unlike the fixed pattern of spray systems, rotor heads rotate, casting water in a smooth, continuous stream across a broad arc. This rotation can be adjusted to cover various shapes and distances, offering flexibility to accommodate different lawn layouts. Rotor systems are characterized by their lower precipitation rate, which allows water to penetrate deeper into the soil, promoting healthy root growth and reducing water wastage due to runoff. This feature makes rotor systems particularly effective for watering large areas of turf where deep, infrequent watering is preferable. While rotor systems may require a bit more planning and investment to install, their efficiency and coverage make them a valuable choice for homeowners with substantial lawn areas.
Drip Irrigation Systems
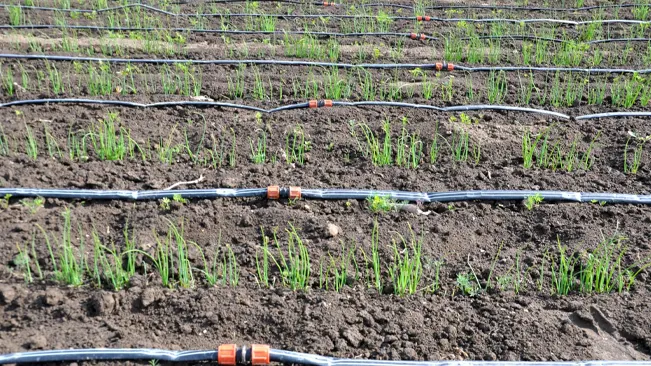
Drip irrigation represents a paradigm shift in irrigation philosophy, focusing on precision and conservation. Instead of blanketing an area with water, drip systems deliver it directly to the soil at the base of each plant. This method drastically reduces evaporation and runoff, ensuring that water is used exclusively where it’s needed most. Drip systems employ a network of tubing, emitters, and drippers, meticulously designed to meet the specific hydration needs of each plant, making them incredibly water-efficient. These systems are especially beneficial in gardens, flowerbeds, and landscaped areas with diverse plant types, each with unique watering requirements. The customization and adaptability of drip irrigation allow for targeted watering schedules, which can significantly enhance plant health and growth while conserving water – a critical consideration in areas prone to drought or water restrictions.
Tools and Materials
Tools
- Air Compressor: The primary tool for the blow-out method, capable of delivering sufficient CFM (cubic feet per minute) to clear water from your irrigation lines.
- Hose with Appropriate Fittings: A durable hose that can connect the air compressor to your sprinkler system, equipped with fittings compatible with your system’s connection points.
- Pressure Regulator: A device to control the air pressure output from the compressor to a safe level for your irrigation system, preventing damage.
- Backflow Device Adapter: If your system includes a backflow preventer, you’ll need an adapter to connect the air compressor hose to it.
- Adjustable Wrench: Handy for tightening or loosening connections to ensure a secure fit between the hose, adapters, and sprinkler system components.
- Valve Key (if applicable): For systems with manual valves, a valve key is necessary for opening and closing the valves during the blow-out process.
- Screwdriver Set: Useful for making adjustments to sprinkler heads or opening control boxes, if necessary.
- Pliers: For gripping and turning parts that are too difficult to manipulate by hand.
- Teflon Tape: Helps seal threaded connections, preventing air leaks during the blow-out process.
Materials
- Air Compressor Oil (if required): Some air compressors require oil for lubrication; check your compressor’s manual to see if this applies.
- Spare Sprinkler Heads and Nozzles: Having replacements on hand is useful if any heads are damaged during the blow-out process or need to be swapped out for different irrigation needs.
- Irrigation System Diagrams and Manuals: Essential for reference, these can guide you through the specific requirements and layout of your system.
- Markers or Flags: Useful for marking sprinkler head locations, especially if they need to be adjusted or repaired.
- Safety Gear:Safety Glasses: Protects your eyes from flying debris and water during the blow-out
- Insulation Materials: For regions with harsh winters, insulating above-ground components like backflow preventers and valves can provide extra protection against freezing temperatures.
Step-by-Step Guide to Blowing Out Your System
Step 1: Shut Off the Water Supply
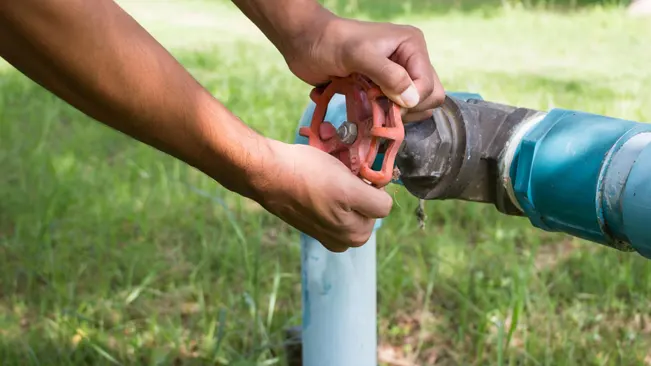
The first step in the winterization process involves locating the main shut-off valve for your irrigation system. This valve is usually situated near the water meter or where the main water line enters your property, and in regions prone to freezing, it might be found indoors to prevent the valve itself from freezing. Once located, the valve should be turned to the “off” position, effectively halting the flow of water into the irrigation system and ensuring it’s safe for the blow-out procedure. It’s also wise to inform all household members that the irrigation system is being winterized and that the water supply to the system is temporarily disabled to prevent any accidental use during the process.
Step 2: Manually Drain the System
Before connecting the air compressor, it’s beneficial to manually drain as much water from the system as possible. This involves locating any manual drain valves your system might have, which are typically found at the end of irrigation zones or at the system’s lowest points. Opening these valves allows water to drain out by gravity, a step that significantly reduces the volume of water the air compressor will need to expel, thereby streamlining the blow-out process. To manage the drained water, you can use buckets to collect it or direct hoses towards areas where the water can be safely disposed of without causing flooding or water damage to your property.
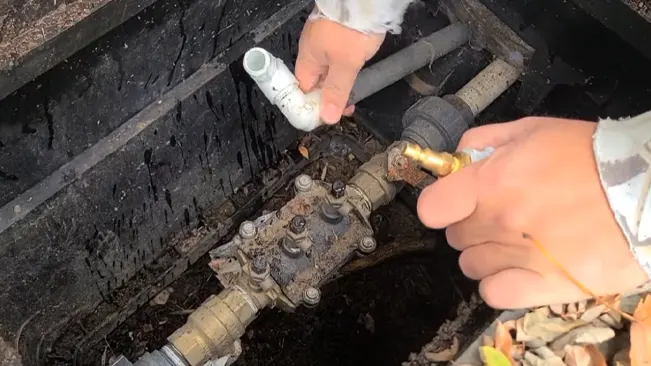
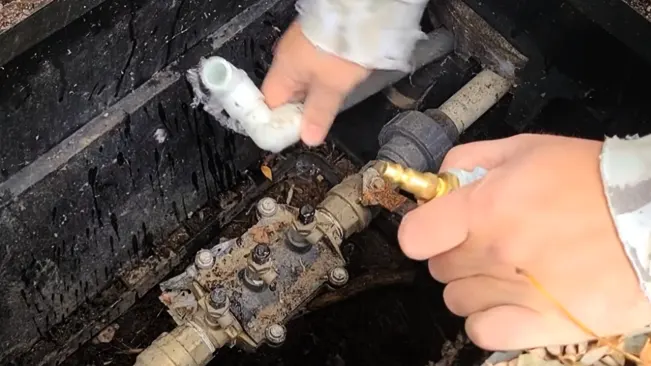
Step 3: Connect the Air Compressor
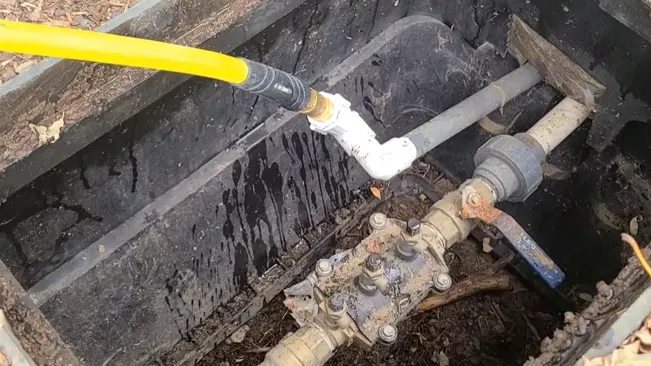
With the preliminary steps completed, the next phase is to connect the air compressor, a critical component in the blow-out method. Choosing the right compressor is crucial; it should have the capability to deliver the necessary CFM (cubic feet per minute) to effectively clear your system of water. For most residential systems, a compressor rated at a minimum of 50 CFM is suitable. If your irrigation system includes a backflow prevention device, you’ll need to attach a specific adapter to this device to facilitate the connection of the air compressor hose. Once the adapter is in place, securely connect the air compressor hose, ensuring a tight fit to prevent leaks. The final step before starting the blow-out is to adjust the air compressor’s pressure regulator to the appropriate PSI for your system, typically within the range of 40-80 PSI. It’s important to consult your irrigation system’s manual for the recommended pressure settings to avoid damaging the pipes or sprinkler heads during the blow-out process.
Troubleshooting Common Issues
1. Water Not Fully Blown Out
- Cause: Insufficient air pressure or volume from the compressor, or not all zones were fully cycled.
- Solution: Ensure your air compressor meets the required CFM and PSI for your system. Revisit each zone, ensuring you give enough time for the air to push all the water out. Double-check that all manual drain valves are opened during the process.
2. Sprinkler Heads Not Popping Up
- Cause: Low air pressure, clogged nozzles, or damaged sprinkler heads.
- Solution: Check the air compressor settings and adjust the PSI if necessary, being careful not to exceed the manufacturer’s recommended pressure. Inspect the sprinkler heads for debris or damage and clean or replace as needed.
3. Leaks in the System
- Cause: Cracked pipes or fittings, often due to water left in the system that froze or improper installation.
- Solution: Identify the source of the leak, which might become apparent during the blow-out process as air escapes from the leak point. Excavate the area around the leak with care and repair or replace the damaged section of the pipe or fitting.
4. Backflow Preventer Issues
- Cause: Damage from freezing temperatures or improper blow-out procedure.
- Solution: Inspect the backflow device for any signs of damage or leaks. If damaged, it may need to be repaired or replaced by a professional. Ensure the backflow preventer is adequately insulated for the winter.
5. Air Compressor Connection Problems
- Cause: Incorrect fittings or adapters, or loose connections.
- Solution: Verify that you’re using the correct adapter for your backflow device and that all connections are secure. Use Teflon tape on threaded connections to improve the seal.
6. Controller/Timer Issues
- Cause: Settings not adjusted for winterization or malfunctioning equipment.
- Solution: After the blow-out, ensure your irrigation controller is set to the “off” or “rain mode” position to prevent the system from turning on. If the controller is not responding, check the power supply, fuse, and wiring. Consider resetting the controller or consulting the manual for troubleshooting tips.
7. Pressure Regulator Failures
- Cause: Incorrect pressure setting or malfunction.
- Solution: Double-check the pressure regulator settings according to your system’s specifications. If the regulator is not functioning correctly, it may need to be adjusted or replaced.
Conclusion
In conclusion, properly blowing out your lawn sprinkler system is a critical maintenance task that should not be overlooked. As the colder months approach, ensuring that your system is free of water can prevent the costly and inconvenient damage that freezing temperatures can inflict. By following the step-by-step guide provided, from shutting off the water supply to blowing out each zone individually, you can protect your investment and ensure your sprinkler system remains in good working order for the next watering season. Remember, safety is paramount, so always wear appropriate protective gear and take your time to do the job correctly. Should you encounter any issues during the process, don’t hesitate to seek professional help. With a little effort and care, you can easily winterize your sprinkler system, keeping it safe and ready for when the warm weather returns.
FAQs
- How often should I blow out my sprinkler system?
It’s recommended to blow out your sprinkler system once a year, typically in the fall before the first freeze. - Can I blow out my sprinkler system without an air compressor?
An air compressor is the most effective tool for this task. Other methods might not fully remove all the water, risking damage. - What’s the best air compressor size for blowing out a sprinkler system?
The size of the air compressor needed can vary based on your system’s size. Generally, a compressor with a CFM rating of at least 10-20 should be sufficient for most residential systems. - Is it necessary to blow out each zone individually?
Yes, blowing out each zone individually ensures that all the water is expelled from the system, preventing any remaining water from causing damage. - What should I do if water is left in the system after blowing it out?
If water remains after the initial blowout, you may need to repeat the process or adjust the air compressor’s pressure. If the issue persists, consider consulting a professional.
For more expert gardening and advice, explore our guides, discover top recommendations in our best section, and delve into in-depth product reviews in our review section. Happy Gardening.

Joel Cunningham
Forestry AuthorI'm Joel Cunningham, an expert in pruning and weed management with over a decade of experience. My skills are rooted in formal training and extensive practice, focusing on advanced pruning techniques and efficient weed control. I'm known for my quality work, precision, and deep understanding of plant health and soil dynamics. My contributions extend to educational initiatives where I share sustainable practices and advice, establishing myself as a reliable and authoritative figure in the gardening community.


Leave your comment