How to Build a Pergola: Captivate Your Backyard’s Potential
- May 6, 2024
- 0 comment
Learn how to build a pergola and enhance your outdoor space with our straightforward, step-by-step guide. Are you ready to transform your backyard into a stunning retreat? Building a perfect pergola is not just about adding structure; it’s about creating a space where memories are made and moments are enjoyed.
This guide will walk you through each step of constructing it that not only enhances your outdoor living area but also boosts your home’s aesthetic and value. Let’s unleash the potential of your backyard and turn it into your personal oasis.
List of Guides on How to Build a Pergola
- Step 1: Planning and Preparation
- Step 2: Laying the Foundation
- Step 3: Building Profiles for Stringline
- Step 4: Pouring Concrete into Post Holes
- Step 5: Marking the Height of the Post
- Step 6: Measuring and Cutting Bearers
- Step 7: Marking Where Rafters Will Sit
- Step 8: Drilling Holes for Bolts
- Step 9: Adding the Rafters
- Step 10: Installing Additional Features
- Step 11: Finishing Touches
- Step 12: Landscaping and Decorating
Why Build a Pergola?
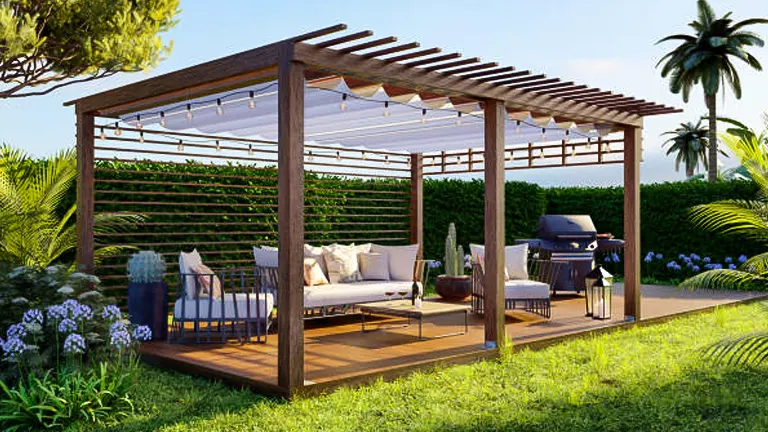
Adding a pergola to your backyard is not just about enhancing its aesthetic appeal; it’s about transforming your outdoor space into a multifunctional area that extends the livable part of your home. Pergolas offer a unique blend of outdoor enjoyment and functional benefits that make them a worthwhile investment for any homeowner. Whether you’re looking to create a shaded retreat from the sun, a defined space for social gatherings, or a structured base for garden greenery, a pergola can meet a variety of needs. Below are some key reasons and benefits:
- Visual Appeal: Pergolas add a striking visual element to your garden or yard. Their distinct architectural style can complement any landscape design, turning a plain space into a focal point of your home’s exterior.
- Enhanced Outdoor Living: It creates an outdoor room that is perfect for relaxing, dining, or entertaining guests. It provides a shaded area, protecting you from the direct rays of the sun while allowing enough light for a comfortable outdoor experience.
- Versatility in Use:
- Support for Climbing Plants: Pergolas are ideal for growing a variety of climbing plants, such as vines, roses, and ivy, which can add both beauty and natural shade as they mature.
- Customization Options: Easily customizable with curtains, lights, and outdoor furniture, pergolas can be tailored to suit your personal style and functional needs.
- Increased Property Value: Installing a pergola can increase the market value of your property. It’s seen as an upgrade that prospective buyers often find appealing due to the enhanced usability and aesthetic of the outdoor areas.
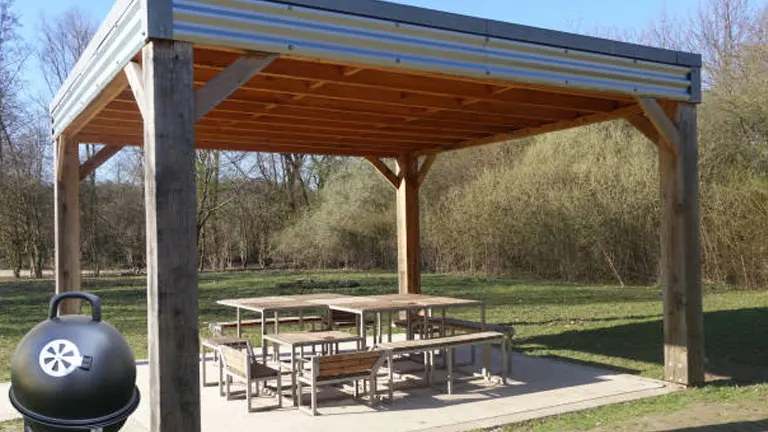
- Defined Entertainment Space: Pergolas define a clear area for entertaining outdoors. They can be equipped with sound systems, lighting, and even outdoor kitchens or fire pits, making them an ideal setting for hosting gatherings, no matter the time of day.
Step-by-Step Guides on How to Build
Step 1: Planning and Preparation
Begin by ensuring compliance with local regulations. Check with your local council to confirm whether a building permit is required for your pergola. Structures over one meter high often need official approval, which helps avoid potential legal complications. Next, select the ideal location in your yard. The space should be large enough to accommodate a 3.5 by 3-meter pergola and offer natural shade, enhancing comfort and functionality. Consider the path of the sun and choose a spot that complements your yard’s layout and existing design elements.
- Tips for Site Selection:
- Evaluate sun exposure throughout the day.
- Check for level ground or plan for necessary adjustments.
For material selection, choose durable options suited to your local climate conditions, especially if you live in areas with extreme weather or corrosive environments:
- Material Tips:
- In coastal areas, opt for materials like stainless steel or hot-dip galvanized metals to prevent corrosion.
- For colder climates, consider pressure-treated wood for its resistance to rot and pests.
Step 2: Laying the Foundation

Start by marking where your post holes will be located. Use string lines and profiles to ensure your layout is accurate and square, which is crucial for the stability of your pergola. Dig each post hole to the specified dimensions of 400 mm square by 500 mm deep. Before digging, it is advisable to contact local utility companies to check for any underground services; this prevents costly damages and ensures safety.
- Foundation Tips:
- Use a manual post hole digger or rent a power auger for more efficient digging.
To ensure longevity and structural integrity, place a concrete block at the bottom of each hole to elevate the posts slightly off the ground. This helps prevent wood rot and decay. Align the posts using your string lines, secure them with temporary braces, and verify their vertical alignment with a level. Mix and pour the concrete, agitating it with a stick to remove air bubbles, which will strengthen the foundation.
Step 3: Building Profiles for Stringline
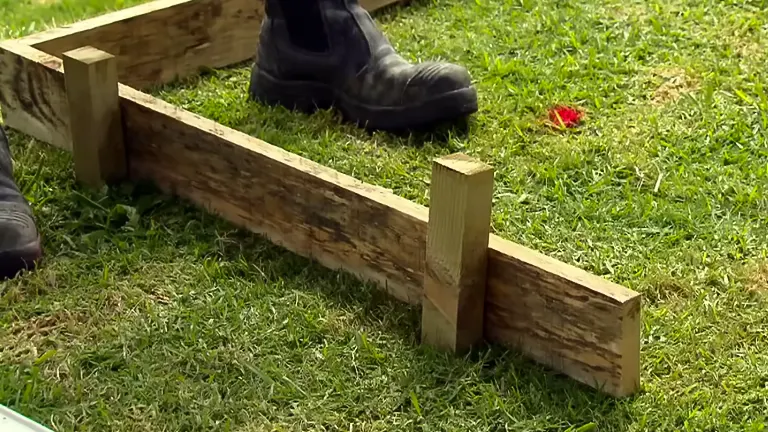
Before digging post holes, set up wooden frameworks called profiles outside each corner of your pergola’s planned area. These profiles hold string lines that help keep your structure aligned and square. This setup is crucial for ensuring that the posts are correctly positioned and the entire pergola structure will be level and square once constructed.
Profile Setup:
- Make sure the profiles are taller than the height of your pergola.
- Secure the profiles firmly into the ground to prevent movement.
- Use a high-visibility string line for easy viewing during alignment.
Step 4: Pouring Concrete into Post Holes
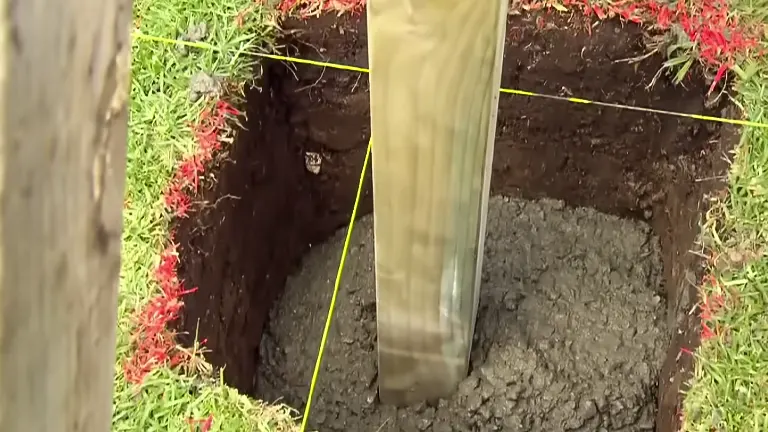
After setting each post in its hole, make sure it’s vertical using a spirit level. Brace each post with wooden stakes to keep them upright. Mix concrete and pour it around each post, ensuring it fills the holes to just below the ground level. Use a long piece of wood to stir the concrete, removing air pockets which can weaken the structure.
Concrete Pouring Tips:
- Make sure the concrete mix is not too runny; it should hold its shape.
- Double-check that all braces are secure before pouring concrete to prevent movement.
- Allow the concrete to cure for at least 48 hours before adding any weight to the posts.
Step 5: Marking the Height of the Post
Use a laser level or a long straightedge and a level to mark where you will cut the posts to achieve the desired height of your pergola. It is important to ensure all posts are cut to the same height so the roof will be level.
Height Marking Tips:
- Create a template from scrap wood to mark consistent heights on all posts.
- Always double-check your marks before cutting to avoid errors.
Step 6: Measuring and Cutting Bearers
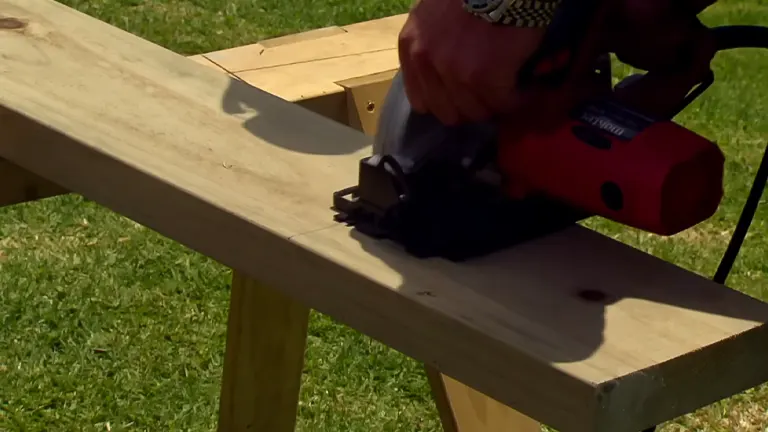
Determine the length of the bearers that will rest horizontally across the top of your posts. These bearers need to extend past the posts on each side to support the rafters effectively and to enhance the pergola’s appearance. Measure carefully, and use a circular saw to make straight cuts.
Cutting Bearers Tips:
- Ensure accuracy in your measurements to avoid waste.
- Use sawhorses to keep the wood stable while cutting.
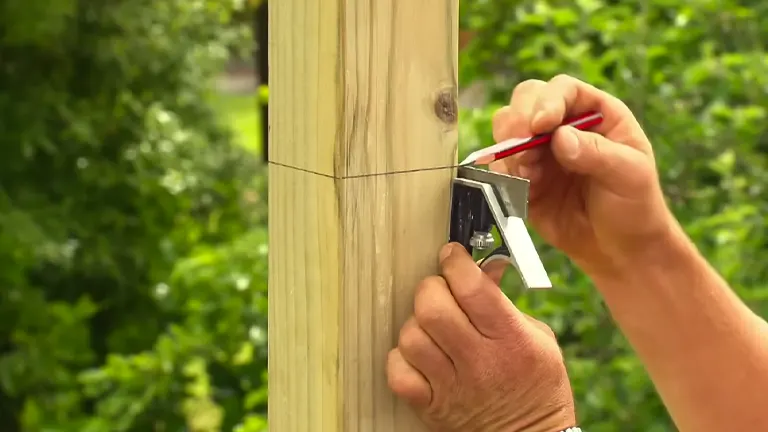
Step 7: Marking Where Rafters Will Sit
With the bearers in place, use a tape measure and a chalk line to mark the exact positions where the rafters will sit. Spacing the rafters evenly is essential not only for the structure’s stability but also for its aesthetic appearance.
Rafter Placement Tips:
- Calculate the spacing beforehand to distribute the rafters evenly.
- Check alignment with the string line to ensure it is straight.
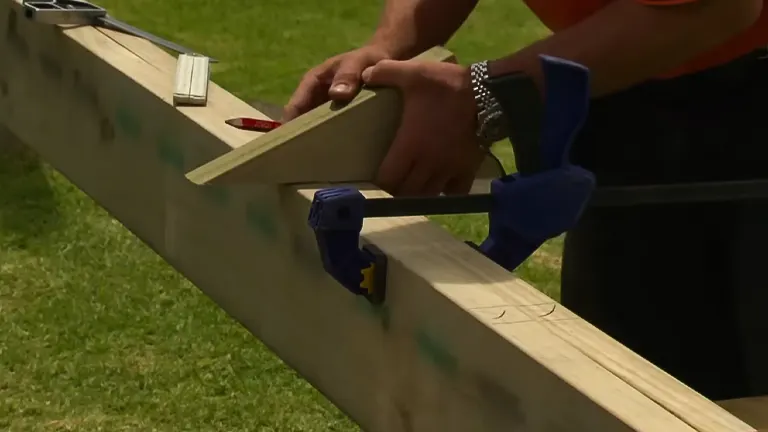
Step 8: Drilling Holes for Bolts
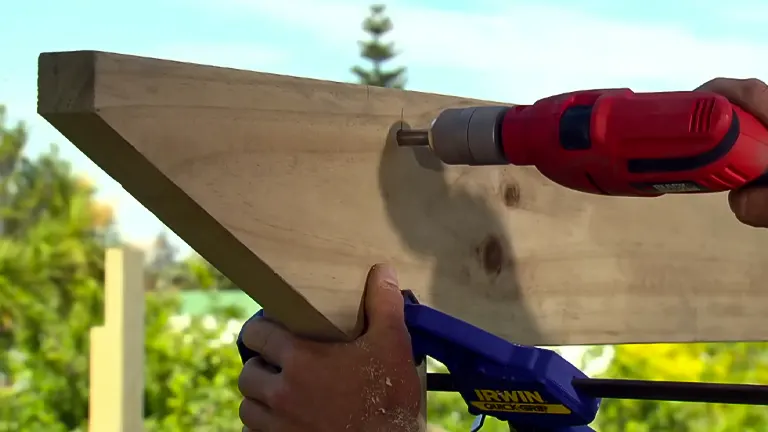
Drill holes through the bearers and into the posts at the marked spots where they will be bolted together. This is an important step to secure the bearers firmly to the posts, providing a solid base for the rest of the structure.
Drilling Tips:
- Drill pilot holes to prevent splitting the wood.
- Use a drill bit that matches the size of the bolts for a snug fit.
Step 9: Adding the Rafters
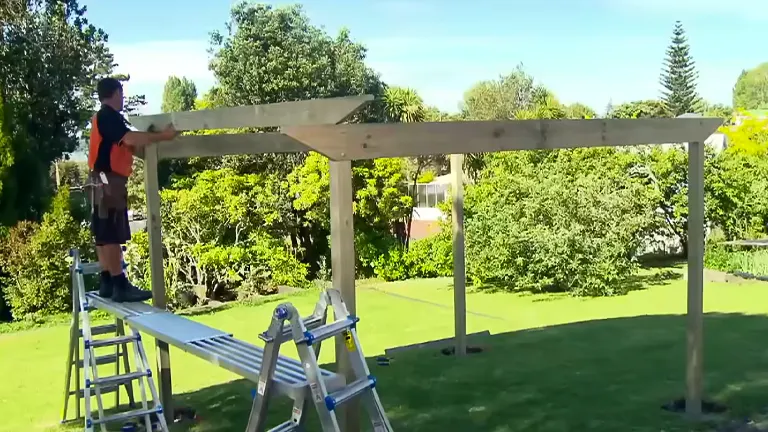
Lift the rafters into place according to the marks on the bearers. Attach each rafter using galvanized screws or nails that are suitable for outdoor use to prevent rusting. Ensure each rafter is properly aligned and secured.
Rafter Installation Tips:
- Use two screws or nails at each end of the rafter for added stability.
- Use a square tool to ensure rafters are perpendicular to the bearers.
Step 10: Installing Additional Features
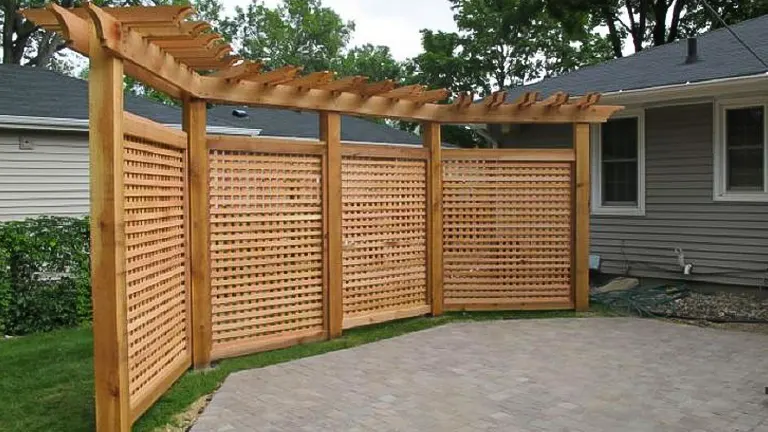
Personalize your pergola by adding features like lattice for added privacy, climbing plants for greenery, or even lighting fixtures for nighttime use. If adding electrical features, consult or hire a certified electrician to ensure all installations comply with local codes and are safe.
Feature Installation Tips:
- Decide on these features during the planning stage to integrate them smoothly.
- Always turn off power when working with electrical installations.
Step 11: Finishing Touches

Protect your pergola from the elements by applying a weather-resistant stain or sealant. This not only enhances the wood’s appearance but also extends its life by protecting it from UV rays and moisture.
Finishing Tips:
- Use a paintbrush or sprayer for even coverage.
- Apply a second coat if necessary for better protection and appearance.
Step 12: Landscaping and Decorating

Complete your pergola project by landscaping around the base and adding furniture and decorations to create a comfortable and inviting outdoor space. Consider planting vines that can grow up the pergola, adding natural beauty and shade.
Landscaping Tips:
- Select plants that are suitable for your climate and pergola exposure.
- Choose furniture that complements the style of your pergola and can withstand the elements.
Maintenance and Care Tips
To ensure that your pergola remains a beautiful and functional part of your outdoor space for years to come, regular maintenance is essential. Here are some practical tips to help you keep your pergola in top condition:
- Regular Cleaning: Periodically sweep and wash the pergola to remove dirt, debris, and any organic material that may have accumulated. This prevents staining and the growth of mold and mildew.
- Tip: Use a mild detergent and a soft brush to clean painted or stained wood without damaging the surface.
- Inspect and Repair: At least once a year, inspect your pergola for any signs of wear or damage. Look for cracks, splits, and loose connections that might need repair.
- Tip: Early spring is a good time for this inspection to prepare for increased use during warmer months.
- Reapply Finishes: Depending on exposure to weather and the type of material used, reapply paint or stain every few years to protect the wood from ultraviolet rays and moisture.
- Tip: Choose a clear day with moderate temperatures for the best application results.
- Check for Pests: Be vigilant about pests like termites and carpenter ants that can damage wood. Treat infestations promptly to avoid significant structural damage.
- Tip: Consider consulting a pest control professional if you suspect a serious issue.
- Winter Care: If you live in an area with harsh winters, take steps to protect your pergola from heavy snow loads and freezing temperatures.
- Tip: Brush off snow accumulation quickly, and consider using a water-repellent product before winter begins.
Related Post
- How to Build a Barn: A Step-by-Step Guide for Beginners
- How to Build a Sustainable Compost Bin: Easy and Eco-Friendly DIY
- How to Build a Wooden Fence: Tips and Techniques for a Sturdy Structure
- How to Build a Wooden Deck
- How to Build a Wood Shed
Conclusion
Building a pergola from scratch involves careful planning, precise construction, and creative customization to make the most of your outdoor space. By following these detailed steps, you have the knowledge and tools necessary to construct a sturdy and beautiful pergola that will serve as a focal point in your backyard for many years. Remember to regularly maintain your pergola by checking for any structural issues, reapplying sealant, and refreshing paint or stain as needed to keep it looking its best.
FAQs
- What are the best wood types for building a pergola in humid climates?
In humid climates, it’s crucial to choose wood that resists rot and mold. Cedar, redwood, and pressure-treated pine are excellent choices because they naturally resist moisture and decay. Additionally, applying a water-resistant sealant can further protect the wood. - Can I integrate smart home technology into my pergola design?
Yes, integrating smart home technology can enhance the functionality and convenience of your pergola. Consider installing smart outdoor lighting, Wi-Fi-enabled outdoor speakers, or smart fans. These devices can be controlled via smartphone, making it easy to adjust settings for comfort and ambiance. - What is the minimum recommended size for a pergola if I want to include an outdoor kitchen?
For pergolas incorporating an outdoor kitchen, a minimum size of 10×15 feet is recommended. This provides sufficient space for basic kitchen appliances, counters, and seating areas, ensuring that the area does not feel cramped and allows for efficient movement around the kitchen. - How can I ensure my pergola is environmentally friendly?
To build an environmentally friendly pergola, use sustainably sourced or reclaimed wood, eco-friendly stains and sealants, and energy-efficient lighting. Additionally, planting vine plants around the pergola can provide natural cooling and improve air quality. - Are there specific design considerations for pergolas in windy areas?
In windy areas, it’s essential to secure the pergola structure adequately. Use deep-set concrete footings for the posts and choose a design with fewer open sides or install windbreak features such as retractable screens or sturdy lattice panels. Choose for heavier, robust materials that can withstand the force of high winds. - What are innovative ways to provide more shade for my pergola?
Beyond the traditional roof slats, consider adding retractable canopies or durable outdoor fabric across the top of the pergola to increase shade. Adjustable louvers are another innovative solution, allowing you to control the amount of sunlight filtering through with just the push of a button. - How do I make my pergola accessible for all guests, including those with disabilities?
Ensure that the approach to the pergola is barrier-free and that the surface is smooth and level. Consider a design with wide pathways and entryways to accommodate wheelchairs. Additionally, adjustable tables and seating can be included to accommodate various accessibility needs. - Can pergolas be built on existing decks or do they require a separate foundation?
Pergolas can be built on existing decks, provided the deck structure is strong enough to support the additional weight. It’s crucial to assess the deck’s foundation and framing to ensure it can handle the load. If uncertain, consult with a structural engineer or a professional builder before installation.
With your new pergola now standing tall, you’ve not only enhanced the beauty of your outdoor space but also created a versatile area for relaxation and entertainment. Embrace this delightful addition to your backyard, and enjoy the countless hours of comfort and pleasure it will bring. Happy pergola enjoyment!

Benjamin Brooks
Forestry AuthorGreetings! I'm Benjamin Brooks, and my journey over the past 15 years has revolved around the fascinating realms of content creation, expertise in snow clearing, and the intricate world of lumberjacking and landscaping. What began as a simple curiosity about the natural world and heavy machinery has evolved into a passionate profession where my love for crafting words intertwines seamlessly with my lumberjacking and garden skills.


Leave your comment