How to Care for Air Plants: Essential Tips for Healthy Tillandsias
- March 12, 2024
- 0 comment
Air plants, scientifically known as Tillandsia, are a fascinating and diverse group of plants that have gained popularity for their unique ability to grow without soil. They’re perfect for modern living spaces and busy lifestyles, adding a touch of greenery without the need for extensive maintenance. This guide will walk you through the essential aspects of air plant care, ensuring these intriguing plants thrive in your care.
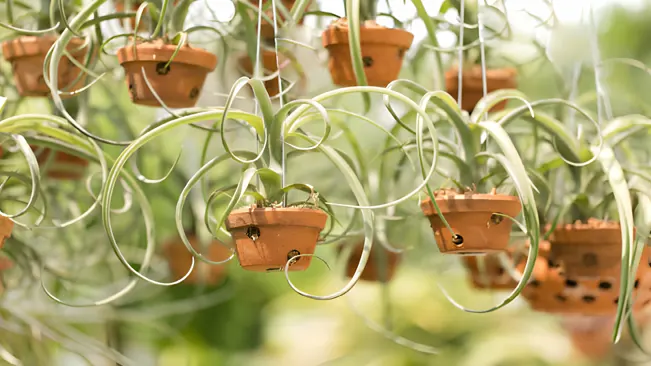
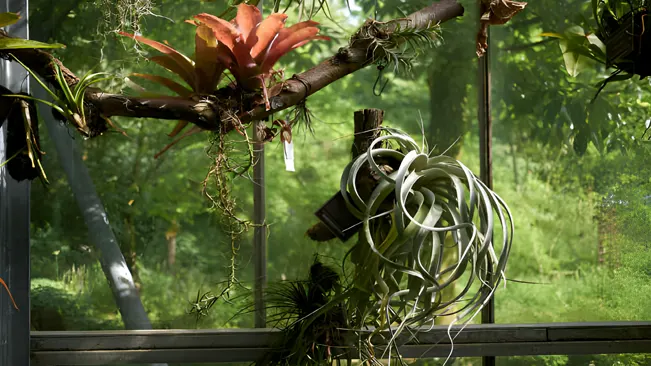
Before delving into the care instructions, it’s important to understand what makes air plants special. These plants are epiphytes, meaning they naturally grow on other plants, rocks, or even in the air, absorbing moisture and nutrients through their leaves. They have a minimal root system, primarily used for anchoring and not for water or nutrient absorption.
Light Requirements
Air plants prefer bright, indirect light. A spot near a window with filtered sunlight is ideal. Avoid direct sunlight, especially in the hotter months, as it can scorch the leaves. If you’re keeping air plants indoors, an east or south-facing window is a good choice. For those with less natural light, fluorescent or grow lights can supplement.
- Bright, Indirect Light Explained: Bright, indirect light refers to a well-lit environment where the plant is not exposed to the harsh rays of direct sunlight. Direct sunlight can cause the leaves of air plants to burn, leading to browning or a bleached appearance. The goal is to mimic the light conditions of their natural habitat, usually under the canopy of trees, where they receive diffused sunlight.
- Ideal Indoor Locations: Placing air plants near an east or south-facing window can provide them with the right amount of light. East-facing windows capture the gentle morning sun, which is less intense, while south-facing windows provide consistent, indirect light throughout the day. Ensure the plants are not directly behind glass, which can amplify sunlight and heat, leading to potential damage.
- Dealing with Low Light Conditions: In environments where natural light is scarce, such as offices or rooms with few windows, fluorescent or grow lights can be excellent substitutes. These artificial lights should be placed close enough to provide sufficient light but far enough away to avoid overheating the plants. A rule of thumb is to have these lights on for about 12-14 hours a day to simulate natural daylight conditions.
- Observing Your Plants: Air plants give visual cues about their light needs. If they start to stretch or lean towards a light source, it might indicate insufficient light. Conversely, leaves that turn pale, yellow, or become scorched suggest too much direct sunlight.
- Seasonal Adjustments: As seasons change, so does the quality and intensity of sunlight. Be mindful to adjust the location of your air plants accordingly. During summer, they may need to be pulled back from windows to avoid the harsh midday sun, while in winter, they might require closer proximity to light sources to compensate for shorter days.
- Rotating Plants: Regularly rotating your air plants can ensure that all sides receive equal light, promoting even growth and preventing the plant from leaning towards a light source.
Watering Your Air Plants
Watering is perhaps the most crucial aspect of air plant care. Unlike traditional plants, air plants absorb water through their leaves, not their roots. There are two common methods to water them: misting and soaking.
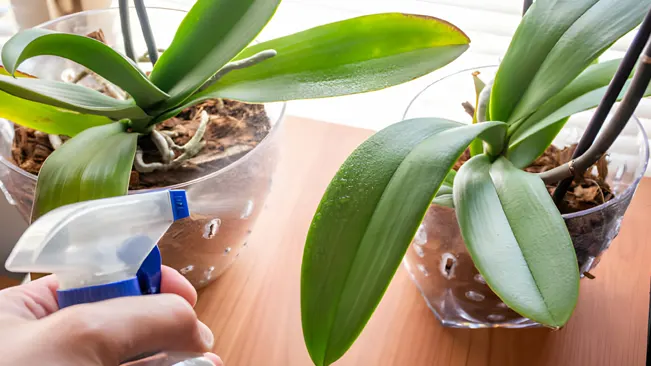
Misting Method
Misting is an effective way to provide moisture to air plants, especially suitable for environments with moderate to high humidity. Here are some detailed steps and tips for misting:
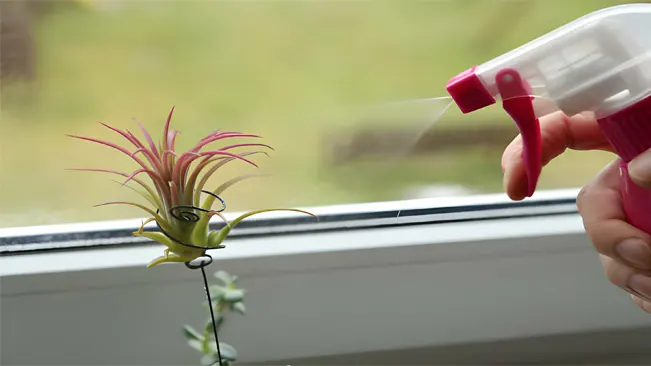
- Frequency: Aim to mist your air plants 2 to 3 times a week. However, this can vary depending on the humidity in your environment. In more humid areas, you might need to mist less frequently, and more often in drier conditions.
- Technique: Use a fine-mist spray bottle to evenly coat the leaves of the air plant. Ensure that the mist covers the entire plant, reaching all the leaves.
- Water Quality: It’s best to use rainwater or filtered water if possible. Tap water can sometimes contain minerals that may build up on the leaves and hinder the plant’s ability to absorb moisture.
- After Misting: Allow the plants to dry in an area with good air circulation. It’s essential that they don’t remain wet for extended periods as this can promote rot.
Soaking Method
Soaking is particularly beneficial for air plants living in drier climates. This method ensures that the plant absorbs enough moisture to sustain it. Here’s how to effectively soak your air plants:
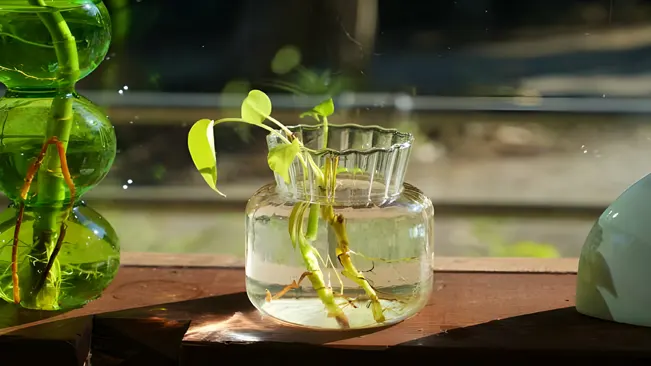
- Frequency: Soak your air plants once a week. This might need to be adjusted based on the specific species of air plant and the humidity of your environment.
- Procedure: Submerge your air plants completely in a bowl of room temperature water. Let them soak for about 20-30 minutes. Avoid using cold water as it can shock the plants.
- Post-Soak Care: After soaking, gently shake off any excess water from the plants. This step is crucial to prevent water from pooling inside the plant, which can cause rot.
- Drying: Place the plants upside down to ensure all the water drains off, preferably in an area with good air circulation. They should be completely dry within 4 hours of watering.
Air Circulation
Good air circulation is vital for the health of your air plants. Stagnant, moist air can lead to fungal issues and rot. Ensure they’re in a place where air can freely circulate around them, especially after watering.
Why is Air Circulation Important?
- Prevents Moisture Build-Up: Air plants absorb water through their leaves. After misting or soaking, air circulation helps in quickly drying the leaves. This is essential because prolonged dampness can lead to rot or fungal diseases, which are detrimental to the plant’s health.
- Mimics Natural Habitat: In their natural habitat, air plants are often found clinging to trees or rocks, where they are exposed to breezes and air flow. This constant air movement is a condition they are adapted to and thrive in. Good air circulation in your home replicates these natural conditions.
- Facilitates Gas Exchange: Air circulation aids in the process of respiration and photosynthesis. Plants take in carbon dioxide and expel oxygen. In stagnant air conditions, this gas exchange is less efficient, potentially stunting the plant’s growth and vitality.
- Temperature Regulation: Adequate air flow helps in maintaining an even temperature around the air plants, preventing hot spots that can occur in still air environments, especially near windows or in direct sunlight.
How to Ensure Good Air Circulation?
- Strategic Placement: Place your air plants in areas where air naturally moves, such as near open windows, fans, or in well-ventilated rooms. Avoid placing them in enclosed spaces or tightly packed groups where air flow is restricted.
- Use of Fans: If natural air flow is not adequate, consider using a ceiling fan or a small oscillating fan to gently circulate air. Be careful to avoid direct, strong winds which can dehydrate the plants.
- Proper Drying Post-Watering: After watering your air plants by misting or soaking, ensure they are placed in an area with good air flow to dry. You can gently shake off excess water and even place them upside down to facilitate drying.
- Regular Observation: Regularly check your air plants for signs of poor air circulation, such as dampness, mold, or a musty smell. These signs indicate that you may need to improve the air flow around your plants.
Feeding Air Plants
While not absolutely necessary, feeding can promote growth and flowering. Use a specialized air plant fertilizer or a bromeliad fertilizer at quarter strength, once a month during the spring and summer months.
Choosing the Right Fertilizer
- The key to fertilizing air plants is to use a fertilizer that’s formulated for them. Air plant or bromeliad fertilizers are ideal because they’re balanced to provide the nutrients that these types of plants need. These fertilizers usually contain higher levels of nitrogen, phosphorus, and potassium, which are essential for air plant health.
How to Fertilize Air Plants
- Dilution is Crucial: Air plants require a very diluted solution. Use a quarter strength of the recommended dosage on the fertilizer package. This weaker solution helps prevent fertilizer burn, which can damage the plant.
- Method of Application: The easiest way to fertilize air plants is during their regular watering routine. If you’re soaking your plants, add the diluted fertilizer to the water. For misting, mix the fertilizer with the water in your spray bottle.
- Frequency of Fertilization: Fertilize air plants once a month during their active growth period, which is typically in the spring and summer. In the fall and winter, plants are less active, and fertilizing can be reduced or stopped.
Temperature and Humidity
Air plants prefer a temperature range of 50-90°F (10-32°C). They thrive in higher humidity but can adapt to less humid environments with more frequent watering.
- Optimal Temperature Range: Air plants are generally hardy and adaptable, but they thrive best within a temperature range of 50-90°F (10-32°C). This range is ideal because it closely mimics the climate conditions of their natural habitats, typically tropical or subtropical regions. It’s crucial to protect air plants from temperatures that fall significantly below 50°F (10°C), as cold temperatures can cause damage or stress to the plants.
- Temperature Fluctuations: While air plants are adaptable, sudden and extreme fluctuations in temperature can be harmful. This is particularly important to consider when placing air plants near windows, as the temperature can drop dramatically in these areas during the night, especially in winter.
- Higher Humidity Preference: Air plants naturally grow in environments with high humidity. In these conditions, they can absorb moisture directly from the air through their specialized leaves. In their natural habitat, they often receive the moisture they need from frequent rain, fog, or dew.
- Adaptation to Lower Humidity: In indoor environments, especially in homes with central heating or air conditioning, humidity levels can be significantly lower than what air plants prefer. However, air plants are adaptable and can survive in these conditions with appropriate care. This includes regular misting and soaking, as these methods artificially replicate the humid conditions the plants are accustomed to.
- Humidity Management: If you live in a particularly dry climate or have dry indoor air, consider using a humidifier to increase the ambient humidity for your air plants. Alternatively, placing your air plants in naturally humid areas of your home, like bathrooms or kitchens (provided they receive sufficient light), can be beneficial.
- Watering Adjustments Based on Humidity: The frequency of watering your air plants can be adjusted based on humidity levels. In a high humidity environment, air plants may need less frequent watering, as they can absorb more moisture from the air. Conversely, in dry environments, more frequent watering or longer soaking times will be necessary to keep the plants hydrated.
- Ventilation and Air Flow: Along with managing humidity, ensuring good air circulation is crucial for air plant health. Even in humid conditions, stagnant air can lead to problems like rot or fungal growth. Ensure that your air plants are in an area with good air flow, which aids in proper moisture evaporation and prevents these issues.
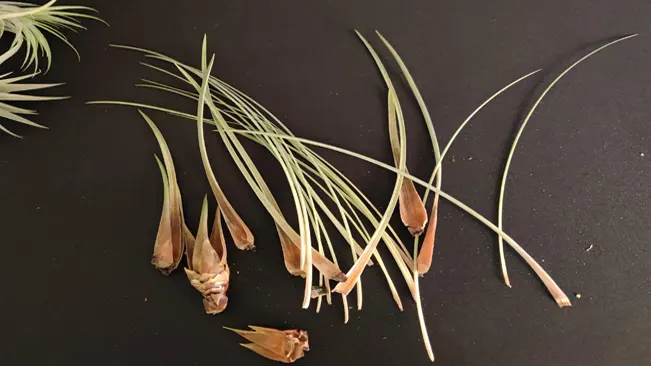
Common Problems
Brown or crispy leaves can indicate under-watering, while soft, mushy leaves may be a sign of over-watering or poor air circulation. If your plant’s leaves start to curl or roll, it might need more water.
Brown or Crispy Leaves

- Under-Watering: This is the most common cause of brown, crispy leaves. Air plants need regular watering to stay hydrated. If they don’t receive enough moisture, their leaves start to dry out, turning brown and crispy at the tips.
- Low Humidity: In very dry environments, air plants might need additional misting to keep them hydrated.
- Sunburn: Too much direct sunlight can also cause the leaves to become crispy and brown. This is often accompanied by a bleached, faded coloration.
- Solutions:
- Increase watering frequency, either by more frequent misting or longer soaking sessions.
- Move the plant to an area with higher humidity or create a more humid microclimate.
- Ensure the plant receives bright but indirect light, away from direct sun exposure.
Soft, Mushy Leaves
- Over-Watering: When air plants are left in water too long or not allowed to dry properly, their leaves can become soft and mushy, a precursor to rot.
- Poor Air Circulation: Without adequate air flow, especially after watering, air plants can begin to rot. This is often visible in the base or inner leaves first.
- Solutions:
- Adjust watering routines, making sure not to leave the plant submerged in water for too long and allowing it to dry thoroughly afterwards.
- Place the plant in an area with better air circulation, avoiding enclosed or cramped spaces.
- If rot has set in, remove the affected parts with a sterile tool to prevent further spread.
Curling or Rolling Leaves
- Dehydration: Curling or rolling leaves often indicate that the plant is trying to conserve moisture. This can be due to infrequent or inadequate watering.
- High Temperature: In very hot conditions, air plants may curl their leaves to reduce surface area and minimize water loss.
- Solutions:
- Increase the frequency of watering or switch to the soaking method for more thorough hydration.
- Move the plant to a cooler spot if high temperatures are a concern.
Conclusion
Air plants are a delightful addition to any space, offering a unique aesthetic with minimal maintenance. By understanding their basic needs for light, water, and air circulation, you can enjoy the beauty of these remarkable plants for years to come. Remember, each air plant is unique, and part of the joy is learning the specific needs of your individual plants. Happy growing!
FAQs (Frequently Asked Questions)
- What are air plants?
Air plants, or Tillandsia, are a type of epiphytic plants that don’t need soil to grow. They absorb water and nutrients through their leaves from the air. - How often should I water my air plants?
Typically, air plants should be watered once a week by soaking them in water for about 20-30 minutes. Adjust frequency based on humidity; more often in dry conditions, less in humid ones. - Do air plants need sunlight?
Yes, they require bright, indirect sunlight. Place them near a window with filtered light, but avoid direct sun exposure that can scorch their leaves. - Can air plants survive in artificial light?
Yes, air plants can grow under artificial light if they’re not receiving enough natural light. Fluorescent or grow lights are suitable substitutes. - How do I know if my air plant is healthy?
A healthy air plant will have firm, green leaves. Signs of distress include brown or crispy leaves (under-watering) and soft, mushy leaves (over-watering or poor ventilation). - What is the ideal temperature for air plants?
They thrive in temperatures between 50-90°F (10-32°C). Protect them from extreme cold and avoid drastic temperature changes. - Do air plants need fertilizer?
While not necessary, feeding air plants with a bromeliad or air plant fertilizer (at quarter strength) monthly during the growing season can promote health and blooming. - How do I display air plants?
Air plants can be displayed in various ways, such as mounted on wood, nestled in shells, or simply placed on a shelf. Ensure they have good air circulation and access to light. - Can air plants live in a bathroom?
Yes, bathrooms can be great for air plants due to higher humidity levels. Just make sure they receive enough light. - What should I do after watering my air plants?
After watering, shake off excess water and place them upside down to dry completely. This helps prevent water from accumulating at their base, which can cause rot.

Kristine Moore
Forestry AuthorI'm Kristine Moore, a seasoned garden landscaping professional with over 30 years of experience. My extensive career has been dedicated to transforming outdoor spaces into stunning, sustainable landscapes. With a deep understanding of horticulture, design principles, and environmental stewardship, I have become a respected figure in the field, known for creating harmonious, visually appealing, and eco-friendly gardens. My commitment to excellence and continuous learning in landscaping trends and techniques has solidified my reputation as an expert in garden design and implementation.


Leave your comment