How to Plant Pears: Simple Steps for Beginners
- March 1, 2024
- 0 comment
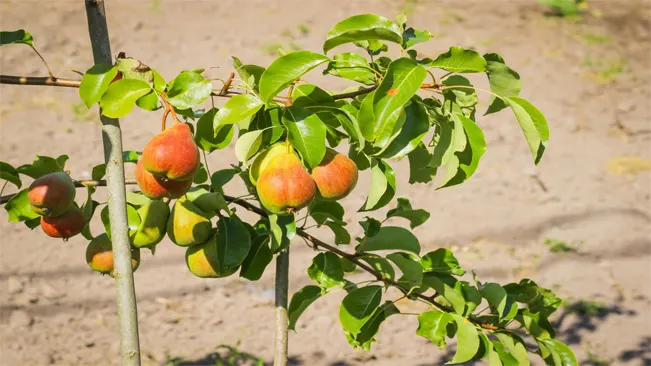
Pear trees are a delightful addition to any garden, offering not only delicious fruits but also aesthetic beauty. Whether you’re a novice or a seasoned gardener, planting and nurturing pear trees can be a rewarding experience. This guide provides a comprehensive overview of how to successfully plant and care for pear trees.
Nutritional Benefits of Pears
| Benefit | Description |
|---|---|
| Nutritional Value | High in essential nutrients including fiber, vitamin C, potassium, and vitamin K. |
| Dietary Fiber | A great source of soluble and insoluble fiber, aiding in digestive health and regularity. |
| Heart Health | The fiber in pears can help reduce cholesterol levels, lowering the risk of heart disease. |
| Weight Management | Low in calories and high in fiber, pears can help in feeling full longer, aiding in weight control. |
| Anti-inflammatory | Contains antioxidants and anti-inflammatory properties, which can help in reducing inflammation. |
| Blood Sugar Control | The fiber in pears helps slow digestion, aiding in blood sugar regulation, beneficial for diabetes. |
| Immune Support | Rich in vitamin C and antioxidants, which are essential for strengthening the immune system. |
| Skin Health | Vitamin C and antioxidants in pears contribute to skin health and may slow signs of aging. |
| Bone Health | Contains high levels of boron, which helps the body to retain calcium, thus protecting bone health. |
| Cancer Prevention | Antioxidants and fiber in pears may help in reducing the risk of certain types of cancer. |
List on How To Plant Pears
- Choosing the Right Variety
- Site Preparation
- Planting Process
- Watering and Mulching
- Fertilization and Pruning
- Harvesting
- Pest and Disease Management
Choosing the Right Variety
Climate Considerations
- Pear trees are well-suited for temperate climates, but their adaptability varies by variety.
- Some varieties can tolerate colder climates with harsh winters, while others are better for milder regions.
- It’s crucial to match the variety with your area’s USDA Hardiness Zone. This information can usually be found on plant tags or in gardening guides.
- Additionally, consider the chilling hours required by different pear varieties. Chilling hours refer to the cumulative number of hours in a year where the temperature is below 45 degrees Fahrenheit (7 degrees Celsius), which is essential for fruit set.
Types of Pear Trees
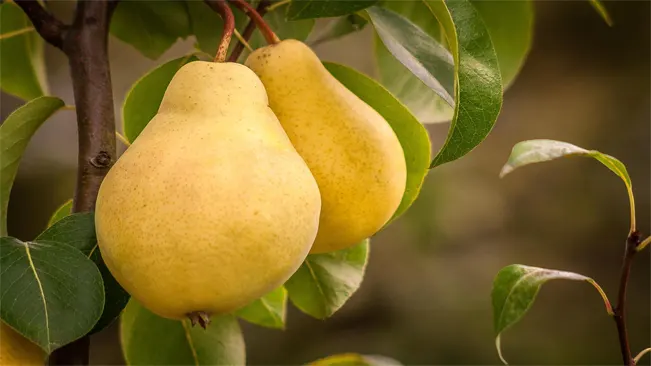
Bartlett Pear (Pyrus communis ‘Bartlett’)
- One of the most popular pears in the world, known for its sweet flavor and juicy texture.
- Good for eating fresh, canning, and cooking.
- They have a traditional pear shape with a bright yellow color when ripe.
Anjou Pear (Pyrus communis ‘Anjou’)
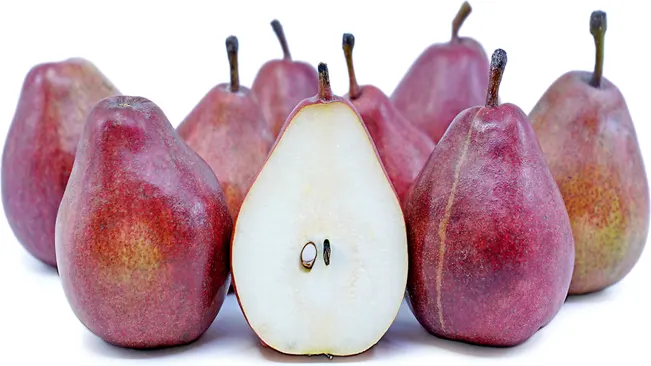
- Recognized for their egg shape and green skin, which remains green even when ripe.
- They have a mildly sweet flavor and slightly firm texture, making them versatile for both fresh eating and cooking.
Bosc Pear (Pyrus communis ‘Bosc’)
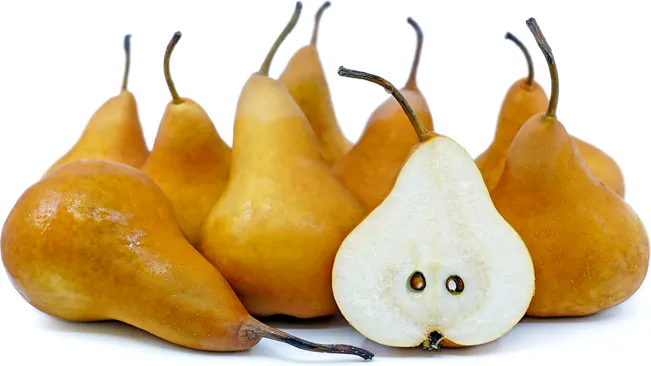
- Known for their elongated shape and distinctive russet-brown skin.
- They have a sweet and spicy flavor with a firm texture, ideal for baking, poaching, and roasting.
Asian Pears (Pyrus pyrifolia)
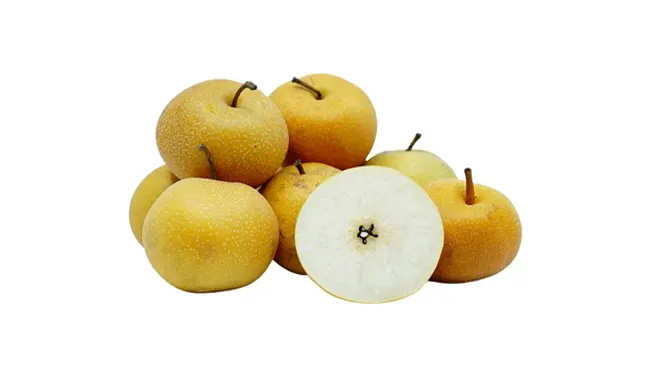
- Quite different from European varieties, these pears are round, crisp, and apple-like in texture.
- They come in several varieties, with skin colors ranging from green to yellow to brown.
- They are very juicy and are usually eaten fresh.
Other Varieties
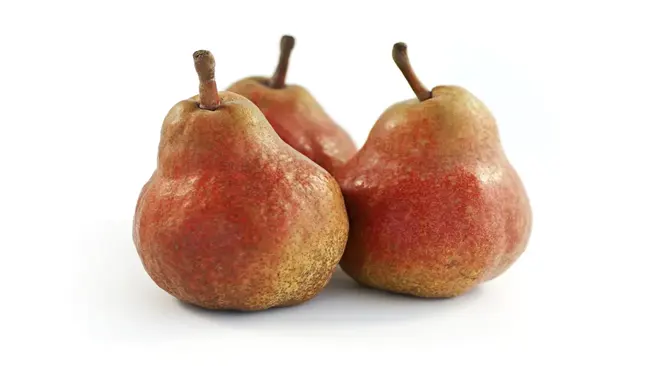
- Seckel Pear: Small in size, known for their sweetness.
- Comice Pear: Large and round with a creamy texture, excellent for eating fresh.
- Conference Pear: Long, narrow shape, with a sweet and juicy flavor.
Considerations for Selection
- Taste Preferences: Some pears are sweeter, while others have a more balanced, subtly acidic flavor.
- Texture: This ranges from soft and buttery to crisp and crunchy.
- Harvest Time: Early, mid, and late-season varieties are available, extending the availability of fresh pears from your garden.
- Purpose: Some varieties are better for fresh eating, while others are preferred for cooking, canning, or making desserts.
Site Preparation
Location: Full Sunlight and Well-Drained Soil
- Importance of Sunlight: Pear trees need a minimum of six hours of direct sunlight daily. This is crucial for the tree’s growth, health, and fruit production. The sunlight helps in photosynthesis, the process by which the tree converts light energy into chemical energy to feed itself.
- Well-Drained Soil: The choice of location must also consider soil drainage. Pear trees do not thrive in waterlogged conditions. Well-drained soil ensures that water doesn’t accumulate around the roots, which can cause root rot and other diseases.
Soil Testing and pH Balance
- Soil pH Range: Pear trees prefer a soil pH between 6.0 and 7.0. This slightly acidic to neutral pH range is ideal for nutrient uptake.
- Testing and Amending Soil: Before planting, it’s advisable to test the soil pH. If the pH is outside the optimal range, you can amend the soil. Lime can be added to increase the pH (make it more alkaline) if it’s too acidic, while sulfur can be used to lower the pH (make it more acidic) if it’s too alkaline.
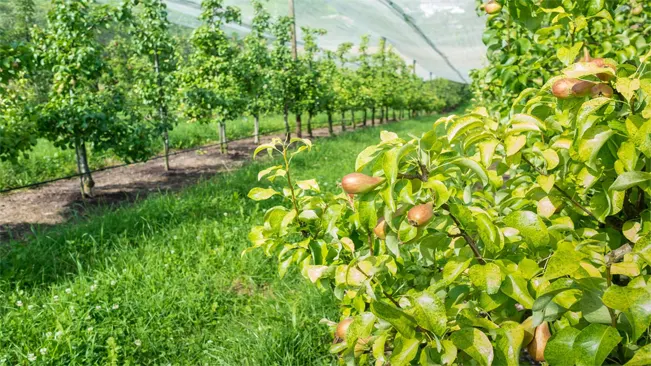
Spacing for Growth
- Space Requirements: The space needed for a pear tree depends on the variety. Standard pear trees, which grow larger, require about 20 feet of space between each tree. This space is necessary for the roots and canopy to spread out, and for air circulation, which is essential in preventing disease.
- Dwarf Varieties: Dwarf or semi-dwarf pear trees, which are smaller due to grafting onto rootstocks that limit their size, need about 10-15 feet of space. These varieties are suitable for smaller gardens and are easier to harvest due to their size.
Planting Process
Best Time to Plant
- The optimal time for planting pear trees is during the late winter or early spring. This timing is crucial because it allows the tree to establish roots in its new location before the stress of summer heat and before it begins active growth in spring.
- In regions where the ground freezes, it’s important to wait until the frost has passed and the ground is no longer frozen. This ensures that the roots can spread out easily in the soil.
Planting Depth and Method
- Hole Preparation:
- The hole should be dug to a depth that is equal to the height of the root ball and twice as wide. This size ensures that the roots have enough room to spread out and don’t become constricted.
- It’s essential to loosen the soil around the hole to facilitate easy root growth.
- Positioning the Tree:
- When placing the tree in the hole, ensure that the top of the root ball is level with the ground surface. Planting the tree too deep can lead to root rot or delayed growth, while planting it too shallow can expose the roots and dry them out.
- If the tree is grafted, position the graft union (a noticeable bump in the trunk where the rootstock and scion meet) a few inches above the soil level.
- Spreading the Roots:
- Gently spread the roots out in the hole to encourage them to grow outward. If the roots are tightly bound in a container, loosen them gently with your hands before planting.
- Backfilling the Hole:
- Fill the hole with the original soil. It’s generally recommended not to add compost or fertilizers at this stage, as this can discourage roots from spreading beyond the enriched soil of the hole.
- Tamp down the soil gently as you fill the hole to eliminate air pockets, which can dry out the roots.
- Watering:
- After planting, water the tree thoroughly. This helps settle the soil around the roots and ensures that the roots have sufficient moisture to begin establishing themselves.
- Continue to water the tree regularly, especially during its first growing season, to ensure a good start. The amount and frequency of watering depend on your climate and soil type.
- Mulching:
- Apply a layer of mulch around the base of the tree, extending out to the drip line. Be sure to keep the mulch a few inches away from the trunk to prevent moisture buildup against the bark.
- Mulch helps to retain soil moisture, suppress weeds, and regulate soil temperature.
Watering and Mulching
Watering Schedule
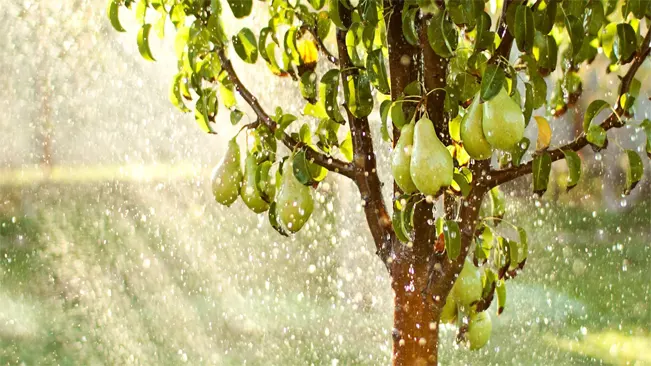
- Initial Watering: Newly planted pear trees require consistent and adequate watering to establish their root systems. During the first few weeks after planting, it’s crucial to keep the soil evenly moist but not waterlogged.
- Establishment Phase: This phase lasts for the first couple of years. During this time, the tree is expanding its root system and becoming more resilient. Water the tree deeply once a week if there is no significant rainfall. The goal is to encourage the roots to grow deeper into the soil, seeking moisture.
- Mature Trees: Once established, pear trees are relatively drought-tolerant. However, they still benefit from occasional deep watering during extended dry periods. It’s especially important to provide sufficient water during fruit development stages to ensure good fruit size and quality.
- Watering Technique: When watering, aim for the base of the tree, avoiding wetting the leaves to reduce the risk of fungal diseases. Use a soaker hose or drip irrigation system for deep, efficient watering that encourages deep root growth.
Mulching
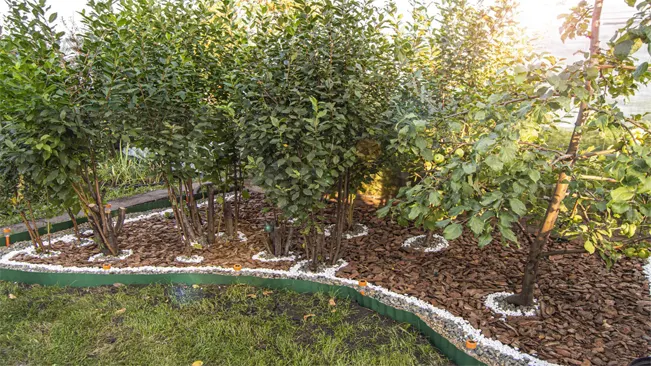
- Purpose of Mulching: Mulch helps to retain soil moisture, suppress weeds, and regulate soil temperature. It also adds organic matter to the soil as it decomposes, improving soil structure and fertility over time.
- Types of Mulch: Organic mulches like wood chips, straw, or compost are ideal. These materials break down over time and contribute to the soil’s nutrient content.
- Application: Apply a 2 to 4-inch layer of mulch around the base of the tree, extending out to the drip line (the area directly under the outer circumference of the tree branches). Avoid piling mulch against the trunk, as this can encourage rot and pest problems.
- Maintenance: Replenish the mulch layer annually or as needed to maintain its depth and effectiveness. As the mulch decomposes, it will need to be topped up to continue providing benefits.
- Winter Protection: In colder climates, mulch acts as an insulator for the roots, protecting them from freeze-thaw cycles. Apply mulch before the onset of winter after the ground has frozen.
Fertilization and Pruning
Fertilization
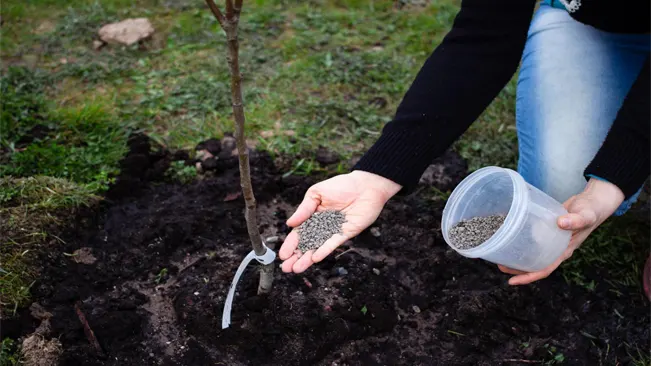
- Timing: The best time to fertilize pear trees is in the spring as new growth appears. This timing ensures that the nutrients are available when the tree is entering its active growing phase.
- Type of Fertilizer: A balanced fertilizer, often labeled as 10-10-10 or 20-20-20 (indicating equal parts nitrogen, phosphorus, and potassium), is ideal for pear trees. These nutrients support overall tree health, leaf and branch growth, and fruit production.
- Application Method: Apply the fertilizer around the drip line of the tree, which is the outermost circumference of the tree canopy where rain tends to drip off. Avoid placing fertilizer too close to the trunk as this can cause root burn.
- Quantity: Follow the manufacturer’s instructions regarding the amount. Over-fertilizing can be as harmful as under-fertilizing.
- Consider Soil Test: Before applying fertilizer, it’s beneficial to conduct a soil test. This test can provide specific information about nutrient levels and pH, allowing you to tailor the fertilization to the exact needs of your soil.
Pruning
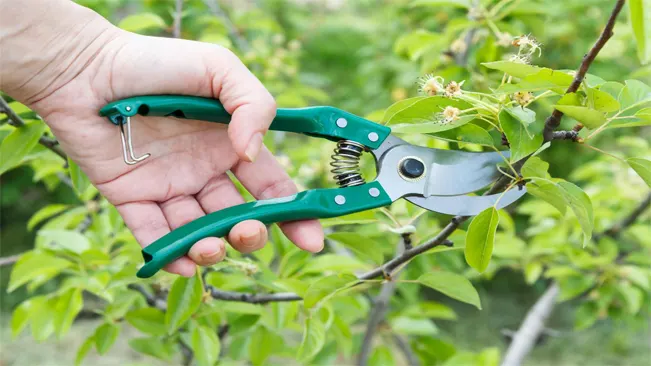
- Best Time to Prune: Late winter or early spring, before the new growth starts, is the ideal time to prune pear trees. Pruning at this time allows for better wound healing and reduces the risk of pest infestations or disease.
- Goals of Pruning:
- Shape the Tree: Create a strong structure that can support fruit production.
- Remove Unwanted Growth: Cut out dead, diseased, or damaged branches to maintain tree health.
- Improve Air Circulation and Sunlight Penetration: Thinning the canopy allows for better air movement and light penetration, reducing the risk of disease and improving fruit quality.
- Pruning Technique:
- Heading Back: Shorten branches to encourage bushier growth.
- Thinning Out: Remove entire branches or limbs to open up the tree structure.
- Corrective Pruning: Address any structural issues such as crossing branches or narrow crotch angles.
- Tools: Use sharp, clean pruning tools. This includes hand pruners for small branches, loppers for medium branches, and a pruning saw for larger limbs.
- Wound Care: Generally, it’s not recommended to use wound paint or sealants as they can interfere with the natural healing process of the tree.
- Safety: Always consider personal safety when pruning. Use a sturdy ladder for higher branches and wear protective gear.
Harvesting
Harvest Time
- Variety-Dependent: The exact timing of pear harvest can vary significantly depending on the variety. For instance, summer pears like ‘Bartlett’ may be ready by late August, while winter varieties like ‘Bosc’ or ‘Anjou’ might not be ripe until late September or October.
- Climate Influence: Local climate conditions also play a role. Pears typically mature earlier in warmer climates and later in cooler regions.
- Yearly Variation: Weather patterns can affect the fruit’s ripening process, causing some variation in harvest time from year to year.
How to Harvest

- Testing for Ripeness: Unlike many fruits, pears are unique in that they ripen off the tree. To test for ripeness, gently press near the stem; if it yields slightly, the pear is ready to pick.
- Twisting Technique: To harvest, gently twist the pear upwards and away from the branch. Avoid pulling directly, as this can damage the tree and the fruit.
- Stem Attachment: A ripe pear will come away easily with the stem attached. If it resists or the stem detaches, it may need more time to mature.
- Harvesting in Stages: Since all pears on a tree may not ripen simultaneously, you might need to harvest in stages, checking for ripeness every few days.
Post-Harvest Handling
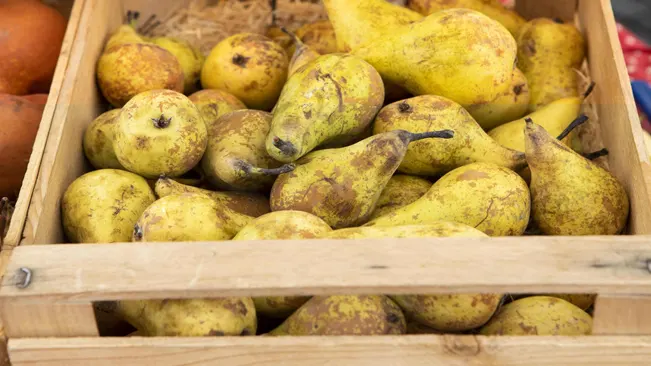
- Ripening Off the Tree: After harvesting, pears continue to ripen. Store them at room temperature for a few days to allow them to reach full ripeness and sweetness.
- Cold Storage: For longer storage, place unripe pears in the refrigerator. Bring them out to room temperature when you’re ready to ripen them for eating.
- Gentle Handling: Pears bruise easily, so handle them gently both during and after harvest.
Uses and Preservation
- Immediate Consumption: Fully ripe pears are perfect for eating fresh or using in recipes.
- Canning and Preserving: Pears can also be canned, dried, or made into jams and preserves to extend their shelf life and enjoy them year-round.
Pest and Disease Management
Pest Management
- Aphids:
- Description: Small, soft-bodied insects that feed on plant sap, often found in clusters on new growth or the underside of leaves.
- Impact: Aphids can cause leaf curling and distortion, and they excrete a sticky substance called honeydew, which can lead to sooty mold growth.
- Management: Introduce natural predators like ladybugs, use insecticidal soaps, or apply horticultural oils. Maintaining overall tree health can also reduce infestations.
- Caterpillars:
- Description: Larvae of various moths and butterflies, which feed on the leaves of pear trees.
- Impact: Severe infestations can defoliate a tree, affecting its growth and fruit production.
- Management: Handpick caterpillars if the infestation is small. Use Bacillus thuringiensis (Bt), a natural bacterium, as an effective and environmentally friendly treatment.
Disease Management
- Fire Blight:
- Description: A bacterial disease caused by Erwinia amylovora, characterized by blackened or burnt-looking branches and leaves.
- Impact: Fire blight is highly contagious and can quickly spread throughout the tree and to other nearby plants, often causing significant damage.
- Prevention and Treatment: Prune infected branches well below the infected parts, sterilizing pruning tools between cuts. Choose fire blight-resistant varieties. Chemical controls include applying bactericides at specific times, although these are more preventive than curative.
- Pear Scab:
- Description: A fungal disease caused by Venturia pirina, resulting in dark, velvety spots on leaves, fruit, and twigs.
- Impact: While not as destructive as fire blight, pear scab can decrease the aesthetic and market value of the fruit and weaken the tree over time.
- Prevention and Treatment: Apply fungicides, and practice good sanitation by removing fallen leaves and fruit, which can harbor the fungus. Proper pruning to increase air circulation can also help.
General Tips for Pest and Disease Management
- Regular Monitoring: Regularly inspect your pear trees for signs of pests or diseases.
- Sanitation: Keep the area around pear trees clean and free of debris to minimize the risk of disease.
- Cultural Practices: Maintain tree vigor through proper watering, fertilizing, and pruning, as healthy trees are more resistant to pests and diseases.
- Integrated Pest Management (IPM): Use a combination of cultural, biological, and chemical methods for a more sustainable approach to pest and disease control.
Conclusion
Planting pear trees is a gratifying endeavor that enriches your garden and yields delectable fruits. Success lies in selecting the right variety for your climate, preparing the site with care, and providing consistent maintenance through watering, fertilizing, and pruning. With patience and attention to detail, your pear trees will flourish, offering a bountiful harvest season after season. The joy of harvesting your own pears is a rewarding culmination of your gardening efforts.
FAQs (Frequently Asked Questions)
- What is the best time of year to plant pear trees?
Pear trees should ideally be planted in late winter or early spring, when the soil is thawable and workable but before new growth starts. - How do I choose the right variety of pear tree for my garden?
Select a variety based on your local climate, soil conditions, and personal preferences for taste and texture. Consider popular varieties like Bartlett, Anjou, or Bosc. - How much space does a pear tree need?
Standard pear trees require about 20 feet of space, while dwarf varieties need about 10-15 feet to ensure adequate room for growth and air circulation. - What type of soil is best for pear trees?
Pear trees thrive in well-drained, loamy soil with a pH between 6.0 and 7.0. Conduct a soil test and amend the soil as needed. - How often should I water my pear tree?
Newly planted trees need regular watering to keep the soil moist. Once established, they require less frequent watering, depending on weather conditions and soil type. - Do pear trees need full sunlight?
Yes, pear trees need at least 6 hours of direct sunlight daily to produce the best fruit. - When and how should I prune a pear tree?
Prune pear trees annually during late winter or early spring. Remove dead or diseased branches, and thin out the canopy to allow light and air to penetrate. - How long does it take for a pear tree to bear fruit?
Depending on the variety and growing conditions, pear trees typically start bearing fruit 3 to 5 years after planting. - What common pests and diseases affect pear trees?
Pear trees can be affected by pests like aphids and caterpillars, and diseases such as fire blight and pear scab. Regular monitoring and appropriate treatments are crucial. - How do I know when pears are ready to harvest?
Pears are ready to harvest when they are full-sized, but still firm. The fruit should detach easily when twisted slightly. Harvesting time varies by variety and is generally in late summer to early fall.

Kristine Moore
Forestry AuthorI'm Kristine Moore, a seasoned garden landscaping professional with over 30 years of experience. My extensive career has been dedicated to transforming outdoor spaces into stunning, sustainable landscapes. With a deep understanding of horticulture, design principles, and environmental stewardship, I have become a respected figure in the field, known for creating harmonious, visually appealing, and eco-friendly gardens. My commitment to excellence and continuous learning in landscaping trends and techniques has solidified my reputation as an expert in garden design and implementation.


Leave your comment