How to Grow Bay Laurel: A Step-by-Step Guide to Planting, Care, and Harvesting
- March 21, 2024
- 0 comment
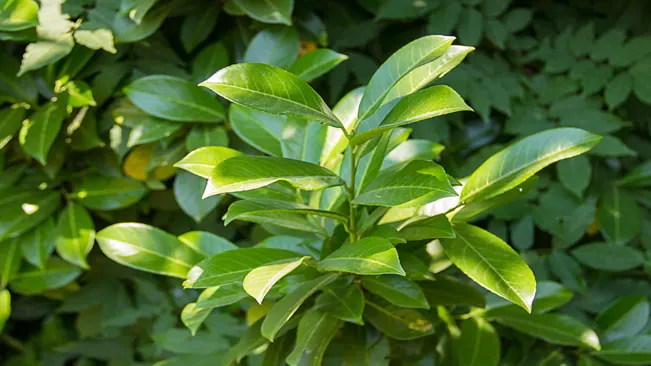
Learn how to grow Bay Laurel (Laurus nobilis), a versatile and aromatic evergreen, with our comprehensive guide. Discover essential tips for cultivating a healthy plant and adding flavor to your culinary creations. Native to the Mediterranean region, bay laurel is often used in cooking to add flavor to a variety of dishes. Growing this plant can be a rewarding experience for gardeners of all levels. This guide provides essential tips and insights into cultivating a healthy Bay Laurel plant.

Benefits of Bay Laurel
| Benefit | Description |
|---|---|
| Culinary Uses | Bay leaves are a popular herb in cooking, adding a distinct flavor and aroma to soups, stews, sauces, and marinades. |
| Medicinal Properties | Traditionally used for its anti-inflammatory and antioxidant properties. May help in treating digestive issues and respiratory conditions. |
| Aromatic Oil | Essential oil from bay leaves is used in aromatherapy for its calming and warming effects, and it may also have antimicrobial properties. |
| Ornamental Value | Bay Laurel, with its glossy, evergreen leaves and attractive shape, is widely used in landscaping and can be shaped into topiaries or hedges. |
| Air Purification | Like many plants, Bay Laurel can help in purifying the air by absorbing pollutants and emitting oxygen, contributing to a healthier indoor environment. |
| Cultural Significance | Historically, Bay Laurel has been a symbol of honor and achievement (e.g., laurel wreaths in ancient Greece), and it retains this symbolic value today. |
| Insect Repellent | The aromatic properties of the leaves can act as a natural insect repellent, particularly against moths and other small insects in wardrobes and pantries. |
| Low Maintenance | Once established, Bay Laurel is relatively easy to care for, making it a suitable plant for both experienced and novice gardeners. |
| Drought Tolerant | Bay Laurel is fairly drought-resistant once established, making it suitable for xeriscaping and gardens in drier climates. |
| Longevity | With proper care, Bay Laurel can live for many years, even centuries, making it a lasting addition to gardens and landscapes. |
List on How To Grow Bay Laurel
- Choosing the Right Location
- Planting and Propagation
- Watering and Feeding
- Pruning and Maintenance
- Pest and Disease Management
- Harvesting Bay Leaves
- Winter Care
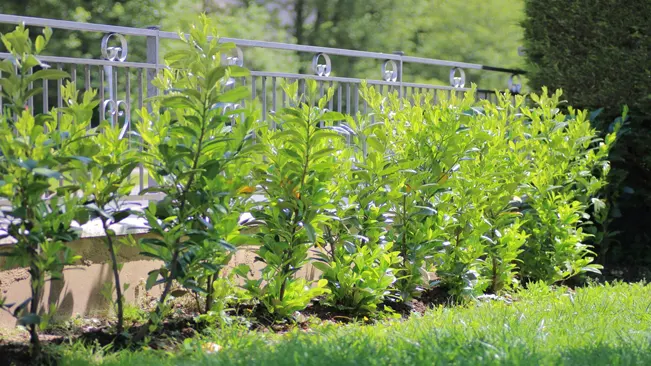
Choosing the Right Location
Bay Laurel thrives in a location that receives full sun to partial shade. Although it is adaptable to different soil types, well-drained, fertile soil is ideal. If you are planting in a pot, ensure it is large enough to accommodate the root system and has adequate drainage holes.
Sunlight Requirements
- Full Sun to Partial Shade: Bay Laurel grows best when it receives at least 6 hours of direct sunlight per day. However, it also tolerates partial shade, especially in hotter climates. In regions with intense sun, some afternoon shade can prevent leaf scorch.
Soil Preferences
- Well-Drained, Fertile Soil: Although Bay Laurel can adapt to a range of soil types, it thrives in soil that is well-drained and rich in organic matter. Poor drainage can lead to root rot, a common issue in overly moist conditions.
- Soil pH: Bay Laurel prefers a slightly acidic to neutral soil pH, typically between 6.0 and 7.5. You can test the soil pH using a home testing kit and adjust it if necessary with soil amendments.
Planting in Pots
- Pot Size and Drainage: If you’re growing Bay Laurel in a container, choose a pot that is large enough to accommodate the plant’s root system with room to grow. Ensure the pot has adequate drainage holes to prevent waterlogging.
- Potting Mix: Use a high-quality potting mix that provides good drainage. You can also add perlite or coarse sand to improve drainage if needed.
- Re-potting: As the plant grows, it may become root-bound. In this case, transfer it to a larger pot to ensure continued growth and health.
Location Considerations
- Wind and Temperature: While Bay Laurel is quite hardy, it can be sensitive to strong winds and extreme cold. In very windy areas, a sheltered location can prevent damage to the leaves and branches. In colder climates, consider planting in a location that offers some protection from harsh winter conditions.
- Accessibility for Harvesting: If you plan to use the leaves for culinary purposes, plant your Bay Laurel in a convenient location where you can easily access it for harvesting.
Microclimates and Local Conditions
- Understanding your Garden’s Microclimate: Be aware of microclimates in your garden. Areas near walls may be warmer, while low spots can be cooler or more prone to frost. Choose a spot in your garden that matches the preferred climate conditions of Bay Laurel.
- Adaptability: Bay Laurel is quite adaptable and can be trained to suit various landscapes. It can be grown as a single specimen, in a hedge, or even as a topiary in more formal gardens.
Planting and Propagation
Planting and Propagation of Bay Laurel
Propagation from Seeds
- Process: Propagating Bay Laurel from seeds can be a slow process, as the seeds have a long germination period. First, the seeds should be soaked in water for 24 hours to soften the hard outer shell.
- Sowing: Plant the seeds in a well-draining seed starting mix, placing them at a shallow depth. Cover lightly with soil.
- Germination: Keep the soil consistently moist but not waterlogged. Germination can take several weeks to a few months, requiring patience.
- Transplanting: Once seedlings have developed a few sets of true leaves and are strong enough, they can be transplanted into larger pots or directly into the garden.
Propagation from Cuttings
- Best Time: The ideal time for taking cuttings is late summer.
- Cutting Preparation: Select semi-hardwood cuttings about 6-8 inches long. Remove the lower leaves, and you may dip the cut end into a rooting hormone for better success.
- Planting Cuttings: Plant the cuttings in a mixture of peat and perlite or a well-draining potting mix. Ensure the environment is humid and the soil is consistently moist.
- Root Development: It may take several weeks for roots to develop. Once rooted, the cuttings can be transplanted.
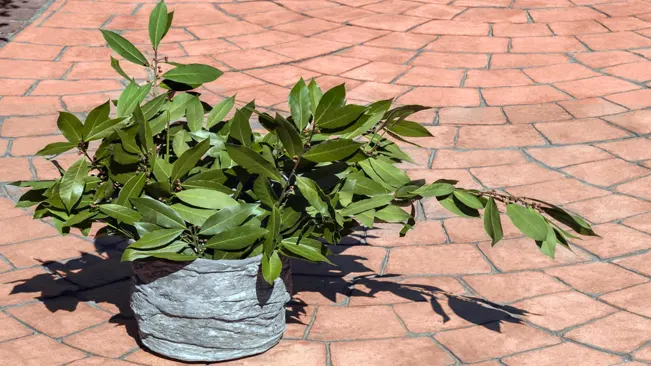
Purchasing Young Plants
- Nursery Plants: Often the easiest method, purchasing a young Bay Laurel plant from a nursery allows you to skip the initial stages of growth.
- Acclimatization: Once bought, it’s important to gradually acclimatize the plant to your environment, especially if it was grown in a greenhouse.
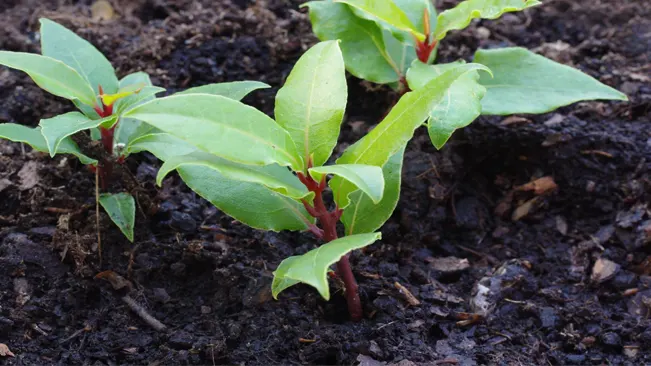
Planting Bay Laurel
Choosing the Right Location
- Sunlight and Soil: Select a location that gets full sun to partial shade. Bay Laurel prefers well-drained soil with a neutral to slightly acidic pH.
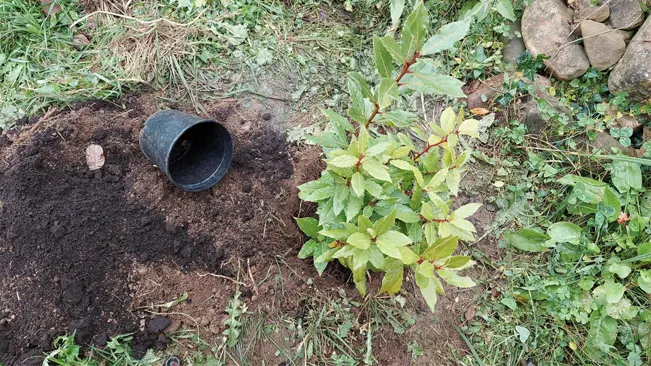
Planting Procedure
- Hole Preparation: Dig a hole that is twice as wide and just as deep as the root ball of your plant. This gives the roots ample space to spread.
- Planting: Place the plant in the hole and fill it with soil. Gently firm the soil around the base of the plant.
- Watering: After planting, water the plant thoroughly to help settle the soil around the roots.
Watering and Feeding
Bay Laurel does not require excessive watering. Allow the soil to dry out between watering sessions. Overwatering can lead to root rot. Fertilize your Bay Laurel in the spring with a balanced, slow-release fertilizer to promote healthy growth.
Watering Bay Laurel
- Frequency and Amount:
- Bay Laurel prefers a moderate watering approach. The key is to water deeply but infrequently. This means you should water the plant until the moisture seeps deep into the root zone, then wait until the soil dries out before watering again.
- The exact frequency depends on factors like climate, season, and whether the plant is grown in a pot or in the ground. In general, outdoor plants may need watering every 1-2 weeks, while potted plants might require watering once a week or more, depending on the pot size and indoor conditions.
- Checking Soil Moisture:
- It’s important to check the soil moisture before watering. You can do this by sticking your finger about an inch into the soil. If it feels dry at that depth, it’s time to water.
- Avoiding Overwatering:
- Overwatering is a common mistake. It can lead to root rot, a serious condition that can damage or kill the plant. Ensuring good drainage, whether in a pot or in the ground, is crucial to prevent water from accumulating around the roots.
Feeding Bay Laurel
- Type of Fertilizer:
- Use a balanced, slow-release fertilizer. Look for one with equal parts nitrogen, phosphorus, and potassium (N-P-K). This balanced approach ensures that the plant gets all the nutrients it needs for overall health.
- When to Fertilize:
- The best time to fertilize Bay Laurel is in the spring as the plant starts actively growing. This gives the plant a nutrient boost when it’s putting out new growth.
- Application Method:
- Follow the instructions on the fertilizer package for the correct application rate. Generally, you’ll apply the fertilizer around the base of the plant, avoiding direct contact with the stem or leaves.
- Avoiding Over-fertilizing:
- Over-fertilizing can be as harmful as under-fertilizing. It can lead to weak, leggy growth and can decrease the concentration of aromatic oils in the leaves, which are essential for culinary use.
- Organic Alternatives:
- If you prefer organic gardening, consider using compost or well-rotted manure as a natural fertilizer. These organic options not only feed the plant but also improve soil structure and health.
Pruning and Maintenance
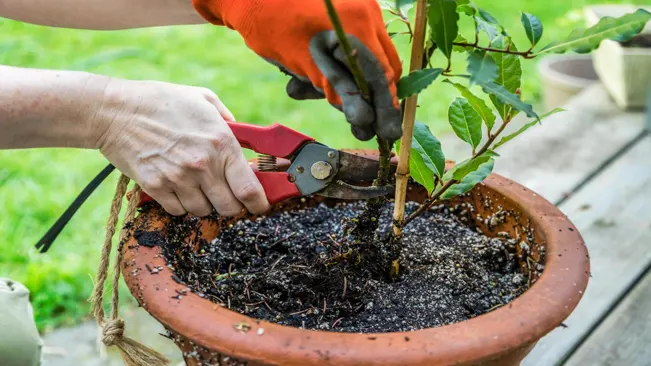
Pruning is essential to maintain the desired shape and size, particularly if grown as a hedge or topiary. It’s best to prune in late winter or early spring before new growth starts. Regular pruning also encourages the growth of fresh, aromatic leaves.
Understanding the Importance of Pruning
- Aesthetic Shape: Pruning helps maintain Bay Laurel’s shape, whether you’re growing it as a decorative shrub, a formal hedge, or an intricate topiary. Without regular pruning, Bay Laurel can become leggy and overgrown.
- Health of the Plant: Pruning also plays a crucial role in the overall health of the plant. It helps in removing dead or diseased branches, which can prevent the spread of disease and pests.
- Improved Leaf Quality: For culinary purposes, pruning is beneficial as it encourages the growth of new, aromatic leaves which are often more flavorful.
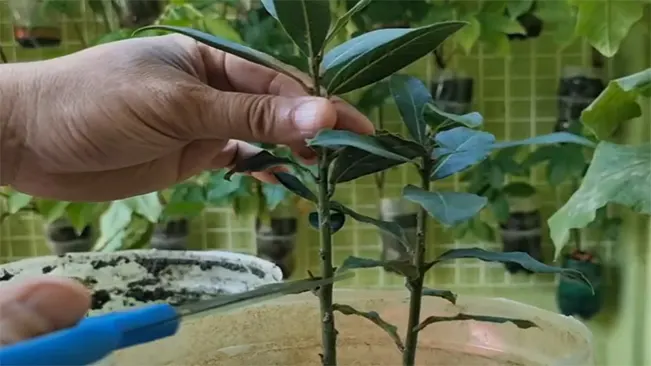
Best Practices for Pruning Bay Laurel
- Timing: The ideal time to prune Bay Laurel is late winter or early spring. This timing ensures that the plant is pruned right before the onset of the growing season, which promotes healthy new growth.
- Technique: Use sharp and clean pruning shears. Make clean cuts at a 45-degree angle, just above a leaf node (where a leaf attaches to the branch). This encourages new growth to sprout from the node.
- Moderation: It’s important not to over-prune. Generally, removing about one-third of the overall growth is safe. Over-pruning can stress the plant and reduce its vigor.
- Shaping: If you’re shaping Bay Laurel as a hedge or topiary, regularly trim it to maintain the desired shape. This may require pruning several times during the growing season.
- Thinning: Thin out crowded areas to improve air circulation, which can reduce the likelihood of fungal diseases.
Pest and Disease Management
Bay Laurel is relatively resistant to pests and diseases. However, watch out for bay sucker insects and leaf spot disease. Use appropriate organic or chemical treatments as needed.
Bay Laurel Pest and Disease Management
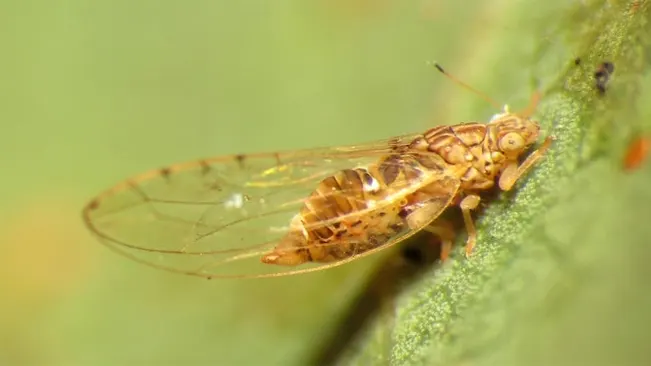
- Bay Sucker Insects (Cacopsylla lauri):
- Identification: These are small, sap-sucking insects that primarily target the underside of leaves, causing yellowing and distortion.
- Management: Control measures include the use of insecticidal soap or neem oil. Encouraging natural predators, like ladybugs, can also help in controlling these pests.
- Leaf Spot Disease:
- Causes: This is often caused by fungal pathogens like Phyllosticta and Xanthomonas campestris pv. lauricola. The disease is characterized by brown or black spots on the leaves.
- Management: Good air circulation is vital for prevention. Prune overcrowded branches and remove fallen leaves from around the plant. Fungicides can be applied as a preventive measure in areas where leaf spot is a common problem.
- Other Pests:
- Scale Insects: These pests appear as small, brown, immobile bumps on stems and leaves. Use horticultural oil or insecticidal soap for control.
- Aphids: Tiny, sap-sucking insects that can cause leaf curl and stunted growth. Control with a strong water spray, insecticidal soap, or neem oil.
- General Pest and Disease Prevention Tips:
- Regular Inspection: Early detection is key. Regularly check your Bay Laurel for signs of pests or disease.
- Proper Watering: Overwatering can create a favorable environment for fungal diseases. Ensure the soil is well-draining and water only when the topsoil is dry.
- Cleanliness: Keep the area around the plant clean. Remove any fallen leaves or debris that could harbor pests or disease.
- Balanced Fertilization: Avoid excessive use of nitrogen-rich fertilizers, as they can promote tender growth that’s more susceptible to pests and diseases.
- Quarantine New Plants: If you’re introducing new plants to your garden, keep them quarantined initially to prevent the spread of pests or diseases to existing plants.
Harvesting Bay Leaves
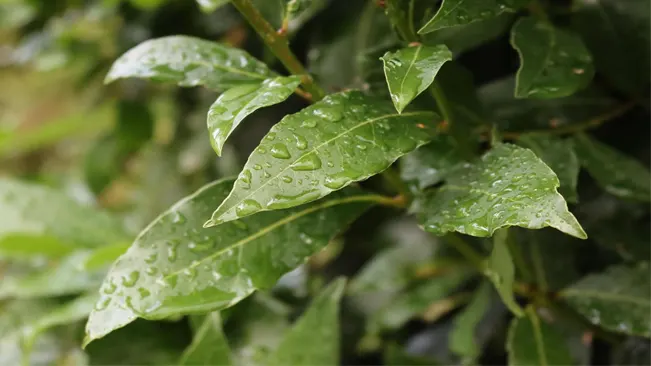
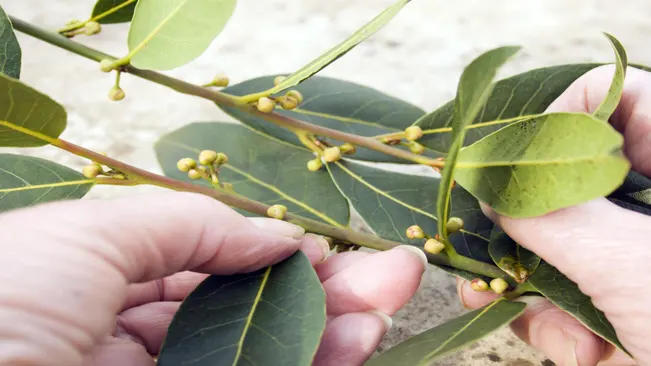
The leaves are best harvested just before the plant blooms in late spring or early summer. Choose mature leaves as they have the strongest flavor. Leaves can be used fresh or dried for later use.
Optimal Harvesting Time
- The best time to harvest Bay leaves is just before the plant starts to bloom. This period typically falls in late spring or early summer. During this time, the leaves contain the highest concentration of essential oils, thus offering the richest flavor and aroma.
Selecting the Right Leaves

- Choose mature leaves for harvesting. These leaves are typically larger, have a deeper green color, and are fully developed. Mature leaves are known to have a more intense flavor compared to younger leaves.
- Avoid picking leaves that are yellowing, damaged, or show signs of disease.
Harvesting Technique
- Gently handpick the leaves from the tree. If using scissors or pruning shears, make clean cuts to avoid damaging the plant.
- Be mindful not to over-harvest. Removing too many leaves at once can stress the plant. A general rule is not to remove more than one-third of the foliage in a single harvest.
Drying Bay Leaves

- Bay leaves are often used in their dried form. Drying intensifies the flavor and allows for long-term storage.
- To dry, spread the leaves out in a single layer in a warm, dry, and well-ventilated area away from direct sunlight. You can also use a dehydrator at a low temperature.
- It can take a few weeks for the leaves to completely dry out. They should feel crisp and crumble easily when fully dried.
- Once dried, store them in an airtight container in a cool, dark place. Properly dried Bay leaves can retain their flavor for several months to a year.
Culinary Uses

- Dried Bay leaves are a staple in various cuisines. They add depth to the flavor of many dishes, including soups, stews, braises, and sauces. The leaves are typically added at the beginning of the cooking process and removed before serving.
Winter Care
In colder climates, Bay Laurel should be grown in containers and moved indoors or to a protected area during the winter. If planted in the ground, a layer of mulch can help protect the roots from freezing temperatures.
Winter Care for Potted Bay Laurel
- Moving Indoors: Before the first frost, move your Bay Laurel plant indoors. Choose a spot that is cool but not too warm (ideally between 40°F and 60°F) and where it can receive plenty of sunlight, such as near a south-facing window.
- Reducing Water: During winter, the plant’s growth slows down, so it requires less water. Water only when the soil’s top layer feels dry to the touch.
- Humidity Levels: Indoor heating can reduce humidity levels, which might not be ideal for Bay Laurel. To increase humidity, you can place the pot on a tray filled with pebbles and water or use a humidifier.
- Preventing Pest Problems: Keep an eye out for indoor pests like spider mites, which can be more common in heated homes. Regularly inspect the leaves and treat with an appropriate method if pests are found.
Winter Care for Bay Laurel Planted in the Ground
- Mulching: Apply a thick layer of mulch around the base of the plant. This helps to insulate the roots, keeping them warmer and retaining moisture.
- Protection from Cold Winds: If possible, shield your Bay Laurel from harsh winter winds. This can be done by using a burlap screen or planting in a location sheltered by buildings or other vegetation.
- Avoiding Frost Damage: Even though Bay Laurel can handle cold temperatures to some extent, prolonged exposure to frost can damage the leaves. Cover the plant with frost cloth or burlap on particularly cold nights.
Related Post:
- How to Grow Mulberry
- How to Grow Horseradish
- How to Grow Daikon Radish
- How to Grow Zucchini
- How to Grow Oregano
Conclusion
Growing Bay Laurel is a delightful endeavor that rewards gardeners with both culinary and aesthetic benefits. By following these simple guidelines, you can enjoy the rich aroma and flavor of fresh Bay leaves right from your garden. Remember, patience is key as this plant grows slowly but surely, symbolizing wisdom and glory in every leaf.
FAQs (Frequently Asked Questions)
- What is the best environment for growing Bay Laurel?
Bay Laurel thrives in full sun to partial shade and prefers well-drained, fertile soil. It’s hardy in USDA zones 8-10 and can tolerate sea spray, making it suitable for coastal areas. - Can Bay Laurel be grown in pots?
Yes, Bay Laurel can be grown in pots. Ensure the pot is large enough with adequate drainage. Use a well-draining potting mix and position the pot where it can receive plenty of sunlight. - How often should I water my Bay Laurel plant?
Water the plant when the topsoil feels dry. Bay Laurel doesn’t require frequent watering; overwatering can lead to root rot. Reduce watering in winter when the plant’s growth slows down. - When and how should I prune Bay Laurel?
Prune in late winter or early spring before new growth starts. Trim to maintain shape and size, and remove any dead or diseased branches. Regular pruning also encourages fresh, aromatic leaf growth. - Is Bay Laurel susceptible to any pests or diseases?
Bay Laurel is relatively pest-resistant, but it can occasionally suffer from bay sucker pests, scale insects, and leaf spot diseases. Regularly inspect your plant and treat with appropriate organic or chemical solutions as needed. - How do I harvest Bay Laurel leaves?
Harvest mature leaves as needed, preferably in the morning when the essential oils are strongest. Leaves can be used fresh or dried. For drying, hang branches in a cool, dry place and then store the leaves in an airtight container. - Can I propagate Bay Laurel from cuttings?
Yes, Bay Laurel can be propagated from semi-hardwood cuttings. Take cuttings in late summer, dip them in rooting hormone, and plant them in a well-draining soil mix. Keep them moist and shaded until roots develop. - How fast does Bay Laurel grow?
Bay Laurel is a slow-growing plant, typically adding about 6-12 inches per year. Patience is key when growing this plant, but its longevity and usefulness make it worth the wait. - Do I need to fertilize my Bay Laurel?
Fertilize your Bay Laurel in early spring with a balanced, slow-release fertilizer to encourage healthy growth. Avoid over-fertilizing, as this can lead to weak growth and less flavorful leaves. - How do I protect Bay Laurel during winter?
In colder climates, move potted Bay Laurels indoors or to a protected area. For in-ground plants, use a layer of mulch to protect the roots. Ensure the plant is not exposed to harsh winter winds and freezing temperatures.
For more expert gardening advice, explore our guides, discover top recommendations in our best section, and delve into in-depth product reviews in our review section. Happy Gardening.

Kristine Moore
Forestry AuthorI'm Kristine Moore, a seasoned garden landscaping professional with over 30 years of experience. My extensive career has been dedicated to transforming outdoor spaces into stunning, sustainable landscapes. With a deep understanding of horticulture, design principles, and environmental stewardship, I have become a respected figure in the field, known for creating harmonious, visually appealing, and eco-friendly gardens. My commitment to excellence and continuous learning in landscaping trends and techniques has solidified my reputation as an expert in garden design and implementation.


Leave your comment