How To Plant Wheat: Expert Tips
- April 5, 2024
- 0 comment
Wheat is a staple crop that has been cultivated for thousands of years. It’s a primary source of food for much of the world’s population. Planting wheat can be a rewarding experience, whether you are a small-scale gardener or a commercial farmer. Here’s a step-by-step guide on how to plant wheat.
| Benefit | Description |
|---|---|
| Nutritional Value | High in carbohydrates for energy, good source of protein, vitamins (especially B vitamins), and minerals like iron, selenium, and magnesium. |
| Dietary Fiber | Contains significant amounts of dietary fiber which aids in digestion and promotes gut health. |
| Supports Heart Health | Whole wheat can lower the risk of heart disease, thanks to its fiber content and the presence of compounds like phytoestrogens and lignans. |
| Weight Management | High fiber content in whole wheat helps in weight management by providing a feeling of fullness and reducing overeating. |
| Blood Sugar Control | The low glycemic index of whole wheat helps in stabilizing blood sugar levels, making it beneficial for diabetics. |
| Reduces Chronic Inflammation | Whole grains like wheat can reduce chronic inflammation, which is linked to various diseases like cancer and heart disease. |
| Gluten Content | Contains gluten, which is a protein providing elasticity to dough, making wheat products like bread and pasta possible. (Note: This is a benefit for those who are not gluten-sensitive or celiac.) |
| Versatility in Cooking | Wheat is extremely versatile, used in a variety of culinary applications from bread and pasta to cakes and pastries. |
| Economic Importance | A staple crop, wheat is crucial for global food security and is a key component in the diets of billions of people. |
| Environmental Adaptability | Wheat can be grown in a variety of climates, making it a vital crop in many regions around the world. |
List on How To Plant Wheat
- Choosing the Right Variety
- Preparing the Soil
- Planting the Seeds
- Watering and Maintenance
- Fertilizing
- Harvesting
- Post-Harvest Processing
Choosing the Right Variety
Wheat is a diverse crop, with numerous varieties each suited to different climates, soils, and end-uses. The two primary categories, winter wheat and spring wheat, have distinct characteristics:
- Winter Wheat
- Planting Time: Typically sown in the fall.
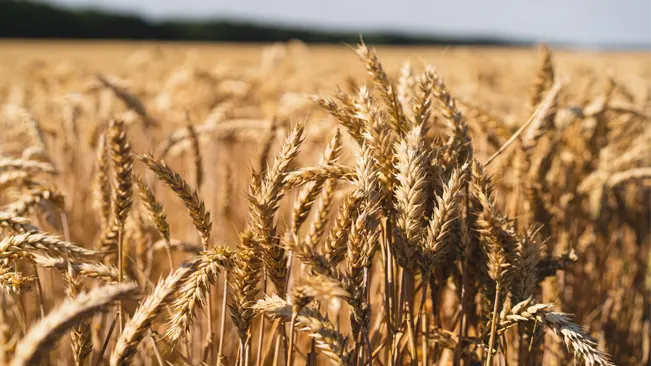
- Harvest Time: Harvested in early summer.
- Characteristics: Generally, winter wheat has a higher yield compared to spring wheat. It’s planted in the fall, goes dormant during winter, and resumes growth as the weather warms up in spring. This dormancy period helps in developing a robust root system.
- Climate Suitability: Best for regions with moderate winters and warm summers.
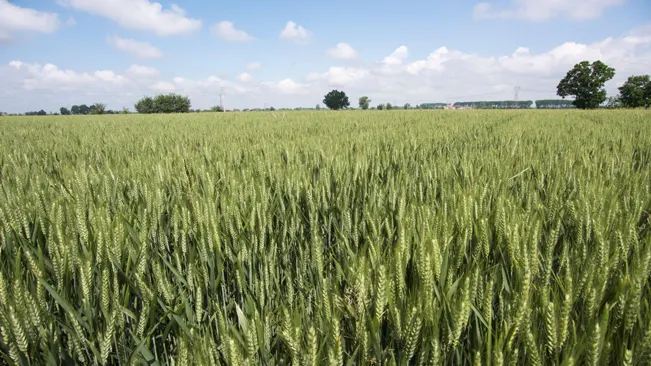
- Spring Wheat
- Planting Time: Planted in early spring.
- Harvest Time: Harvested in late summer.
- Characteristics: Unlike winter wheat, spring wheat does not go through a vernalization period (cold treatment). It’s suitable for areas where winters are too harsh for winter wheat to survive.
- Climate Suitability: Ideal for colder climates where winters are severe.
Factors to Consider When Choosing Wheat Variety
- Climate: The most crucial factor is your local climate, especially the winter temperature and length of the growing season.
- Soil Type: Some wheat varieties do better in certain soil types. For example, loamy or well-drained soil might be preferred for certain varieties.
- Disease Resistance: Look for varieties that are resistant to prevalent local diseases or pests.
- End Use: The intended use (e.g., bread-making, pastries, noodles) might influence your choice as different varieties have different gluten content and quality.
- Yield and Maturation Time: Consider how quickly the crop matures and the expected yield, which can vary between varieties.
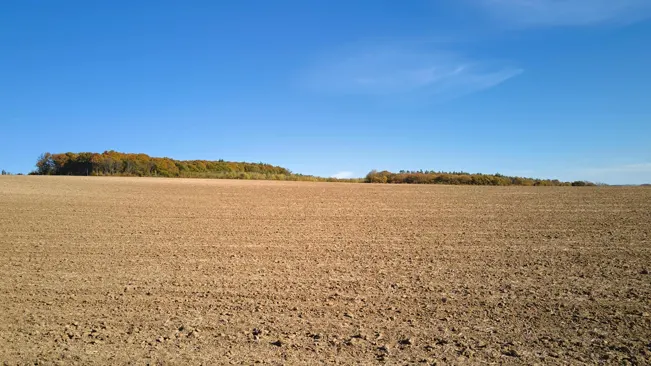
Preparing the Soil
Soil preparation is a crucial step in wheat cultivation. It determines the soil’s ability to support wheat growth and affects both the yield and quality of the crop. Proper soil preparation ensures that the wheat roots have an ideal environment for growth, adequate access to nutrients, and proper water drainage.
Detailed Guide to Preparing Soil for Wheat
Testing the Soil
- Purpose: Determines soil’s nutrient content and pH level.
- Ideal pH: Target range is 6.0 to 7.5.
- Amending Soil: Use lime to raise pH, or sulfur to lower it.
Tillage
- Depth: Till to a depth of about 6 inches.
- Benefits: Enhances aeration, improves water infiltration, breaks up compacted soil.
- Method: Use appropriate tilling equipment like a plow or rototiller.
Weed Control
- Initial Step: Remove existing weeds through tilling.
- Herbicide Use: Optional, depending on farming practices (conventional vs. organic).
- Importance: Reduces competition for nutrients and water.
Incorporating Organic Matter
- Materials: Use compost, aged manure, or other organic amendments.
- Benefits: Improves soil fertility and structure, enhances moisture and nutrient retention.
- Application: Evenly mix with soil during tilling.
Leveling the Field
- After Tilling: Ensure the field is level.
- Purpose: Promotes uniform water distribution and prevents uneven irrigation.
Planting the Seeds
Method of Planting Wheat
- Manual Planting
- Method: Scattering seeds by hand or using a handheld tool.
- Suitability: Ideal for small gardens or plots.
- Advantages: Allows close monitoring and control over the planting process.
- Challenges: More labor-intensive, potential for less uniform seed distribution.
- Application: Best for small-scale farming or personal gardens.
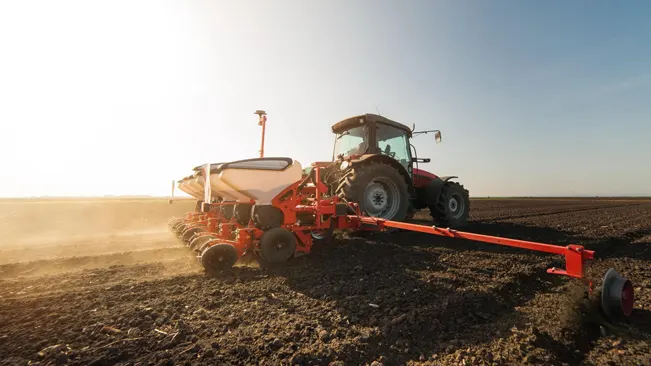
- Using a Seed Drill
- Method: A mechanical tool that plants seeds at consistent depth and spacing.
- Suitability: Used for larger fields.
- Advantages: Efficient, ensures uniform germination and growth, conserves seeds by preventing over-planting.
- Challenges: Requires access to machinery and is more suitable for large-scale farming.
Planting Depth
- Ideal Depth: Approximately 1 to 1.5 inches.
- Importance: Ensures proper root establishment and protection from birds or animals.
- Risks: Shallow planting can lead to weak root systems and vulnerability; overly deep planting may prevent germination.
Row Spacing
- Recommended Spacing: About 6 to 8 inches between rows.
- Benefits: Promotes adequate airflow, reduces disease risk, and allows access to nutrients and sunlight.
- Field Management: Facilitates activities like weeding and application of fertilizers or pesticides.
Seed Rate and Coverage
- Factors: Dependent on wheat variety, planting method, and crop purpose.
- Goal: Achieve even coverage to ensure uniform crop growth.
- Implications: Overcrowding leads to resource competition; sparse planting lowers yield potential.
Watering and Maintenance
Effective post-planting care of wheat involves a balance of appropriate watering, vigilant pest and disease management, and diligent weed control. Each of these elements contributes to the health and productivity of the wheat crop, ultimately influencing the yield and quality of the harvested grain.
Watering Wheat Crops

- Initial Watering
- Purpose: The first watering after planting is crucial to kickstart germination.
- Method: Light, even sprinkling across the field.
- Caution: Avoid overwatering which can cause seed rot. The soil should be moist, not waterlogged.
- Regular Watering
- Quantity: Aim for about an inch of water per week, including rainfall.
- Soil Types: Adjust frequency according to soil type; sandy soils need more frequent watering, while clay soils retain moisture longer.
- Weather Dependence: Increase watering during dry, hot periods and reduce during wet spells.
- Monitoring Moisture Levels
- Soil Check: Regularly feel the soil; it should be moist to the touch but not soggy.
- Weather Patterns: Be attentive to local weather forecasts and adjust irrigation accordingly.
Maintenance of Wheat Crops
- Weed Control
- Methods: Employ mechanical (tilling, hand weeding), chemical (herbicides), or a combination.
- Timing: Critical in early stages when wheat is establishing itself.
- Strategy: Regular inspection and timely action to prevent weed proliferation.
- Pest and Disease Management
- Monitoring: Regularly inspect crops for signs of pest infestation or disease.
- Common Pests: Be vigilant for aphids, armyworms, and cereal leaf beetles.
- Diseases to Watch: Look out for rust, smut, and blight.
- Control Methods: Utilize Integrated Pest Management (IPM), combining biological controls (like natural predators), cultural practices (crop rotation, proper spacing), and, if necessary, chemical treatments.
- Environment Consideration: Use chemicals as a last resort and follow safety guidelines to minimize environmental impact.
Fertilizing
Fertilization is a crucial part of wheat cultivation as it directly impacts yield and quality. Understanding the right type and amount of fertilizer, as well as the timing of application, is essential.

Timing of Fertilizer Application
- Winter Wheat:
- Early Spring: Apply nitrogen when plants begin active growth.
- Consideration: Over-application can lead to lush growth that’s prone to diseases and lodging.
- Spring Wheat:
- At Planting: Starter fertilizers can be beneficial.
- Early Growth Stage: Additional nitrogen application can boost growth.
Method of Application
- Broadcast Application: Evenly spreading fertilizer over the soil surface, often before planting.
- Band Application: Placing fertilizer in bands near the seed or root zone. More efficient as it places nutrients closer to the roots.
- Foliar Application: Applying liquid fertilizer directly to leaves. Used primarily for micronutrients or quick nutrient boosts.
Harvesting
Determining the precise timing for wheat harvest is a critical decision influenced by multiple factors like climate, weather conditions, wheat variety, and signs of crop maturity.
Harvesting Methods
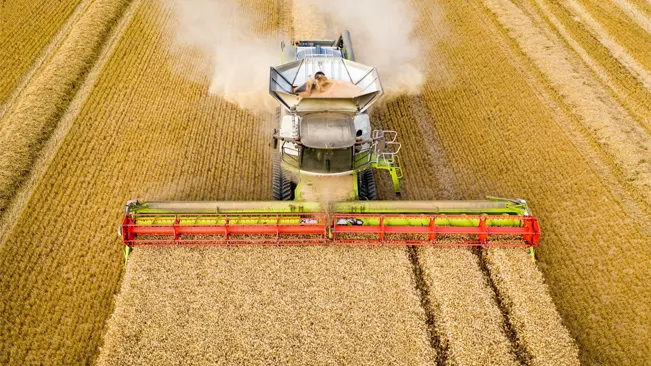
- Combine Harvester: For large scale production, a combine harvester is the most efficient method. Combines perform three functions – reaping (cutting), threshing (separating), and winnowing (cleaning) in a single pass over the field. This significantly speeds up the process and reduces labor.
- Manual Harvesting: For small plots or in regions where machinery isn’t accessible, manual methods like using a scythe are employed. This is labor-intensive and time-consuming but can be effective for small-scale farming.
Post-Harvest Processing
Threshing
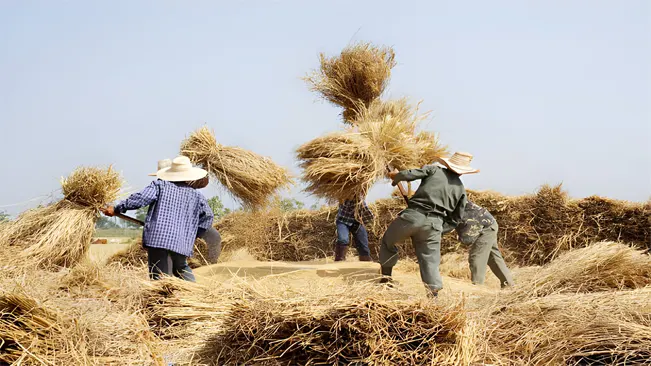
- Threshing is a crucial step in wheat processing. Its primary goal is to separate the edible part of wheat (the grain) from the non-edible parts (the chaff and straw).
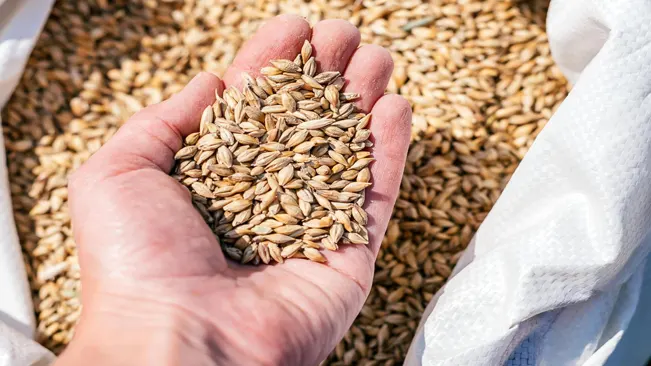
Winnowing

- After the wheat is threshed, separating the wheat kernels (grains) from the chaff (the husks and other plant debris) is essential. This process is known as winnowing.
Drying

- Drying wheat to the correct moisture level is a critical step in ensuring the longevity and quality of the grain during storage.
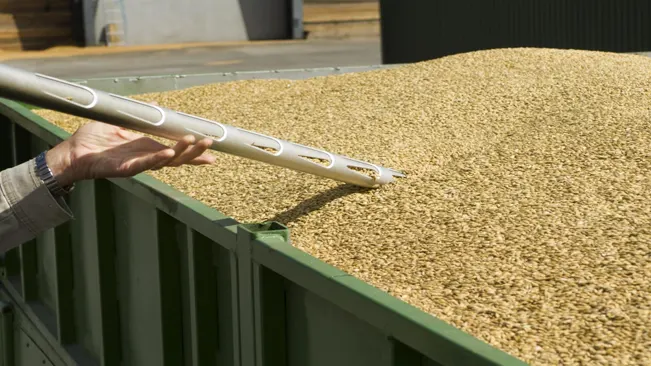
Storage
- Proper storage of wheat involves meticulous control of environmental factors, regular inspections, and appropriate responses to any signs of deterioration. This ensures the maintenance of wheat quality, prolongs its shelf life, and safeguards it against potential losses due to pests and mold.
Quality Check and Grading
- Quality checks and grading of wheat are crucial in determining its market value and suitability for specific applications. This comprehensive evaluation ensures that the wheat meets the necessary standards for safety, quality, and functionality in various uses.
Milling
- While not always immediate post-harvest, the next significant step in the wheat’s journey is milling. Milling is the process of grinding the wheat grains to produce flour. Different grades of flour can be produced depending on the milling process and the parts of the grain used.
Transportation
- Finally, if the wheat is intended for sale or distribution, it will be transported to the market or processing facilities. This step requires careful handling to prevent contamination and maintain grain quality.
Related Growing Guides:
Conclusion
Planting wheat is a process that requires attention to detail and care. By following these steps, you can successfully grow this vital crop and contribute to the global food supply. Remember, the key to a successful wheat harvest lies in proper preparation, regular maintenance, and timely harvesting.
FAQs (Frequently Asked Questions)
- What is the best time to plant wheat?
The best time depends on the variety. Winter wheat should be planted in the fall, while spring wheat is best planted in early spring as soon as the soil is workable. - How deep should wheat seeds be planted?
Wheat seeds should be planted about 1 to 1.5 inches deep in the soil. - What kind of soil is ideal for wheat?
Wheat grows best in well-drained, fertile soil with a pH between 6.0 and 7.5. - How much water does wheat need?
Wheat generally needs about an inch of water per week, either from rainfall or irrigation. - Do I need to fertilize my wheat crop?
Yes, applying nitrogen-based fertilizer can enhance growth. The exact amount and timing depend on your soil’s condition. - How do I protect wheat from pests and diseases?
Regular monitoring and using appropriate pesticides or fungicides as needed. Also, practicing crop rotation can help prevent many diseases. - How far apart should wheat rows be?
Rows should be spaced about 6 to 8 inches apart to ensure adequate space for plant growth. - When is wheat ready to harvest?
Wheat is usually ready for harvest when the grains are hard and the stalks have turned golden brown, which is 7-8 months after planting for winter wheat, and 3-4 months for spring wheat. - Can I plant wheat in a small garden?
Yes, wheat can be grown in a small garden. Just ensure it’s planted in rows with proper spacing and receives adequate sunlight and water. - What should I do with the wheat after harvesting?
After harvesting, the wheat needs to be threshed to separate the grain from the chaff and then winnowed to remove debris. The grains should be stored in a cool, dry place.

Emma Hudson
Forestry AuthorEmma's experience in farming shapes her detailed guides on gardening and farming tools, providing practical, actionable advice grounded in real-world experience. Her work targets both newcomers and experienced farmers, aiming to enhance their practices with a mix of traditional wisdom and modern techniques. By making complex agricultural concepts accessible, Emma's guides serve as valuable tools for those navigating the challenges of contemporary farming, offering strategies for sustainable success.


Leave your comment