How to Plant Swiss Chard Seeds: Comprehensive Growing Tutorial
- February 26, 2024
- 0 comment
Swiss chard, a leafy green vegetable known for its vibrant colors and nutrient-rich leaves, is a wonderful addition to any garden. It’s not only a delicious and versatile ingredient in the kitchen but also an attractive plant that can brighten up your garden space. If you’re new to gardening or looking to add Swiss chard to your repertoire, this guide will take you through the process of planting Swiss chard seeds step by step.
List on How to Plant Swiss Chard
- Choosing the Right Time and Place
- Preparing the Soil
- Planting the Seeds
- Caring for Your Swiss Chard
- Fertilizing and Maintenance
- Harvesting
Nutritional Benefits of Swiss Chard
| Benefit | Description |
|---|---|
| Nutrient-Rich | Swiss chard is packed with vitamins and minerals, including vitamin K, vitamin A, vitamin C, magnesium, iron, and potassium. |
| Low in Calories | It’s a low-calorie food, making it ideal for weight management. |
| High in Antioxidants | Contains antioxidants like beta-carotene, zeaxanthin, and lutein, which help protect your cells from damage. |
| Heart Health | The fiber, potassium, and other essential nutrients in Swiss chard support heart health. |
| Supports Bone Health | High in vitamin K, which is essential for bone health and helps in preventing osteoporosis. |
| Blood Sugar Regulation | The fiber in Swiss chard can help in regulating blood sugar levels, making it beneficial for people with diabetes or at risk of the disease. |
| Eye Health | The presence of beta-carotene, lutein, and zeaxanthin is beneficial for eye health, potentially reducing the risk of age-related macular degeneration and cataracts. |
| Anti-Inflammatory Properties | Contains compounds that may reduce inflammation, which is beneficial for chronic disease prevention and overall health. |
| Improves Digestion | The high fiber content aids in digestion and helps prevent constipation. |
| Skin Health | Vitamins A and C in Swiss chard are essential for healthy skin, aiding in skin repair and collagen production. |
What You Need
- Swiss chard seeds
- Well-draining soil
- A sunny spot in your garden or a container for planting
- Watering can or hose
- Mulch (optional)
- Fertilizer (optional)
Choosing the Right Time and Place
- Early Spring: Planting in early spring takes advantage of the cooler temperatures which Swiss chard prefers. This timing often aligns with a few weeks before the last frost date in your region. The cool spring weather helps in the germination and growth of young plants, leading to a robust early summer harvest.
- Late Summer: Planting in late summer allows the chard to grow in cooler fall temperatures. This timing is typically about 40 to 50 days before the first expected fall frost. The plants will mature as the weather cools down, which can sweeten the leaves and make them more flavorful.
Choosing the Right Location
The location where you plant Swiss chard is just as important as when you plant it. Here are some considerations:
- Sunlight: Swiss chard grows best in full sun to partial shade. A spot that receives at least 5-6 hours of sunlight daily is ideal. If you’re in a region with very hot summers, some afternoon shade can help protect the plants from excessive heat.
- Soil Conditions: The plant thrives in fertile, well-draining soil. Preparing your garden bed with compost or organic matter can improve soil health and benefit your Swiss chard plants.
Container Gardening
For those with limited garden space or living in apartments, Swiss chard is an excellent candidate for container gardening.
- Container Size: Choose a container that is at least 12 inches deep to accommodate the roots. Ensure it has good drainage to prevent waterlogging.
- Soil for Containers: Use a high-quality potting mix designed for container gardening. This ensures good drainage and nutrient balance.
- Sunlight and Water: Place the container in a spot where it will receive adequate sunlight. Container plants may require more frequent watering as they dry out faster than garden beds.
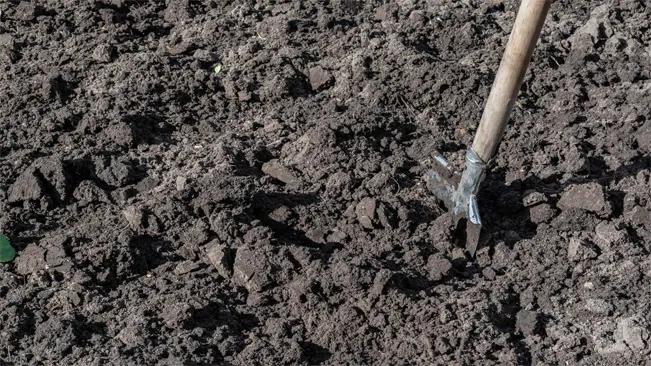
Preparing the Soil
Swiss chard thrives in nutrient-rich and well-drained soil. This means the soil should be able to retain enough moisture to nourish the plant while also allowing excess water to drain away to prevent root rot.
Steps to Prepare the Soil
- Test Your Soil
- Before you start, it’s a good idea to test your soil’s pH level. Swiss chard prefers a pH between 6.0 and 7.0. If your soil is too acidic or too alkaline, you can amend it accordingly with lime (to raise pH) or sulfur (to lower pH).
- Loosen the Soil
- Using a garden fork or a tiller, loosen the soil to a depth of about 12 inches. This depth is important as it allows the roots of the Swiss chard to penetrate the soil easily and access nutrients and moisture.
- Add Organic Matter
- Mix in well-decomposed compost or aged manure into the loosened soil. This not only adds essential nutrients but also improves soil structure. Compost helps sandy soil retain moisture and breaks up clay soil to improve drainage.
- Enhance Drainage (If Necessary)
- If your soil is heavy or clayey, consider adding some sand or perlite to improve drainage. Swiss chard does not do well in waterlogged soil.
- Level and Smooth the Soil
- After amending the soil, use a rake to level and smooth the surface. This prepares the bed for an even sowing of seeds and ensures that water will be distributed evenly during irrigation.
- Consider Raised Beds
- If drainage is a major concern, or if you have poor soil quality, using raised beds can be an effective solution. Raised beds offer improved drainage and make it easier to control the quality of the soil.
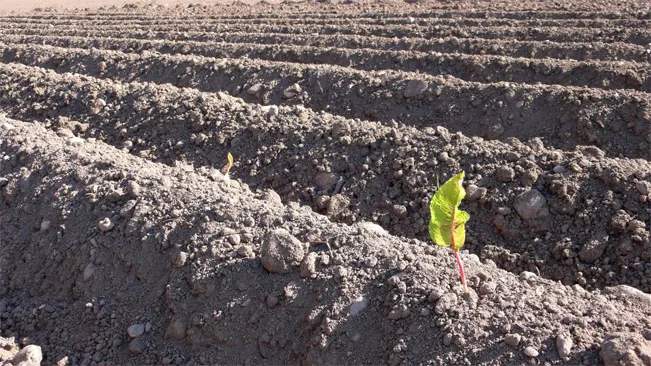
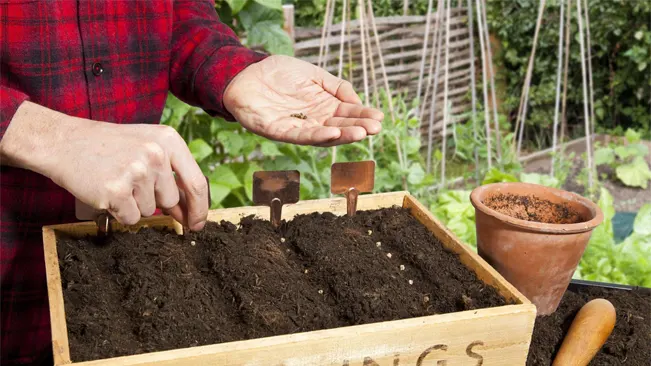
Planting the Seeds
- Seed Depth: Planting Swiss chard seeds at the right depth is crucial for successful germination. Half an inch deep is ideal because it allows the seeds to be covered sufficiently by soil without being so deep that they struggle to emerge. Seeds planted too shallowly might get washed away or fail to germinate due to insufficient moisture. Conversely, seeds planted too deeply might not have the energy to reach the surface.
- Spacing Between Seeds: Spacing the seeds 2-3 inches apart ensures each plant has enough room to develop its root system and foliage. Overcrowded plants can compete for nutrients and sunlight, leading to weaker growth. Proper spacing also helps with air circulation around the plants, reducing the risk of fungal diseases.
Considering Row Spacing
- Row Spacing: If you’re planting multiple rows of Swiss chard, spacing the rows about 18 inches apart is important. This spacing allows you to easily navigate between rows for maintenance tasks like weeding, watering, and harvesting. It also ensures that each plant gets adequate sunlight and air flow, which are essential for healthy growth.
Covering the Seeds
- Covering the Seeds: After placing the seeds in the prepared soil at the correct depth, cover them lightly with soil. This means just enough soil to block out light but not so much that the seedlings will struggle to emerge.
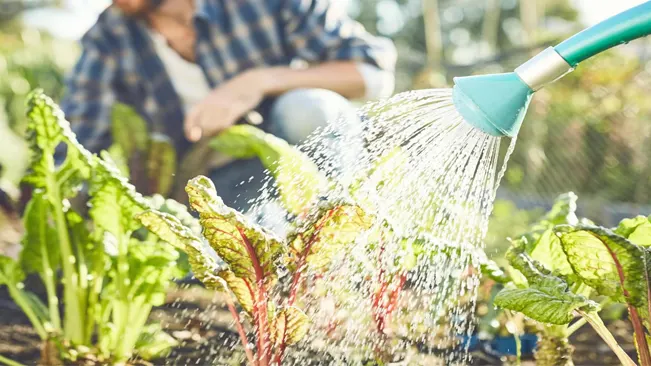
Watering After Planting
- Initial Watering: Gently water the area after planting the seeds. The key is to moisten the soil without disturbing the seeds. A soft spray or a watering can with a gentle flow is ideal. The goal is to provide enough moisture to encourage germination but not so much that the seeds get waterlogged.
Caring for Your Swiss Chard
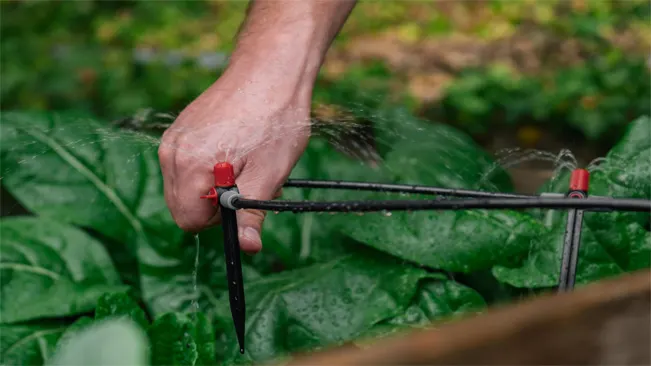
Watering
- Consistent Moisture: Swiss chard needs a steady supply of moisture to thrive. The soil should be kept evenly moist, but it’s important to avoid overwatering, which can lead to root rot and other issues.
- Watering Technique: Use a watering can or a hose with a gentle spray to avoid disturbing the soil or damaging young plants. Watering early in the morning is ideal as it allows the foliage to dry out over the day, reducing the risk of fungal diseases.
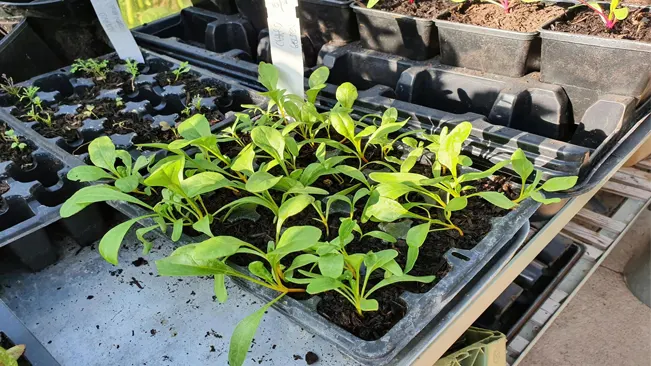
Thinning Seedlings
- Importance of Thinning: As the seedlings grow, they can become crowded, which can hinder their development. Thinning is the process of removing some seedlings to give the remaining ones enough space to grow.
- How to Thin: Gently pull out the smaller, weaker seedlings, leaving the stronger ones about 6-8 inches apart. You can transplant the removed seedlings to another part of your garden or use them as microgreens.
Mulching

- Benefits: Mulch helps retain soil moisture, suppresses weeds, and can regulate soil temperature. In hot climates, mulch is particularly beneficial.
- Types of Mulch: Organic mulches like straw, grass clippings, or shredded leaves are ideal. They gradually break down and add nutrients to the soil.
Fertilizing and Maintenance
Fertilizing Swiss Chard

- Type of Fertilizer: Swiss chard benefits from a balanced, all-purpose fertilizer. Look for fertilizers labeled as 10-10-10 or 20-20-20, which indicate an equal ratio of nitrogen, phosphorus, and potassium. These nutrients support leafy growth, root development, and overall plant health.
- Application Timing: Apply fertilizer at the time of planting to give the seeds a healthy start. A second application can be made when the plants are well established and starting to grow vigorously, usually about 4-6 weeks after planting.
- Method of Application: Fertilizer can be applied directly to the soil around the plants. Be careful not to let the fertilizer touch the plant leaves or stems to avoid burning them. Water the soil well after applying the fertilizer to help it soak in.
- Organic Options: For those preferring organic gardening, well-composted manure or a seaweed-based fertilizer are excellent alternatives. They release nutrients slowly and improve soil structure.
Maintaining Swiss Chard
- Watering: Swiss chard needs consistent moisture to thrive. Water the plants deeply once or twice a week, more frequently in hot, dry conditions. Avoid overhead watering to reduce the risk of leaf diseases.
- Weed Control: Weeds can compete with Swiss chard for nutrients, water, and light. Regularly hoeing or hand-pulling weeds is essential. Mulching around the plants with organic materials like straw or bark can help suppress weed growth and retain soil moisture.
- Pest and Disease Management: Swiss chard can attract pests like aphids and leaf miners. Inspect plants regularly and use organic pest control methods if necessary, such as insecticidal soap for aphids. Crop rotation and proper spacing can help prevent fungal diseases by ensuring good air circulation around the plants.
- Harvesting Techniques: Regular harvesting encourages more leaf production. You can either harvest the whole plant at once or use a “cut and come again” approach, where you pick the outer leaves and allow the inner ones to continue growing.
- Winter Care: In milder climates, Swiss chard can survive winter. Mulching heavily around the base of the plants can provide extra protection from cold temperatures.
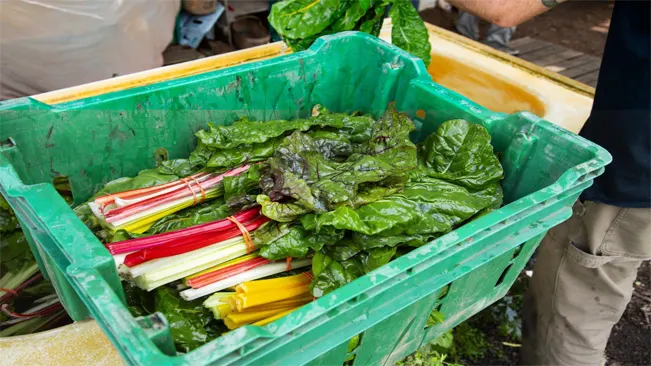
Harvesting
Swiss chard is a versatile and productive leafy green, and knowing how to harvest it correctly can maximize your yield and ensure the plant continues to produce fresh leaves. Here’s more detail on the two primary methods of harvesting:
Timing of Harvest

- Early Harvest: As mentioned, you can start harvesting Swiss chard as early as 4-6 weeks after planting. This early harvest typically involves picking young, tender leaves that are ideal for salads and dishes where a delicate texture is desired.
- Ongoing Harvest: Swiss chard can be harvested throughout its growing season. The leaves can be picked at various stages of growth, depending on your preference for leaf size and texture.
Harvesting Methods
Harvesting Whole Plants
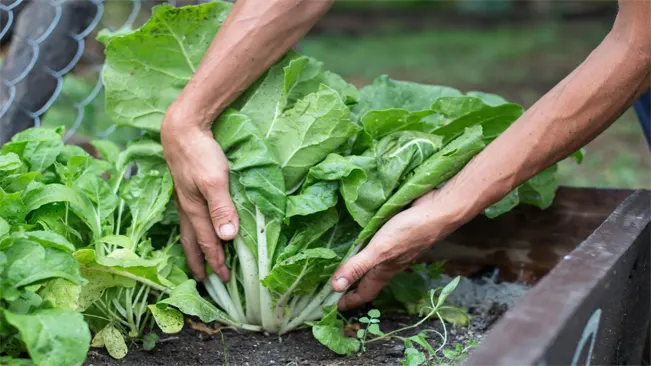
- Method: This involves pulling up or cutting the entire plant at the soil line.
- Best For: This method is ideal if you need a large quantity of Swiss chard at once or if you’re at the end of the season and want to clear the bed for new plants.
- Consideration: Once a plant is harvested entirely, it won’t regrow, so you need to have additional plants growing for a continuous supply.
“Cut and Come Again” Method
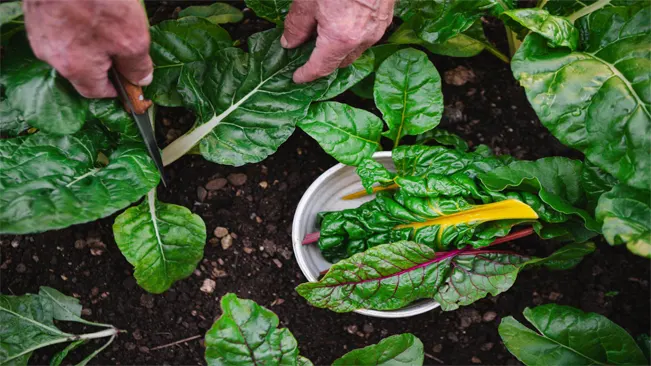
- Method: In this approach, you selectively harvest the outer, more mature leaves while leaving the inner, younger leaves intact. Gently twist or cut the leaves at the base, taking care not to damage the central part of the plant.
- Best For: This method is perfect for maintaining a continuous harvest. The plant will keep producing new leaves as long as the growing conditions are favorable.
- Regrowth: By using this method, the plant remains healthy and productive over a longer period. It encourages new growth and can lead to a more extended harvest season.
Post-Harvest Care
- Washing: Rinse the leaves under cool, running water to remove any dirt or insects. It’s best to wash them right before use, as moisture can accelerate spoilage.
- Storage: Store unwashed Swiss chard in a plastic bag in the refrigerator’s crisper drawer. It generally keeps well for about a week.
Tips for Optimal Harvesting
- Regular Picking: Regular harvesting encourages new growth. The more you pick, the more the plant will produce.
- Morning Harvest: The best time to harvest is in the morning when the leaves are most crisp and full of moisture.
- Avoid Overgrowth: Overly large leaves can become tough and lose flavor. Regular harvesting of medium-sized leaves ensures the best quality and taste.
- Gentle Handling: Swiss chard leaves can bruise easily, so handle them gently when harvesting and washing.
Conclusion
Planting Swiss chard seeds is a simple and rewarding process. With proper care, your Swiss chard will not only provide a delicious and nutritious addition to your meals but also add a splash of color to your garden. Happy gardening!
FAQs (Frequently Asked Questions)
- When is the best time to plant Swiss chard seeds?
Swiss chard seeds can be planted in early spring or late summer. They prefer cooler temperatures but can tolerate a range of conditions. - How deep should I plant Swiss chard seeds?
Plant the seeds about half an inch deep in the soil. - How much space do Swiss chard plants need?
Space the seeds 2-3 inches apart, and if planting multiple rows, space the rows about 18 inches apart. - Can I grow Swiss chard in containers?
Yes, Swiss chard can be grown in containers. Make sure the container is deep enough and has good drainage. - What type of soil is best for Swiss chard?
Swiss chard grows best in well-draining soil rich in organic matter. - How much sunlight does Swiss chard need?
Swiss chard prefers full sun to partial shade. Aim for at least 5-6 hours of sunlight per day. - How often should I water Swiss chard?
Keep the soil consistently moist but not waterlogged. The frequency will depend on your climate, but generally, a deep watering once or twice a week is sufficient. - Do I need to fertilize Swiss chard?
While not necessary, applying a balanced, all-purpose fertilizer can encourage healthy growth. - When can I start harvesting Swiss chard?
You can begin harvesting as early as 4-6 weeks after planting, when the leaves are young and tender. - How do I prevent pests and diseases in Swiss chard?
Keep the area weed-free, ensure good air circulation, and practice crop rotation. If pests are a problem, use appropriate organic pest control methods.

Kristine Moore
Forestry AuthorI'm Kristine Moore, a seasoned garden landscaping professional with over 30 years of experience. My extensive career has been dedicated to transforming outdoor spaces into stunning, sustainable landscapes. With a deep understanding of horticulture, design principles, and environmental stewardship, I have become a respected figure in the field, known for creating harmonious, visually appealing, and eco-friendly gardens. My commitment to excellence and continuous learning in landscaping trends and techniques has solidified my reputation as an expert in garden design and implementation.


Leave your comment