How to Plant Taro: Cultivating Nutritious Roots with Ease
- April 5, 2024
- 0 comment
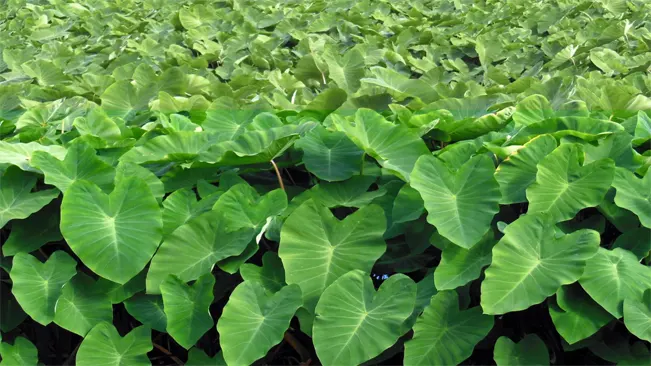
Taro, scientifically known as Colocasia esculenta, is a tropical plant cultivated primarily for its edible corms, a root vegetable most commonly known in different cuisines. It’s a staple in African, Oceanian, and South Asian cultures. Growing taro is not overly complicated, and this guide aims to provide you with step-by-step instructions on how to plant and care for your taro plants.
| Benefit | Description |
|---|---|
| Rich in Nutrients | Taro corms are a good source of fiber, vitamins C and E, and B vitamins, as well as minerals like potassium and magnesium. |
| Dietary Fiber | High in dietary fiber, which aids in digestion and promotes a healthy gut. |
| Low Glycemic Index | Taro has a low glycemic index, making it suitable for people with diabetes as it doesn’t cause a significant spike in blood sugar. |
| Heart Health | The fiber and potassium in taro can contribute to cardiovascular health by regulating blood pressure and cholesterol levels. |
| Antioxidant Properties | Contains antioxidants that help fight free radicals, potentially reducing the risk of chronic diseases. |
| Gluten-Free | Taro is a gluten-free food option, ideal for those with celiac disease or gluten sensitivity. |
| Promotes Healthy Vision | Contains vitamin E and beta-carotene, which are essential for eye health. |
| Supports Immune System | The vitamin C content in taro supports the immune system, helping the body resist infections. |
| Good Energy Source | Taro is a complex carbohydrate, providing a steady release of energy over time. |
| Versatility in Cooking | Taro can be cooked in various ways and is a staple in many cultural cuisines, offering culinary diversity. |
| Skin Health | Vitamins C and E in taro are known for their skin health benefits, promoting a healthier complexion. |
List on How To Plant Taro
- Choosing the Right Variety
- Selecting and Preparing a Planting Site
- Planting Taro Corms
- Watering and Weeding
- Fertilizing
- Pest and Disease Management
- Harvesting
Choosing the Right Variety
Choosing the right variety of taro for your garden is an important decision that depends on both your local climate and your intended use for the taro. Here’s a bit more information about the different varieties and considerations for selecting the most suitable one.
Common Varieties of Taro
Dasheen (Colocasia esculenta ‘Dasheen’)
- Description: This is a large variety known for its sizable corms and broad leaves.
- Culinary Use: Its corms are starchy and are commonly used in savory dishes.
- Climate Suitability: It thrives in humid, tropical climates but can be grown in temperate zones during the warm season.
Eddoe (Colocasia esculenta ‘Eddoe’)
- Description: Eddoe is smaller than Dasheen and is known for its rounded, hairy corms.
- Culinary Use: Eddoe has a nuttier flavor and is often used in stews and soups.
- Climate Suitability: It’s adaptable to a range of climates and can tolerate slightly cooler temperatures than other varieties.
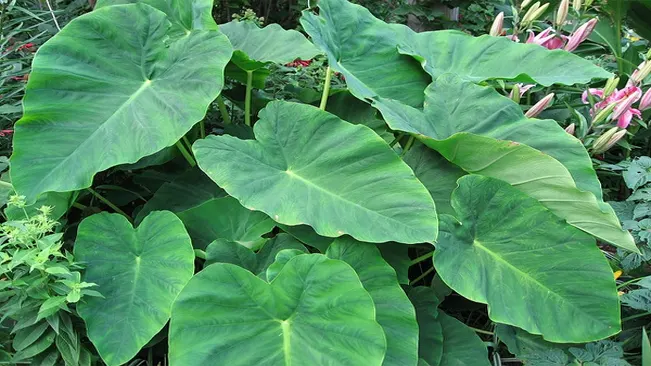
Japanese Taro (Colocasia esculenta ‘Japanese Taro’)
- Description: Recognizable by its purple-tinged leaves, this variety is visually striking.
- Culinary Use: Often used in Asian cuisine, both the leaves and corms are edible.
- Climate Suitability: Prefers a warmer climate and high humidity.
Factors to Consider When Choosing a Variety
- Climate Compatibility: Some varieties are more tolerant of cooler temperatures, while others require a strictly tropical environment.
- Culinary Preferences: The taste and texture of taro can vary significantly. Some are better for frying, while others are more suitable for soups and stews.
- Size and Growth Requirements: Larger varieties like Dasheen need more space and resources, whereas smaller varieties like Eddoe are suitable for smaller gardens or container growing.
- Availability of Corms or Seedlings: Availability might vary depending on your location, so choose a variety that is readily obtainable.
Selecting and Preparing a Planting Site
Selecting the Right Location
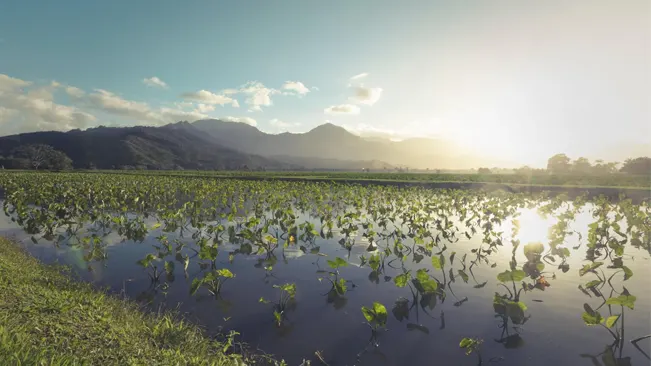
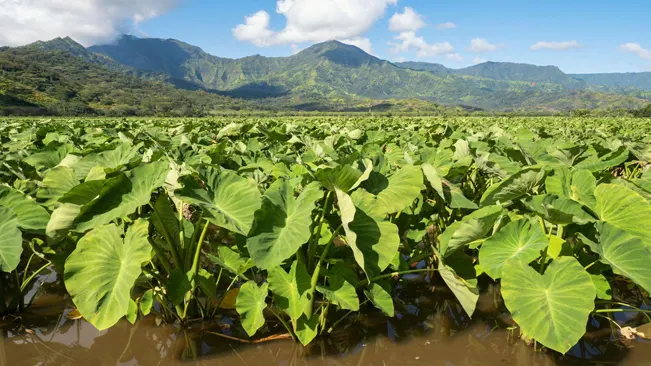
- Climate Considerations: Taro is a tropical plant and prefers warm and humid conditions. If you live in a cooler climate, you might need to create a microclimate or use protective measures during colder months.
- Sunlight Requirements: While taro can tolerate partial shade, it flourishes best in areas receiving full sunlight. This is especially important for the development of the corm, which is the edible part of the plant.
- Proximity to Water Sources: Taro is a water-loving plant. If possible, choose a site near a natural water source like a pond or a stream. Alternatively, ensure you have an efficient irrigation system in place to maintain constant soil moisture.
Preparing the Soil
- Soil Type: Taro grows best in loamy soil, which allows for proper drainage while retaining sufficient moisture. Avoid areas with heavy clay or sandy soils unless they can be significantly amended.
- Soil Fertility: Enrich the soil with organic compost or well-rotted manure before planting. This not only improves soil fertility but also enhances soil structure, aiding in water retention and root penetration.
- pH Level: Taro prefers slightly acidic to neutral soil (pH 5.5 to 7.0). If necessary, test the soil pH and adjust it using sulfur to lower the pH or lime to raise it.
- Drainage: Although taro needs ample water, good drainage is crucial to prevent root rot. If the site is prone to waterlogging, consider raised beds or ridges to improve drainage.
- Preparing the Bed: Clear the area of weeds, rocks, and other debris. Loosen the soil to a depth of about 12-15 inches to allow the roots to penetrate and grow freely. Incorporate the organic matter during this process.
- Mulching: After planting, applying a layer of organic mulch can help retain moisture, suppress weeds, and add nutrients as it decomposes.
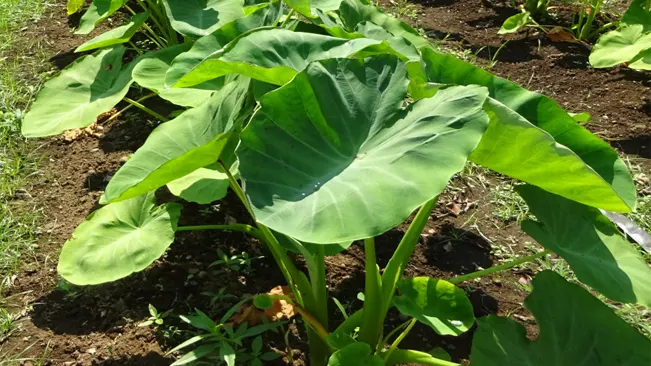
Planting Taro Corms
Selecting Taro Corms
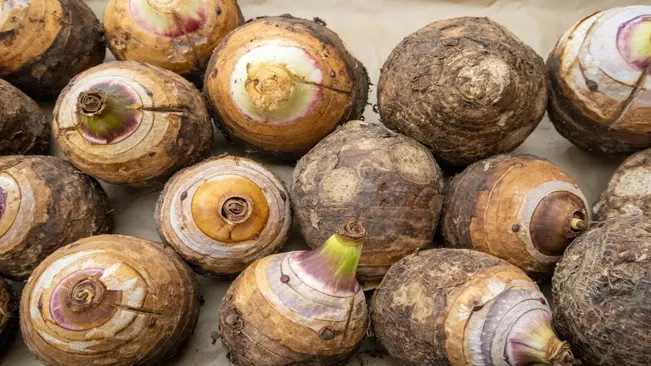
- Source: Ensure that you purchase taro corms from a reputable garden center or supplier. Look for corms that are firm and free of soft spots or signs of rot. The quality of the corms can significantly affect the growth and yield of your taro plants.
Preparing for Planting
- Curing: Some gardeners recommend curing the corms before planting. This involves letting them dry in a shaded, well-ventilated area for a few days to harden the skin, which can help prevent rot.
- Cutting: Large corms can be cut into smaller pieces, each with a portion of the growing point or “eye.” Ensure each piece is sufficiently large, usually around the size of a small potato.
Planting Process
- Depth and Spacing: Plant the corms about 2-3 inches deep. Proper depth is crucial; too shallow planting might lead to exposure, while too deep can hinder growth. Space the plants approximately 2 feet apart. This spacing allows each plant enough room to grow and ensures adequate airflow, reducing the risk of disease.
- Soil Requirements: Taro prefers loamy, fertile soil with good drainage. If your soil is heavy clay or too sandy, consider amending it with organic matter like compost to improve its texture and nutrient content.
- Orientation: If your corms have visible growing points or eyes, plant them facing upwards. This orientation encourages the sprouts to grow towards the surface more easily.
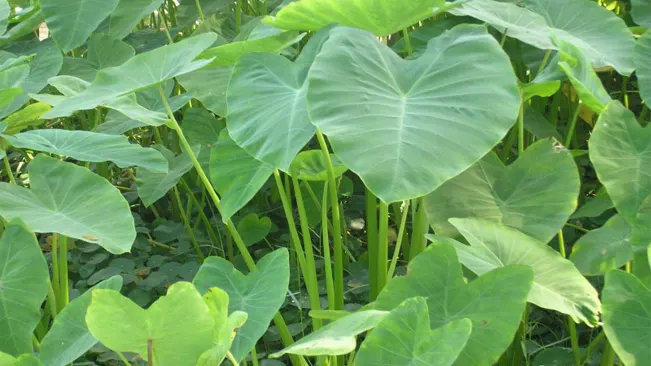
Watering and Weeding
Watering Taro Plants
- Frequency of Watering: This largely depends on your climate and the weather. In hot, dry conditions, taro plants may need watering every day. In cooler, more humid climates, less frequent watering might be sufficient.
- Amount of Water: Ensure the soil is kept evenly moist but not overly saturated. The goal is to mimic the naturally damp conditions of taro’s native habitat.
- Method of Watering: Drip irrigation or soaker hoses are ideal as they deliver water directly to the roots and minimize moisture on the leaves, which can lead to fungal diseases. If using a hose or watering can, water at the base of the plant rather than overhead.
- Monitoring Soil Moisture: Check the soil moisture regularly. A simple way to do this is to insert your finger into the soil near the plant. If it feels dry at about an inch below the surface, it’s time to water.
- Adjustments for Weather and Season: Be adaptable in your watering schedule, increasing water during dry, hot periods and reducing it during cooler, rainy spells.
Weeding Around Taro Plants
- Regular Weeding: Check for and remove weeds frequently, as they can grow rapidly and become more difficult to manage if left unchecked.
- Mulching: Applying a layer of organic mulch around taro plants can suppress weeds, retain soil moisture, and add nutrients to the soil as it decomposes.
- Avoiding Herbicides: While chemical herbicides can control weeds, they might harm the taro plants or affect the soil quality. It’s best to weed manually or use organic weed control methods.
- Gentle Weeding: Be careful when weeding around taro plants. Their roots are relatively shallow, and aggressive weeding can disturb or damage them.
- Cultivating Soil: Lightly cultivating the top layer of soil can help control weeds without disturbing taro roots.
Fertilizing
Choosing the Right Fertilizer
- Balanced Fertilizer: A balanced fertilizer, typically represented with equal N-P-K numbers like 10-10-10, is ideal for taro as it provides an equal proportion of the primary nutrients.
- Organic Options:
- Fish Emulsion: This is a fast-acting, organic liquid fertilizer rich in nitrogen and other nutrients. It’s beneficial for leafy growth and overall plant health.
- Compost Tea: Made by steeping compost in water, it’s a gentle, organic way to provide nutrients. It improves soil structure and provides a range of micro-nutrients.
Application Frequency and Method
- Frequency: Taro plants should be fertilized every 4-6 weeks. This frequency can be adjusted based on the plant’s growth stage and the specific fertilizer’s instructions.
- Application Method:
- Surface Application: Spread granular fertilizer evenly around the plant, avoiding direct contact with the stems or leaves. Water the soil after application to help the nutrients seep into the soil.
- Liquid Fertilizers: Apply directly to the soil near the base of the plant. It’s also possible to use foliar feeding, where diluted liquid fertilizer is sprayed onto the leaves.
Pest and Disease Management
Pest Management in Taro Cultivation
- Common Pests
- Taro is susceptible to several pests, with aphids and spider mites being the most common. Others include taro beetles, armyworms, and leafhoppers.
- Aphids
- These small, sap-sucking insects can cause leaf curling and stunted growth. They also excrete a sticky substance called honeydew, which can lead to sooty mold.
- Spider Mites
- Spider mites, particularly in dry conditions, can cause yellowing and speckling of leaves. Severe infestations can lead to leaf loss.
- Organic Control Methods
- Neem oil or insecticidal soaps can be effective against both aphids and spider mites. Introducing natural predators like ladybugs can also help control aphid populations.
- Monitoring
- Regular inspection of the plants, especially the undersides of leaves, is crucial for early detection and control of pest infestations.
Disease Management in Taro Cultivation
- Fungal Diseases
- Taro is prone to fungal diseases like leaf blight and root rot. These diseases are often exacerbated by wet conditions.
- Leaf Blight
- Symptoms include water-soaked lesions on leaves which can enlarge and cause leaf dieback. Proper air circulation and avoiding overcrowding can help prevent this.
- Root Rot
- Over-watering or poor drainage can lead to root rot, characterized by soft, brown roots and stunted growth. Ensuring well-drained soil is key.
- Preventive Measures
- Avoiding overhead watering helps keep foliage dry and reduces the incidence of fungal diseases. Mulching can help maintain soil moisture without making the surface too wet.
- Cultural Practices
- Crop rotation and removal of plant debris reduce the risk of disease carryover. Using disease-free corms for planting is also critical.
- Chemical Control
- If necessary, fungicides can be applied, but it’s advisable to use them as a last resort and to opt for eco-friendly options when possible.
Harvesting
Taro’s readiness for harvest can largely be identified by observing its leaves. As you noted, the leaves will begin to yellow and die back, usually around 6-8 months after planting. However, this can vary depending on the variety and growing conditions. In some cases, taro might be ready earlier or may require a few more weeks.
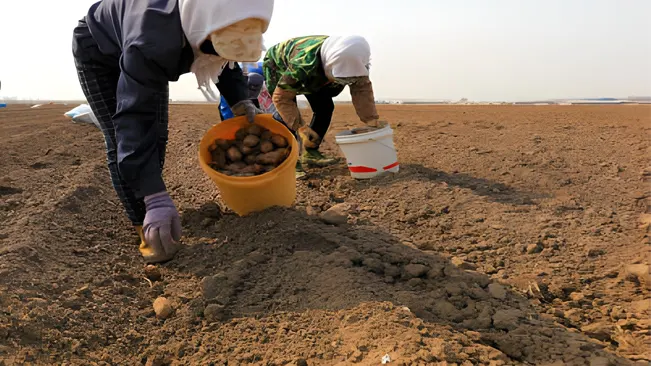
How to Harvest
- Preparation: Before starting the harvest, ensure you have the right tools. A spade or a garden fork is usually ideal for this task.
- Identifying Mature Corms: Look for plants with the largest leaves, as they are likely to have larger, more mature corms.
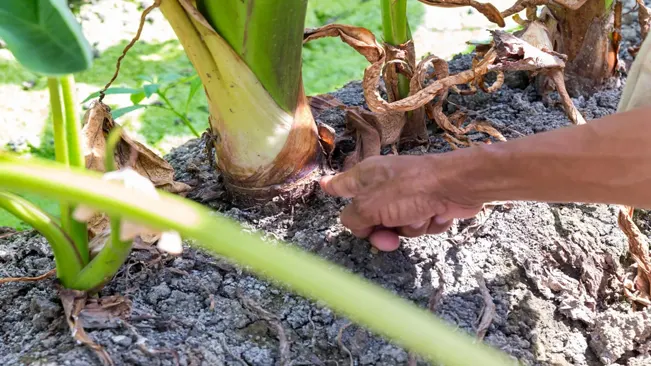
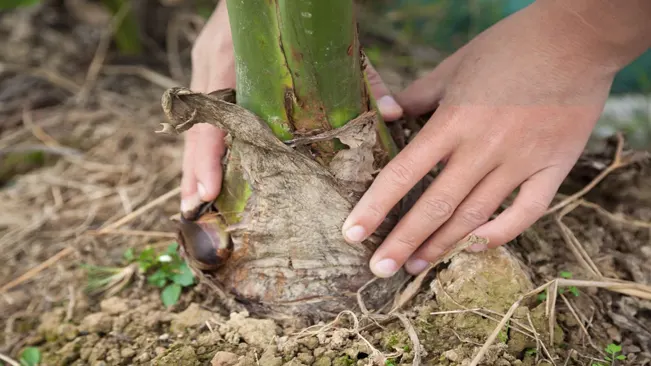
- Digging Up Corms: Gently dig around the plant, starting a few inches away from the base to avoid damaging the corm. Loosen the soil around the plant.
- Extracting the Corms: Carefully lift the plant out of the ground. You may need to use your hands to feel around in the soil to locate and extract all parts of the corm.
- Handling Precautions: Remember that raw taro can be irritating to the skin and mucous membranes due to calcium oxalate crystals, so it’s advisable to wear gloves while handling them.
Post-Harvest Processing
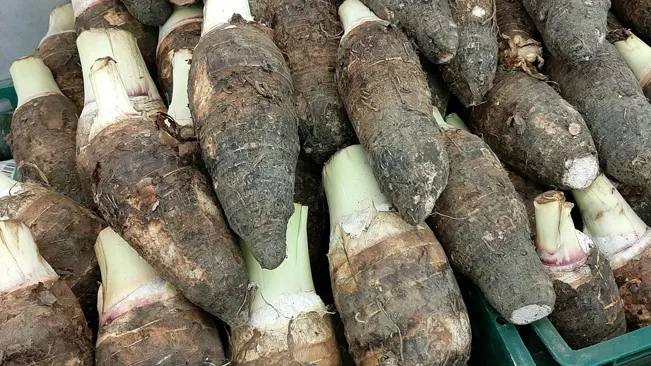
- Cleaning: Rinse the harvested corms to remove soil. They can be stored in a cool, dry place until ready for use.
- Curing: Some varieties benefit from a curing process, which involves letting the corms dry in a well-ventilated area for a few days. This process can improve the storage life and flavor.
- Storing: Store the corms in a cool, dry place. Properly stored taro corms can last several weeks.
Use and Cooking
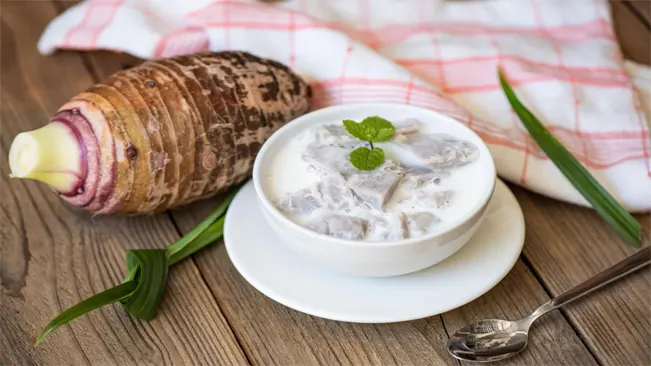
- Taro corms are quite versatile in the kitchen. They can be boiled, baked, fried, or added to stews. It’s important to cook taro thoroughly, as raw corms contain toxins that are neutralized by cooking.
Conclusion
Growing taro can be a rewarding experience, especially when it’s time to taste the fruits of your labor. With proper care and attention, your taro plants will thrive, providing you with a unique and delicious root vegetable. Remember to always handle taro with care, as the raw leaves and corms can be toxic due to calcium oxalate and should be cooked before consumption.
FAQs (Frequently Asked Questions)
- What is the best time of year to plant taro?
- Taro should be planted at the beginning of the warm season. In tropical climates, it can be planted year-round, but in cooler areas, it’s best to plant after the last frost.
- Taro should be planted at the beginning of the warm season. In tropical climates, it can be planted year-round, but in cooler areas, it’s best to plant after the last frost.
- How much sun does taro need?
- Taro plants prefer partial to full sunlight. They can tolerate some shade but thrive best with several hours of direct sunlight daily.
- Taro plants prefer partial to full sunlight. They can tolerate some shade but thrive best with several hours of direct sunlight daily.
- How deep should taro corms be planted?
- Taro corms should be planted about 2-3 inches deep in the soil.
- Taro corms should be planted about 2-3 inches deep in the soil.
- How often should taro be watered?
- Taro needs consistent moisture. Water the plants regularly to keep the soil evenly moist but not waterlogged.
- Taro needs consistent moisture. Water the plants regularly to keep the soil evenly moist but not waterlogged.
- What type of soil is best for taro?
- Taro grows best in rich, well-drained soil with a good amount of organic matter.
- Taro grows best in rich, well-drained soil with a good amount of organic matter.
- How far apart should taro plants be spaced?
- Space taro plants about 2 feet apart to give them enough room to grow.
- Space taro plants about 2 feet apart to give them enough room to grow.
- When is taro ready to harvest?
- Taro is usually ready for harvest 6-8 months after planting, when the leaves begin to yellow and die back.
- Taro is usually ready for harvest 6-8 months after planting, when the leaves begin to yellow and die back.
- Do taro plants need fertilization?
- Yes, feeding taro plants every 4-6 weeks with a balanced fertilizer can promote healthy growth.
- Yes, feeding taro plants every 4-6 weeks with a balanced fertilizer can promote healthy growth.
- How do I prevent pests and diseases in taro plants?
- Regularly inspect for pests and use organic pesticides if needed. Avoid overhead watering to prevent fungal diseases.
- Regularly inspect for pests and use organic pesticides if needed. Avoid overhead watering to prevent fungal diseases.
- Can taro be grown in containers?
- Yes, taro can be grown in large containers. Ensure the container has good drainage and is big enough to accommodate the plant’s growth.

Kristine Moore
Forestry AuthorI'm Kristine Moore, a seasoned garden landscaping professional with over 30 years of experience. My extensive career has been dedicated to transforming outdoor spaces into stunning, sustainable landscapes. With a deep understanding of horticulture, design principles, and environmental stewardship, I have become a respected figure in the field, known for creating harmonious, visually appealing, and eco-friendly gardens. My commitment to excellence and continuous learning in landscaping trends and techniques has solidified my reputation as an expert in garden design and implementation.


Leave your comment