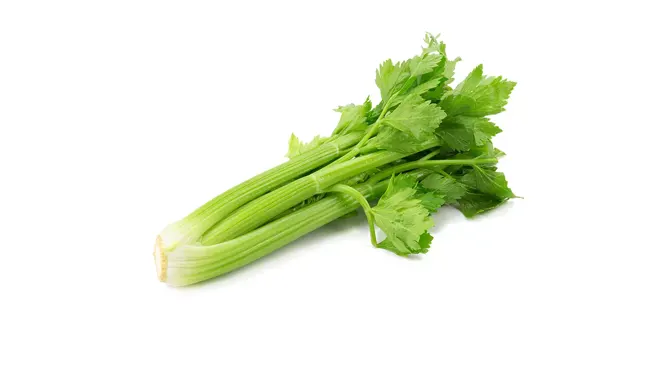
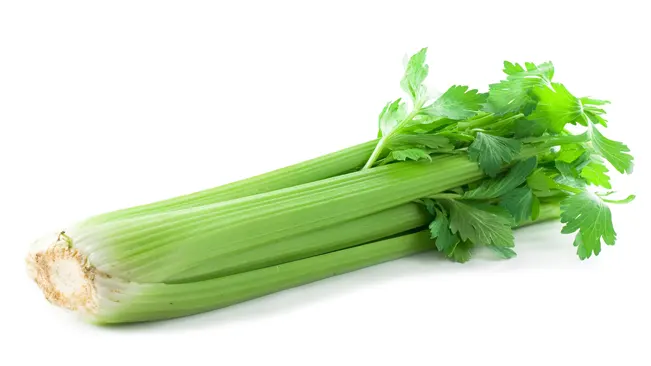
How to Grow Celery
- March 28, 2024
- 0 comment
Discover how to grow Celery in your garden with this comprehensive guide, which will lead you through every step from seed planting to the rewarding harvest of this crunchy and flavorful vegetable, known for its culinary uses and health benefits.
| Benefit | Description |
|---|---|
| Low in Calories | Celery is very low in calories, making it a great choice for weight management and low-calorie diets. |
| High in Fiber | The high fiber content in celery supports digestive health and can help regulate bowel movements. |
| Rich in Vitamins & Minerals | Celery contains vitamins such as Vitamin A, K, and C, as well as minerals like potassium and folate. |
| Hydrating | Due to its high water content, celery is hydrating and can help in maintaining body fluid balance. |
| Antioxidant Properties | Contains antioxidants that combat oxidative stress and inflammation in the body. |
| Supports Heart Health | The presence of antioxidants, fiber, and potassium in celery contribute to cardiovascular health. |
| Lowers Inflammation | Compounds like apigenin and luteolin in celery have anti-inflammatory properties. |
| May Lower Blood Pressure | Phthalides in celery may help lower blood pressure by relaxing blood vessel walls. |
| Aids in Weight Loss | Being low in calories and high in fiber, celery can be a beneficial part of a weight loss diet. |
| Improves Cholesterol Levels | Celery might help reduce LDL (bad) cholesterol levels. |
List on How To Grow Celery
- Choosing the Right Variety
- Planting Seeds
- Transplanting Seedlings
- Ongoing Care
- Pests and Diseases
- Harvesting
Choosing the Right Variety
Celery (Apium graveolens) comes in a range of varieties, each with unique characteristics that make them more suitable for different growing conditions and culinary uses. Here are some factors to consider when choosing a celery variety:
Climate Adaptation
- Cool-weather varieties: Some celery types, like ‘Tall Utah’, are more tolerant of cooler temperatures. They are ideal for regions with milder summers and cooler springs and falls.
- Heat-tolerant varieties: Varieties like ‘Ventura’ are better suited for warmer climates. They can withstand higher temperatures without bolting (going to seed prematurely).
Color and Flavor
- Green varieties: These are the most common and have a classic celery flavor. They are crisp and can have a range of flavors from mild to strong. ‘Tall Utah’ is an example of a crisp, flavorful green variety.
- White or blanched varieties: These tend to be more tender and have a milder flavor. The process of blanching, either naturally or through garden techniques, reduces bitterness. An example is ‘Golden Self Blanching’.
Growth Rate and Size
- Fast-growing varieties: These are suitable if you have a shorter growing season. ‘Tango’, for instance, is known for its quicker maturity and disease resistance.
- Large varieties: If space isn’t a constraint, choosing a larger variety like ‘Giant Red’ can yield a more substantial crop.
Popular Celery Varieties
Tall Utah
- Known for its long, sturdy stalks.
- Has a classic celery flavor, crisp texture.
- Good disease resistance and relatively easy to grow.
Ventura
- Adapts well to warmer climates.
- Produces well-formed stalks with a traditional celery flavor.
- More tolerant of fluctuations in weather.
Tango
- Faster maturing, which is great for shorter growing seasons.
- Known for its smooth texture and good flavor.
- Resistant to common celery diseases.
Golden Self Blanching
- A heritage variety, known for its yellowish stalks.
- Has a more delicate flavor and less fibrous texture.
- Ideal for gourmet cooking due to its unique color and taste.
Planting Seeds
When to Plant
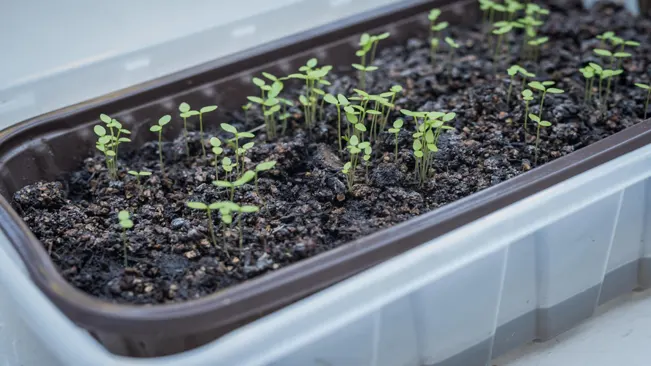
- Celery seeds have a longer germination period compared to many other vegetables. Thus, starting them indoors about 10-12 weeks before the last expected frost date in your area is crucial. This early start is important because celery needs a long growing season and fares best when it can mature during cooler weather.
Why This Timing Matters
- Slow Germination: Celery seeds can take 1-3 weeks to germinate. Early planting compensates for this slow start.
- Long Growing Season: Celery typically requires around 130-140 days from seed to harvest.
- Temperature Sensitivity: Celery grows best in cooler temperatures. Planting early ensures the bulk of growth occurs in favorable conditions.
Seed Starting Tips
Selecting the Right Mix and Container

- Seed-Starting Mix: Use a high-quality, fine seed-starting mix. This mix should be light and fluffy to allow for good air circulation and drainage, promoting healthy root development.
- Containers: Shallow trays or small pots are ideal. Ensure they have good drainage holes.
Sowing Seeds
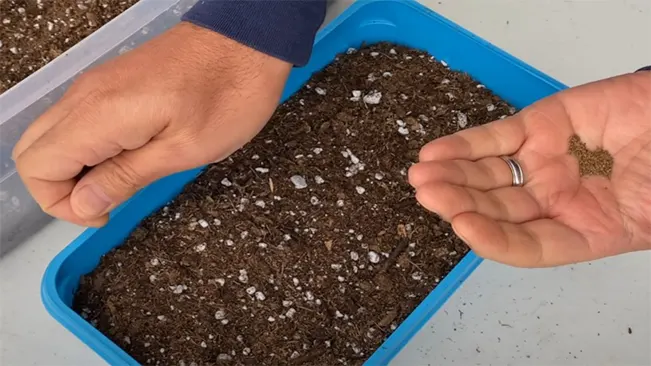
- Sowing Technique: Sow the seeds thinly to avoid overcrowding. You can lightly press the seeds into the soil or sprinkle a very thin layer of soil over them.
- Depth: Celery seeds need light to germinate, so they should be barely covered with soil or even left partially uncovered.
Moisture and Watering
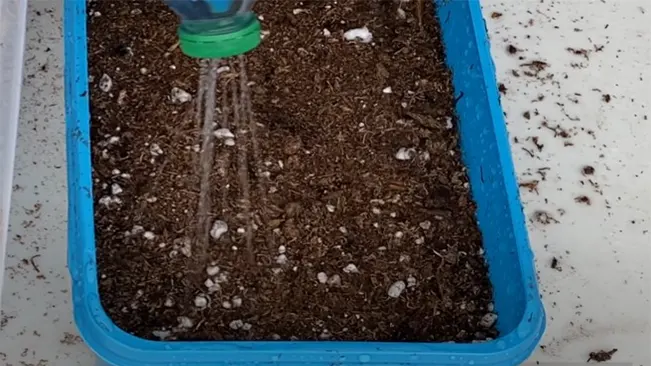
- Moisture Level: The soil should be consistently moist but not waterlogged. Overly wet soil can lead to seed rot or fungal diseases.
- Watering Method: Use a spray bottle to gently mist the soil, or water from below by placing trays in shallow water. This avoids disturbing the tiny seeds.
Light and Temperature
- Light: Celery seeds need plenty of light to germinate. Place the trays in a bright location or use grow lights. Aim for 12-16 hours of light per day.
- Temperature: Maintain an ambient temperature of around 70°F (21°C). Consistent warmth is key to successful germination. Using a heat mat can help, especially in cooler environments.
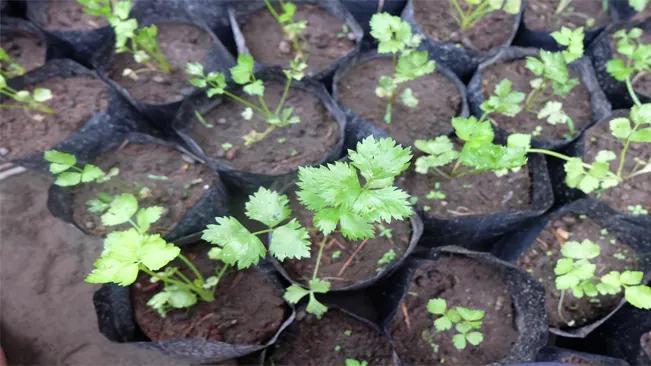
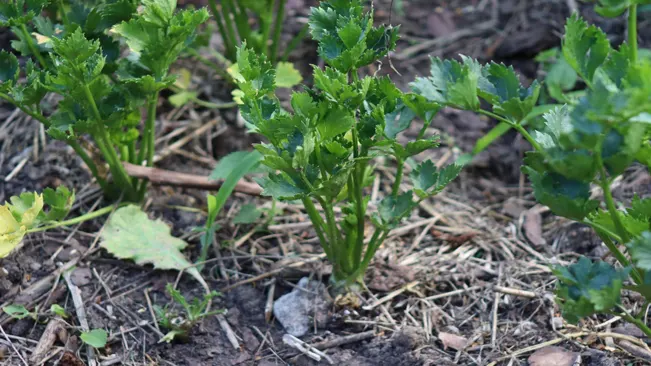
Transplanting Seedlings
Timing is crucial when transplanting celery seedlings. The process should begin when the seedlings have developed 3-4 true leaves. This stage indicates that they are strong enough to withstand the transition to outdoor conditions. Additionally, it’s important to wait until the outdoor temperatures are consistently above 50°F (10°C). Celery, being sensitive to cold, requires a mild environment to thrive.
The Hardening Off Process
Before transplanting, seedlings need to acclimate to their future outdoor environment, a process known as “hardening off.” This step is vital to prevent shock that can occur from sudden changes in temperature, light, and wind. Here’s how to do it:
- Start Gradually: About a week before transplanting, begin by placing the seedlings outside in a sheltered spot for a few hours each day, avoiding extreme temperatures and direct sunlight.
- Increase Exposure: Gradually increase the time the seedlings spend outdoors each day, exposing them to more direct sunlight and varying temperatures.
- Monitor Closely: Keep an eye on the weather forecast to avoid exposing young plants to harsh conditions like strong winds or late frosts.
Choosing the Right Location
Celery thrives in full sun and rich, fertile soil. When selecting a spot in your garden, consider these factors:
- Sunlight: Choose a location that receives at least 6 hours of direct sunlight daily.
- Soil Quality: Celery prefers soil that is rich in organic matter. Enhance your soil by adding compost or well-rotted manure to provide the nutrients the plants need.
- Soil Drainage: Ensure the chosen spot has good drainage. While celery needs moist soil, waterlogged conditions can be detrimental.
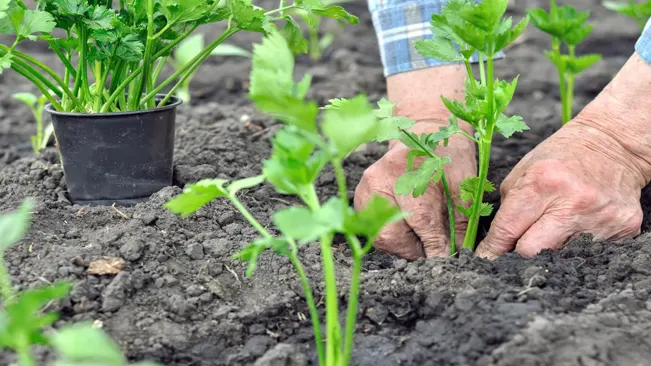
Planting the Seedlings
Once the seedlings are hardened off and the location is prepared, it’s time to transplant:
- Spacing: Plant the celery seedlings 8-10 inches apart. This spacing allows adequate room for growth and airflow between plants, reducing the risk of disease.
- Row Arrangement: Arrange the plants in rows that are 2-3 feet apart. This distance provides ample space for easy maintenance and harvesting.
- Planting Depth: Plant the seedlings at the same depth they were growing in the containers. Burying them too deep can hinder their growth.
- Watering: Immediately after transplanting, water the seedlings thoroughly to help settle the soil around the roots and reduce transplant shock.
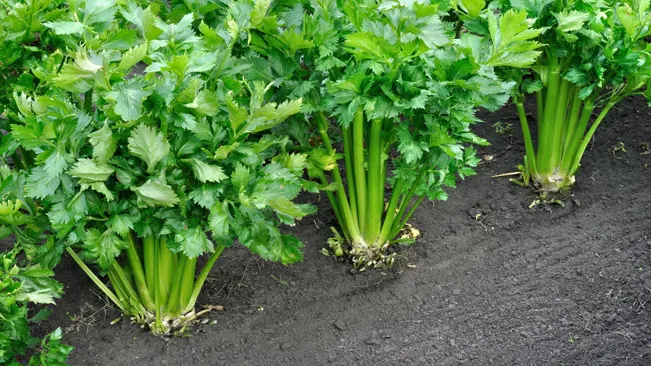
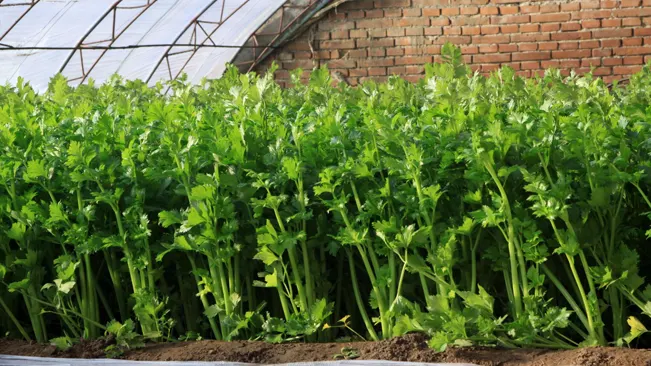
Ongoing Care
Watering
- Importance of Consistent Moisture: Celery plants have shallow root systems, making them particularly sensitive to moisture levels in the soil. Inconsistent watering can lead to problems like stringy or hollow stalks, and can stress the plant, leading to poor growth or bolting (flowering prematurely).
- How to Water Properly: It’s ideal to water deeply and less frequently, encouraging deeper root growth. During dry spells or in particularly hot climates, you may need to water celery once or even twice a day to keep the soil consistently moist. Early morning watering is most effective as it allows water to soak deeply into the soil and prevents evaporation.
- Signs of Over or Under Watering: If the leaves of the celery plant start to yellow or the stalks appear wilted, this could be a sign of over or under-watering. It’s crucial to strike a balance – the soil should feel like a wrung-out sponge, moist but not waterlogged.
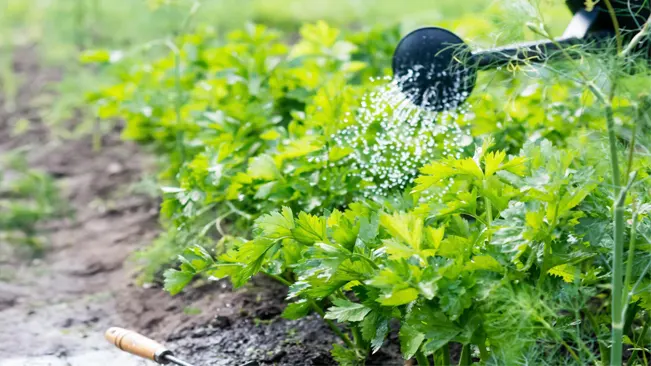
Feeding
- Nutritional Needs: Celery is a nutrient-hungry plant. It thrives when there’s a steady supply of essential nutrients, particularly nitrogen, which supports lush, healthy leaf growth.
- Fertilizer Selection and Application: An all-purpose, balanced fertilizer (like a 10-10-10 NPK formula) works well. You can start applying fertilizer a couple of weeks after transplanting and then continue every 3-4 weeks. Follow the instructions on the fertilizer package for the correct amounts.
- Organic Options: For those who prefer organic gardening, well-rotted manure or compost can be excellent alternatives. These natural options not only feed the plant but also improve soil structure.
Mulching
- Purpose of Mulching: Mulch helps in maintaining soil moisture by reducing evaporation. It also aids in regulating soil temperature, which is beneficial for celery’s root development.
- Types of Mulch: Organic mulches like straw, shredded bark, or leaf mold are preferable. These materials break down over time, adding organic matter and nutrients back into the soil.
- Application Tips: Apply a layer of mulch around the base of the celery plants, making sure it’s a few inches away from the stems to prevent rot. The layer should be approximately 2-3 inches thick.
- Weed Suppression: Mulch also plays a crucial role in suppressing weeds, which can compete with celery for nutrients and water.
Pests and Diseases
Watch out for common pests like aphids and diseases such as pink rot. Regular inspection and organic preventive measures can help keep these problems at bay.
Pests Affecting Celery
- Aphids: These small, sap-sucking insects can cause the leaves to curl and stunt the growth of the plant. They often cluster on the undersides of leaves.Management:
- Introduce beneficial insects like ladybugs and lacewings, which are natural predators of aphids.
- Use a strong jet of water to dislodge aphids from the plants.
- Apply insecticidal soaps or neem oil as an organic solution.
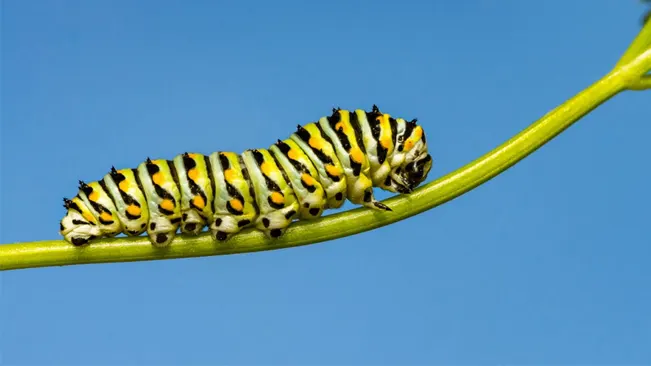
- Celery Worms: Also known as parsley worms, these caterpillars can chew large holes in the leaves.Management:
- Handpick and remove the caterpillars when you see them.
- Use Bacillus thuringiensis (Bt), an organic bacterial pesticide, to control their population.
- Slugs and Snails: These pests are especially problematic in moist and cool conditions, leaving holes in leaves and stems.Management:
- Set up traps using beer or yeast in a shallow dish to attract and drown them.
- Apply diatomaceous earth around the base of the plants.
Diseases Affecting Celery
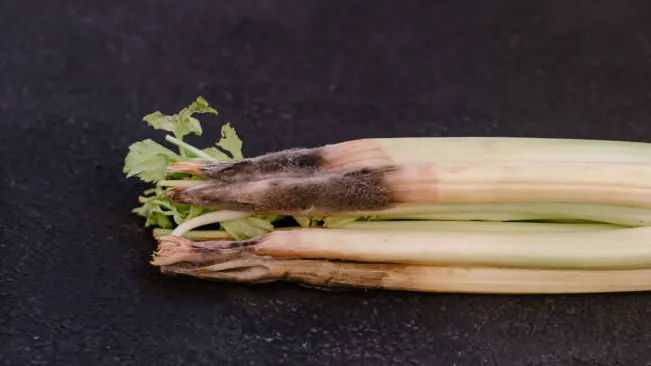
- Pink Rot: This fungal disease causes pinkish or salmon-colored patches on the stems, leading to the plant’s collapse.
- Management
- Ensure good air circulation around plants to reduce humidity.
- Avoid overhead watering to keep foliage dry.
- Use fungicides as a preventive measure, especially in areas previously affected by the disease.
- Early Blight (Cercospora leaf spot): This disease presents as small brown spots on leaves, which can expand and lead to significant leaf drop.
- Management:
- Remove and destroy infected leaves.
- Apply copper-based fungicides as a preventive measure.
- Rotate crops to prevent the build-up of soil pathogens.
- Fusarium Yellows: This disease is characterized by yellowing and wilting of leaves and can be fatal to the plant.
- Management:
- Plant resistant celery varieties.
- Maintain a balanced soil pH and ensure proper nutrition to strengthen the plants against diseases.
- Avoid planting celery in the same area where the disease has been previously noted.
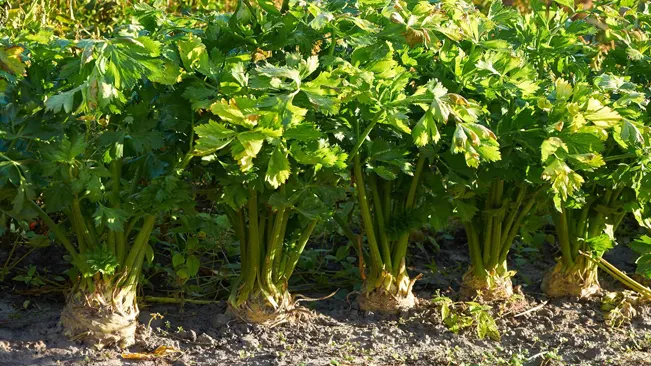
Harvesting
Timing is crucial for harvesting celery. The typical window for harvest is around 3 to 4 months after transplanting, but this can vary depending on the variety and growing conditions. Here are some signs that your celery is ready for harvest:
- Height of Stalks: The celery stalks should be around 8 inches tall. However, the height can vary with different varieties.
- Firmness and Texture: The stalks should be firm and crisp to the touch. If they’re too soft or fibrous, it’s either too early or too late for the ideal harvest.
- Overall Plant Size: A mature celery plant will have filled out with a robust bunch of stalks.
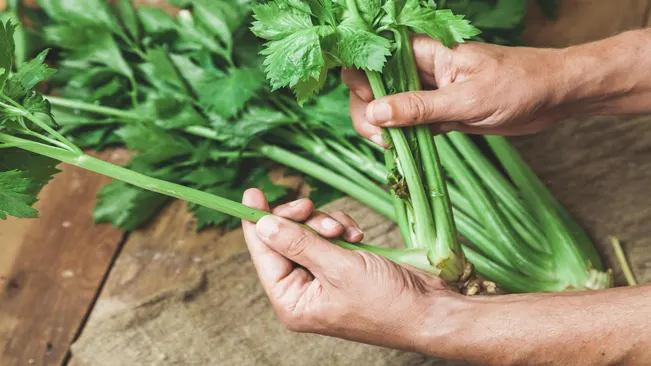
How to Harvest Celery
Harvesting the Whole Plant

- Choose a day when the soil is relatively dry to make the process easier.
- Use a sharp, clean knife to cut the entire celery plant at soil level.
- Be sure to cut straight across to avoid damaging the plant.
- This method is ideal when you need a large quantity of celery at once.
Harvesting Individual Stalks
- This method allows the plant to continue growing and producing more stalks.
- Carefully select the outer stalks, which are typically more mature than the inner ones.
- Cut each stalk at the base, near the soil level, being careful not to damage the adjacent stalks.
- This method is great for continuous harvesting and ensures a fresh supply over a longer period.
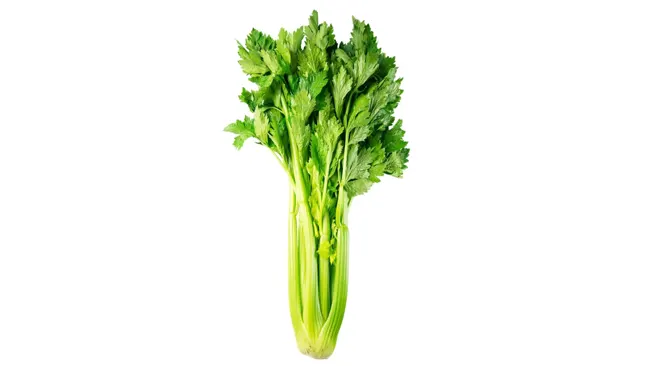
Post-Harvest Tips

- Cleaning: Wash the harvested celery thoroughly to remove any soil or garden residue.
- Storage: Store celery in a plastic bag in the refrigerator. It typically stays fresh for up to two weeks.
- Usage: Freshly harvested celery can be used in a variety of dishes, from salads to soups.
Conclusion
Growing celery requires patience and attention to detail, but the rewards are great. Fresh, home-grown celery has a flavor that’s superior to store-bought varieties and is a healthy addition to your diet. With proper care and attention, you can enjoy a bountiful celery harvest from your own backyard.
FAQs (Frequently Asked Questions)
- What is the best time to plant celery seeds?
- Plant celery seeds indoors 10-12 weeks before the last expected frost date in your area.
- Plant celery seeds indoors 10-12 weeks before the last expected frost date in your area.
- How long does it take for celery to grow from seed to harvest?
- Celery usually takes around 3 to 4 months from transplanting to be ready for harvest.
- Celery usually takes around 3 to 4 months from transplanting to be ready for harvest.
- Does celery require full sun or partial shade?
- Celery grows best in full sun but can tolerate partial shade, especially in hotter climates.
- Celery grows best in full sun but can tolerate partial shade, especially in hotter climates.
- How much water does celery need?
- Celery needs consistent moisture. Water regularly to keep the soil evenly moist but not waterlogged.
- Celery needs consistent moisture. Water regularly to keep the soil evenly moist but not waterlogged.
- What type of soil is best for growing celery?
- Use rich, well-draining soil with a pH between 5.8 and 6.8, amended with compost or well-rotted manure.
- Use rich, well-draining soil with a pH between 5.8 and 6.8, amended with compost or well-rotted manure.
- Do I need to fertilize celery plants?
- Yes, apply a balanced liquid fertilizer every few weeks during the growing season.
- Yes, apply a balanced liquid fertilizer every few weeks during the growing season.
- How do I prevent pests and diseases in celery plants?
- Keep an eye out for common pests like aphids and slugs. Promote good air circulation and practice crop rotation to prevent diseases.
- Keep an eye out for common pests like aphids and slugs. Promote good air circulation and practice crop rotation to prevent diseases.
- When and how do I harvest celery?
- Harvest celery when the stalks are firm and crisp, cutting the whole plant at soil level or removing individual stalks as needed.
- Harvest celery when the stalks are firm and crisp, cutting the whole plant at soil level or removing individual stalks as needed.
- Is blanching necessary for all celery varieties?
- Blanching, which involves covering the stalks to prevent sunlight, is necessary for some varieties to reduce bitterness but not for all, particularly self-blanching types.
- Blanching, which involves covering the stalks to prevent sunlight, is necessary for some varieties to reduce bitterness but not for all, particularly self-blanching types.
- Can I grow celery from the base of a store-bought bunch?
- Yes, you can regrow celery from the base. Place the base in water until new growth appears, then plant it in soil.

Kristine Moore
Forestry AuthorI'm Kristine Moore, a seasoned garden landscaping professional with over 30 years of experience. My extensive career has been dedicated to transforming outdoor spaces into stunning, sustainable landscapes. With a deep understanding of horticulture, design principles, and environmental stewardship, I have become a respected figure in the field, known for creating harmonious, visually appealing, and eco-friendly gardens. My commitment to excellence and continuous learning in landscaping trends and techniques has solidified my reputation as an expert in garden design and implementation.


Leave your comment